
Likes
Comments
Share


@GrownwithLED
Follow
After germinating the seeds are transplanted into small pots with soil (see tutorial in VIDEO above). The soil is prepared with water mixed with a little bit of BIO NOVA Roots (0,5 ml/l), which aids the development of the seedling. Transplanting is very easy now, because they have grown a STRAIGHT tap-root while hanging during the SERIOUS' WAY of germination. This straight root allows for easy potting of the seeds. Simply make a little hole in the center of the soil with your pinky finger and carefully place the germinated seed with the white root pointing DOWNWARDS into the hole. Best is to lay it onto one side-wall of the hole with the seed shell right at the surface. Then I push the other side inwards and enclose the whole root with soil. At the end only the top of the seed-shell peeks out of the soil. IT IS VERY IMPORTANT to plant the seeds NOT TO DEEP into the soil. The seedling only needs extra strength to work itself upwards thru the soil and you run the risk of the soil drying out and the seed dying off. When you PLANT THE SEED VERY SHALLOW into the soil (=with the top of the seed-shell still peeking out) your seedling can grow out right away and you have a small plant already 24 hours after putting the seed into the soil.
The small seedling sometimes still has the seed-shell on its 'head', it normally falls off by itself, but sometimes you have to carefully help and take it off with your finger nails. Be careful to NOT clip of the seedling accidentally when you do this!
The seed-shall has an inner lining, which feeds the small seedling when it germinates. This inner lining sometimes gets tangled around the stem of the small seedling after the shell has fallen off. This little skin MUST be taken off the stem right away! Once it dries up, it gets hard and can strangulate the seedling around the stem. In order to avoid this, the skin must be taken off as soon as possible! I show it in the pics above and also made a video about taking off the inner lining of the seed.


Likes
3
Share

@PhinolaGreen
Follow
Woche 16
Sie wachsen beide weiter drauf los, sie haben sich gut erholt und mal sehen, wann die fertig werden 😊 Die Lampe läuft aktuell auf 75% was 120 Watt entspricht. Sie kriegen alle 12 Stunden ca 500ml Wasser. Ich habe mir Hesilicio von Hesi bestellt. Ich wollte eigentlich umsteigen auf Mineralisch aber ich habe festgestellt, dass ich noch voll viel von dem Biobizz habe. Wäre doch schade drum, den einfach stehen zu lassen. Deswegen werde ich den wohl noch aufbrauchen und dann umsteigen auf Hesi. Ich habe schon alles hier und dachte mir, ich mache schon mal bisschen Hesilicio von Hesi rein und SuperVit von RQS. Die werden auch bei den neuen Ladys dann mit dran kommen.
Ich habe aktuell Zeit mich um die Ladys zu kümmern und muss noch bisschen was nachholen. 😄


Likes
10
Share


Likes
3
Share


@tontodedoverdee
Follow
So finally this week the plan was looking strong enough to be trained, initially I've lift the plant from his seedling bed, i moved her more on the side of the tent to have more space to bend her and give more open space to the lowest branch, after just 12 hours the plant was already fighting the training pointing the top cola to the closest source of light

Likes
2
Share

@hyperborean
Follow
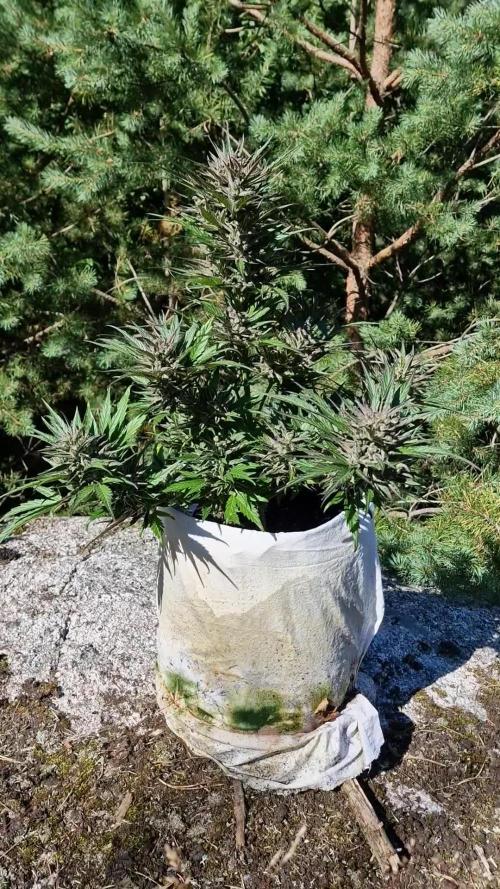
Only giving plain water from now on. Smaller plant has little bit of mold. Not much, but after rain it might spread, so I am probably harvesting it within a week since there are couple rainy days ahead. . Days are warm and dry and still very long, so that inhibits the mold from spreading too fast so I am not to worried.
Buds appear fluffy and leafy but there is good amount of cannabinoids so I think it'll be fine and since this is not for sale but for my personal use, the form of the buds doesn't matter so much.
Happy grows to everyone.
Likes
11
Share


@NoLimitQ
Follow
11/02/21 Вытащил все зацепы из почвы чтобы перераспределить ветки. Сделал легкую тренировочку LST. Установил дополнительный свет из COB LED чипа (мультиспектр) на 50 Вт с линзой. Скоро с aliexpress придет второй такой же чип и после этого я уберу ЭСЛ105 Вт. Собрал еще один дополнительный светильник из 2x COB чипа (по 10 Вт каждый) с цветовой температурой 3000К. Завтра повешу в бокс.
12/02/21 Опрыскал из пульвика водой.
13/02/21 Полив водой 1 литр. Оборвал нижние веерные лопухи и перераспределил ветки, т.к. они начали вытягиваться. При тренировках начинаю чувствовать запах от растения - он приятен =)
14/02/21 Установил вентилятор поближе к растению, опрыскал из пульвика водой.
16/02/21 Полив раствором GHE: 1,5 литра воды отстоянной кранухи + MGB (3ml/2ml/3ml)


Likes
66
Share


@Hashy
Follow
Week 11 7th week of flower.
Light settings
12/12 on at 9.00am off 9.00pm
Light power= 75% 184w
Radiator settings
LIghts on
Turn on if temp drops below 22.5c
Turn off if temp goes above 22.5c
Lights off
Turn on if temp drops below 18.5c
Turn off if temp goes above 18.5c
Extractor settings
temperature 23c with 1c steps
Humidity 50% with 0% steps
Max speed 10
Min speed 4
VPD aim 1.0-1.4
DLI aim 35
Wednesday 5/4/23 Day 71 (Day 43 flower)
Away
Thursday 6/4/23 Day 72 (Day 44 flower)
Away
Autofeed 4 15 minute runs
Normal pump
4 drops ph d
Water Est. 24L Ec=0.22 Ph=6.3
Est. 18L left
Roughly 2L each.
Friday 7/4/23 Day 73 (Day 45 flower)
Back home
3.30pm
Movement fan has broke while away.
15L left Ec=0.225 Ph=6.7/6.7
Used15L over the week.
Plants didn't like being on just water for a week. Needed PK
#1 Height= 49CM Dist= 44CM DLI=26.5
Big defoliation.
Lifted light and moved it.
#1 Height= 49CM Dist= 50CM DLI=22.3
Saturday 8/4/23 Day 74 (Day 46 flower)
Autofeed 5 runs (total 70 mins)
Normal pump
Different Feed times
4 drops ph d
Nutes 15L Ec=1.37 Ph=6.3
8L left
Roughly 2.3L each.
#1 run 0.55L Ec=2.75 Ph=6.2
Radiator settings
LIghts on
Turn on if temp drops below 21.5c
Turn off if temp goes above 21.5c
Lights off
Turn on if temp drops below 18.0c
Turn off if temp goes above 18.0c
Extractor settings
temperature 23c with 1c steps
Humidity 45% with 0% steps
Max speed 10
Min speed 4
Been a hot day.
Sunday 9/4/23 Day 75 (Day 47 flower)
Nothing
Monday 10/4/23 Day 76 (Day 48 flower)
Nothing
Tuesday 11/4/23 Day 77 (Day 49 flower)
Autofeed 6 runs (2,3,5,15,15,15 total 55 mins)
Normal pump
Different Feed times
4 drops ph d
Nutes 8L Ec=1.32 Ph=6.3
8L left
Roughly 1.6L each.
#1 Height= 49CM Dist= 50CM DLI=23.2
Light power= 100% 240w
#1 Height= 49CM Dist= 50CM DLI=27.6
I was away for most of the week so the grow was on autopilot. I decided to have them just being watered rather then having any nutes this week. Some plants suffered a little but I got on top of it when I got home.
#1 Wedding cheesecake FF has done fine this week and being on just water hasn't done her any harm.
Power used for week
Light
(2.21+2.22+2.21+2.21+2.22+2.21+2.25)=15.53Kw
Extractor
(0.55+0.57+0.55+0.54+0.58+0.58+0.58)=3.95Kw
Fans
(0.98+0.99+0.94+0.94+0.95+0.89+0.87)=6.56Kw
Dehumidifier
(++++++)=Kw
Radiator
(2.22+2.19+2.46+1.75+1.38+1.1+1.69)=12.79Kw
Water pump.
(0+0.01+0+0.01+0+0+0.01)=0.03Kw
Total for the week=38.86Kw
Back in a week.
Thanks for stopping by.

Likes
18
Share


@Chubbs
Follow
420Fastbuds
Gelato Auto
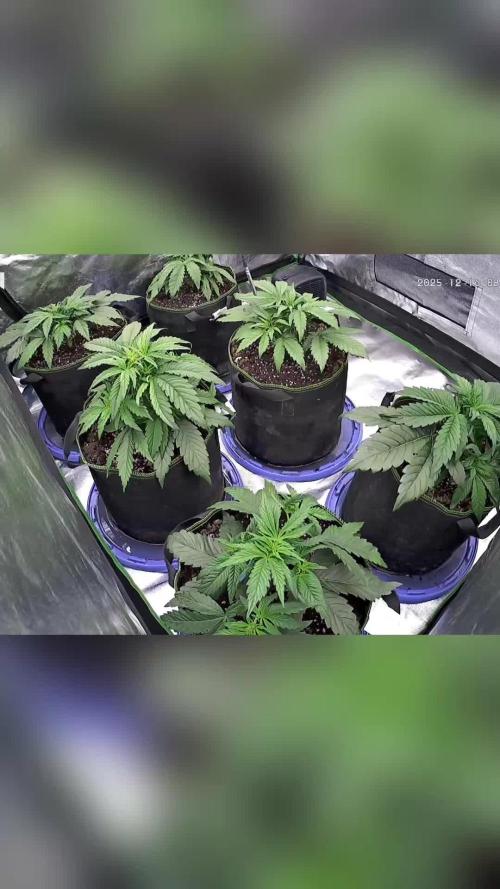
Week 3
What up grow fam. Weekly update for these three beautiful girls. All are growing absolutely amazing. Showing no signs of any issues at all. I'll introduce nutes this week using General Hydroponics Flora 3 part flora series. Will continue the same routine as they seem to be responding great.
All in all Happy Growing
Likes
20
Share


@eldruida_lamota
Follow
Que pasa familia, última semana de floración de esta farm cheese de genofarm, y que decir, es increíble vaya aroma y vaya flores repletas de tricomas.
Lleva su limpieza de raíces ,después se controló ph temperatura y humedad todo el cultivo, de principio a fin.
Variedad de 10 para trabajar en indoor, ideal para SOG .

Likes
61
Share

@daggaDNA
Follow
DAY36🌻BIG BLOCK
Bred by
Cannabis Brothers California
Lineage
Blockberry x Motorbreath 15 (Legend OG)
Tap water feeding (Premium program)
Aptus
Light (BS600) + UVA/UVB 3hrs daily
@future_of_grow
Soil (lightmix) & pH
Plagron
Tent size
4x4 (120x120)
Pot size
6L (1.6 gal)
Media sponsor
Skunk Magazine
5th week of 12/12 ended for my Big Block by Cannabis Brothers California.
As you can see, I don't do heavy defoliation on my plants as I think it's not natural to shock them like that. I don't give a flying f@ck about yield. My philosophy is turned towards good flavors before all and I like to follow plants development in more natural way when comes to defoliation. I believe that plant will always adapt and focus on where energy comes from, and in indoor grows we all know that bottoms will get bleachy as we enter late flowering. On the other side, nobody wants mids and small buds, so yes, of course I remove bottoms, but only first few nodes and not in a way of lollipopping or something like that. I'm just trying to be in balance with natural process of plant development at all times. I'm not saying defoliation is wrong, but since I never grow the same cultivar twice, it's way safer to observe their natural behaviour, instead of forcing techniquies other growers are claiming to be "the best".
With that being said, my plants are exploding from happiness, as you can see. I got two of more indica leaning phenotypes and two taller - more sativa alike specimens. But all have a distinctive OG structure and smell is getting super intense. It smells diesel and chem like no run before. It's the reason why I'm growing it in the first place. And what better way to try out the true OG than from the original creators of White Fire OG. Yes. If you didn't know Terence and Philip, in collab with Rascal, the real OG's, also known as Payaso and Cannabis Gardener, are behind the legendary OG cross and all the rest are just white labeling this famous cross. Know your genetics, brothers and sisters. There are too many copycats out there, so try to show respect to the origins. Noone can make a patent on a certain cultivar, but we as consumers, need to know who are we going to support in the future. Breeding is art and I like to pay respect to those who actually do the work of breeding. Just look at the Blue Dream for instance. Do we actually know who stands behind this cross and who has the original tissue of this genetics? Ask Google a little bit, dig in, and you'll be shocked. Show respect to those who truly deserve one.
Peace in and out!
Processing
Likes
29
Share


@Grey_Wolf
Follow
Ginger nut cookies and Aussie Music Videos update 20th Feb 2020
On Monday just past, I started to leave this plant out at night thus reducing light hours to the same as a regular outdoors Plant. This should induce flowering as all my other
Photoperiod dependent strains are now in Flowering mode. Thru the use of Topping and LST training I have managed to create lots of potential bud sites for this plant to develop into lovely sticky and stinky Buds. Later on today I will do some more LST & As soon as I see pistils developing I will begin to add P+K to the soil by using Guano , Mollasses , Liquid potash, comfrey teas ,Compost teas and Worm castings. The smell of the stems is increasing in strength and has a blend of Red diesel stink mixed with cookies dankness. 😛
Now for the Weekly Music Videos yes I say videos because there will be three 🙏
Last week I chose The Divinyls but this week I thought I would do something different and ask the People what they wanted to hear. Well I got 3 responses and they all
made good suggestions all of which I will play this week . @Fruitgrower asked to see anything by Kylie minogue naked 😆 Couldn't manage that but the video I chose does see her prancing around in next to nothing which is the next best thing . So Fruity Enjoy mate heres the Link https://youtu.be/j3VjJKKVNew
@PlaguedGardens asked for Flume. I had to google them as I hadnt heard of it but they sound ok I am not particuarly into Electronic music but it has it's place and I chose this one for you mate https://www.youtube.com/watch?v=Hwg7hJrDiRg
Then finally @I_and_I asked for Airbourne which is a great group who obviously were influenced by AC/DC , Metallica , Motorhead etc etc and you will understand when you watch the video so here is Airbourne for I_and_I https://www.youtube.com/watch?v=Q0q9a5QS6WQ
All three growers couldn't have chosen more different music genres if they'd tried which just goes to show how different we all are with our musical tastes .
I won't clog up the questions section again so if anyone has a request for an Aussie artist or bands Music video they's like to see played please drop your suggestions in the comments section below. Thankyou again for reading my update I hope you enjoy the Music 👍


Likes
80
Share


@Qlimax
Follow
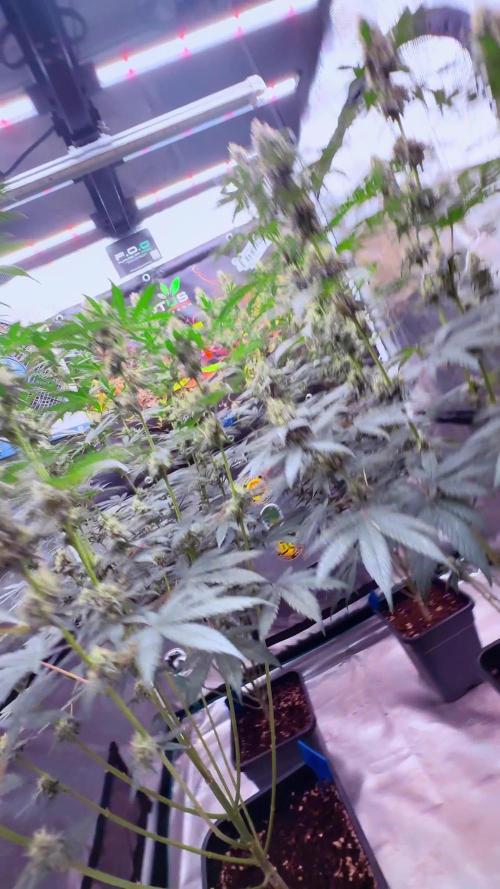
👉Day43- buds getting fatter and fatter every day :) i can just watch nothing to do rly..:)
👉Day44-Did little deformation and changed 22h>21h lighting since i saw info abt this strain 20h is best they say..... Week or 2 and will change from 21h>20h sleping time so they can rest little bit loonger🤣🤣👍
👉Day45- spoted calcium deficiecy onley on the biggest plant od 3..or 4 leafes.... 😣😪 overall all is well :)
👉Day46-flowers start to smell rly rly nice!!! U can alredy smell that orange/citrus/sweet strong smell when u smell it closely💚🤗🤗🤗💚
👉Day47-2flowers had sings of heat strees(expected that!) so i change height of lap for 10cm,reorganize positions of flowers,so the lower buds are in the middle..... and change fann position, they also kinda stopped rising in to the high white&blue sky!! Height info:cca 85,cm 70cm,66cm,64cm,64cm and the farthest bud away from lamp is like 65cm 🤗👍
👉Day48-flowers flowering rly good :) little calcium deficiency..and did kinda big deformation .... nothing to do now anymore rly ......can just water them every 2days and wait :)🤗🤗
👉👉Have fun mates and be safe!!!😷🤣👍💚

Likes
9
Share

@THCReich
Follow
From all plants, shoots were removed from time to time and the leaves were removed


Processing
Likes
20
Share


@MRCANDY
Follow
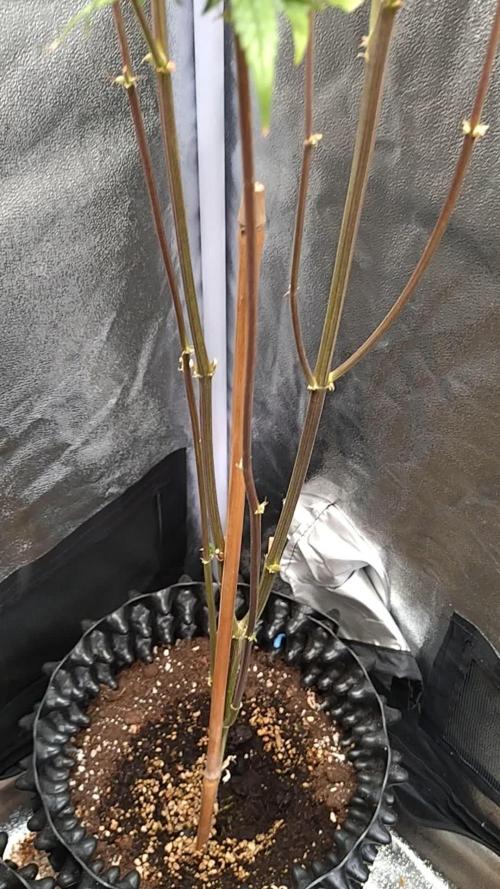
Progress is amazing she growing more tops everyday. I think all of my problems are now solved still have purple stem does anyone know why? heard it could of been a magnesium lock out but she's healthy in every other way. I'm desperate to put her in flower but think she will he to big for the tent!

Likes
57
Share


@Kmikaz420
Follow
Et voici le reste du jardin (sans la cherry cola qui sèche deja;)
Rien à signaler à part les 2 monstre dans la tante qui n arrêtent pas de grandir ;) j ai fais une defoliation aux 2 ainsi qu aux dos i dos (qui produisent pas mal de feuilles à enlever;)
Mais autrement elle aussi évolue bien .
Demain la 2eme cherry cola va être recolter ainsi que la gorrilla x purple punch , et le reste du jardin ça continuer sont chemin encore une semaine avec nutriment puis on passera au flusch voilà voilà on y arrive tous doucement à cette douce et tendre recolte;)
En espérant que se que vous voyez vous plaît ;)
Bon dimanche à toute et tous je profite de vous postez quelque photo du jardin presque au complet (vue que j vais couper la cherry cola 2 ..et la gorrilla x purple punch
Mention spécial à la dos i dos de barney qui m étonne de jour en jour plus une odeur folle de kusch ,des têtes dur comme la pierre, et pour une plante de 40cm elle va faire une bonne recolte !! (A voir d ici une semaine voir 2 ) et j ai dans les dos i dos comme pour les strawberry x gorrilla 2 pheno différent
Un des pheno de strawberry prend 2 voir 3 semaine de plus à finir (j avais se pheno à mon premier journal de strawberry x gg4..
Dommage car l autre pheno est juste magnifique avec des têtes énormes (c celle de droite ) et elle fini bien plus tôt que l autre.. bon c été à peut près tout j voulais juste mettre quelque souvenirs en plus de ces magnifiques ladys 😀