
Likes
Comments
Share


@Cannabis_Sativa
Follow
Mid/late flowering buds are sticky and strong like rock but too baby

Likes
9
Share


@Southwest_budders21
Follow
Pink Wafers!
Day 16
Building up a nice root system at the minute and will start topping and Training over the next week or so. Had a bit of stretch but got that under control and will root pot very soon aswell ✌️🏻🇬🇧🏴

Likes
9
Share

@Abendkraut
Follow
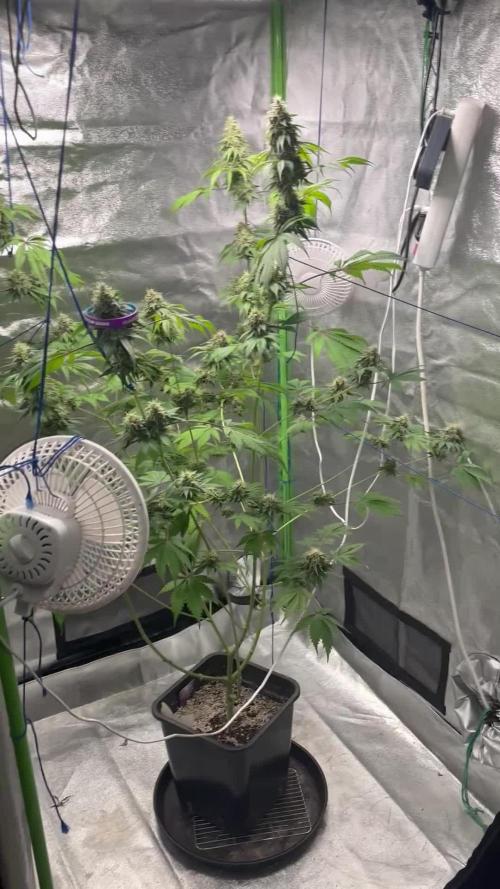
Nearing the end, the past week I only gave plain water and yesterday added 2ml/L of Flawless Finish. The tent is filled with notes of citrus. Buds are getting heavier and require support (blue vinyl cord visible in pictures).


Likes
1
Share


@Sandero
Follow
Everything is really taking off! at the end of the week I topped all the plants between the 5th and 6th node. Unfortunately, im pretty sure BOTH of my Double Lemon Pies are Males...😞


Likes
2
Share


@Thunderstruckfarmer
Follow
Plants were stunted for a few days from transplant and roots took a long time to make their way down to water line.

Processing
Likes
94
Share


@Master_weeda
Follow
Good morning all
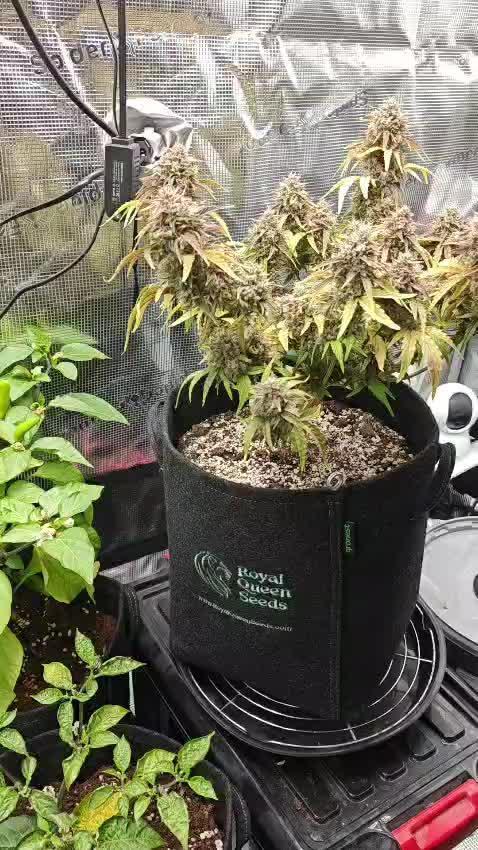
Day 63 and everything goes wonderfully I think for most that feels the end.
Some begin senescence including my gorilla glue from fastbuds and northen light auto from RQS
I start rinsing all of my 5 plants except the bubblegum which has not started to flower after 63 days
I specify that in terms of performance the blueberry auto of pev seeds and the most prolific it is beautiful. 😍
The gorilla glue from fast_buds is smaller but is not left behind because it is loaded with nitroglycerine 😋
We are no longer far from the harvest I am doing a final defolliation in order to let the light reach the lower heads
I think that within a week for some to two weeks for others they will all be harvested
What a pleasure for this run even if the weather is long approaching the harvest ... patience is the mother of all the virtues 😉
May the strength be with me 💪
And in french langage
Bonjour a tous
Jour 63 et tout ce passe à merveille je pense que pour la plupart cela sent la fin .
Certaines commencent la senescence notamment ma gorilla glue de chez fastbuds ainsi que la northen light auto de chez RQS
Je commence le rinçage de la totalité de mes 5 plants hormis la bubblegum qui n'a toujours pas commencée à fleurir après 63jours
Je précise que en terme de rendement la blueberry auto de pev seeds et la plus prolifique elle est magnifique. 😍
La gorilla glue de chez fast_buds est plus petite mais n'est pas en reste car chargée à la nitroglycérine 😋
Nous sommes plus très loin de la récolte j'effectue une dernière defolliation en vue de laisser la lumière atteindre les têtes du bas
Je pense que d'ici une semaine pour certaines à deux semaines pour d'autres elles seront toutes récoltées
Quel plaisir pour ce run même si le temps ce fais long à l'approche de la récolte... la patience est mère de toute les vertus 😉
Que la force soit avec moi 💪


Likes
8
Share


@ZanderZone777
Follow
What a successful experiment! People said you couldn't grow and flower good weed in an Aerogarden so I had to prove them wrong. When I first started this grow experiment I would have been happy with a quality oz of bud. I never imagined pulling more than 2 oz's from 1 gallon of soil and only 45 Watts of light. That's 1.4 grams per watt! Already have a second Aerogarden going. This time it's Bud Bud Bling-Tingz✨ Give it a look!


Likes
1
Share

@ChubbyBudBros
Follow
-
Day 71
I increased the height from the lamp a bit further trying to get about 600-700 ppfd across the canopy, just to help her finish and prevent trichomes from degrading into CBD too fast. Hopefully She will be ready to cut down this week.
Day 72
Still seeing a lot of clear trichomes, think we gonna be waiting for a while still. 😅 There's quite a few white pistils node still as well, which makes me believe she is still not done swelling.
Likes
44
Share


@Chedderbob112
Follow
This week I am vegging using an led in my toilet 26 watt on 24 hours a day but am Goni leave the three chronic to hang dry a can’t really fill in ma diary properly n can’t seem to get on to the group chat has been like this for couple of days now so am playing the waiting game but soon as they come out the tent ⛺️ while I will be in trim jail hopefully a get a haf decent harvest it will be a nice smoke but am not rushing the drying process depending on wit results a get but am confident in the quality of the smoke that a hav produced definitely and will grow this strain again anyone with any favourites hit me up @chedderbob112 s2340420


Likes
3
Share

@Thedibber
Follow
Got myself some new genetics for the next run after the badazz og and Bubba cheesecake. Both Ethos Dip n stax and Capjunky x Endgame #3 special limited edition 🙏🙏
Once the Pyschoberry cheese is ready ill scrog 2x Bubba and 1 Badazz Og in the 3x3 should be within the next week or two 💪

Likes
13
Share


@XanHalen
Follow
Apr 09:
Things are chuggin along, i think light may have been a factor in the brown spots, seeing similar symptoms on one of the other plants but very very minor in comparison....
I think it was too little calmag, i may have locked them out mid veg by using high concentration of nutes without watering till runoff (i now know, that is a no-go), and light stress. i have had them under 850-1050 ppfd when flipped to flower...
one of them is loving the light, one is big and bushy (had to defoliate later than i wanted), and one has good bud structure but pistils seem thin, and growth seems slower (the one with the brown polkadot party on its body) so thinking it may be stunted.
either way, im seeing denser buds, and im learning the ropes, thats enough for me :)
Apr 12:
Last feed day...
Trichomes look just about ready, will do 2 runoff waterings 48hrs apart, then 24-36 hr darkness...
Will try to post trichome pics....
Super excited to see the improvements from this run vs last run...!

Likes
151
Share


@Zurban_Poison
Follow
Harvest took about 3 hours! The buds are big, firm and covered in gluey trichomes! harvest of the highest class!
Likes
11
Share


@TheSlimeGrows
Follow
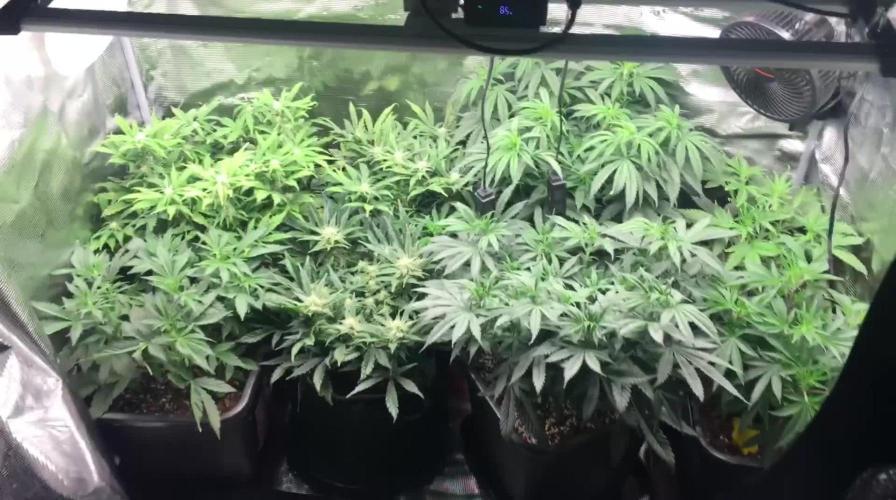
2 plants left after I harvested the first one that flowered earlier than these 2 - got 94g dry off that plant but the nugs are pretty loose.
seeing some issues on the top-most leaves on plant 3, the bigger one. plant 1, the smaller one also has some nute issues but I'll stop feeding for a week or so and see if that helps. Buds seem to be fattening up tho.
Also seeing some weird brown/rust spots on plant 3 at the top-most leaves on the buds, almost like they're drying from the inside out. Anyone help with that? is it Potassium Toxicity!

Likes
9
Share


@MotoXfarmer
Follow
Corleone Kush is right on track doing great sucking up all nutrients I can give it I feed every other watering as for the strawberry gorilla still no flowers but it looks like it’s ready to start the preflowering. It’s just a fat big fat plant. They say I have nothing a time just time for these plants, but I think I’m running out of time I don’t I don’t know. I was gonna run until it’s finished. See where it ends up. It’s a fat plant. It takes everything I thought of it. Light feed.


Processing
Likes
3
Share


@XxBILLZAxX
Follow
Water is 5.8 - Run off is perfect until I water 2 days later then it's 6.4-6.6
Trichomes still clear maybe 5% milky. I have the flawless finish so will only need to flush 1 week prior to snipping.
Likes
13
Share


@Juthdeet
Follow
Not an awful week, not great though. I seem to have developed a fungus gnat issue, albeit small as of yet I'm taking appropriate measures to get rid of them. First I drenched all the pots with a 1:4 peroxide:water mixture(1l total liquid) and let the soil dry out over a few days(it was already fairly dry). Once that dried I added nematodes to each pot. I've given the nematodes 4 days so far and I'm adding defender mites(stratiolaelaps scimitus) to the soil tomorrow. I have yellow traps everywhere as well. I'm also getting rid of my wood chips(most of them) for the rest of this grow for a faster drying time on my soil. I'm really happy how the freak has been turning out. I'm super excited to try it!
Happy growing folks!