Likes
Comments
Share


@Gromie
Follow
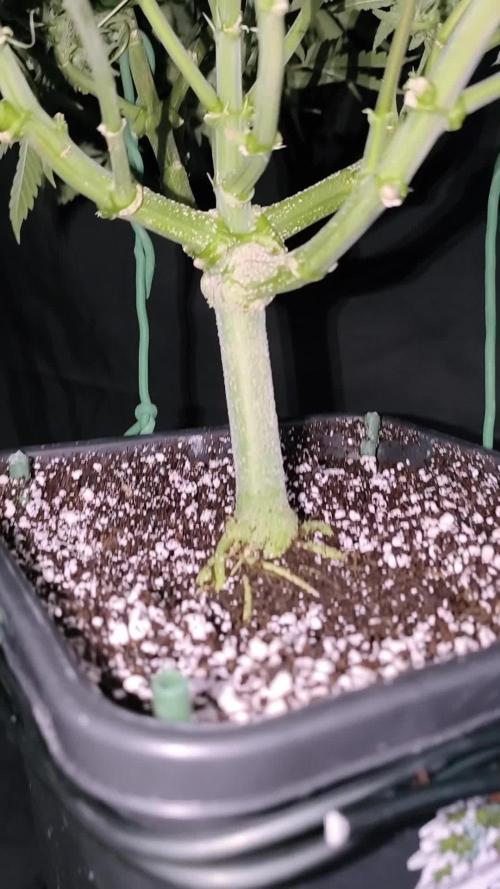
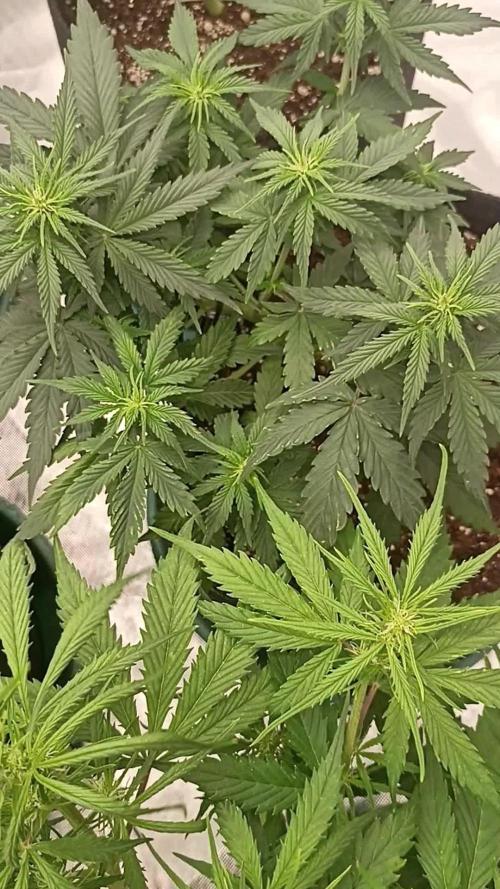
Last Sunday I increased the nutes so that the ppm was on the higher level (600-625) as the feeding schedule showed. Dec 9th I started to see some lime green (video) leaves on new growth. The ppm would go up mostly & down slightly, but the lime green spread & eventually turned yellow (last pic from today). I did a water change the other day & lowered the ppm/nutes to around 575-580 range. I've been reading around that this might be a sulfur deficiency? Some suggested adding Cal-mag. Today I added 2 ml more of Cal-mag & snipped some of the darker fan leaves that had some damage. I ordered epsom salt, waiting for it to arrive (tomorrow). Any other suggestions/diagnoses are welcomed! 😊


Likes
23
Share

@Chubbs
Follow
What up fam, weekly update on these lovely ladies. They're getting close to being finished so I'd say where in the home stretch. The flowers are swelling amazing and definitely smelling even better. All in all its been HappyGrowing.

Likes
5
Share


@84ruk
Follow
La planta ya tiene al rededor de 76 días mientras el banco sugiere cosechar de 70-74 días, estamos atentos a que los tricomas comiencen a tornearse cafés, el 10% para cosechar, al parecer está a menos de una semana.

Likes
9
Share


@Ryno1990
Follow
Wedding glue from @fastbuds is flowering along nice an stacking up the trichromes as the gelato from @herbies is comming along a little slower as i feel like the gelato has a longer veg cycle by a week or 2 but shes comming along beautiful just like last time i grew her
Likes
1
Share

@DrGL_Thumb
Follow
Dropped the 3 seeds in water bath with a little HESI rooting mix, little mycorrhizae.
On a heat mat, covered for complete darkness. 24 Hr soak -
then seeds moved into own Seed Germinator - Karl’s Bubatz Popper 😂
24 hrs after 22 degrees and 90-95% humidity seeds developed long enough roots to hit the soil. To avoid any chance of damage the cotton pads hit the soil too.


Likes
9
Share

@eldruida_lamota
Follow
Que pasa familia, vamos con la décima semana de floración de estas Barcelona Puff feminizadas de Seedstockers.
Vamos al lío ,se trasplantaron en macetas de 7 litros definitivamente.
El ph se controla en 6.0 , la temperatura la tenemos entre 25/21 grados y la humedad ronda el 50%.
El ciclo de floración puse 12h de luz, el foco está al 75% de potencia.
De momento tienen un buen color, la flor está madurando y a tricomado bastante, por el momento todo bien.
Agradecer a Agrobeta por el envío del kit gold series para la temporada 🙏.
- os dejo por aquí un CÓDIGO: Eldruida
Descuento para la tienda de MARS HYDRO.
https://www.mars-hydro.com
Hasta aquí todo, Buenos humos 💨💨💨

Likes
5
Share

@Marijuanaut
Follow
Tottaly forgot to take some pics from the dutch passion strains this week... all I got is a group photo and short video!
Could have been a bit more hands on with the training but seems a like a nice and even canopy it´s emerging 😍
Defoliated a bit and trimmed the lower branches.
Likes
97
Share


@CANNASIM
Follow
GENERAL COMMENT.
Two different realities are populating my humble growroom, by one side we have a vibrant SKR and the other the NL that was destabilised a wile back. This two girls from RQS have lots of virtues, and shooting up many colas, and harvest is looking promising also with the lock in the NL.
RQS NORTHERN LIGHTS AUTO AKA NL - COMMENT.
After struggling a lot to curb her deficiencies and spotting, I could rinse off the salt buildup and raise the soil PH, flush, flush, flush little bit of voodoo juice, and only the full organic based nutes made the trick for now, so we are stable, and leaves started to look healthier, spotting stoped but is already in the majority of the leaves.
EC is light at 1.1
Stoped taking the runoff since i made the medium treatment, and honestly that got on my nerves now is bulking this colas or die, finito with the over caring thing… One thing to notice is that i have to re do this strain to fully grow it and having a 100% potencial to be able to fully judge, as for now if you do this strain use less of everything, nutes, light, water, less is definitely more with this strain. Smell is the least pungent of the plants i ever done, so if you are looking for a stealth plant this is a good candidate.
Likes
22
Share


@GERGrowDesigns
Follow
Dear Growers ,
Welcome to Week 6 or Flower week 3 // Day 42-49 from Sweet Seeds Pineapple Slush Xl Auto.
Incase of Moving to a New Home . I Decided to skip 3-4 Weeks from every Diarie of the 12x12 Automatic Project . Everything should be Normal in the next Weeks .
Whether you're a beginner or an expert, you are warmly invited to join, ask questions, and share your own experiences along the way!
Project Setup & Conditions:
• Brand/Manufacturer: Sweet
• Tent: 222cmx150cmx150cm
• Light: 2x 720 Watt Full Spectrum
• Humidity: 50%
• Soil: Narcos Organix Mix
• Nutrients: Narcos Products
• pH Value: 6
If you want Germinitation results like mine , check out Kannabia Seeds with my link [https://www.kannabia.com/de?ref=61966] and grab the germination device or the strains I used . Trust me – it’s worth it for sure !
Get another 20% Discount at all products using the code [GGD] at the Checkout .
Stay curious and keep up Growing —we look forward to welcoming you back for the next chapter soon!

Likes
6
Share


@GoldenWeedGrower
Follow
Legend
Timestamp: 📅
EC - pH: ⚗️
Temp - Hum: 🌡️
Water: 🌊
Food: 🍗
pH Correction: 💧
Actions: 💼
Thoughts: 🧠
Events: 🚀
Media: 🎬
D: DAY, G: GERMINATION, V: VEGETATIVE, B: BLOOMING, R: RIPENING, D: DRYING, C: CURING
______________
📅 D08/V04 - 23/04/24
⚗️ EC: 0.8 pH: 6
🌡️ T: 24 °C H: 55%
🌊 6L
🍗 Calmag - Grow A-B - B52
💧
💼
🧠
🚀
🎬
______________
📅 D09/V05 - 24/04/24
⚗️ EC: 1.0 pH: 6.2
🌡️ T: 22 °C H: 65%
🌊
🍗
💧
💼
🧠
🚀
🎬
______________
📅 D10/V06 - 25/04/24
⚗️ EC: 1.1 pH: 6.3
🌡️ T: 21 °C H: 60%
🌊
🍗
💧
💼
🧠
🚀
🎬
______________
📅 D11/V07 - 26/04/24
⚗️ EC: 0.8 pH: 6.1
🌡️ T: 21 °C H: 55%
🌊 3L
🍗
💧
💼
🧠
🚀
🎬 1 TL video
______________
📅 D12/V08 - 27/04/24
⚗️ EC: 0.7 pH: 6.0
🌡️ T: 21 °C H: 50%
🌊
🍗
💧
💼
🧠
🚀
🎬 1 TL video
______________
📅 D13/V09 - 28/04/24
⚗️ EC: 0.7 pH: 6.0
🌡️ T: 21 °C H: 50%
🌊
🍗
💧
💼
🧠
🚀
🎬 1 TL video
______________
📅 D14/V10 - 29/04/24
⚗️ EC: 0.7 pH: 6.0
🌡️ T: 21 °C H: 50%
🌊
🍗
💧
💼
🧠
🚀
🎬 1 TL video

Likes
37
Share

@Hempface86
Follow
So as you can see, we have upgraded into a 5 gallon wide fabric pot and I'm going to give her another couple weeks to fill into her new home... i broke a couple of branches, definitely gave her silica to early on.. I'm not used to keeping plants in veg for this long... i do think when all said and done, she's gonna be a beast, so it'll be worth it... Thanks again @Grow4releaf!! Happy grown everybody God bless ✌️

Likes
39
Share


@BelgianBudtender
Follow
Heyo bud,
Did some serious training this week, all lower growth was removed, kind of like a lazy main-line. She's as good as recovered and bushier than before defoliating it all! You can see her bounce back in the time lapse, its pretty cool!
Still chasing the gunk around the roots, worried it might be rot, treated her with some h202 whilst I shop around for some bennies here in Europe, if you have any advice hit me up!
Rot or not, the root growth this week was great, despite the absurd amount of stress I put her under, Maybe this little girl isn't so weak and behind after all, the genetics seem hardy.
going to let my little plant recover as I keep adjusting ties, I want to find a solution to my root issue and have a bit more green growth before I flip to flower, I'll reconsider my flip date next week, I don't want to veg too long, I do need weed in my Jars.
Thanks for checking out my Diary, keep safe and keep growing!

Likes
11
Share


@Herroqitti
Follow
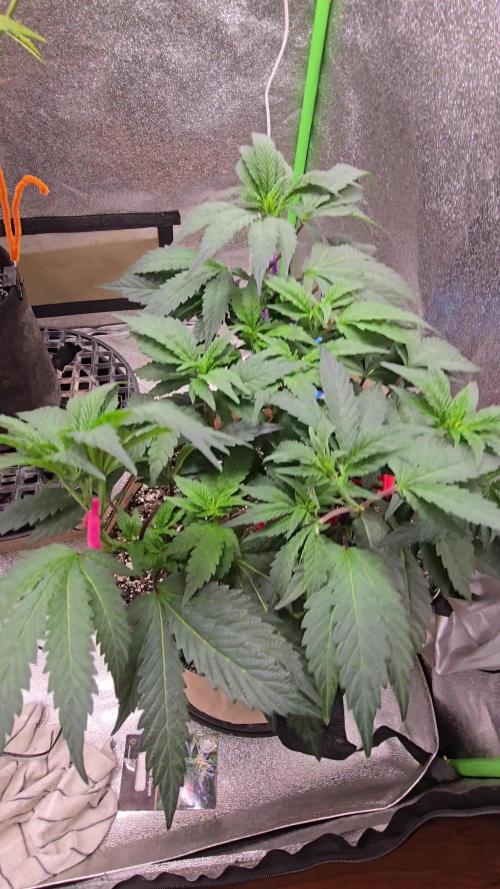
Some kind of deficiency going on. Threw some organic nutes at it and good ol cal mag plus. Trimmed those nasty leaves. She looks better, time will tell.
Likes
8
Share


@JohnnyBarrel
Follow
Week 11
All is under control: plants are growing correctly, healthy, deep green… perfect size, a few weeks before flowering cycle; I did a second topping week 10 on everyone (+6 nodes): I would have a maximum size around 150 cm for discretion and space.
Still Aphids problem on the Royal Moby and I treated leaves by hand with Soap…making a mistake: too late in the morning so the sun burned some leaves.
This insects are still there but the infestation is contained for the moment.
I sprayed Neem oil on all plants.
Added more soil in each pot : 1.5/2L of humus worm + guano bat.
I observed a sort of burn on lhe extremity of leaves: possibly a sign of nitrogen excess.
I stopped nutrients for a while, adding just enzyme and Alga Mic.
Watering around 1.25L/2 days
Daylight 15h30 - 6h25/21h55
Sunny days, cloudy sometimes, windy (NNE)
T°= 13ºC N / 21°C D
Humidity 67%


Likes
1
Share


@Growedbypepper
Follow
Hasta ahora muy bien mis planta aunque muy resistente presenta unos cuantos acaro aunque ya no puedo aplicar preventivos en el punto de floración en el que se encuentra ya solo qued a mirar el desarrollo de la planta
Likes
12
Share


@Coman
Follow
Harvest time has come for my first lady which was a little faster, and had a completely other aspect than ther other 2. A little purple color and shorter. Also got some issues during veg phase with her. Anyway got 428g nice good smelling wet buds from her an they are drying now. Will post pictures from harvest next week. All of them are cherry cola.
The remaining 2 ladies look very promising and will be harvested and of this week.
Today 70 days from seed.