
Likes
Comments
Share


@WolverineGreens
Follow
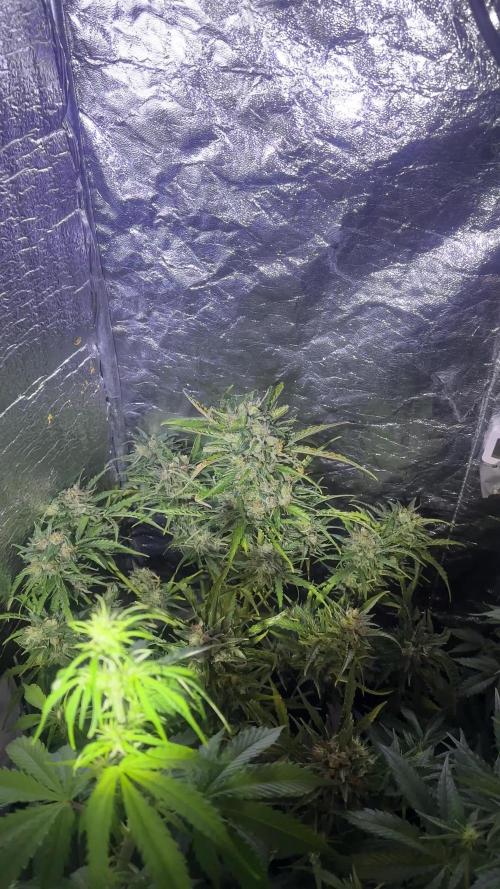
Loving in-house right bout now. 😁😁😁. Finish line is in sight.


Likes
1
Share

@Manball
Follow
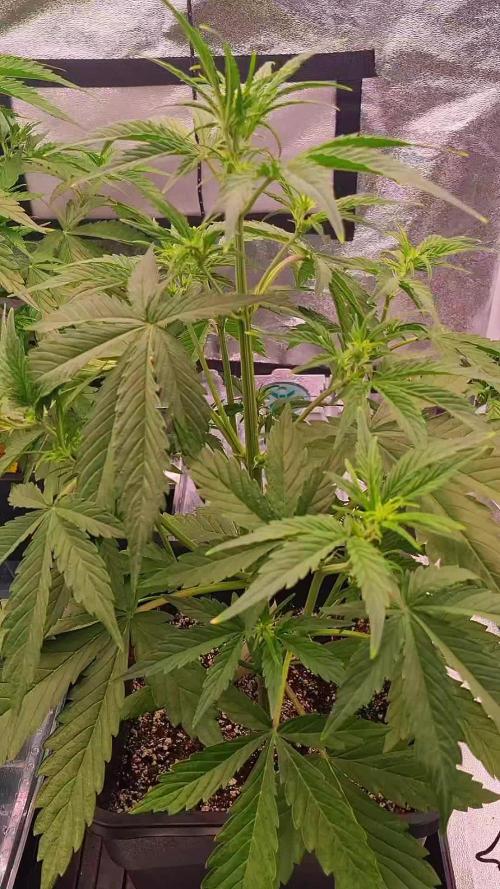
This adoptee has been growing nicely, although she suffered from stress because she wasn’t taken care off very well (she & other had a to find new
Homes).
But after having it for 4 weeks, now entering the 5th week (of flowering, I Guess)
We are getting closer and closer to harvest.
Today’s pictures are from Sunday, we are maturing well :3 there will be only 3 more feeds with nutrients, then flush, an wait for the ideal time to harvest.

Likes
2
Share


@RatmanJR
Follow
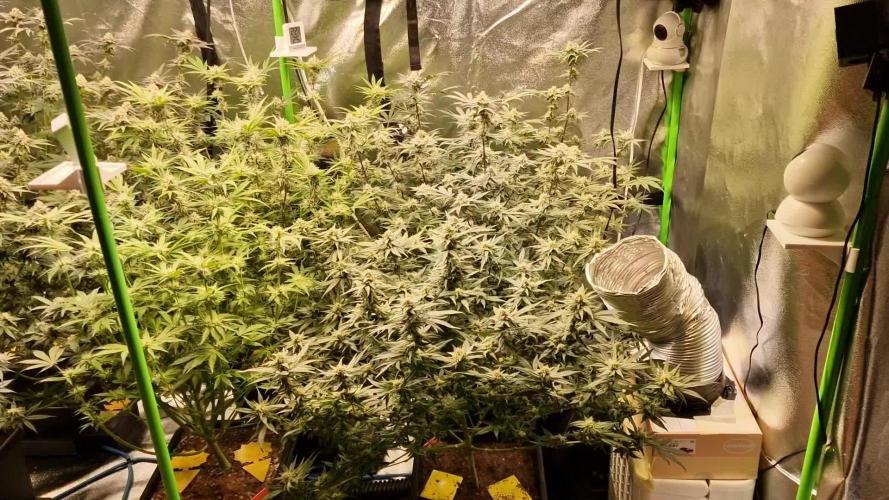
November 8th. 39 days post flip
Plants continue to grow very well. A lot of fattening has occurred in the last week and I expect even more in this following week.
Midweek I have some big 6 and recharge. At this point I likely won’t be providing anything but water until the finish line. My lower leaves have not started to fade yet and so I do not want to overdo it with any nutrients.
Smells have intensified a lot in the last week. I smells these things when I wake up in the morning when I go to work. Still not a lot of purpling on the purple marmalades. I can see them starting to turn. I’m hoping lower nighttime temperatures will help
They need a defoliation now honestly but I am going to be patient and will not defoliate until day 49.
I still need to add those two fans. I just ordered them so will add them in a few days when they arrive.
Number 1(Cherry Chunks):
This one seems to have the fattest colas. Also appears to be the frostiest so far but number 3 seems to be catching up. Not much on the smells on this one just yet. Earthy so far
Number 2(Purple Marmalade):
This one is my winner so far. The smells and taste of the Trichomes on this thing are absolutely insane. Candy mixed with guava mixed with watermelon. It is also the tallest and most vigorous plant. I’m confident I could fill this whole tent easily with one of these
Number 3(Purple Marmalade):
Smells of slight lemon mixed with earth and gas. This one seems like it’s going to be a bit gassy. Not as vigorous as 2 but it is frostier as far as I can tell.
Clones:
Growing well and really starting to take off!
God Bless!!
November 9th Update:
Hey guys i ended up lying in two category’s.
The first one was when I said I was waiting until day 49 to defoliate any more. The fan leaves were getting out of hands so I ended up removing half of them now on day 40.
This significantly opened up more bud sites to the lights up top and also increased airflow and lowered my humidity a few percentage points. I did this a little early because they are fattening and I’m concerned about navigating around the buds when they are fatter in 9 days. Trying to mitigate the number of Trichomes I smash up.
I also ended up giving some molasses. Want to make sure my microbes are happy and figured the potassium boost will help the flowering.
As always, thank you guys and god bless!

Likes
6
Share


@HomeGrowHeaven
Follow
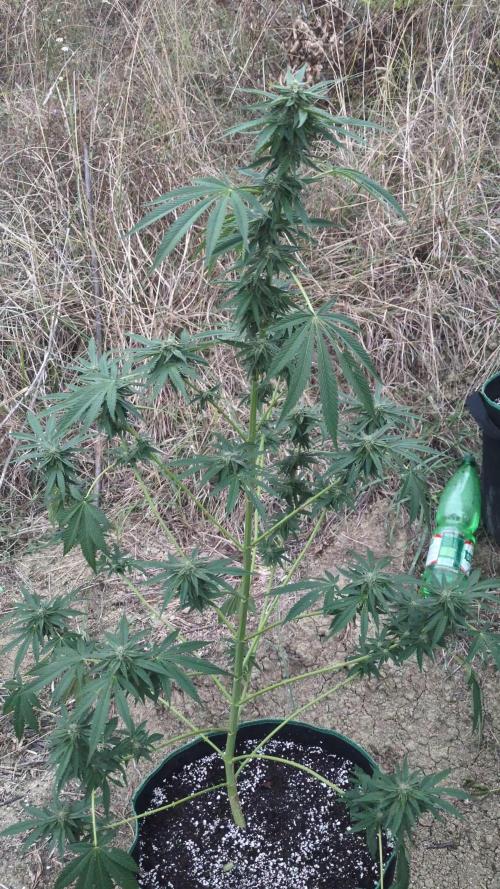
The plant grows really good and recovers good from the defoliation, topping and mainlining🍀
She grows really accurat and i will sent her in the next 1-2 weeks into flower🌺


Likes
25
Share

@GrowBro1981
Follow
Hallo liebe Growfreunde 💞
Ich bin zurück mit dem neuen Wochenbericht 🤗
Danke an die neuen Follower, ich hoffe es macht euch Spaß meinem Grow zu Folgen
An alle anderen, für immer aktuelle Updates auch Folgen😁😁😁🤗🤗🤗
So jetzt zum Wochenbericht. Alles läuft sehr entspannt, kaum was zu tun, aber es ist einiges passiert🤩🤩. Die Buds werden fetter, der Geruch ist einfach himmlisch und die Farben sehen toll aus. Leider kann man die Farben nicht so gut erkennen auf den Bildern, aber es purplet ganz schön🤗😁
Die Sweet ZZ erholt sich von ihrer Calmag Blockade und die neuen Blätter zeigen keine Anzeichen mehr auf Mängel. Die Gorilla Zkittlez holt an Größe auf und ist jetzt etwa so groß wie die Sweet ZZ, aber mit deutlich weniger Nodien. Ich denke die Peyote Critical wird als erstes reif sein, sie wirkt am weitesten entwickelt und auch die Blütezeit ist die kürzeste von meinem Setup. Danach wahrscheinlich die Sweet ZZ und evtl. Die Green Gelato. Die Runtz und die Lemon Shining Silver Haze werden am längsten brauchen. Ne quatsch, die Gorilla Zkittlez wird am längsten brauchen da sie erst seid etwa 2 Wochen blüht.
So das wars für diese Woche meine lieben💞
Ich hoffe euchvgefällt was ihr seht und lasst likes und Kommentare da🤗🤗🤗
Tut gutes💞
Cioaiii👋👋👋


Likes
2
Share


@Gardens_of_Of
Follow
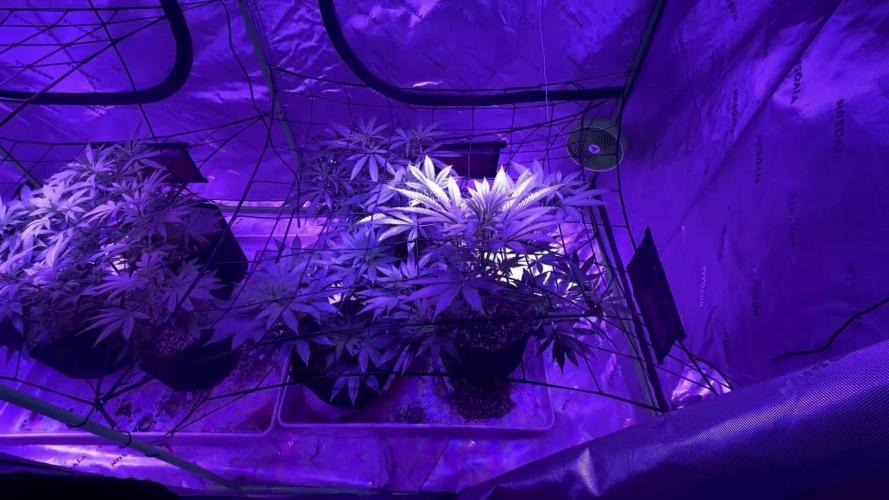
I keep increasing the light and she seems to enjoy it, growing new bud sides and leaves everyday. Defoliation continues. I can’t go below 25-26 Celcius due to increased light though. She has also been moved to back middle.


Likes
4
Share

@Guerrilla_grower777
Follow
29/09/2025 18:50
Finally here after 10 full cloudy and rainy days,found out that the two Coco needs more water,the pots were dry like never even with rain almost every day
18.6 °C and 53%RH means only one thing,autumn is here and officially summer ended
Video #1 apricot auto 68 days from seed
Harvest Is near for this little auto,smell is the best by far Just like an apricot juice
Checked all the plant and didn't found any mold sign so i cut a little sample to have a better look at the trichomes
Video #2 Coco fresh 60 days from seed
This one is really focusing on the buds you can see the difference from the last time
Noticed that the buds below the apical are pretty dense i don't know if it's normal or if it's because of underwatering
Video #3 Coco Milk 72 days from seed
I think last time defoliation was a bit hard as i see not much difference on the buds as i think should be in 10 days
Smell of this Is like buttery really strange if you think It comes from a plant
At the end there are the first four branches of the gorilla z, these flowers are 94 days old and keeps going wtf
2nd of october now and Is raining again after a full day of heavy rain,maybe i will be back after a full week

Likes
3
Share


@PapaTerps
Follow
Wizard Fuel - Wizard Trees
Day 98
🚿 She has been watered twice this week, with 3L of RO tap water with nutrients mixed individually, in order and then pH'd to 6.3. Shes a week away from harvest, so Ive reduced her nutrients over the last two-three feedings, so she is just getting the Acti-Vera and BioHeaven at the moment 💪🏻
✂️ She has been given another round of defoliation this week, mainly focusing on removing fan leaves and larger sugar leaves from around her flower, so that any shaded areas are now exposed to light - this is to ensure her flower matures as much as possible before harvest 👌🏻
🌸 Her flower is looking just how it was advertised, which I'm super happy about! Vibrant light green with the contrasting ambers of the pistils, sat upon fat juicy goofballs, with the trichomes from stem to sugar leaf tips, shimmering in the light - she is so beautiful! Her aroma is also quite striking, very candy meets gas! 😍 Around 90% of her trichomes have turned milky with around 5% amber and clear each, basically all of her pistils have turned amber, so I will complete this week of flush and then she will be harvested 🙌🏻
Notes: I had taken a small sample from the lowest budsite on the plant, dried it for a few days and then tested it in the Arizer Solo IIIv2 - she is definitely leaning more into the Rope Fuel side with the citrus and diesel flavours up front with a lingering sweetness; its very nice! The effects hit pretty much straight away in the eyes getting tight and the smile smaked on my face - I can already tell that this one will be grown again! Very nice so far! 👌

Likes
49
Share


@AsNoriu
Follow
Day 77. Harvest day for that amazing plant.
Dry trim chosen.
Will update after drying.
Thank You Zamnesia for that chance !
Day 86. Girls has started curing process.
Happy Growing !!!
Likes
5
Share


Likes
12
Share


@DaddyLauterbach
Follow
So i hatvested them on day 80, they got 24h of light before harvest.
I removed all fan leafes with no to verry little trichomes visible.
Both plants are now drying by ca. 21°C and 57% humidity.
This time i will dry them with lights on to be more efficient with my growing cycles. ( i think they will get at least 2-4 days darkness before the new seedlings move in the box )


Likes
1
Share


@I_Identify_As_A_Dan
Follow
Week 6 for AK Triple Haze by SSSC
She's definitely my shortest auto that's outside ATM but anyway her main cola is bulking up nicely. Aiming for her to be done by week 9... but lets see😇
Still no signs of her needing any extra nutrition @naturelivingsoiluk @naturelivingsoil is definitely keeping their word of water only feeding😍
Was watered once last week. No pest issue either with her! The leaf rub atm giving her some light hazy smells which is appealing.
Already looking forward to seeing how she's doing in a weeks time😍 BRING ON THE BULKING!

Likes
10
Share


@Bud_vista
Follow
We are entering week 6 now!
Since the last heavy defoliation 3 days ago she’s handling any stress like a champ. No highs of slowing down growth. First pistils are showing and looking strong
I feed her with 2liter of ph regulated water from bottom and about 1,5liter from top every 4 days.
The stretch is visible but not that crazy, which is good in regards of the limited space in the vgrow. At the end of week 6 she’s getting a little defoliation to ensure good light conditions in the lower part of the plant.
Likes
8
Share


@AestheticGenetics
Follow
harvested her 6/21/25 after 8 weeks flowering indoors and then 1 week in the outdoor sunshine. will update more with drying and curing and smoke report