
Likes
Comments
Share


@ChameleonsCannabis
Follow
I love sativa. This is a great freaking plant. Long skinny buds (a little squeezed by me :) and the smell is incredible (strong put in jar open 5 min later my house smells strong) its sweet from the haze but it's got that gassy fuel smell to it also with a tiny bit of earthy after aroma. It's wonderful smokes great gets me higher than any weed at the stores and I never have coughed from it I don't think it's so smooth. Organically grown buds are fckin smooooothh man I never would have understood until I grew organic! This bud is the tits I'm stoned off a mix of blueberry amnesia haze northern ligbt joint as I write this lmao good harvest


Likes
7
Share


@HomeGrown_Medicinal
Follow
End of week 4 and this orange sherbet is finally pumping and has almost caught up to her sister (which I stunted this week 🤦♂️) I haven't defoliated or trained this girl, im going to leave her el natural for now.
On day 27 I added a big dose of compost tea and she loved it, she's now praying to the lights and I'm stoked she's stoked
Today on day 28 I repositioned the thermometer in the tent as it was too far from the plants, the girls were getting baked and not the good kind, they're all loving life now.
I hope you all had a good week and thanks a lot for checking in 🙏

Likes
19
Share


@Seedtoweed
Follow
Starting to fill out now on the right one n loads of crystal main looking beautiful loving the led finally looks as though vertical growth has slowed thank God haha think shes just putting all energy into flowers now
Girl on the left is just a beast flowers are just big n chunky solid n absolutely covered in crystal so cant wait for this one to be ready between the 2 I'm expecting a verry decent yield definitely a strain il run again im putting 2 clones from the girl on the left side to chill out in a smaller tent for now


Likes
22
Share


@NanoLeaf
Follow
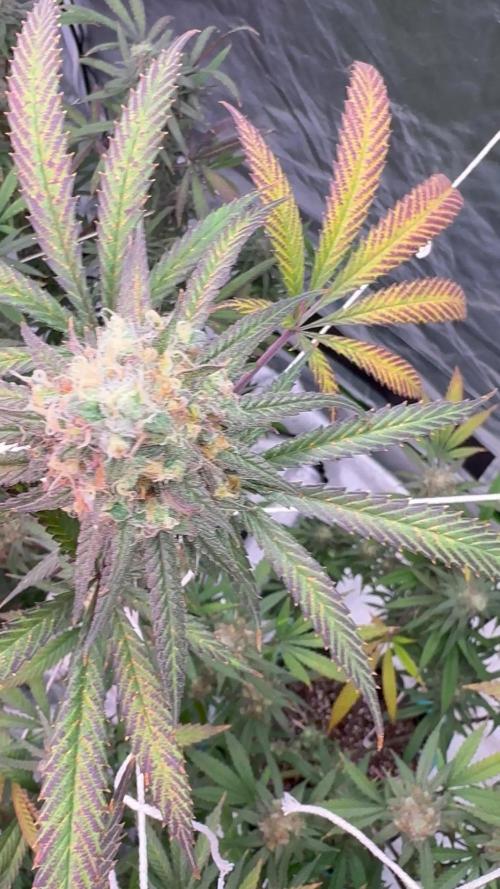
End of Week 16 (9th week of flower)
Final week of flower.
Turned the lights wattage down at the end of this week to 400W to mimmic the sun moving further away from the earth during Autumn and Winter seasons. This also creates an overall cooler temperature signalling to the ladies that the end is in sight. This also protects the trichomes and ensures they don't get damaged and also dropped the
The ladies are fading more and more into their vibrant autumn shades. With hues of pink and purple that makes me so excited!
Feeding just PH correct water until harvest, which is around the corner. We are currently on day 63 of flower and checked the trichomes - just a few specs of amber and the cloudy trichomes are more prominent although there are still some clear ones.
We will push to harvest within the next couple of days, around day 67-69
Pest Report: None
Smell Report: Staaaaanky!
Likes
10
Share

@Ninjabuds
Follow
This plant was a beast all around from the start it had some crazy strong vigor. I could see the plant being able to grow outdoors if you steak up the branches in late flower. The buds were huge and very round and dense. The tricomb density was ok it wasn’t a frost party or anything but it’s got some big white tricomb heads. The smell is amazing super strong candy gelato smells with some gas skunk on the back end. Other than needing tied with string it using steaks in late flower it was a great plant. Still a 10/10
Likes
12
Share


@eldruida_lamota
Follow
Que hay familia, nuestras única variedad con predominancia sativa, bastante vigorosa, flores bastante compactas vemos como van formándose y engordando, desprenden un aroma bastante dulce me recuerda al regaliz rojo.
Humedad y temperatura controladas dentro de los parámetros.

Likes
60
Share


@julian100614
Follow
La planta esta empezando a formar brotes y sigue estirandose con mucha normalidad 👌
Empezamos aplicando los nutrientes para floracion y de forma progresiva para no estresar en exceso a la planta 👏
Por el momento la planta y hojas se ven fuertes y sanas sin indicios de problemas 🤗
Empieza a soltar un leve olor a cítricos 🍋😋

Likes
19
Share


@Sti_Cazz
Follow
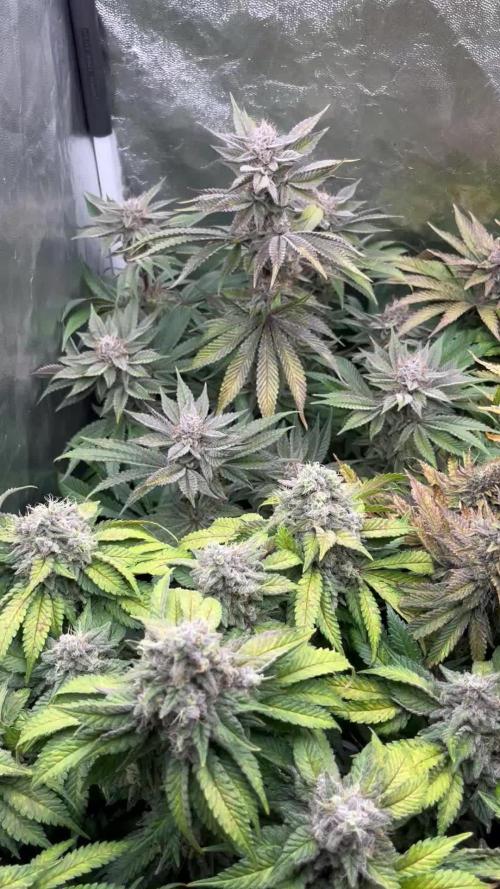
Day 70.
Watered with heavy nutes last Wednesday and just water today... Just wanna give em a little break and see...
The super silver haze is pretty much done. Will wait another week to get more Amber just a few seen atm.
The main cola must be 10 grams alone... Bets are on!
Definitely doing 100% better then last time... Guessing going to be 20/25 grams dry compared to last grow.
Likes
7
Share


@Sunstonedgrows
Follow
Well the pas week has been a lot! We had some dehydration issues, did some defolitation, and additional LST to prep for flower. Starting today, this plant has been kicked into the flower tent and will be starting its journey!
Before we went to flower, I gave this guy 1tbsp of Dr. Earth tomato blend. Over the next week or so we'll be switching to Dr. Earth flower girl.
Cheers til next time!
-Dj Sunstone
Likes
13
Share

@Ultrabrut82
Follow
Tak 9 týden květu.😁Už začínám pro sichr kontrolovat mikroskopem ,ale zatím je čas.?
Čtvrtek zalito jen voda.
Neděle zálivka dle foto je to na 10 litrů.Ještě to bude chvíli trvat ?tak ať nestrádají 😁


Likes
Comments
Share


@streamkiller
Follow
Malas noticias con Nefertiti todavía no creció. La saqué del papel húmedo y ahora nuevamente está con agua, la dejaré así 1 o 2 días y luego la plantare directamente.
Las 2 CSSH que germine fueron exitosas, una con una raíz de 5-6mm y otra de 3-4mm, ya fueron trasladadas a tierra como se ve en la imagen.
La primer CSSH todavía no creció , tengo miedo que haya tomado mucha humedad la tierra y no haya descargado correctamente.
En esta ocasión agregué unas muy pocas gotas de una hormona de enraizado, he tirado unos pocos milímetros de agua en cada una , guarde mucho para los días consecuentes.


Processing
Likes
9
Share


@russrahl
Follow
Placed seeds in water for the night and the started sprouting in the glass before morning, very strong seeds! Put them directly in rock wool cubes in RDWC buckets and the we’re up and out the next day. Got the 1000w MH HID turned down to 600w and moving on a light rail about 2ft above seedlings.


Likes
23
Share


@Barcelona_Farmers710
Follow
Esta semana entramos en pre flora Farmers, a ver cómo tira con el té compost que pusimos... aproximadamente 5% de melaza pescado hidrolizado ácido fulvico, mycorrizas, azos bacter and micro organismos para un buen rendimiento un saludo compañeros!

Likes
11
Share


@GrowerBaal
Follow
What should i say. My fear was reasonable. Even so i sprayed Purolyt and fed Silic Rock, i found mildew on day 75. I gave her another chance and wanted to wait until i woulkd find another place with mildew.

Likes
2
Share


@CanadianFillmore
Follow
Week 16 of veg, had these ladies vegging while I flowered the other 4 in my previous diary. They've been topped a few times, going to flip this weekend.
