


Likes
2
Share


Likes
10
Share

@CrackinBeans
Follow
Mephisto and bighead going into darkness for 48-72 hrs. Then the chop. Big bomb is the last one standing in the 5x4 will begin flushing soon


Likes
30
Share


@SooSan
Follow
J'ai divisée la 90x60x140 en 3 parties (et donc 3 Diaries) :
1️⃣
🏠 60x60x140
☀️ FC-E 4800
🍁
1x Black Bomb / Philosopher Seed
2x Amnesia Lemon / PEV Seeds
1x Blueberry / PEV Seeds
1x Blueberry / 00 Seeds
1x Wappa / Paradise Seed
1x Dark Phoenix / Green House Seed
1x Quick Sherbet / Exotic Seeds
1x Mango Cream / Exotic Seeds
1x Banana Frosting / Sensi Seed
1x Hindu Kush / Sensi Seed
1x Fast Mix / Sweet Seed
📎 https://growdiaries.com/diaries/122084-grow-journal-by-soosan
2️⃣
🏠 30x60x90
☀️ TS1000
🍁 4x Fast Mix - Sweet Seed
📎https://growdiaries.com/diaries/124052-grow-journal-by-soosan
3️⃣
🏠 30x60x50
☀️TS1000
🍁 4x Quick Sherbet
📎 https://growdiaries.com/diaries/122080-grow-journal-by-soosan

Likes
121
Share


@ctm_dzagi
Follow
It should be noted that with the current share of blue in the spectrum, the sprout does not stretch at all, I will probably adjust in favor of red in the coming days

Likes
38
Share


@Esoteric_growing
Follow
Fantastic thc production and buds nicely developed, swapped out the shogun boost for the bud xl which I like to do for the last week before flush. Dropped EC down to 1.1-1.2 as they are in the final stages of flowering.
Only issue is I regret getting rid of one of the phenos so may try and take a clone from a small flower to save it.

Likes
37
Share


@Kirsten
Follow
So the plants survived without light in my garage for 2 days, thank goodness!
FBP2 is the best plant by far. She had stacked lots of tight buds, orange pistils coming in nice. Nice bushy structure to her. Super happy with her progress.
Royal Critical is doing great, progressed further than all the others so far, lots of orange pistils, curling inwards towards the buds, still white pistils too, so not ready obviously. Not as dense a structure as FBP2, but much better than FBP1 and FBP3, which you can see are way behind both the others. They're looking super straggly. Not sure that they'll improve much at this stage unfortunately.
Still I'm pleased overall with this grow, as it's my first and I have learnt a lot about the necessity for LST, and genetics being different from plant to plant.
Hopefully we'll be able to harvest the Royal Critical here soon, then FBP2. As for the other 2 plants, I guess I'll have to wait and see.
Likes
8
Share
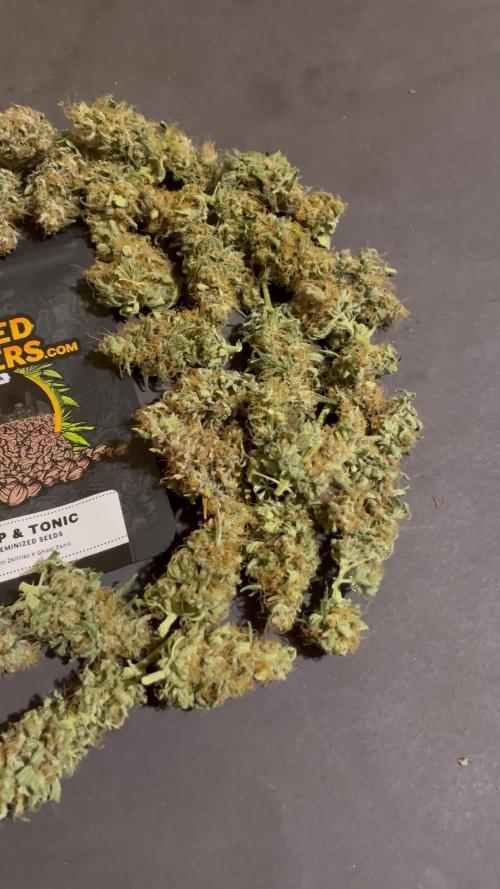

@eldruida_lamota
Follow
Venga familia que ya viene la cosecha de estas Terp & Tonic de Seedstockers, que ganas que tenia ya de darles machetazo.
No veas que ma me dio esta variedad desde principio de floración entre carencias y a mediados una maldita plaga de trips.
Las flores aparte, se ven resinosas.
a sido una genética con la que disfruté cultivarla, es algo complicada cultivarla pero merece la pena si eres cultivador con experiencia no te será problema cosechar.
Agrobeta:
https://www.agrobeta.com/agrobetatiendaonline/36-abonos-canamo
Mars hydro:
Code discount: Eldruida
https://www.mars-hydro.com/
Hasta aquí es todo , espero que lo disfrutéis, buenos humos 💨💨.

Likes
Comments
Share

@Anon73
Follow
Excellent growth still.
No bugs, no mildew.
Found a few snails and one grasshopper.
The grasshopper would not touch the plant.
It was staying on the support pole.
Flowering has made itself known.

Likes
36
Share


@Salokin
Follow
Hi growmies,
unfortunately I skipped a day checking on the reservoir and the plant must have consumed a lot more water than expected, probably due to the heat we are experiencing where I live, since I realized tip burn getting worse everywhere I checked the ec, which was close to 3 😳, topped up with RO water right away and this seems to have stopped it. Other than that I don’t think it bothered the plant too much either, as she keeps on swelling bigger and bigger. A&B fertilizer was reduced already and once, either next week or the one after I’ll start flushing, depending on the stage of ripening.
Likes
9
Share


@chapothegrower
Follow
No nutrient deffiencies 💪 they growing healthy AF! Everyday LST is my job 😂 I will try to make about 6-8 main colas with this method! Also little defoliation, just to make the light more effective👌 things getting more and more interesting lets go wow!!😈 100%ORGANIC no chemical nutrients!!!
Likes
2
Share

@Thebeardserkers
Follow
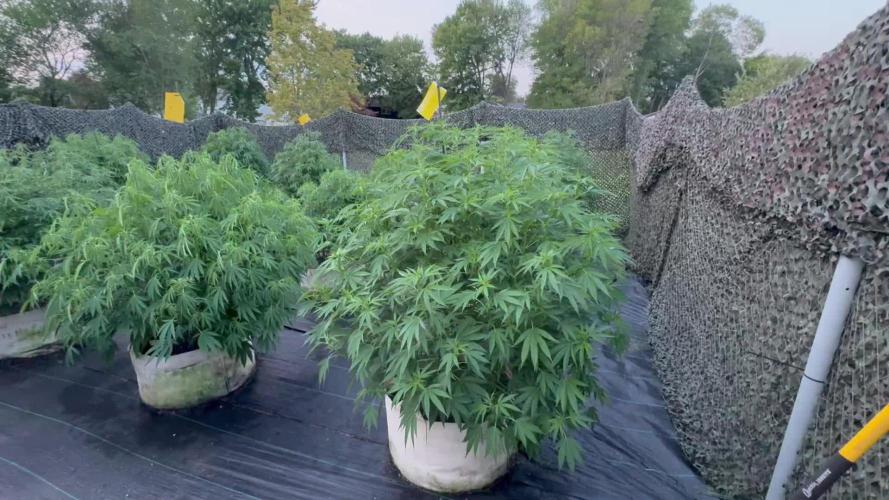
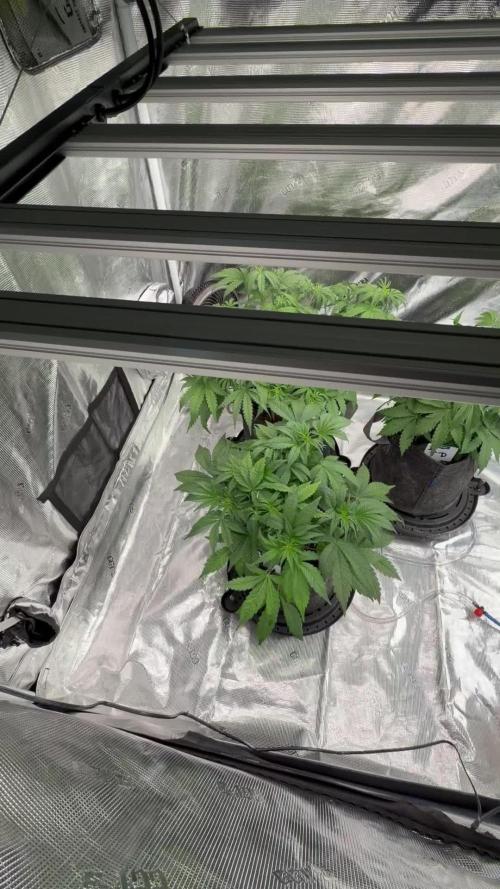
Nous entrons dans la semaine 5 avec une run qui se déroule très bien dans l’ensemble. La tente 4x8 Gorilla abrite 7 plantes en 100% coco sous deux lampes 500w, dont l’AC Infinity IronForge IF500 comme lumière principale, avec un système AutoPot 4 pots AQUAValve 5.0 actif depuis le jour 17, complété par 3 plantes en bases AC Infinity arrosées manuellement via la valve de saignée du réseau.
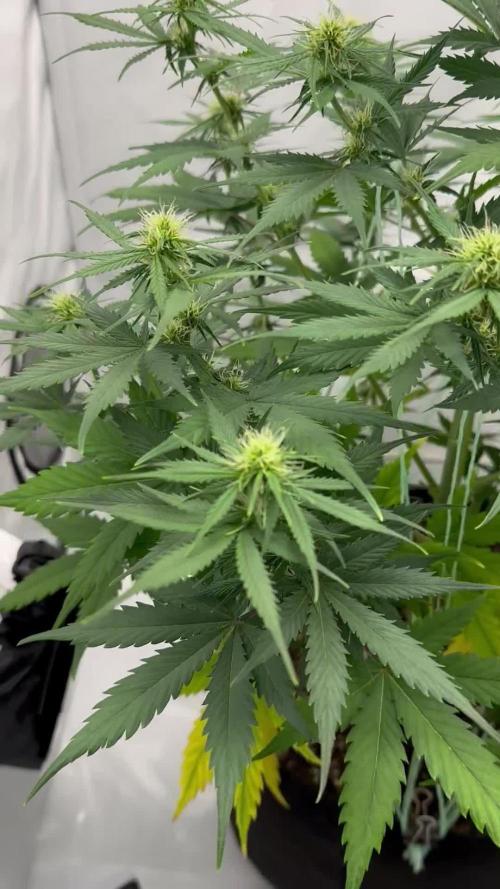
La Gorilla Cookies est la première à entrer en floraison confirmée dès la fin de la semaine 4, avec des pistils blancs bien visibles sur plusieurs sites. Les Toof Decay devraient suivre dans les prochains jours. Les Mephisto’s Wedding et Hubbabubbasmelloscope sont encore en vég avancée mais la transition est imminente.
On a noté des carences légères en calcium et magnésium sur le Hubbabubbasmelloscope et la Gorilla Cookies, corrigées par des applications manuelles de Cal/Mag directement sur les pots et par une hausse de la dose dans le réservoir à 2 ml/L. Le réservoir tourne actuellement à 545 ppm avec Bud Ignitor, Voodoo Juice, Grow/Micro/Bloom en ratio 1:1:1 et Cal/Mag renforcé.
L’environnement est stable et performant : température 24-25°C, RH 62-64%, VPD 1.17-1.21 kPa, score 100/100 en continu. La consommation du réservoir a atteint 10L par 24h, signe que les racines sont bien établies et que la demande hydrique monte avec la floraison qui s’amorce.
Objectif semaine 5 : surveiller la transition florale des autres génétiques, maintenir le Cal/Mag, et préparer la bascule de la recette vers floraison dès que 3-4 plantes seront en fleurs.

Likes
9
Share


@Bryankush
Follow
Giorno 1 Ho ordinato un misuratore del ph su internet mi dovrebbe arrivare giovedì quindi fino ad allora non posso iniziare il lavaggio. Oggi ho dato a lei 1.5l di acqua come sempre.
Giorno 5 oggi finalmente ho fatto il primo lavaggio andato tutto liscio.


Likes
8
Share


@Hawkbo
Follow
They are all putting on weight quickly and taking shape very impressed with all of them and they prob have another week or so before flush/harvest.
REMEMBER , IF YOUR SHOPPING FOR GEAR YOU CAN USE THE CODE “BANGDANG” FOR 10% OFF YOUR ENTIRE PURCHASE FROM ANY OF THE FOLLOWING COMPANIES.
@greenbuzzliquids
@rainscience_growbags
@gorilla_grow_tent
@growlightscience.led
NEW* @Rocbudinc Seeds on his website *
*****Gorilla grow tent discounts extend to all companies affiliated with grow strong industries which include..*****
@super.closet
Lotus Nutrients
Kind LED grow lights
Likes
53
Share


@Skunk_Life85
Follow
Slowed her feed way down this week and next before my flush, I added molasses to my last couple feed. She smells like grape jelly when you touch her, cant wait to get her into a jar...
Likes
19
Share


@KeiKie90
Follow
1.10.2021 Day 8
Auto Blackberry Kush
Info:
Nutrients: n/a
Water: 300ml
Temperature: 21*C - 29*C
Humidity: 54% - 72%
2.10.2021 Day 9
Auto Blackberry Kush
Info:
Nutrients: n/a
Water: 300ml
Temperature: 22*C - 29*C
Humidity: 52% - 72%
3.10.2021 Day 10
Auto Blackberry Kush
Info:
Nutrients: n/a
Water: 300ml
Temperature: 21*C - 29*C
Humidity: 56% -78%
4.10.2021 Day 11
Auto Blackberry Kush
Info:
Nutrients: 2nd week!
Water:
Temperature: 21*C - 27*C
Humidity: 54% - 76%
5.10.2021 Day 12
Auto Blackberry Kush
Info:
Nutrients: n/a
Water: 300ml
Temperature: 22*C - 29*C
Humidity: 50% - 68%
6.10.2021 Day 13
Auto Blackberry Kush
Info:
Nutrients: n/a
Water: 300ml
Temperature: 21*C - 28*C
Humidity: 51% -72%
7.10.2021 Day 14
Auto Blackberry Kush
Info:
Nutrients: n/a
Water: 300ml
Temperature: 21*C - 26*C
Humidity: 56% - 70%

Likes
Comments
Share

@Vet_J
Follow
Day 52
The lower leaves of the plant turned yellow
I have two options that could have caused the lower leaves to turn yellow
The first is a lack of nitrogen. In the last two weeks, I have reduced the dose of AD Grow fertilizer from 4 ml to 2 ml which contains nitrogen and i have not added AD B-52 for two weeks
The second option is that I have a low-quality ph meter. I measure the ph with drops I don’t have digital one and there may be an ph error
The plant was unable to absorb the fertilizer and a large amount of salts are most likely accumulated in the soil.
one more detail:He was defoliated a few days ago.
I hope that this problem will be resolved by next week and the plant will continue to grow at a good pace.

Likes
22
Share


@BlackOpsGrow
Follow
Well this lady is starting to look finish 😁 I've bumped down nutes and are still keeping ph at 6.0+-0.2. She had started to crumble under her own weight so I've had to tie her up a bit. Next week I'll flush her and then it's harvest time 👍
A little note the 20/7, i saw today that i got a single little mushroom growing out of the side of my airpot. I've seen a lot of funny things, but never actually mushrooms 😂 didn't know they could thrive in coco at all?