
Likes
Comments
Share


@902EastCoast
Follow
From the beginning to the end of their life, they were easy to grow. Nice structured plants and buds. Fast finishing at 49 days for these 2. Love this strain!


Likes
47
Share


@Northern_Ent
Follow
June 15: looks really good and will do second round of topping tomorrow. The last 30 days have been cooler than the historic average, and last year was way above average. So, she’s doing great despite cool weather.
June 16: adjusted tie downs and watered with soluble seaweed extract.
June 17: second round of topping to make 8 colas done this morning. Will do another round in a week or two to get the final 16 cola layout I want.
June 20: released tie downs this morning. Looks really good on the last day of spring. Solstice and the photoperiods are right on schedule, unlike my two autos.
Made second compost tea as shown in video. Key things are blackstrap molasses (sugar and trace metals), good compost, and I use coco coir for something for the bacteria to physically live on (substrate or matrix).
#seedsman420growoff
#seedsmanseeds

Likes
51
Share


@MadeInGermany
Follow
Info:
Unfortunately, I had to find out that my account is used for fake pages in social media.
I am only active here on growdiaries.
I am not on facebook instagram twitter etc All accounts except this one are fake.
Flowering day 44
since time change
to 12/12 h.
Hey guys :-) .
The lady is developing very well.
The buds keep getting thicker and smell better and better :-).
This week it was poured twice with 1.2 l each (sewing materials, see table above).
The tent was cleaned and everything checked.
Stay healthy 🙏🏻
A thank you for this wonderful strain goes out to
Herzog
https://instagram.com/herzog030?utm_medium=copy_link
and the Exotic Seeds team
You can buy this Nutrients at :
https://greenbuzzliquids.com/en/shop/
With the discount code: Made_in_Germany you get a discount of 15% on all products from an order value of 100 euros.
You can buy this Strain at :
https://www.exoticseed.eu/
Type:
Herz Og
☝️🏼
Genetics:
Larry OG X Kosher Kush
Indica 60 % / Sativa 40 %
👍
Vega lamp:
2 x Todogrow Led
Quantum Board 100 W
💡
Bloom Lamp :
2 x Todogrow Led
Cxb 3590 COB 3500 K 205W
💡💡☝️🏼
Soil :
Canna Coco Professional +
☝️🏼
Nutrients :
Green Buzz Liquids :
Organic Grow Liquid
Organic Bloom Liquid
Organic more PK
More Roots
Fast Buds
Humic Acid Plus
Growzyme Big Fruits
Clean Fruits
Cal / Mag
Organic Ph - Pulver
☝️🏼🌱
Water: Osmosis water mixed with normal water (24 hours stale that the chlorine evaporates) to 0.2 EC. Add Cal / Mag to 0.4 Ec Ph with Organic Ph - to 5.8 - 6.4

Likes
8
Share

@IndigoMist8
Follow
Overall happy with her yield considering how small she was. Curious to see how it smokes.

Likes
64
Share


@Natrona
Follow
Sponsored grow 👉WeedSeedsExpress👈
Week 7 / Flower week 3
2/23-3/1
Week 7 flower week 4 Love Potion is in flower, the buds are puffing out with many white pistols. Trichomes are just starting to form Love Potion got her first defoliation removing fans and any bud sites and more pins added on 2/24. Since I have overfed my gals, this week I am trying to remove excess fertilizer from the planting medium by giving ph 6.5 water only. I am hoping since Love Potion is behind the other gals, I’ve addressed the over feeding issue and she will not show burnt tips and look pretty out her life.
Ph 6.5
Temp 65
Thank You @WeedSeedsExpress for the opportunity to grow your strains.
Your likes and comments are appreciated. Thanks for stopping by.
Growers love 💚🌿
💫Natrona💫

Likes
26
Share


@Young_agronomist
Follow
23.09.23- и так мы на 85 дне жизни )
Сильных изменений не замечено . Ветки стали немного толще , цветы развиваются , но вверх она не вытягивается .
Имхо может и лучше )
28.09.23- 90 дней жизни !
За последние пару дней она прибавила в росте и зеленой массе . Она очень кустиста и я принял решение провести несколько щадящих дефолиаций с подрезкой пасынков ,чтобы освободить пространство для света и воздуха . В остальном она здорова , а шишки продолжают набирать .
Это очень красивое растение

Likes
3
Share


@Jp_tetreault
Follow
The buds are beginning to show, I'm excited for the upcoming weeks.
Next week I will place a plant net, that way more lights might come through.


Likes
54
Share


@rhodes68
Follow
3/4 Day 15 Flower
Changing PK to KoolBloom as the Peak has run out.
Will work up the CT nuets to @10ml/gal or so as the burnt tips have proven kind of a red herring.
Loving the dual light sources, makes things so much easier.
3/5 Day 16
More pics
Nuets up to 925 ppm, thats unadjusted for the water (@125 ppm)
Fish Sh!T added for terps among other reasons, they just explode with this stuff.
Took the last of the loofy branches that were not getting light.
Plants look almost lollipoped but thats due to the stretch we were fight during the tent space problem.
3/6 Day 17
Pics, prob last of the week unless something presents itself.
Leaving nuets as is for now.
Zhaan is really coming along being a tad shorter than the rest.
Little clean up today so took the opportunity for better pics
Having some issues find coco coir hope its temporary.
Update
Burnt tips have worsened a bit with the increase in Bloom nuets (nitrogen)
Keeping the nuets as is for now keeping an eys on em.
If I have to decrease will up the PK to compensate.
3/7 Day 18 Flower
Tips have not worsened so leaving CT Bloom as is but did increase PK slightly and decrease Fish Sh!T to 1 ml/gal try and make it last a bit longer , stuff aint cheap and this is enough.
Input Feed - 900 ppm
Runoff - 1180 ppm
well within limits
3/9 Day 20 Flower
Upped the PK to 4ml/gal and feed to 925 ppm, that will be the top end and carry that level for at least a week before ending PK.
Buds are frosting up and growing large pics when I can
Really liking this strain guys... whatever it may be 😜
Redid the grow room and tent completely, improved the girls environment somewhat but mainly for space reasons.
Pics/Vid

Likes
74
Share


@Ferenc
Follow
Day 15- 4/10/21:
Welcome to the first day of the 3rd week....
Happiness.... big one. They look amazing.... really so some changes:
Lamp is set to be on 150W approx 60% of the full power..... enough..... they love this ViparSpectra XS2000....
So Do I.....
Himidity stays on approx 60%
Ventilation is fine every 2 hours switched on for 5 min....
Watering like 0.06 l per day....
Started some fertilization also with Bat Guano, Biobizz family /before someone ask why I use BioBloom and Top Max in veg just beacuse lol/
And... Epsom salt....
Ratio can be found just scroll down....
And yes, I do it on Tuesday and Saturday except the Epsom just 1x a week the rest then 2x for now.
All of them are beautiful and the first LST has been done basically just bent them to the right or left haha for now except Afghani Gold and Spliffs Strawberry because they are basically just 2 weeks old so too young to be trained.
I assume Blue Berry has a little funny deficiency but I am sure she will be okay anyways I will colour her back lol with some magic nutrition 🤣🤣🤣
I am happy ;)
As you can see 2 of them are smaller /Afghani Gold, Spliffs Strawberry/ because they are younger: planted 1 week later as the first germination failed.
Pictures sYs everything so not much more to say... ;)


Likes
8
Share

@Wondrej
Follow
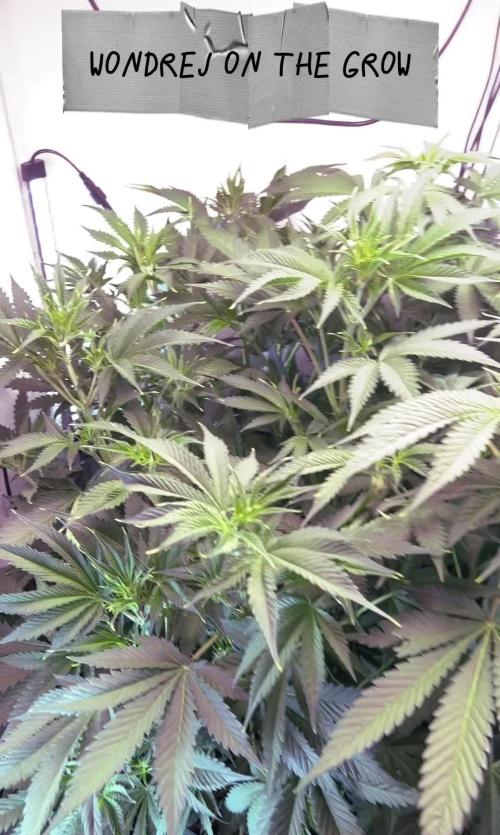
🚀 Week 7 Overall | Flower Week 2: The Great Stretch & Soil Struggles 🌿
What’s up growmies! We’ve officially moved into Week 7 overall, which marks the second week of flowering.
The girls have absolutely exploded! That Week 2 stretch is in full effect and it’s beautiful to see. Because of the crazy growth, I had to step in with some light defoliation and a "mini" lollipopping from the bottom. I want to make sure the strongest branches have enough energy to reach for the sky. Once the stretch is over and they stop growing taller, I’ll do one final heavy defoliation and a proper lollipopping, but for now, this was definitely necessary.
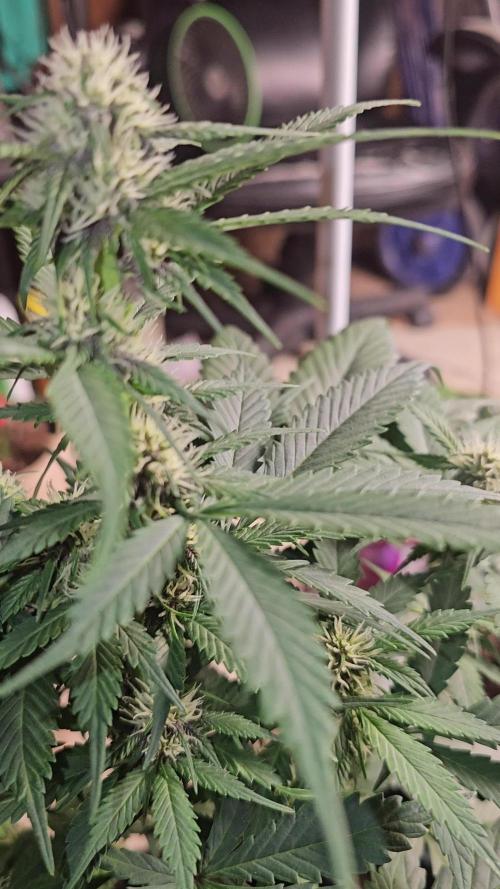
The Struggle: I’m still dealing with the yellowing of new leaves. Since I’m running a no-chem, low-feed organic setup, "nutrient burn" is highly unlikely. I’m starting to lean towards the fact that I messed up my living soil mix and it’s lacking oxygen.
The Fix: I decided to drill some extra holes into my old pots to get better aeration into the root zone. Lesson learned: for the next run, I’m definitely upgrading to a proper living soil bed! 🛏️
I honestly hate this kind of stress during a grow. I’m just crossing my fingers that the plants finish strong and the root system doesn't get messed up.
Stay tuned and happy growing to everyone out there! 🙏💚 One love!
Likes
1
Share

@Samsationalseeds
Follow
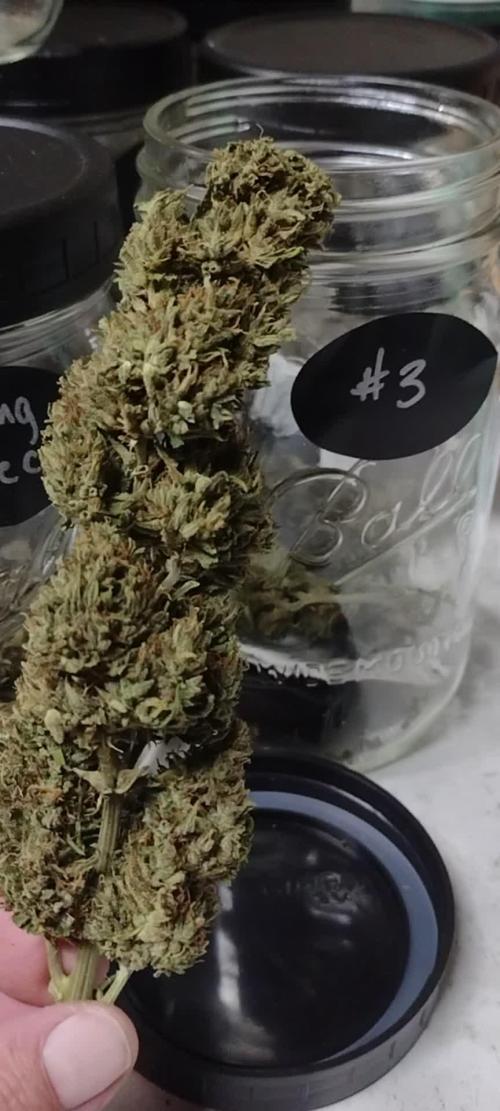
Day 43-49
A lot of them are showing signs of going into bloom. Doing their stretch before bloom, so they need more nitrogen before they're done stretching.
My own unbiased opinions about deep water culture.I love it.It's got the precision I need and control.
If you like something more relaxed, living soil is your thing, but this is mine.I'm enjoying it.Everything's growing people have already done the research.I just gotta apply it.
Likes
52
Share


@Cannabeast40
Follow
Finally harvest time arrived 🤗
It’s been a great run, though I had to improve a lot along the way. But as usual there was a way to get things done and finished up😎
After a long heatwave I decided to chop the whole tent, just a bit before I actually wanted to. But I see amber trichomes and heavy buds, so I think it’s safe to chop now, so here we go. 🤩
Can’t wait to taste this after so long watching over it🤤
More details to come.
Likes
21
Share


@PabloTheGrower
Follow
What a great strain...definitely surprised me positively. Thank you Exotic Seeds for the opportunity to work with you trying this awsome plant.
It has a steady growth, kinda short and bushy like a lot of plants with strong indica traits
Very dense buds, big ones, fat and resinous. With a LOT of productions all-over the plant. So much thricome production it sparkles white.
Cutes it yesterday (17/12/2023) altough on my opinion it could have 1 more week.
Altough because of the huge problem I had to do it. This grow tent (specially the other plant growing side by side) had a mold issue, bud rot spreading fast. I must have lost about 5
65 grams of wet flower total on the Fat Banana.
When I cuted it 🍓 Strawberry Cola weighted 829 grams it has a lot of defoliation done alredy but I'll trim it 100% when dry.
This is it, thank you all of you growmies for watching this grow. See u guys on the next one.
Likes
7
Share


@Nikkov
Follow
excellent recovery from the top pruning I did last week, again watering with top crop top veg and they seem to be doing very well enjoying the substrate and the fertilizer and the climate
Likes
17
Share


@VegHead_Lou
Follow
Entering week 9 and this little lady is still filling up. I want to give her about another 2-3 weeks. I kept the runt because it’s just so freaking adorable. She’s lying her rent so she can stay a while longer. And lastly my nitrogen hungry girl is finally showing her sex. She lost a nice sized side branch this next, you can see the pic on my instagram. The oldest girls smells of sweet, grapes and candy with a undertone of funk. The runt actually has a pungent earthy and sharp nose. Thank you all for continuing to follow my grow a few more dairies are to come.

Likes
8
Share


@Alien98
Follow
This week I discovered some leaves on the bottom of my ladies turning yellow, so I decided to raise magnesium nutrients to 3ml/l,but I think it happens when the plant get closer to harvest. In the past week I saw the buds getting bigger and frostier so I think so far it's going well. From today, (day 49) I will introduce Big Bud and Carboload for one week, then one week of Overdrive and finally a week of flush. Hopefully great end-result and great yield too.
Day 52: Some Tricomes are turning into a Brown color so maybe I could harvest the first plant next week

Likes
60
Share


@Professor_Chaos
Follow
HARVEST DAY!!!....
What a beautiful plant.. I can't wait to give her a taste.. Was expecting to push her another week.. But a closer look showed that there were alot of amber already.. Kinda hard to see them against the purple calyxes along with with the Mars Hydro TS 1000 on as well.. But she should be perfect! Oh I cant wait!!! Will be updating with the drying and curing as I go!!! So happy!!! 😭😭😭
Drying - Day 4...
Ok so humidifier is definately not needed this time lol.. For a couple days the room and box were at 70% so I took the water and filter out of the humidifier and just running it as a fan to help move the air around the small room its drying in.. The box also has a very small and weak computer fan which is just pulling the air out SLOWLY but SURELY.. Now the humidity inside the box has been reading 66% constantly for the last 2 days! This will be my first harvest that doesnt dry in 3 - 5 days without a humidifer! Maybe cuz I watered that morning?? Idk.. But this is much better.. Hoping for at least a 7 day dry.. 10 or 12 would be nice.. But I doubt that very much lol.. Anyways.. Will still be updating as I go!!!
Drying - Day 5...
So I went ahead and trimmed all the smaller nugs and colas.. Leaving the 3 biggest colas (back of the box) to trim in the morning tomorrow. I wish I would have lollipopped some.. Alot of larfy, leafy nugs.. But still gonna smoke that shit! Lol.. Took about 2.5 hours to trim what I did today.. Keeping the trim (duh) to make some bubble hash.. Or maybe just gather the keif and press it.. Haven't made up my mind on that yet.. Either way it's gonna be some epic shit! The smell is still so amazing! You could probably fuck up the drying and curing and still smell the citus! Lol.. But I will still keep updating as I go!
Drying - Day 7..
I went ahead and put some smaller nugs into a jar to see what they were reading.. Still way too high.. In about 8 hours it was reading 84% RH so they still got at least a couple more days drying.
Drying - Day 8...
Ok so I was feeling the nugs I already trimmed and jarred.. They feel pretty crispy. So I'm jarring them again today. I have trimmed up 2 more of the bigger colas but I can feel that they still have some moisture.. So later today I'm going to finish trimming up the last one (which is gonna be awful lol it has alot of smaller branches that are gonna be very tedious) but that one is gonna have to be left out to dry a little longer than the rest. As of now, I have 3 jars filled.. I may even need to buy another jar.. I really wish I had some big mouth mason jars so I can buy those lids for curing! Those things look legit asf!
Later that night...
So I have now finished trimming.. The jars that I had already filled were reading 62% RH on the dot.. I like to have it at 65% - 68% RH to have some room to get it down to 62% after a week or two.. But this shouldnt be any issue.. Will add 62% packs when the jars get below 60%.. But since they are already at 62%.. I dont want to burp very often at all.. 62% RH is where I like my bids at. I have a sandwich bag FULL of trim.. That is gonna make some amazing bubble hash! Very airy bud.. But this strain is very beautiful.. Smells great.. Just the airy buds.. Will definately grow again.. Will update with a taste test in 15 - 30 days.. Would rather get the cure done before I taste her.
Likes
21
Share


@Rytmause
Follow
Start of week 7 buds start put some weight on one of Ak totally massive buds 👏 Amnesia coming up nice as well cannot be more happy thanks for check out my babies 😉and have a wonderful day
Processing
Likes
38
Share


@Silverback_Guerilla
Follow
Harvested them on 10/4, washed them and hung them to dry for 4 days, then alternated them in brown paper bags and big jars for a few days until perfect.
Final thoughts:
Like most sativas I've grown, those biggass colas were kinda fluffy and shrunk up pretty bad once dry, but it's super frosty, tasty, and smells delicious as well.
It was very easy to grow, but a pain to trim...too leafy. No deficiencies at all with normal feed, and they bulked up really well in the last two weeks. They are thirsty girls because they have a lot of foliage. They can withstand being less than a foot from quantum boards for their final week or two without burning up too much.
I don't like that it took this strain almost two weeks longer than the others, but a good sativa usually takes quite a while longer than these did.
Plant A: 79g
Plant B: 75g
Plant C: 74g
Plant D: 88g (this is the one that split and had two colas)
Potency: 9/10
Flavor: 8/10
Aroma: 8/10
Yield: 7/10
Bag-appeal: 7/10
Ease of growing: 10/10