
Likes
Comments
Share


@Rinna
Follow
Did a strip/defoliation on all of them. She's catching up with the rest nicely and looking great. Will be feeding them all Terra Bloom from now on, still no mildew or bugs thanks to spraying cannacure weekly. Also, the subtle colors I spotted (hard to get a clear pic) are developing nicely, but some leaves are turning, twisting and curling, my first guess is that I've overwatered her, she's quite a bit smaller (more 'skinny', and flowering slower) but I've been watering here the same as the other two, might need to let her dry up a bit longer than the others.

Likes
97
Share


@Kitties_and_Colas
Follow
~_~_~_~_~_~_~_~_~_~_~_~_~_~_~_~_~_~_~_~_~_~_~_~_~_~_~_~_~_~_~_~_~_~_~_~_~_~_~_~_~_~_~_~_~_~_~_~_~_~_~_~_~_~_~_~_~_~_~_~_~_~_~_~_~_~_~_~_~_~_~_~_~_~_~_~_~_~_~_~_~_~_~_
❤️💡🌱😽💨
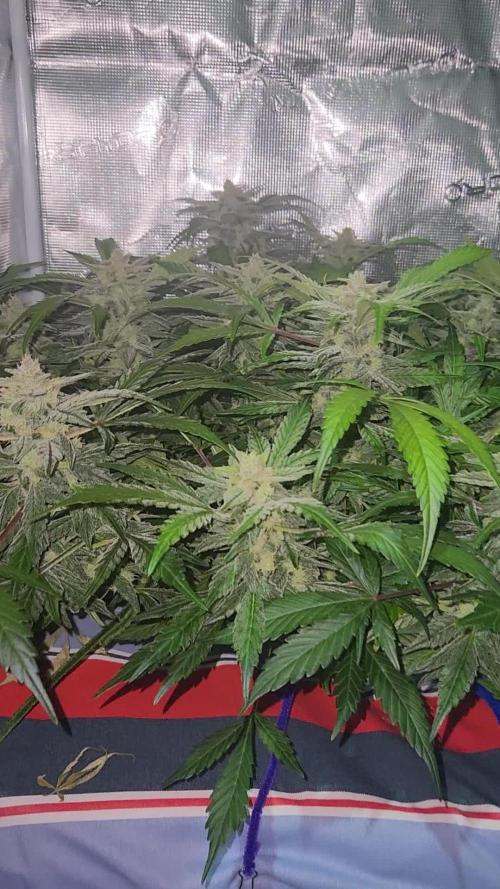
Its been a great week! Everyone has fully recovered and buds are covered in frost..at this rate they may end with more crystals than Bruce Banger..all plants are eating trace amounts with every watering. We stopped giving them vit-B but are continuing with a few ml/gal of calmag..I think we found the sweet spot with the SP-3000, these plants pray hard most of the day..we're not cut out for these long flowering strains but I really think these will be worth the wait..thanks as always for dropping by, we'll be sure to update if anything changes..happy harvests everyone!! 💡🌱
⚡Mars Hydro/SP-3000⚡ Specifications ⚙️:
Diodes: Samsung LM301B / Osram 660nm (960 total!)
Driver: Meanwell 300watt 🔌 (300W±5% @AC120V-277V)
PPF: 824umol/S ☢️
PPE: 2.8 µmol/j 〰️〰️
Lifespan: 50k+ hrs ⌛
Weight: 10.1 lbs (4.6kg)
Veg Coverage: 3 x 5 ft 🌱
Flowering Coverage: 2 x 4 ft 🌼
-The SP-3000 uses an aluminum heatsink (no fan) and the driver can be placed outside the tent 🌡️⬇️
-IP65 waterproof ratings, tolerant to high humidity grow environments 💦 ..
-Up to 15 can be daisy-chained together and all controlled from a single light! 💡~💡~💡~💡~💡
~_~_~_~_~_~_~_~_~_~_~_~_~_~_~_~_~_~_~_~_~_~_~_~_~_~_~_~_~_~_~_~_~_~_~_~_~_~_~_~_~_~_~_~_~_~_~_~_~_~_~_~_~_~_~_~_~_~_~_~_~_~_~_~_~_~_~_~_~_~_~_~_~_~_~_~_~_~_~_~_~_~_~_

Likes
12
Share


@NORTHWALESAUTOS
Follow
She's coming along nicely considering the weather.
She seems happy enough on the greenhouse.
Added monkey nutrients boost this week to help her on her way.
Didn't realise I had a pit inside a pot. Now I have long ass roots to deal with lol


Likes
97
Share


@Zurban_Poison
Follow
Hello everyone!
At some point, a thought struck me: isn't the pot too small for my Dark Phoenix? She has grown to a size that I did not expect and did not plan). and I was tormented by the fact that it grows in a 25-liter pot just .. so I decided to take a chance and transplant it into a 35-liter pot. the transplant took place without problems and stress .. she did not even guess what had happened. The root system is curled perfectly. Bioenchaser does its job 100% well!

Likes
3
Share


@Earthsower
Follow
Just waiting to see if she develops any further clearly struggling bull still moving. She has had a 100 ml dose of home made solutions e.c 1.7 I will wait until the pot is dry until I fed her next!
Likes
8
Share


@JohnnyBarrel
Follow
Week 14 - July 30
Last vegetation weeks. On 4 plants: 2 healthy / 2 injured.
Royal Moby and GMOxZombieK were seriously contaminated with aphids. To stop the propagation I did many washes with black soap and neem oil but may be I treated at the wrong time: morning, even soon; is too late by a hot sunny summer day. I think the 2 plants are suffering from sunburn… and they still have aphids…
I stopped soap treatments and try another recipe which seems working very good against aphids and revitalizing all plants: spraying Garlic + Laurel
-I cooked separately during 1h garlic (5 cloves) and Lauren leaves (12) in approximately 1L of water
-filtered the preparations and wait 4 days
-for 1L of water to spray: 15cl garlic mixture + 5 cl laurel BEWARE: checking Ph… last year I burned plants with garlic + chili mixture: it was catastrophic.
Brake Pad Breath and Flash Back are beautiful and healthy. Aphids aren’t interested by this 2 plants.
I did preventive treatments Neem oil and soap but not so much. Good reaction to the Garlic+Laurel.
Plants are bushy, densely ramified. Deep green color, the female sexual signs are visible.
Ready for flowering.
Watering with a little bit of nutrients 1.5L/plants each 2 or 3 days
Defoliation
Now I quit the “garden” for 7 days…traveling to Amsterdam (NL) and Prague (CZ) for holidays.
I installed automatic watering systems (Blumat) and sticky traps, locked the veranda, programmed the Ventilation and crossed fingers.
I’m not afraid about heat or dry…. More about pests and diseases….and rubbery too cause I have 6 auto flowering quasi ready.
I’m writing this in Prague, returning in my country to the west side in 2 days.
After smoking lot of joints in Amsterdam (3 days)
Amnesia haze
Tangerine dream
Kush Mints
Super Lemon Haze
Dynamite cookie
Intergalactic toad
Super Silver Haze
In Prague Weed (THC) is prohibited. But I discovered that you can buy pre roll joints (100% pure hemp-Thc-sativa, hybrid etc…) in strange gifts shops for 6€. It’s really not the best weed but it’s Strong and easygoing.


Likes
2
Share

@Weedman268
Follow
Week 6 of flower, she's looking good, just been filling the reservoir when empty and observing her.
Likes
9
Share


@GrowPassionItalyChris
Follow
Sono felice di queste varietà, impressionanti come si adattano ai cambiamenti climatici italiani e soprattutto resistono ai parassiti tipo afidi e lepidotteri. Sono tante piante,diverse varietà da 4 banche dei semi mondiali quindi descriverle tutte sarebbe assurdo. Ogni varietà cresce abbondantemente, iniziano tutte a riempirsi di infiorescenze resinose,profumate e abbastanza appiccicose alcune. Sono rimasto sorpreso per la dimensione di alcune varietà, sono tipo di taglia XXL e non si fermano, continuano ad allungarsi e ad allargarsi nonostante sono poco distanti una dall'altra. Sembra una piccola foresta di autofiorenti felici e con il caldo estivo in arrivo non faranno che migliorare! Prevedo tanta abbondanza di qualità! Complimenti a tutte le banche semi che ho scelto! Un abbraccio


Likes
6
Share


Likes
5
Share


@CanarianGrow92
Follow
Started week 1 and we placed these girls in a 7 liter pot, they are now growing with 1x Marshydro TS1000 but im adding another TS1000 in 2 weeks when they start flowering
Likes
22
Share


@Gram_Solo
Follow
Can't believe these now absolutley smashing it. Think it's another week of Overdrive for a few of them and then flushing. There is one that developed some black spots which I think is potassium deficiency. Other than that the rest are doing amazing under the Spider Farmer and Advanced Nutrients.
The Purple is crazy really don't wanna chop it down become attached haha
Smells like blackcurrant fruit punch omg
Unreal . One smells like giant bag of skittles fruity as hell man!
2 weeks maybe and she done
💪👽


Likes
10
Share

@CanarianGrow92
Follow
Last week for our C-vibez grom dutch Passion! 🇳🇱
Awesome strain, fruity and citric smell with very hard and sticky buds, we see trichomes all over the plant and leaves!
This strain is close to one of my favorites so far.
This week we continue with water and in some days we will harvest!
Likes
40
Share


@valiotoro
Follow
Easy trim✂️
The buds are super sticky & dense⚡️
The smell is Absolutely DIVINE,flowery sweet & orange🤤🍊🌸


Likes
11
Share


@CronkNutrients
Follow
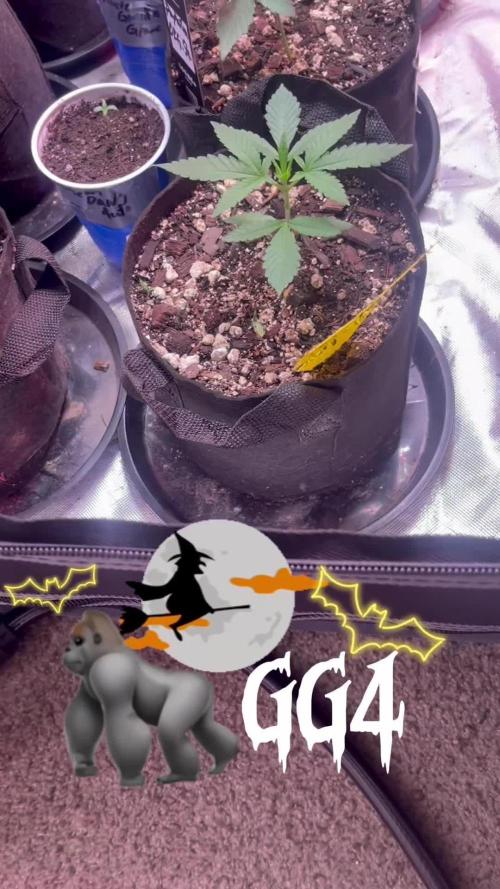
Dropped 2 Seeds into 1oz of RO water with 1 dropper of Monkey Juice from Cronk Nutrients.
Both Gorilla Cookie seeds popped and have 🍃 in 72 hours
This will be a very good grow 🔥
Likes
37
Share


@Smoking_Joe_Frasier
Follow
Grow Diary Update: Week 5 - Pre-Flowering and LST Evaluation
Entering Pre-Flowering Stage
At the end of last week, the first pistils appeared, marking the beginning of the pre-flowering stage for my plants 🙌 There's much to manage now. To support optimal stretching, I've adjusted the nutrients following 2/3 of the Terra Aquatica feeding schedule:
CalMag: 2 ml/l (Starting EC before adding nutrients: 0.45 mS/cm)
Grow: 1.33 ml/l
Bloom: 1.0 ml/l
Micro: 1.33 ml/l
The nutrient solution now has an EC of 1.3 mS/cm (638 ppm PPM-500/TDS) with a pH of 6.1. These adjustments aim to promote vigorous growth and prepare the plants for flowering.
Weather and Growth
With significant weather improvements, my plants are thriving at full speed. Every centimeter gained now counts towards maximizing the final yield, turning around from the challenging weeks prior.
Pest Management
I'm fortunate not to have encountered pests like spider mites, aphids, or thrips. However, the persistent snail issue remains. Nightly patrols with a flashlight have been effective, and placing old lettuce leaves away from the plants has helped trap and remove snails, ensuring the plants remain undisturbed.
LST Experiment Results
The two plants I trained with LST have responded admirably, showing healthy adaptation to the bending and vigorous growth. Yet, I'm at a crossroads regarding the upcoming stretch phase: should I continue to tie down branches to maintain an even canopy or allow natural upward growth to potentially boost vertical yield?
Your Feedback Matters
I value your insights on this critical decision. Should I proceed with low-stress training to control canopy height, or should I let the plants stretch upwards for increased productivity? Your experiences and advice are invaluable to me as I navigate this stage of my grow. Share your thoughts below!
Stay tuned as I continue to document the pre-flowering stage and learn from the ongoing LST experiment in my grow diary!
Likes
12
Share


@CentralCoastGenetic
Follow
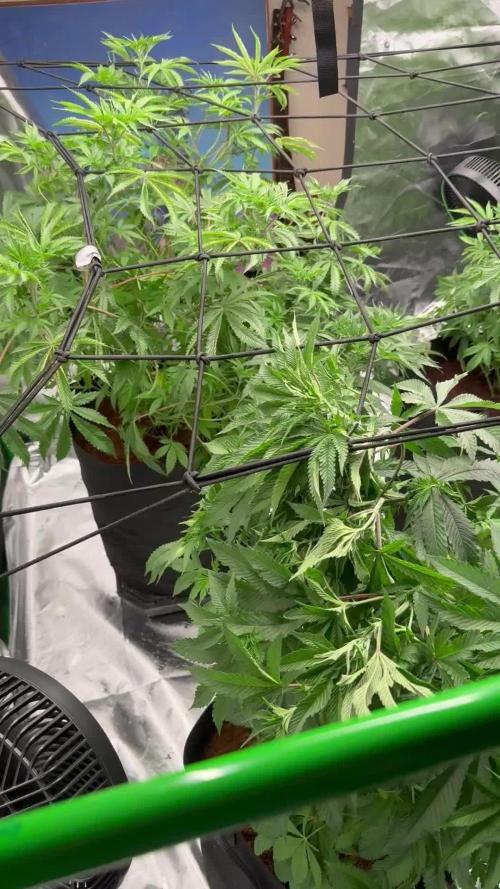
She’s moving along just fine , she was super bushy but it’s going away some how and starting to see the bud build up .. found a friend t hope it sick’s around

Likes
20
Share

