


Likes
Comments
Share


@Mz876
Follow
The beginning of Week 6 of Flower and boy is she getting stinky. I have high hopes for this plant to live up to her name .

Likes
10
Share


@jahredi
Follow
Both plants started coming along. The Blue Dream has a weird leaf curl. The ends are pointing straight down on some leaves. Also, a little twisting. Maybe some dark leaf veins. I’d be inclined to think nitrogen toxicity, but I’m reusing some soil from may last grow that I had in a huge pile all winter. And I only put .25 tsp per gallon of Big Grow for the last water. I dunno. Just going to go back to regular water and see how it goes. Funny that the HP isn’t showing any unusual signs.


Likes
2
Share


@Fatbudz
Follow
as I still had time and I had two seeds given by a friend I decided to give them life. and as you can see these two girls already had the right to normal vases !! ehehehe 🤣🤣

Likes
141
Share


@Ganja4Show
Follow
Update 14/03/2022 (Day 29)
Nothing much to say. plants looking happy and Healthy. and they kinda exploded with growth the past week.
I've done some defoliation 3 days ago and it really opened up the lower site of the plants.
Will stretch the Veg time maybe till week 6 or 7. it depends on how fast they will grow.
Update 17/03/2022 (Day 32)
Plants looking nice.. did some defoliation 2 days ago and they respond with so much growth every time.
I've made a little shortclip video. If you like the sound make sure to check out https://www.instagram.com/dutchdogg/
Update 18/03/2022 (Day 33)
I figured I check out the actual EC value of my water in order to know how much Calmag i should add.
So I had to add double the amount of Calmag in order to reach EC value of 0.4. let's see if this will change the colours of the leaves in to more deep green.
Overall PPM sits around 1320 now. Filled the Reservoir with 5 gallons at 15:00.
let's see how much time it takes for it do empty up so we can check how much these Ladies are actually drinking.
Likes
11
Share


@Chubbs
Follow
420 Fastbuds
FBT2304 Week 4
Weekly update for these two beauties. From sprout to this point they've grown like Champs. A little calmag issues a few weeks back but over all nothing major. Still spraying PureCrop every Monday as preventive maintenance for pest,mold, or any other topical problems. I upped to feeding to 2000ml everyother day and alternating from nutes to just Ph'd water. Until next week's update grow fam Happy Growing my fellow growers.
Likes
2
Share


@Bluemels
Follow
Tag 40: Ich habe die Pflanze entlaubt und ein Netz zum scroggen eingebaut. Jetzt wird es spannend wie die Pflanze das alles wegsteckt.
Likes
4
Share


@Ninjabuds
Follow
My OG Kush plant is from Royal Queen Seeds, and I know they sometimes get a bad rap, but I've grown their OG Kush before and it was fantastic. This pheno has some awesome leaves and just a really good structure overall.
It's been a challenging week with the constant rain and ridiculously high humidity. Keeping things dry indoors has been a real struggle. Despite the weather, I managed to flip all my feminized photoperiod plants to flower this week. I'm hoping the switch will go smoothly, but with this humidity, it's going to be tough.

Likes
90
Share


@MrCOCO
Follow
Hi... Everything goes very fast ... I used the pinching method to increase my yield and the quality of buds also... 🍃🍃🍃now I keep my fingers crossed for the girls ...🍃🍃🍃 I think maybe a week and I will switch to flowering... 🍃🍃🍃
Happy growing 🍃🍃🍃

Likes
5
Share

@DE_BW
Follow
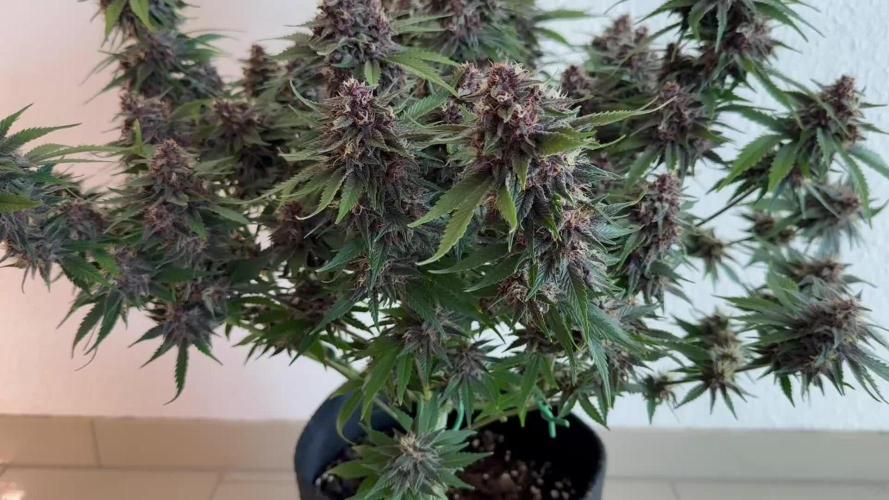
The plant is now in mid to late flower (around day 35–37) and bud structure is fully developed. No new pistils are forming anymore, indicating the transition from bulk to ripening and resin maturation. Buds are very dense, heavily calyx-stacked and already showing strong coloration and frost. Feeding has been stabilized with moderate Bloom and Micro, minimal Grow for pH stability, and the switch to Overdrive has begun. From here on the focus is on ripening, trichome development and maintaining airflow until the final harvest window.
Likes
5
Share


@PETEROG
Follow
Hey everyone at week 4 know and wow have these girls grown early this week I applied some LST and all took really well to say it was my first time trying this
Likes
15
Share

@All_our_small_plants
Follow
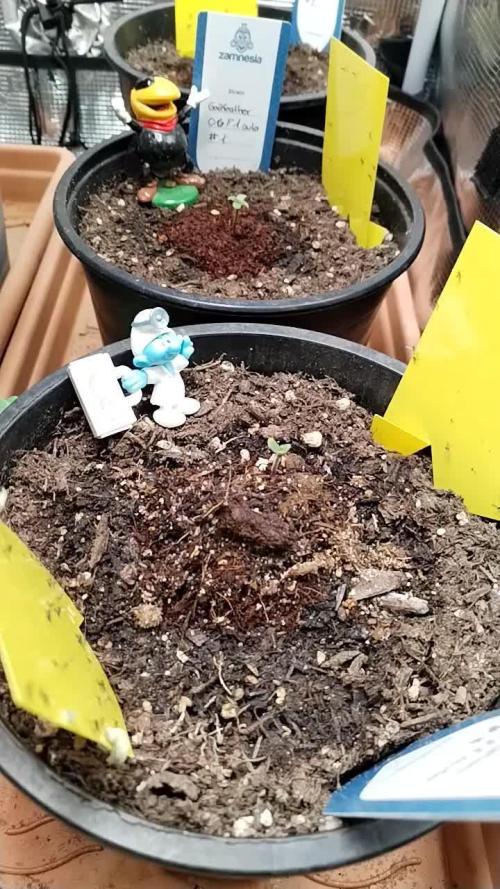
Hier ein paar Daten zu der Sorte.
Eltern: Larry Bird Kush x God´s Gift
Genetik: ist eine Indica/sativa hibrid
Blütentyp: Autoflower
Blütezeit: 8-9 Wochen
THC: 22%
CBD: 0-1%
Innenhöhe: 85-120cm
Außenhöhe: 150cm
Ertrag Innenanbau: Bis zu 500g/m²
Ertrag Außenanbau: 150/Pflanze
Gattung: Feminisiert
Bewässerung: 100ml
pH-Wert: 5,8
EC-Wert: 0
Temperatur: 30ºC
Luftfeuchtigkeit 55%
Schädlingsbekämpfung:
PPFD: 200 µmol/m²/s
DLI: 12.96
Düngemittel:
Besonderheiten: Wurden direkt in die erde gepflanzt in einer Kokos-Quelltabletten.
-Tag 1 Heute ist sie gekeimt und sie hatte Probleme mit der Samenschale, diese ist nicht von alleine abgefallen und mussten präzise entfernt werden 😱
-Tag 3 Heute sieht sie etwas besser aus, aber sie macht uns noch immer Sorgen. mal sehen ob sie es überlebt.
-Tag 5 sieht sehr gut aus, so wie es aussieht hat sie es überstanden 😘
-Tag 7 heute ist sie eine Woche alt. Sie sieht soweit in Ordnung


Likes
9
Share


@Sauce_XL
Follow
2.17.2024: Start of week 5, day 29 from seed, day 25 from sprout. Plant is healthy from what i can tell. Top of the plant's leaves all have slight white tips from what i'm assuming is light stress? Light is 16 inches from top of plant at 112 watts. I've let it pretty much do its thing so far. Branches are rather short making any sort of LST hard. Pistils are clearly visible so i'm assuming we're entering the flowering stage. Wouldn't be surprised to see the first signs of bud growth by the end of the week. Still no nutrients given. The fan leaves are large and blocking bud sites so perhaps i'll clip soon? Will upload pics today.
2.18.2024: Plant is responding well to the increase in light intensity. Still can't bring myself to take the large fan leaves off.
2.19.2024: Day 31 from seed. Plant is drinking more. Gave 64oz at 6.4ph. Run off ppm was 1450 at 6.6ph. Essentially 4 full weeks from seed before i need to start feeding. Next watering will contain nutrients.
2.20.2024: Humming along. Now firmly in the preflower/early flower stage. Growing 1/2 to 1 inch a day. If anyone is reading this, please tell me its ok to chop the big fan leaves blocking bud sites!
2.21.2024: Day 33 from seed, 29 from sprout. Picked up the pot this morning and it was very lite so i gave it another 64oz at 6.3ph. No run off this time which tells me they are starting to need more water or i need to up the frequency. Still no nutes in 33 days!
2.22.2024: Besides white tips on top growth, steady as she goes. I'll post a pic of the white tips. No idea how to solve. Plant is totally in flower but since we're almost at the end of week 5 from seed, i'll keep the diary in "flower." 14.5 inches from soil to top. Would love to see these get to 24 inches by the end.
2.23.2024: Upped water to 96oz at 6.4ph. About 2 cups of run off at 6.6ph and 1130ppm. Original soil still has nutes to offer at day 35 from seed.
Likes
4
Share

@Ensign420
Follow
|»» LOG DISCLAIMER: Not intended as a grow guide. Grow log entries are usually posted 3 weeks later and are for my learning reference. ««|
Introduction - Week 18 Summary -
Ensign's log, stardate 17559.9,
Another pretty epic week in the garden!
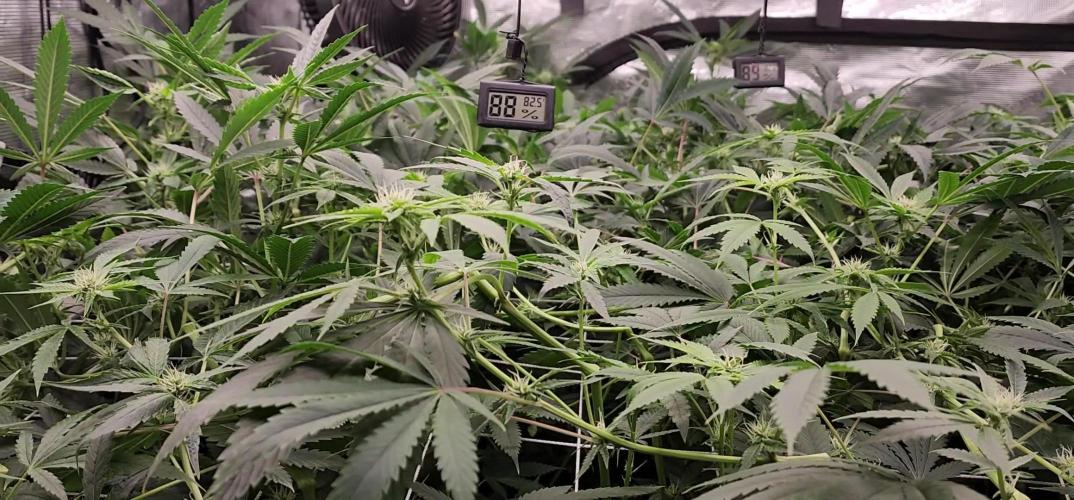
Growth has been healthy and wow the canopy is getting stacked for the beginning of flower. Heady OG managed to reach the grow light so super-cropped the canopy once more. Also lollipopped and defoliated the under canopy. Cleaned the best I could, but can’t reach TKO (in the back of the tent) so mainly cleaned Heady OG.
Both are still recovering which could mean growth is starting to prioritize bud development over vegetative growth. Bud sites are already starting to swell up nicely!
The veg tent has been thriving and growth has been all around healthy! Watered the spare Heady OG clone and transplanted the rooted mother cuttings into solo cups.
Onwards to next week Ensign!
[START OF WEEK 18]
==========================================================
---------- [ 4x4 MAIN TENT ] ----------
Heady OG BX1 #1 [Round4 ~Wk11] - WEEK 18 - Full Bloom Wk2
TKO [Round2 ~Wk16] - WEEK 18 - Full Bloom Wk2
----------- [ 3x3 VEG TENT ] ------------
TKO - WEEK 01 - Full Veg
Heady OG BX1 - WEEK 01 - Full Veg
08/18/25 → 08/24/25
This Week's Estimated Goals
----------------------------------------------------------------------------------------------
DLI: ~20 mol/m²/d
PPFD: ~463 μmol/m²/s
VPD: ~1.0 kPa
This Week's Meter Readings & Averages
----------------------------------------------------------------------------------------------
Light On/Off: 19:00 - 07:00 | Wattage: ~326.5W [LV04]
Distance From Canopy: ~11.5”, 11.5”
DLI: ~19.22 mol/m²/d
PPFD: ~445 μmol/m²/s
VPD: ~0.58 kPa
Soil %: [49.0, 45.7, 25.3, 48.7, 42.6, 41.3, 42.7, 42.0]
==========================================================
Day 01 - Monday - 08/18/25 - Total Days: 127
-----------------------------------
Daily Averages ~[+01:00]
- Temps: 84.4°F [29.1°C]
- Humidity: 85.7%
- VPD: 0.58 kPa
- Soil %: [49, 47, 24, 50, 41, 43, 45, 44]
-----------------------------------
- [+00:10]: Night check on the 4x4 tent.
--- CA-CAW!! Wow the garden is thriving and perky!
--- Heady OG (BX1 #1) is a lot more even and she has already perked up again from the super-cropping!
--- TKO is also looking really healthy and she’s clearly starting to flower and swell up with bud growth!
--- This is why we grow! Let’s go girls!
- [+00:14]: Checked the Ecowitt soil moisture sensor data:
------------------ [ 4x4 MAIN TENT ] ---------------
------ 52% - [CH01 FT » G30 - Heady OG BX1 #1]
------ 47% - [CH02 FB » G30 - Heady OG BX1 #1]
------ 23% - [CH03 BT » G20 - TKO]
------ 48% - [CH04 BB » G20 - TKO]
------------------ [ 3x3 VEG TENT ] ----------------
------ 40% - [CH05 BL » GR7 - Garlic Budder OG#1]
------ 43% - [CH06 BR » GR7 - Garlic Budder OG#2]
------ 44% - [CH07 FL » GR7 - Gorilla Goat #1]
------ 44% - [CH08 FR » GR7 - Gorilla Goat #2]
--------- Veg: 38% - 45% | Flower: 45% - 55%
--------- General: 30% [Dry] «| 45 - 60% [Moist] |» 70% [Wet]
- [+00:18]: Checked the 3x3 veg tent.
--- Looking great in the veg garden!
--- Both Heady OG and TKO mothers look healthy and established in the their new homes.
--- Removed the clear cups from the spare Heady OG clone cuttings. They still look a little stressed, but going to acclimate to the veg tent.
- [+00:23]: Checked the propagation dome,
--- Spare mother cuttings are looking beautiful
--- The rooting cuts are all looking great as well!
--- Did not mist the top growth.
--- Plan to check for roots soon.
--- Refreshed the RO water for the spare mother cuttings.
- [+00:39]: Checked the humidifiers.
--- Tanks are still full and no leaks found.
Day 02 - Tuesday - 08/19/25 - Total Days: 128
-----------------------------------
Daily Averages ~[+01:00]
- Temps: 83.8°F [28.8°C]
- Humidity: 84.2%
- VPD: 0.63 kPa
- Soil %: [49, 46, 21, 45, 44, 42, 43, 43]
-----------------------------------
- Oops! Forgot to update the soil sensor names.
- [14:35]: Updated the Ecowitt sensor names:
------------------ [ 4x4 MAIN TENT ] ---------------
------ [CH01 FT » G30 - Heady OG BX1 #1]
------ [CH02 FB » G30 - Heady OG BX1 #1]
------ [CH03 BT » G20 - TKO]
------ [CH04 BB » G20 - TKO]
------------------ [ 3x3 VEG TENT ] ----------------
------ [CH05 BL » GR7 - TKO]
------ [CH06 BR » GR7 - Pheno #2]
------ [CH07 FL » GR7 - Heady OG BX1 #1]
------ [CH08 FR » GR7 - Pheno #4]
- [15:03]: Also swapped the batteries for all six WittFlow units.
--- Marked the names on each unit with a bit of painters tape.
--- Also removed the screws from the battery lids. Currently, I’m keeping the units outside the tent so don’t need them to be completely water proof. Sealed the lids with a strip of masking tape. This should make future battery changes a lot easier.
- [16:05]: Evening check on the 3x3 veg tent.
--- Ooo yea! The veg garden is clean and looking healthy!
--- The spare Heady OG clones seem to be a bit stressed, but should bounce back as soon as roots are more established.
- [16:07]: Okay! Time to check for roots!
--- It’s been 10 days since the cuttings were planted into the Coco Coins.
--- Well there are roots. But not a lot.
--- Going to wait a bit longer before transplanting into solo cups.
--- Misted the top growth with RO water before closing the propagation dome.
--- All vents are still fully closed.
--- Refreshed the RO water for the spare mother clones before placing the cup on top of the propagation dome.
- [19:18]: Checked the Ecowitt soil moisture sensor data:
------------------ [ 4x4 MAIN TENT ] ---------------
------ 47% - [CH01 FT » G30 - Heady OG BX1 #1]
------ 46% - [CH02 FB » G30 - Heady OG BX1 #1]
------ 21% - [CH03 BT » G20 - TKO]
------ 44% - [CH04 BB » G20 - TKO]
------------------ [ 3x3 VEG TENT ] ----------------
------ 44% - [CH05 BL » GR7 - TKO]
------ 42% - [CH06 BR » GR7 - Pheno #2]
------ 43% - [CH07 FL » GR7 - Heady OG BX1 #1]
------ 43% - [CH08 FR » GR7 - Pheno #4]
--------- Veg: 38% - 45% | Flower: 45% - 55%
--------- General: 30% [Dry] «| 45 - 60% [Moist] |» 70% [Wet]
- [19:22]: Quickly checked on the 4x4 tent.
--- Wow the garden is full!
--- Heady and TKO have completely filled the canopy and growth is looking healthier than ever!
--- Both cultivars are showing signs of bud development and the canopy is starting to stack up with bud growth!
--- Glad that vertical growth has finally started to slow down. I think.
--- Anyways, plan to defoliate soon.
--- Ca-Caw!! Keep growing strong my girls!
- [19:35]: Checked the humidifiers.
--- Tanks are still full and no leaks found.
Day 03 - Wednesday - 08/20/25 - Total Days: 129
-----------------------------------
Daily Averages ~[+01:00]
- Temps: 84.9°F [29.4°C]
- Humidity: 84.4%
- VPD: 0.64 kPa
- Soil %: [49, 46, 20, 40, 41, 41, 42, 42]
-----------------------------------
- [23:58]: Quick night check on the 4x4 tent.
--- Woah the canopy is still stretching upwards!
--- Both Heady OG and TKO are perky and soaring upwards again!
--- The canopy is still pretty even so not going to train.
--- CA-CAW!!! Grow strong my girls!
- [12:02]: Checked the Ecowitt soil moisture sensor data:
------------------ [ 4x4 MAIN TENT ] ---------------
------ 49% - [CH01 FT » G30 - Heady OG BX1 #1]
------ 46% - [CH02 FB » G30 - Heady OG BX1 #1]
------ 25% - [CH03 BT » G20 - TKO]
------ 40% - [CH04 BB » G20 - TKO]
------------------ [ 3x3 VEG TENT ] ----------------
------ 40% - [CH05 BL » GR7 - TKO]
------ 41% - [CH06 BR » GR7 - Pheno #2]
------ 41% - [CH07 FL » GR7 - Heady OG BX1 #1]
------ 42% - [CH08 FR » GR7 - Pheno #4]
--------- Veg: 38% - 45% | Flower: 45% - 55%
--------- General: 30% [Dry] «| 45 - 60% [Moist] |» 70% [Wet]
- [+00:07]: Checked the 3x3 veg tent.
--- Wow the veg garden looks healthy and growth is looking great!
--- Both the Heady OG and TKO mothers are green and perky!
--- The spare Heady OG clones are still recovering from the transplant and are both looking better.
- [+00:08]: Checked the propagation dome and cuttings,
--- Surprisingly, the extra mother cuttings are still looking green!
--- The rooting mother cuttings are looking good too!
--- Did not mist the top growth and all vents are still closed.
--- Refreshed the extra mother cutting’s RO water before placing the cup back on top of the propagation dome.
- [+00:18]: Checked the humidifiers.
--- Tanks are still full and no leaks found.
Day 04 - Thursday - 08/21/25 - Total Days: 130
-----------------------------------
Daily Averages ~[+01:00]
- Temps: 84.0°F [28.9°C]
- Humidity: 85.6%
- VPD: 0.58 kPa
- Soil %: [49, 46, 27, 50, 43, 41, 42, 42]
-----------------------------------
- [16:21]: Evening check on the 3x3 veg tent.
--- Looking healthy in veg garden!
--- The spare mother cuttings on top of the propagation dome are still looking green!
--- Both the Heady OG and TKO mothers are looking beautiful!
--- The extra Heady OG clones are still recovering.
- [16:23]: Checked the propagation dome,
--- Nice! The rooting cuttings are still looking good! Plan to transplant into solo cups soon.
- [16:26] Refreshed the spare mother cutting’s RO water.
--- After using the PVC rig for a week or so, I’m quite impressed and makes water chances really simple!
- [16:38]: Checked the Ecowitt soil moisture sensor data:
------------------ [ 4x4 MAIN TENT ] ---------------
------ 48% - [CH01 FT » G30 - Heady OG BX1 #1]
------ 46% - [CH02 FB » G30 - Heady OG BX1 #1]
------ 27% - [CH03 BT » G20 - TKO]
------ 51% - [CH04 BB » G20 - TKO]
------------------ [ 3x3 VEG TENT ] ----------------
------ 42% - [CH05 BL » GR7 - TKO]
------ 40% - [CH06 BR » GR7 - Pheno #2]
------ 44% - [CH07 FL » GR7 - Heady OG BX1 #1]
------ 42% - [CH08 FR » GR7 - Pheno #4]
--------- Veg: 38% - 45% | Flower: 45% - 55%
--------- General: 30% [Dry] «| 45 - 60% [Moist] |» 70% [Wet]
--- Unlike most growers, I determine the start of flower when pistil hairs start to form (technically called the stigma) and vertical growth slows and switches to bud development.
--- When growing indoors, it makes sense to set day one of flower as soon as the light cycle is changed to from 18/6 to 12/12. But what about outdoor growing?
--- As far as how I determine flowering,
--- My personal logic and opinion is that nature does not change immediately. So I usually don’t count the beginning stretch phase as part of flowering. If anything, I think of it as the end of veg.
--- The stretch phase usually lasts between 14-21 days. As far as day one of flower development, this is different with every pheno.
--- Anyways!
--- Plan to clean the main tent tonight. While still in early flower, the under canopy needs to be defoliated.
- [19:05]: Checked on the 4x4 tent.
--- Wow the tent is raging with growth!
--- Both Heady OG and TKO are swelling up with bud growth!
--- Okay! Need to do a bit of under canopy cleanup!
- [19:54]: Cleaned and defoliated the growth under the scrog netting.
--- Removed as much as I could and mainly focused on the front quadrants, but can’t reach the back quadrants.
--- Using a vacuum clean with a hose did help, but still could not defoliate all of the back.
--- Thankfully there is plenty of airflow, so hopefully that will be enough.
- [20:19]: Checked the humidifiers.
--- Tanks are still full and no leaks found.
Day 05 - Friday - 08/22/25 - Total Days: 131
-----------------------------------
Daily Averages ~[+01:00]
- Temps: 85.1°F [29.5°C]
- Humidity: 87.2%
- VPD: 0.54 kPa
- Soil %: [49, 45, 27, 52, 43, 40, 43, 41]
-----------------------------------
- [22:25]: Night check on the 4x4 tent.
--- Wow the garden has blown up with canopy growth!
--- Both Heady OG and TKO look perky and healthy!
--- Heady OG has reached the grow light!
--- Need to train!
- [22:51]: Super-cropped and lowered the canopy a good 6-7in lower.
--- Can’t reach the back tops, but glad TKO is not as stretchy and Heady OG.
- [22:56]: Took the weekly height and light distance measurements.
------ Both phenos were about 42" tall.
------ Both Heady OG (BX1 #1) and TKO were about 11.5" away from the grow light.
- [22:59]: Took the weekly general PPFD readings.
------ Both phenos were around 445 μmol/m²/s which gives a DLI of 19.22 mol/m²/d under a 12/12 light cycle (at ~326.5W).
- [23:03]: Checked the Ecowitt soil moisture sensor data:
------------------ [ 4x4 MAIN TENT ] ---------------
------ 52% - [CH01 FT » G30 - Heady OG BX1 #1]
------ 45% - [CH02 FB » G30 - Heady OG BX1 #1]
------ 25% - [CH03 BT » G20 - TKO]
------ 50% - [CH04 BB » G20 - TKO]
------------------ [ 3x3 VEG TENT ] ----------------
------ 41% - [CH05 BL » GR7 - TKO]
------ 40% - [CH06 BR » GR7 - Pheno #2]
------ 43% - [CH07 FL » GR7 - Heady OG BX1 #1]
------ 41% - [CH08 FR » GR7 - Pheno #4]
--------- Veg: 38% - 45% | Flower: 45% - 55%
--------- General: 30% [Dry] «| 45 - 60% [Moist] |» 70% [Wet]
- [23:06]: Checked the 3x3 veg tent.
--- Mother garden is ramping up with growth again!
--- Both Heady OG and TKO mothers look healthy and soaring upwards!
--- The spare Heady OG clones are looking better! Will need to water soon.
- [23:07]: Checked the propagation dome,
--- All rooting mother cuts are looking green and healthy for the most part!
--- Gorilla Goat #1 is looking bit stressed, but okay.
--- Need to transplant these ladies soon!
--- Refreshed the RO water for the spare mother cuttings before placing the cup on top of the propagation dome.
- [23:24]: Checked the humidifiers.
--- Tanks are still full and no leaks found.
Day 06 - Saturday - 08/23/25 - Total Days: 132
-----------------------------------
Daily Averages ~[+01:00]
- Temps: 84.9°F [29.4°C]
- Humidity: 86.6%
- VPD: 0.56 kPa
- Soil %: [49, 45, 29, 52, 43, 41, 42, 41]
-----------------------------------
- [08:00]: Quickly checked on the 3x3 veg tent.
--- Veg garden is thriving and looking healthy!
--- Both Heady OG and TKO mothers are healthy and vegging along beautifully!
--- Need to water the extra Heady OG clones tonight.
--- Also the spare rooting cuts need to be transplanted into solo cups.
- [19:36]: Night check on the 4x4 tent.
--- Looking good girls!
--- The canopy is recovering nicely and tops are already facing upwards towards the grow light.
- [19:39]: Checked the Ecowitt soil moisture sensor data:
------------------ [ 4x4 MAIN TENT ] ---------------
------ 47% - [CH01 FT » G30 - Heady OG BX1 #1]
------ 45% - [CH02 FB » G30 - Heady OG BX1 #1]
------ 28% - [CH03 BT » G20 - TKO]
------ 52% - [CH04 BB » G20 - TKO]
------------------ [ 3x3 VEG TENT ] ----------------
------ 42% - [CH05 BL » GR7 - TKO]
------ 42% - [CH06 BR » GR7 - Pheno #2]
------ 47% - [CH07 FL » GR7 - Heady OG BX1 #1]
------ 40% - [CH08 FR » GR7 - Pheno #4]
--------- Veg: 38% - 45% | Flower: 45% - 55%
--------- General: 30% [Dry] «| 45 - 60% [Moist] |» 70% [Wet]
- [19:58]: Checked the 3x3 veg tent.
--- Veg tent is healthy and mothers and clones look green and perky!
--- Need to water the spare Heady clones!
- [20:04]: Took the initial starting weight range of both clones before watering,
------ Heady OG BX1 #1A » 237.7g → 300.3g
------ Heady OG BX1 #1B » 244.4g → 305.6g
--------- General Solo Range: [Dry] «| [Initial Cup Weight] + ~55-100g |» [Wet]
--- All cups were last watered 6 days ago.
--- Took the starting weight of both clones before watering,
------ Heady OG BX1 #1A » 232.5g
------ Heady OG BX1 #1B » 232.4g
--- While on a scale,
--- Gently misted the straw mulch of both cups with RO water.
--- Focused on the straw and sprayed as evenly as possible.
--- Misted 10-20 sprays. Waited a moment, then misted again.
--- Repeated this process for both cups.
--- There was no runoff.
- [20:25]: Took the saturated weight of both clones after watering,
------ Heady OG BX1 #1A » 310.6g
------ Heady OG BX1 #1B » 315.1g
--- Marked the final wet weight on the back of each cup. Also marked the watering date on the front.
--- Placed both phenos back into the tent.
--- Got more to do! Also need to transplant the rooted cuttings in the propagation dome.
--- Let’s go Ensign!
- [20:37]: Took 4 old solo cups (has bottom corners cut for drainage) and partially filled each with some fresh dry BuildASoil 3.0 potting soil.
--- Made sure that the soil was well packed.
--- Also made sure to mark each cup with the name and pheno number.
--- Misted the dry soil with a bit of RO water (~3 sprays).
--- Inoculated each cup with Great White mycorrhizae.
------ Sprinkled 1/16tsp of Great White
--- Time to plant! One clone at a time,
- [21:49]: Took a rooted clone and placed them into each solo cup.
--- Made sure the solo cup had enough room for more soil.
- [21:54]: Inoculated each Coco Coin with Great White mycorrhizae.
------ Sprinkled about an 1/16tsp of Great White onto each Coco Coin.
--- Made sure to get the sides evenly.
- [22:09]: Gently filled each solo cup with more soil.
--- Completely covered the top of each Coco Coin and made sure to tuck the sides fairly snug with soil.
--- Evened and patted down the top soil smooth. Each Coco Coin is about 1/4-1/2 inch below the top soil.
- [22:12]: Added some BuildASoil Organic Straw Mulch to the top.
--- Using the small straw bits at the bottom of the bag is great for solo cups.
--- Time to water!
- [22:30]: Filled a measuring cup with 2 cups of RO water.
------ Added 1/64tsp of Quillaja Saponaria Extract [60]
------ Added 1/16tsp of Horticultural Coconut
------ Added 1/16tsp of Horticultural Aloe
------ Added 1/8tsp of Mycrobe Complete
--- Mixed and poured the solution straight into a spray bottle.
- [22:35]: Took the dry soil weight of each pheno before watering,
------ Gorilla Goat #1 weighed 256.1g
------ Gorilla Goat #2 weighed 255.4g
------ Garlic Budder OG#1 weighed 263.5g
------ Garlic Budder OG#2 weighed 256.4g
--- Marked the starting weight on the back of each cup.
--- While on a scale,
--- Gently misted the straw mulch of each cup.
--- Focused on the straw and sprayed as evenly as possible.
--- Misted 5-10 sprays. Waited a few seconds, then misted again.
--- Repeated this process until each cup weighed at least 300g
--- There was no runoff.
- [22:53]: Took the weight of each pheno after watering,
------ Gorilla Goat #1 weighed 300.4g
------ Gorilla Goat #2 weighed 300.4g
------ Garlic Budder OG#1 weighed 305.2g
------ Garlic Budder OG#2 weighed 300.2g
--- Marked the saturated wet weight on each cup.
- [23:00]: Placed each cup into the propagation dome.
--- Removed the side extensions along with the plug tray and have the cups resting in the main drip tray.
--- Have the lid and lights suspended above the tray (~13 inches).
--- Refreshed the RO water for the spare mother cuttings before placing the cup onto the drip tray.
--- Also increased the propagation dome’s bar lights.
------ Increased the intensity from 1 to 5
- [23:06]: Took general PPFD readings.
------ Clones were around 88 μmol/m²/s which gives a DLI of 5.70 mol/m²/d under an 18/6 light cycle.
- [23:08]: Checked the humidifiers.
--- Tanks are still full and no leaks found.
Day 07 - Sunday - 08/24/25 - Total Days: 133
-----------------------------------
Daily Averages ~[+01:00]
- Temps: 85.0°F [29.4°C]
- Humidity: 86.7%
- VPD: 0.55 kPa
- Soil %: [49, 45, 29, 52, 43, 41, 42, 41]
-----------------------------------
- [08:00]: Quickly checked on the 3x3 veg tent.
--- Ooo yea! The veg garden is vibing and growth is looking healthy!
--- Both the clones and cuttings look healthy and growth is perky!
--- Also the rooting clones look great as well!
- [19:02]: Night check on the 4x4 tent.
--- Ca-Caw! Looking great in the garden!
--- All tops are perky and the canopy looks even for the most part.
--- Grow strong ladies!
- [19:05]: Checked the Ecowitt soil moisture sensor data:
------------------ [ 4x4 MAIN TENT ] ---------------
------ 53% - [CH01 FT » G30 - Heady OG BX1 #1]
------ 45% - [CH02 FB » G30 - Heady OG BX1 #1]
------ 32% - [CH03 BT » G20 - TKO]
------ 53% - [CH04 BB » G20 - TKO]
------------------ [ 3x3 VEG TENT ] ----------------
------ 43% - [CH05 BL » GR7 - TKO]
------ 40% - [CH06 BR » GR7 - Pheno #2]
------ 40% - [CH07 FL » GR7 - Heady OG BX1 #1]
------ 40% - [CH08 FR » GR7 - Pheno #4]
--------- Veg: 38% - 45% | Flower: 45% - 55%
--------- General: 30% [Dry] «| 45 - 60% [Moist] |» 70% [Wet]
- [19:11]: Checked the 3x3 veg tent.
--- Wow veg growth is perky and soaring upwards!
--- Both the Heady OG and TKO mothers are looking really healthy and growth is ramping up! Plan to top both next week.
--- The spare Heady OG clones also look healthy and have recovered! Nice!
--- The rooting mother clones are also looking great!
--- Refreshed the RO water for the spare mother cuttings.
- [19:17]: Checked the humidifiers.
--- Tanks are still full and no leaks found.
--- Wow what a week!
--- Since the mother clones are now in solo cups, going to need to select two for transplanting soon (for the left side of the veg tent).
--- Been pheno hunting the past two harvests and am pretty sure that the #2 phenos of both Garlic Budder and Gorilla Goat are going to be the ones!
--- Anyways onwards to next week!
[END OF WEEK 18]
Likes
5
Share

@hassehujasse
Follow
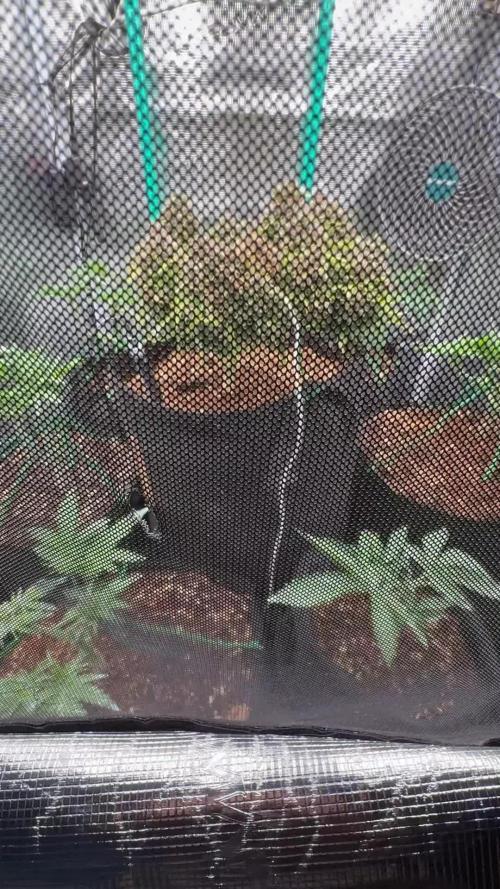
Working hard with co2 in my homemade lab.
First time Mars Hydro at 100% of his power.Two small boxes always better then just one big)))


Likes
32
Share

@ThatsmyGrow
Follow
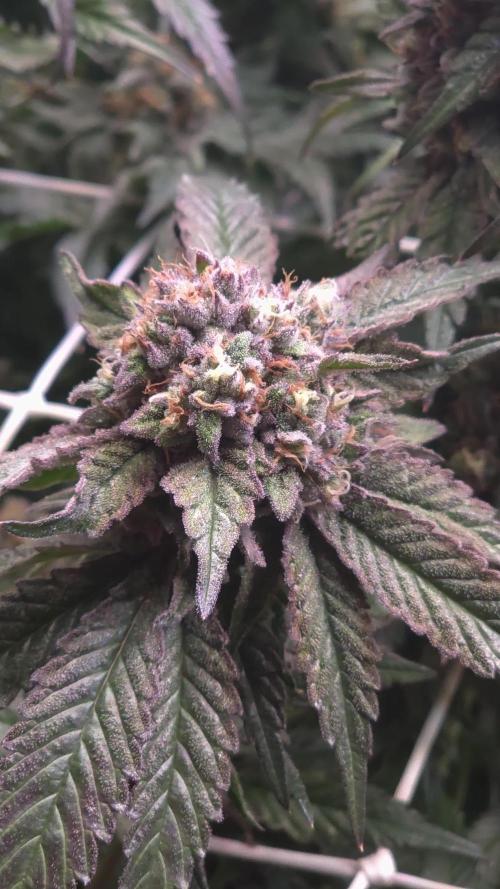
The final week is here, and the plants are now ready for harvest.
I flushed the plants and started preparing everything for the harvest. Looking back at the whole grow, I’m really happy with how everything developed.
The SCROG turned out beautifully, and the flowers have become absolutely stunning. They are dense, covered in frost and have developed an incredible aroma.
It’s always a great feeling to reach this point after watching the plants grow week after week. I’m really proud of how this run turned out and I can’t wait to see the final result after harvest and drying.
Now it’s time for the last step. Harvest time is coming!


