


By continuing to use the website or clicking Accept you consent to our cookies and personal data policy and confirm that you are at least 18 year old. For details please see Privacy Policy and Terms
Accept


Likes
142
Share


@MadeInGermany
Follow
Hey everyone :-)
This week it smells more and more sweet and fruity in the whole room 😍.
There is actually not much to report, everyone is now under 12/12 :-).
This is the last grow that comes in the entire diary.
From now on, each plant will be added to the diary 👍.
I wish you all a lot of fun watching, stay healthy 🙏🏻 and let it grow 😎👌


Likes
3
Share


@MicroHidroGrow
Follow
Día 39. La temperatura viene siendo un gran problema. Hace mucho frío y de noche en el lugar que está el indoor no tengo calefacción. Así que probablemente haya una merma en el resultado. De todos modos ya puse la lana de roca a remojo para germinar la próxima cepa. Ahora voy a ver bien que configuración uso para el próximo cultivo. Esta configuración que usé no fue un buen aprovechamiento del espacio.


Likes
3
Share


Likes
18
Share


@DogDoctorOfficial
Follow
Seedsman Seeds Germination Report - Run 01: The White OG Journey
Kickoff to Germination: The Start of Something Great!
Welcome to the beginning of this adventure with The White OG feminized seeds from Seedsman Seeds. Excitement is in the air as we’re searching for strong, resilient plants, and this journey has all the best tools and tips. Starting with five seeds, we’re aiming for a solid beginning and maximum potential. Let’s explore every step in detail to make this grow as robust as it can be!
Germination Process: Tools of the Trade
TheCannaKan: The Ultimate Germination Gadget
I’m thrilled to share my love for TheCannaKan, a little germination wonder! This tool is essential for any grower who wants to start their seeds with precision and care. I noticed rapid results in just 24 hours, with the seeds showing signs of life. At about 32 hours, I transferred them to the Root Riots, which brings us to the next exciting stage.
Why I Love TheCannaKan:
• Quick Results: Seeds sprouted rapidly, minimizing wait time.
• Consistency: Keeps moisture levels optimal for uniform germination.
• User-Friendly: Simple yet effective for both new and experienced growers.
Root Riots and Their Role in Root Development
After sprouting, I placed the seedlings into Root Riot cubes under a dome. Root Riots are fantastic for stabilizing young plants, providing an airy and nutrient-friendly environment that promotes robust root growth from the start.
Benefits of Root Riots:
• Root Aeration: Soft yet structured, these cubes support root expansion.
• Moisture Retention: Holds just the right amount of water for growing seedlings.
• Enhanced Root Health: The cubes are ideal for preventing damping-off and ensuring healthy, white roots.
Nutrients to Kickstart Growth: Aptus Holland Regulator and Startbooster
To give the seedlings a perfect start, I added Aptus Holland’s Regulator and Startbooster (1ml/L each). This mix promotes early root and stem strength, giving seedlings the ability to absorb light and nutrients more efficiently.
• Aptus Regulator: Enhances plant resilience, aids in nutrient absorption, and promotes early vitality.
• Aptus Startbooster: Adds a balanced mix of growth hormones and nutrients that are ideal for the early stages, encouraging healthy roots and faster seedling growth.
Light and Environment: Future of Grow FOG LED with TrolMaster Tent X Controller
I’m using a Future of Grow (FOG) LED at 600W, but keeping it dimmed down to around 200 PPFD. This setting is controlled by the TrolMaster Tent X Controller to give the plants the perfect start without overwhelming them with intense light. Controlled lighting helps seedlings to develop without stress, encouraging healthy growth and internode spacing.
Shoutouts:
• Future of Grow LED: High-quality, efficient LED light that adapts well to seedling and veg stages.
• TrolMaster Tent X Controller: Reliable and intuitive control over light, humidity, and more. Perfect for a hands-off, efficient environment setup.
Observations: One Seedling Takes the Lead
At the end of this germination stage, it looks like one seedling has emerged as the strongest, while the others may need a few more days. Patience and observation are key; some seeds naturally take a bit more time to sprout. I’ll keep monitoring these with hope, allowing each seedling its own rhythm.
Grower’s Notes and Tips
• Consistency Matters: Germination is all about steady conditions—consistent moisture, gentle nutrients, and stable lighting make all the difference.
• Document Everything: Keeping a log of each step (like this one!) helps track growth patterns and provides valuable insights for future grows.
• Stay Positive and Patient: Not every seed will sprout at the same rate. Trust the process and remember each plant is unique.
Community Shoutouts
Thank you to everyone who makes this process smoother and inspiring—TrolMaster, Aptus Holland, Future of Grow, and Seedsman Seeds for amazing genetics and tools, as well as the growers’ community who share insights, tips, and encouragement along the way.
Next Steps
Now that we’re through germination, we’ll move into the early growth phase. I’ll keep documenting the lighting adjustments, nutrient changes, and growth patterns of each plant, especially that eager seedling leading the way!
Growers Love, and here’s to a strong start for the future of this grow! 🌱
DISCOUNT CODE - SeedsmanSeeds - DOGDOCTOR 10% off
As always thank you all for stopping by, for the love and for it all , this journey of mine wold just not be the same without you guys, the love and support is very much appreciated and i fell honored and so joyful with you all in my life 🙏
With true love comes happiness 💚🙏 Always believe in your self and always do things expecting nothing and with an open heart , be a giver and the universe will give back to you in ways you could not even imagine so 💚
Friendly reminder all you see here is pure research and for educational purposes only
💚Growers Love To you All and remember to keep that smile big and alive 💚


Likes
16
Share


@Chocolopeison
Follow
Comenzando semana 7 de estás nenas, aun las mantengo en 1L y hoy le hicimos su primera defoliación masiva, ahora a esperar que se recuperen para hacerle trasplante a maceta de 3,5L.
La verdad no eh tenido muchos problema, todo sigue igual siguiendo el mismo orden de nutrientes, bacterias y hongos benéficos una vez por semana, enzimas ahora se las estoy dando día por medio o cada 3 día.
Ya logramos sacar los primeros clones de la watermelon, punch y cookie y la thc bomb. la dss aun la tenemos tirando fuerza que no va mal pero no tenia espacio para más clones.
Saludos


Likes
7
Share


@GrowGuy97
Follow
Finally remembered to take a update video on the hulk berry clones! Really wish I would have kept track on how many days these are but man are they growing good! These ladies are gonna be MASSIVE by the time I get room for them in the flower tent! Thanks for following friends & happy growing!✌️🏼🌱


Processing
Likes
12
Share


@2Stones1Bird
Follow
Checkout my Instagram @smallbudz to see the Small budget grow setup for indoor use, low watt, low heat, low noise, step by step.
17/02/2020 - Fed her 1.5l of 6.4PH water with 0,2ml of each: Cal Mag (Atami), Grow, Bloom and Max, and 0,5ml of each: Heaven, Alga-mic and Vera, noticed some run off, I use about 1/4 of the nutrient dosage on the chart, to achieve about 100/150PPM (500 scale).
She's starting to smell like smelly feet.
22/02/2020 - Last feed, gave her 1.5l of 6.5PH water with 0,2ml of each: Cal Mag (Atami), Grow, Bloom and Max, and 0,5ml of each: Heaven, Alga-mic and Vera, noticed some run off, I use about 1/4 of the nutrient dosage on the chart, to achieve about 100/150PPM (500 scale).

Likes
17
Share


@Appoldro420
Follow
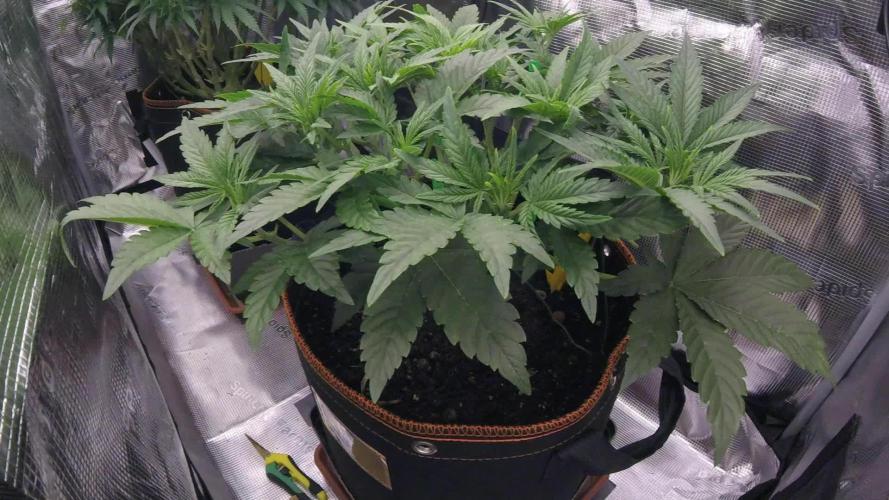
This week ia am planning to let it grow just like this. Hopefully I will receive a plant camera next week to monitor my VPD. Also added an IRheater to keep temperature stable
The infrared heater does its job, but I find it a waste of electricity, 3.6 kWh in one night. So I've decided to install a gas heater instead, which delivers the same result at a much lower cost and also provides additional CO2. The heater can then keep the temperature above 21˚C with the lights off. The natural gas heater will be used with the lights on. I need to quickly find a CO2 sensor because too much CO2 has a counterproductive effect, as I've already noticed. Approximately 1200 PPM at 32˚C is optimal as long as I can maintain a DLI of 35. Great technology is on the way.
Added: Installed CO2 burner, run it for 6 minutes every hour. Temp raises from 22˚C to 27˚C in about 7 minutes. CO2 detector (just colors, no values) doesn't alarm so not above 1500PPM CO monitor also no alarm :)
Running for 4 hours now and a visible change is there. Tomorrow I will know if it is ok or not.
Added a few pictures. Lets see if we can see the difference tomorrow.
26-05: Added Dimlux Maxi controller for CO2 and VPD. Works nice.
28-05: Topped a few
31-05 Added additional 300W to heat the stuff up. RH is stable but high on 72%. Could add a dehumidifier but since CO2 is already there and my VPD is around 0.8 I thought adding light would be cheaper. Can go up to 33˚C before my floor is heating up too much.
Also cleaned the watertank. So from now on they are on Ata Max

Likes
13
Share


@tresplantes
Follow
Smell is Even more amazing now al swellin up pretty good
Bluezy has a lil lighter bud structure for now but started swellin up just now
Dantes Inferno has already some good nuggs
Tomb Rider is really headbound and a lil too close to the lamp
Starting to lower the EC from 3 to 2.5
Starting With fade 2 days earlier than planed will give them a 5 day flush instead of 3

Processing
Likes
11
Share


@Newbie5648
Follow
Love this 1st grow. Even though its small.
Hope I got good weight out of this.
Smells great whenever I open my cupboard.
Cant wait for my next grow green gelato auto. 😁
Likes
15
Share


@northern_rookie
Follow
Hifi 4G seems to be a bit sensitive to the current and previous feeding levels. Had multiple leaves exhibit nutrient burn. Otherwise all seem to be happy. Hifi 4G, NL/Skunk and Blueberry continue to lead the pack on Bud development. God I hope I don't screw this up!


Likes
10
Share


@mingokoon
Follow
All into flowering although the back plants seem to be a few days ahead (?). The middle plant has grown about an inch a day (as with the rest) . this one went from 14" to 18.5" in 4 days. the stretch went from 22 to 26".
I will wait for the vertical growth to stop be fore I bring the light down - they may just grow into it.

Likes
15
Share


@Bhangi_Zimidar
Follow
Sorry for the broken lens. My harvest was 19.5oz. I left the main stem and one of the branches to seed, I'll grow with the next generation of female plants, if successful. There was a week of rain and it was starting to seed, so I harvested it a week early. In the end though the terpene profile was crazy for edibles and for smoking. The slow drying allowed the buds to retain a lot more terpenes, the fan leaves shield the buds and prevent them from drying out too quickly.