


Likes
10
Share

@BalconyBoy
Follow
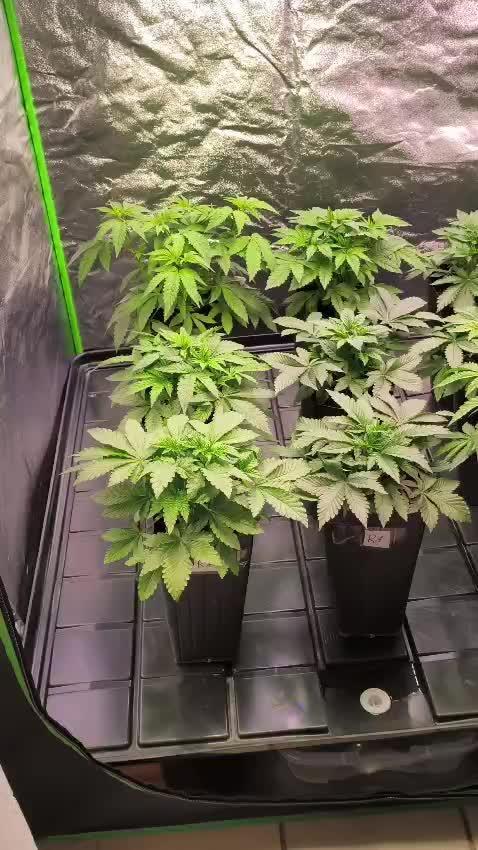
28.07.25 all plants are doing fine, pests are contained and yesterday each plant got 95g of flowering fertilizer top dressing. This should last until I return from the holidays. While tip dressing I noticed that the pots are now full of root webs almost to the top, the extra layer of soil and fertilizer is definitely welcome. The empty spot from the auto Lemon Kix was filled with a quick sherbet clone.


Likes
17
Share

@Bncgrower
Follow
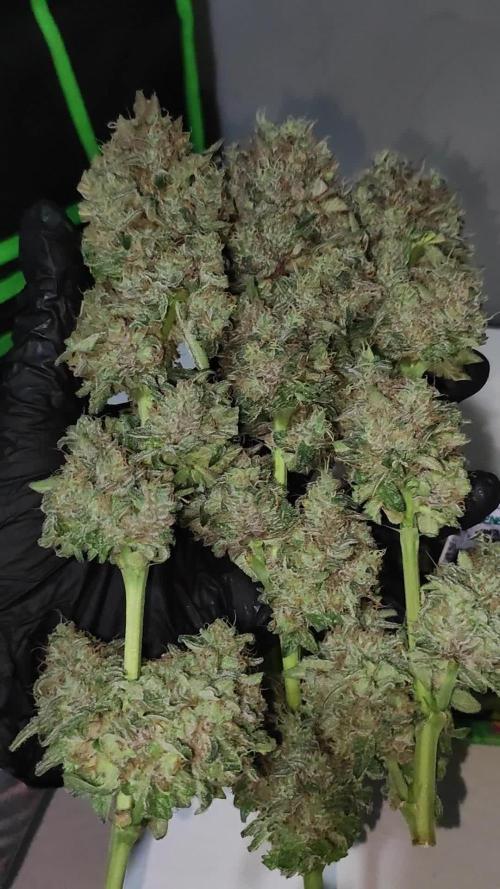
Harvested last night, truly strong smell, cultivation was absolutely perfect from start to finish. Very happy with the result, anxious for the drying and curing process! Thank you for following along.. 🤜🤛🌱🌿🌲
Likes
16
Share


@willertex
Follow
📅 D77 - 16/01
📜 Almost ready, Waiting for final flush
✍️ 1.5 EC
♒ 9 pH
🌊 10 L
📏 90 cm
📅 D80 - 19/01
📜 Final flush started
✍️ 1.5 EC
♒ 9 pH
🌊 10 L
📏 90 cm
📅 D83- 22/01
📜 Not yet ready - 3-4 days more I think. Suggestion accepted ;)
✍️ 1.5 EC
♒ 9 pH
🌊 10 L
📏 90 cm

Likes
2
Share


@autofloweronly
Follow
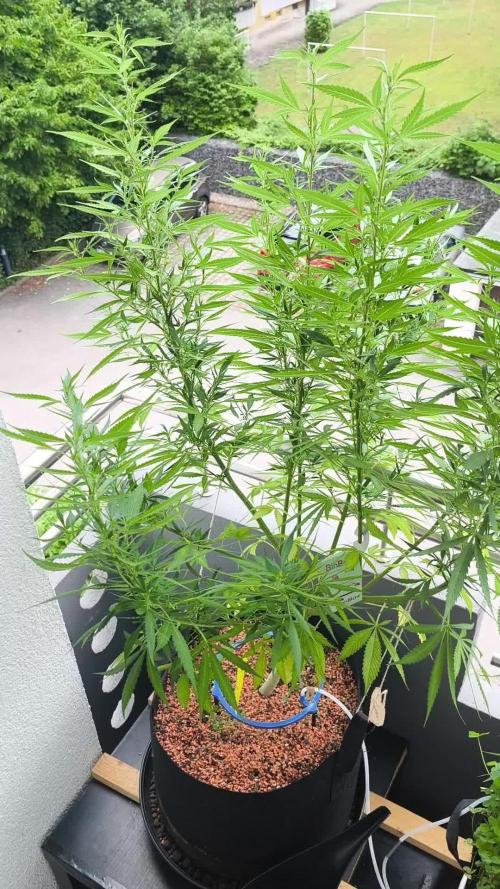
Week five has arrived. So far so good she is doing great and smelling dank.👌👌👌👍
Likes
1
Share


@Barcelona_Farmers710
Follow
Buenas farmers!! Después de pasarnos tres dias con sólo agua volveremos con la mitad de nutrientes durante los próximos dos riegos, ya empezamos a prepar nuestras plantas para la fase final ! Cada cogollo huele diferente 👌🏻Espero que os guste buenos humos family!💚


Likes
23
Share


@DeepRootsGrowTrees
Follow
MATARO BLUE by KANNABIA
Week #18 overall
Week #4 Flower
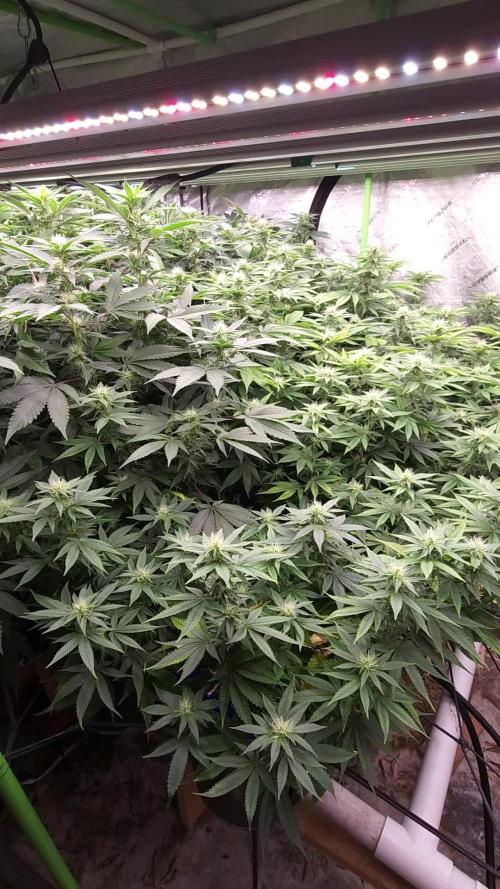
She's doing great this week looking good and her buds are starting to dense up she's getting nice trichome coverage as well. Stay Growing!!
Kannabia.com
MATARO BLUE

Likes
4
Share

@Dr_Metanol
Follow
Buenas chicos, lamento no ver podido seguir dando el seguimiento semanas tras semanas pero es que se me ha hecho dificil con tanto trabajo, tengo para decir que la carpa me quedo pequeña, las plantas crecieron bastante y no puse seguir subiendo las led pero, estan lindas y engordando cada dia mas, tienen ec de 2.8 y el co2 a 1400 ppm, vamos a ver como termina todo.

Processing
Likes
26
Share


@GrowGuy97
Follow
Day 49 - Still giving the ladies just PH water with no nutrients trying to see if I can fix whatever is wrong with them😅 All in all the White Widow & Orange Sherbet plants I took individual pictures of are growing great & should have a pretty nice yield! Thank you for following & make sure to check back for daily updates! Happy growing friends!🌱✌️🏼

Likes
Comments
Share


Processing
Likes
4
Share


@Shangrilapapers
Follow
What a week recovering from a transplant brought on by Nitro Lock. We start week 3 Monday! I added one more new plant to the group being my total number of plants up to four!

Likes
58
Share


@WeedManiacLove
Follow
Fue una excelente semanas al ver las raíces, me impresionaron mucho, ver un bonito color y buen desarrollo de las micorrizas que necesitamos para darle vida al sustrato y para crear la conexión con el trébol blanco! 💪
Al transplantar colocamos de nuevo micorrizas de Elite91 esperando que siga su buen desarrollo.
Cream Mandarine no tolero mucho el transplante.
Es mi primera vez con Green House y veo que las plantas le costó mas tiempo recuperarse que la Royal Queen.
Super contento!!😍
Cuatro días después de cambiar de macetero, realicé poda apical en el tercer nodo para empezar a formar la estructura que queremos lograr.😎🙏
Buenos Humos!


Likes
54
Share


@Papablob
Follow
12/05 Ouai! Elle se porte bien mieux. Elle ne se crame plus sur les LED, déjà, et les feuilles se sont élargies. 😅 Une belle plante malgré des débuts ardus. 👍
15/05 Les points blanc c'est là ou elle à touchée les LED. Mais en même temps cela l'a étalé.🙂

Likes
29
Share


@GrowingGrannie
Follow
I've rather ignored these ladies this week as a lot of other things were on my agenda - but they don't seem at all bothered by the lack of attention. In fact, they seem more than happy to just do their thing.
We've had more hot days and fairly cool nights and nothing is fazing them - nothing! Their pistils are just starting to go brown but I don't foresee a rapid change here... they just keep bulking up and bulking up... whoever said that sativa buds were light and airy have never met these gals! They're out on my deck with 3 indicas and if I hadn't labeled the pots, I'd have a hard time figuring out which was which except for the smell! Kudos to the Super Sativa Seed Club!!
Still a few weeks to go but I'm VERY pleased with their progress!

Likes
10
Share


@steadfast_grower
Follow
#########################################
HARVEST (Day 93 / June 4)
#########################################
-----------------------------------------------------------
GROW SUMMARY
-----------------------------------------------------------
Grown in 4x4 tent - but I only used 2x2 space because of heater and dehumidification and other plants (Outlier Z). This plant used a dedicated CMH 315 light. The plant was grown in hydroponics using a custom single-site PA hydroponics clone RDWC system with Advanced Nutrients Sensi Coco line, Microbial Mass and Orca for beneficials. I also experimented with Rapid start in the RDWC system, but I didn't see explosive root growth relying on Rapid Start as an additive to the system verse using it when starting in rapid rooters which worked well.
All around a pretty easy grow and things went very well. Topped twice for a mainline structure and she really spread out. Sparkling golf ball size nugs down the branches and spaced out nicely. The scent off her was like burned rubber/tires or maybe fresh blacktop. A single water change which was only performed when switching to bloom nutrients around week 7.
-----------------------------------------------------------
HARVEST
-----------------------------------------------------------
No dark period and no flush. On day 93 she was chopped and hung to dry.
-----------------------------------------------------------
DRYING
-----------------------------------------------------------
Entire plant hung upside down for 15 days. The temps were dialed in at 60F by using the S6 intake fan pulling air from the AC through intake vent on side of the tent. Humidity was dialed in at 63%/60F for 24hr, 62%/60F for the next 48hr. Then 60%/60F for the third day and onward. AC Infinity T6/S6 exhaust and intake fans were on the setting of '2' during drying until day 7, then I could turn down to a setting of '1' once the plants were not transpiring excess moisture. Trimmed on day 18. Then the jars were left open in the tent for another 12 more days for a full 30 day dry at 60%/60F while rolling the jars frequently. Also ran dehumidifier in the tent but it only ran for 1-2 minutes every hour because the AC was doing most of the dehumidification on the intake.
-----------------------------------------------------------
TRIMMING
-----------------------------------------------------------
Trimming was an absolute breeze. All swelled nuggets, very little sugar leafs left to trim.
-----------------------------------------------------------
CURING
-----------------------------------------------------------
Flower product was transferred to 1L mason jars averaging 35g of product per jar. I added a mini hygrometer to each jar and chose not to use a boveda this time. The RH averaged 62-64% when trimmed flowers went in jars.
Jars were left open in the tent for a total dry time of 30 days from harvest keeping the tent at 60%/60F.
Once closed, the jars were burped once a day for the first seven days, once every other day for the next seven days, rolling jars often. The burp was only for 3-5 second for air exchange until a. 62% was maintained in the jar.
-----------------------------------------------------------
YIELD
-----------------------------------------------------------
* Weight calculated at 62% humidity after 30-day dry and 14-day cure.
==============================
FLOWER PRODUCT
==============================
180.41g (6.44oz)
==============================
TRIM PRODUCT
==============================
57g (2.03oz)
** All major fan leaves, stems, and branches removed from trim product.
==============================
TOTAL OVERALL YIELD
==============================
Total: 238.41g (8.51oz)
==============================
SPACE YIELD
==============================
238.41g / 4 sqft (2x2 canopy) = 59.60g per sqft
==============================
WATTAGE YIELD
==============================
315 Watts / 4 Square Foot (3x4 canopy) = 78.75 watts per sqft.
238.41g / 315 watts = 0.76 grams per watt
-----------------------------------------------------------
PRODUCT TEST
-----------------------------------------------------------
Bag appeal is top-notch. Trichome covered, with aromas of that unique 'kush' you can quickly identify based on experience.
Best OG Kush I've ever tried, hands down! The flavour is kushy, smoke is smooth and definitely my favorite strain in my tote of cured harvests at the moment. I can't keep my hands off of the jars. Definitely not a daytime strain, even for experienced users, although I'll use it in the afternoon when life is throwing curve balls. The effects rise you up, then sets you right down and will wash away all that anxiety after a long day. Put it this way....if I puff a few hours before bed, I still feel it the next morning when I peel my eyes open. No joke.
I'll definitely be growing this one again, maybe even next run because I'll be sad when I run out.
-----------------------------------------------------------
REGRETS
-----------------------------------------------------------
Not running more of this amazing plant.
-----------------------------------------------------------
NEXT RUN
-----------------------------------------------------------
This was the first run at my new residence so it will take some time to get it dialed in. I had some calibration issues which are now fixed. I'm going to be shooting for 1gram per watt on the next run.
-----------------------------------------------------------
FINAL THOUGHTS
-----------------------------------------------------------
DarkOwl is the best autoflower I've grown yet. I'm now eager to give the Bruce Banner #3 they released a run and will surely acquire future releases from DarkOwl.
-----------------------------------------------------------
THE END
-----------------------------------------------------------
Thanks for checking out my diary! I typically journal in my notebook but I put some time and effort into documenting my grows on this platform in hopes it will help a new or experienced grower with their DWC journey. Any questions or suggestions are welcomed.
Happy growing!


Likes
28
Share


@TeamQuality420
Follow
So this week is the start of flower !! Woooohooo finally get to show what I'm made of !
Step one ) take all the big fan leaves
Step two ) establish a "light line" and take all small shoots that are unable to get the proper amount of light due to their distance from the top of the canopy. * These are the places we all wish would grow ! These are also the places that are at risk of
- hermaphroditism
- mold
- waste of energy for the plant.
** These are also some of the best places to take clones **
Continue to tie and secure everything in preparation of massize buds !
I hope some people looked at this like
" This took way too much off "
I took ALOT. Yes I push , I push hard to know how much they can take . Yes I would say 60% of plants DO NOT like a massive defoliating.
But, the ones who do , you will unlock a yeild like never seen .
It's the risk we take .
One thing I have noticed is when I'm gonna defoli , I don't combone high stress or toping + a bunch of other techniques .
Should have some pretty huge plants by two months !
Thanks for stopping by more notes and pictures to follow .
First week of flower was a great success!!! Unfortunately I did have covid this week so my pictures weren't exactly where I would want them .
For these genetics, it's crazy , they haven't been topped or LST'd and yet they are growing flat at the top !
*** I did have covid this week so my pictures weren't exactly up to par.
So I'll do my.best to make it up with notes ,
- this week very little flower stretch that is definitely a plus for people who want medium sized bushy plants . Not saying that this one won't stretch but so far there has been very little stretching .
- there are ALOT of nice shoots throughout the canopy, plenty of places to take clones *** this genetic clones very well so that is another thing to note ! So great clonability .
The end of week one I have seen very little stretching , in my opinion these could all be considered S1 . It interesting, even with no topping or training these plants NATURALLY grow FLAT! so for all you Screeners out there this is a primal genetic for that !!!
In to week two !!! Here
We
Go !!!
--------------------------
Find these world class genetics at :
https://www.exoticseed.eu/products/exotic-animal#:~:text=What%20is%20Exotic%20Seed's%20Exotic,be%20cultivated%20indoors%20and%20outdoors.
Or
https://www.seedsman.com/eu_en/exotic-animal-feminised-seeds
Find all about the nutrients that fuel this grow on here:.
https://diablonutrients.com/
Absolutely a life-changing nutrient company for me really brought my game to the next level.
Likes
10
Share


@Plzgrow4me
Follow
Definitely behind in my journalism… big surprise there. I never could keep up with it. I blame it on purchasing my first trailer and camping all the times
From what I remember this is the week I started to see pistols. One plant started to develop some mottling. Didn’t do much to change it, just kept on with the nutrients and it seemed to grow out of it quickly.

Likes
Comments
Share

@Growitworldwide
Follow
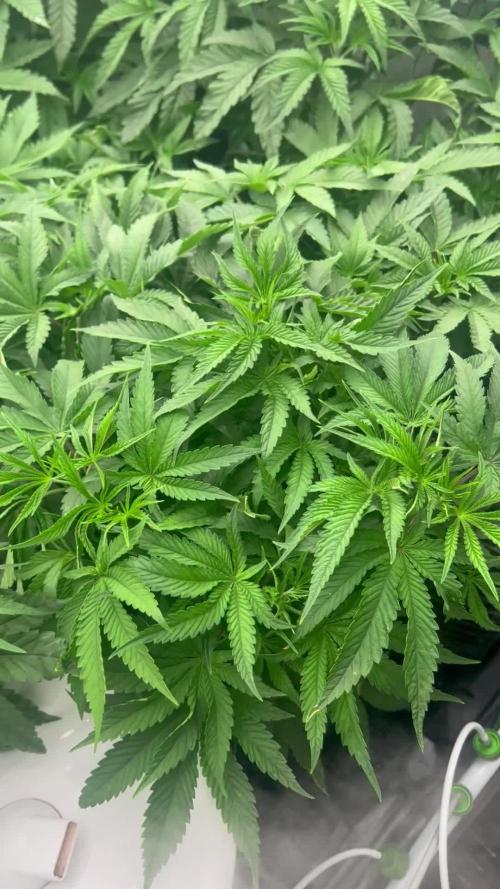
They are huge. I think I will start doing defoliation 2 times per week.
PH 5,5 - 5,7
EC 2,50 - 2,75
See you next week guys!
