
Likes
Comments
Share


@Kratomizer
Follow
Everything looks good. Humidity has been way too high.
I started flushing the plants.

Likes
11
Share

@GERGrowDesigns
Follow
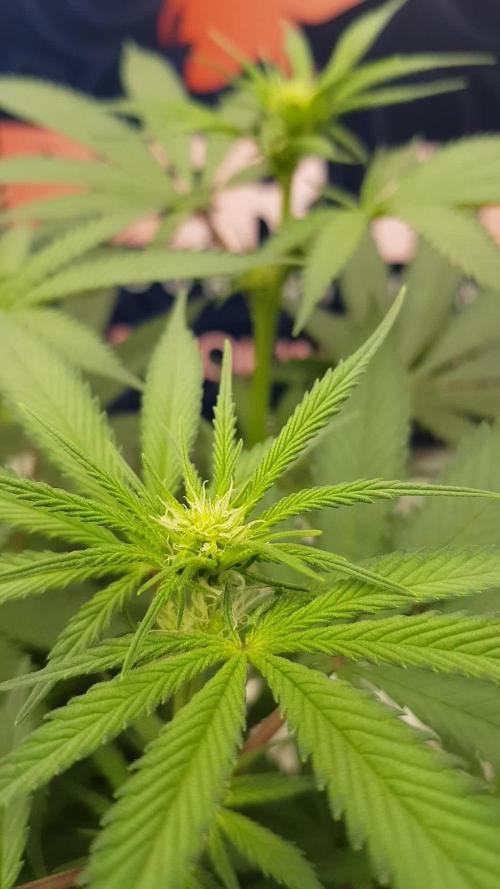
Welcome to Flower Week 2 of Kannabia Pink Gelato
I'm excited to share my grow journey with you from my
Kannabia Seeds Project . It's going to be an incredible ride, full of learning, growing, and connecting with fellow growers from all around the world!
Check out Kannabia Seeds with my link [https://www.kannabia.com/de?ref=61966] and grab the germination device or the strains I used . Trust me – it’s worth it for sure !
Get another 20% Discount at all products using the code [GGD] at the checkout.
For this Project , I’ve chosen the Feminized Photo Strain Pink Gelato:
Here’s what I’m working with:
• 🌱 Tent: 120x60x80
• 🧑🌾 Breeder Company: Kannabia Seeds
• 💧 Humidity Range: 60
• ⏳ Flowering Time: 56-63 Days
• Strain Info: 23%THC
• 🌡️ Temperature: 26
• 🍵 Pot Size: 20
• Nutrient Brand: Hy-Pro
• ⚡ Lights : 600W x 2
A huge thank you to Kannabia Seeds for allowing me to try my Best with this amazing collection from Photo Strains they managed to Sponsore . Big thanks for supporting the grower community worldwide! Your genetics and passion speak for themselves!
Let’s grow together – and don’t forget to stop by again to see the latest updates!
Happy growing!
Stay lifted and stay curious!
Peace & Buds!

Likes
3
Share


@BudxLess
Follow
Well, this is certainly a special strain. MASSIVE colas and rock hard nugs combined with an earthy flavor is an instant winner in my books. 124 dried and cured grams from one plant in a 3 gallon hand watered soiless mix, so this genetic definitely has the potential for more greatness. Smoking on this now and it is a smooth smoke with a relaxing and uplifting body feel to it. A long lasting stone and a very pungent smell. Fastbuds did a great job on this product.

Likes
218
Share


@DevilsBud
Follow
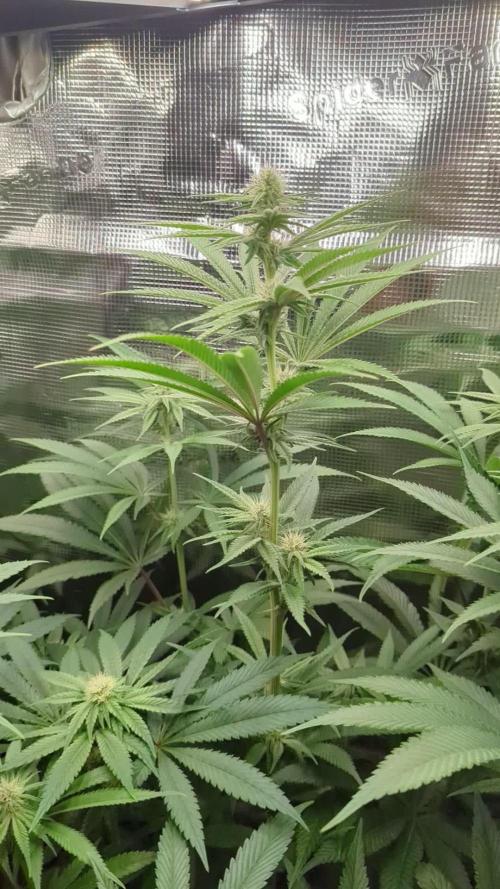
Week 9 of Critical RQS
Day 57 FLUSH WEEK!!!!!
I have decided to flush the critical.
Normally the critical needs 7 to 9 weeks of flowering and on week 9 . I don't see a lot of white pistils anymore and tricomes are all cloudy and some ambers it's going to be a exiting week.
Day 58
Flush the plants and run off had a lot of nutrients in it so have to flush for quit a bit
Day 59
Drying the soil out some and then do big flush again hopefully i will get those nutrients out other then that critical is looking awesome 🤘🏻😎🤘🏻
Day 60
Flush them again today and getting the nutrients out of the soil I probably have flush at least for a week i had bin a bit lazy checking with EC meter and now i have to deal with it i don't like to be inconsistent but is was a bizzy week
Day 61
Sunday rest day nothing going on 🤘🏻
Also want to thank everybody for the comments likes etc you know who you all are 👍🏻😍👍🏻
visit www.marshydro.eu
for your best gear and use the PROMO CODE: DEVILSBUD
Fully marshydro supported Setup:
Marshydro GT100X100X180
Marshydro Ts 1000 LED lamp
soil :Plagron batmix
Nutrients :Advanced Nutrients
Advanced Nutrients pH Perfect Bloom
Advanced Nutrients pH Perfect grow
Advanced Nutrients pH Perfect micro
Advanced Nutrients B-52
Advanced Nutrients Voodoo Juice
Advanced Nutrients Rhino Skin
Advanced Nutrients Big bud
Advanced Nutrients Bud candy
Advanced Nutrients Overdrive
Advanced Nutrients flawless finish
Advanced Nutrients Sensizym
BioBizz - Calmag
Mars Hydro tent handy info
Lock All Light Inside: MARS HYDRO Grow Tent Interior is made of diamond mylar. Non-toxic to the environment, no harm to plants. High-quality 1680D canvas being double stitched, (ALL OTHERS BRAND grow tent is 601D canvas) which is tear-proof for perfect light locking, No light leaks or rips at all.
Durability Grow Tent :Stable Metal corner adapters and poles are the trustful supporters of the tent. No rusting nor paint-falling. Quick easy tool-free installation. Carries strong heavy-duty SBS zippers, double layer lining to create a light-proof seal.
Easy Observation of your Plants: Special peek👀 window made by double layers of cloths. Observe the growing conditions of your plants without opening the tent and avoid disturbing plants. The peek window also serves to dissipate heat and ventilate air.
Removable Tray Keep Clean: The package includes a removable waterproof floor tray to hold soil and fallen leaves. The tray can be taken out easily to wash. Removable and water-proof cleaning easy.
Good Ventilation&Fast Assembly: Circular double-sleeved vent holes with adjustable nylon strap for air circulation by exhaust fan, ducting, carbon filter, or reflector. Better allows proper light, heat, and airflow. Quick tool-free installation. Reinforced by a sturdy metal frame to ensure security and stability, supports up to 140lb. Perfectly safeguard your plants to thrive even in winter.


Likes
18
Share


@Thckaos
Follow
21-11-20 Se cambia la solución y se realiza un lavado de raíces. Para bajar la conductividad de las raíces de 1.95 a 0.2 ms para que la solución nueva sea más efectiva. Se corrige el PH de 6.5 a 5.6. La solución tiene 1.95 ms y 5.6 PH. Se añade una pastilla de CO2.
22-11-20 Se corrige el PH 5.90 a 5.60 Conductividad 1.40 ms.
23-11-20 Se corrige el PH 5.90 a 5.60 Conductividad 1.33 ms.
25-11-20 Se corrige el PH 5.60 Conductividad 1.40 ms.
Se queda sin agua, se echar una solución con 1.34 ms y PH 5.6
26-11-20 Se corrige el PH 5.80 Conductividad 1.40 ms.
27-11-20 Se corrige el PH 5.10 a 5.80 Conductividad 1.20 ms.
28-11-20 Se corrige el PH 5.40 a 5.80 Conductividad 1.25 ms.


Likes
11
Share


@MadeInGermany
Follow
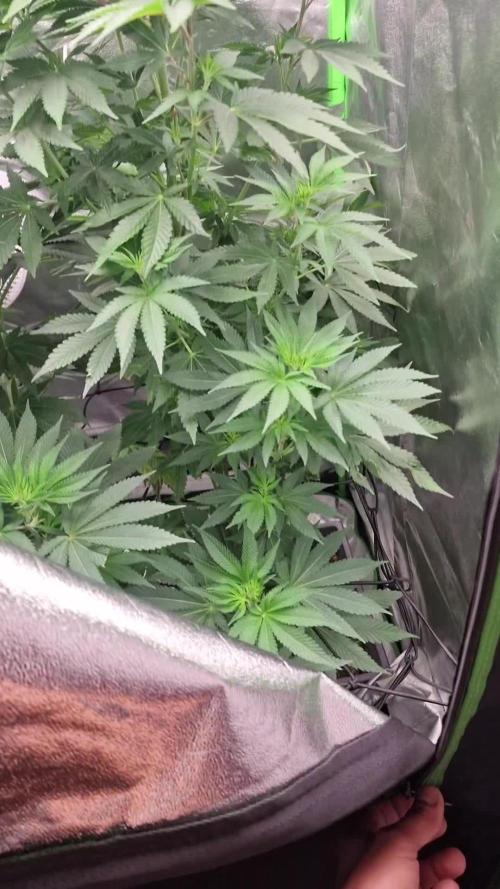
Hey everyone ☺️.
It gets more beautiful from week to week 😍👍.
I have them all this week Sprayed again properly with neem oil in the veggie phase ☺️.
There have been no trips for 2 weeks, but prevention is better 😀.
Because of the neem oil, the plants look very dark and shiny, which I really like when they shimmer like that 😝.
I didn't do any training these days, that will be done again the next few days 👌.
it was watered twice this week with around 0.6 l per plant.
The Ph / Ec measuring device was also recalibrated.
Otherwise there is nothing to report for this week and we'll see you again with the next update ☺️👍.
I wish you and your families a Merry Christmas 😊.
Stay healthy and let it grow 🍀
You can buy This Strain at :
www.Zamnesia.com
☝️🏼☝️🏼☝️🏼☝️🏼☝️🏼☝️🏼
Strain
Gelato clone from mother (Zamnesia )
☝️
Genetics: Wedding Cake x Gelato x Gelato 33
Vega lamp:
2 x Todogrow Led
Quantum Board 100 W
💡
Bloom Lamp :
2 x Todogrow Led
Cxb 3590 COB 3500 K 205W
💡💡☝️🏼
Soil :
Canna Coco Professional +
☝️🏼
Fertilizer:
Green House Powder Feeding
☝️🏼🌱
Water:
Osmosis water mixed with normal water (24 hours stale that the chlorine evaporates) to 0.2 EC. Add Cal / Mag to 0.4 Ec Ph with Organic Ph - to 5.5 - 5.8 .
Processing
Likes
12
Share


@Csmithch
Follow
Felt like growing was slow going this week. I know they’re only 7 days from breaking ground so they’re establishing their roots but there was two days I felt like they didn’t grow at all.
I germinated two more seeds, was going to have a total of 5 in my 4x4 but I somehow managed to kill both my master kush seeds despite having a beautiful tap root when I planted them into the soil. (Any advice/methods for getting seedlings going from germination to 🌱 is welcome and appreciated)
My two Gorilla Breath plants struggled for the last 3 days of this week and went pretty yellow, which I presumed was a lack of nutrients since they’re only in solo cups right now with Fox Farm soil. They most likely used up all those nutrients and thus began showing signs of nutrient deficiency.
I plan to make the next transplant into pro mix with added perlite so I have Advanced Nutrients Micro, Grow, Bloom on standby with RO water for that process. I ended up giving the two gorilla breath a 1/3 dose of micro, grow, bloom in 1L of water for one of their feedings to attempt to get some color back. It seemed to start working as you can see on the pictures.
I was into my local hydro store today to buy some perlite to add to my pro mix next week and the guy talked me into some foliar spray (see attached image) to address the nutrient deficiency. I sprayed it on the leaves right before lights out on day 7 (February 6th)
Hopefully that helps them out. Time will tell.
I also struggled with humidity this week, ended up using a wet towel temporarily to keep humidity levels around 50% but I ended up ordering a humidifier on amazon and got that set up today. Super happy with the results from that 😁
Stay blessed and happy growing!


Likes
1
Share

@PapaTerps
Follow
Blue Zushi - Dutch Passion
Day 74 - Watered with 3 litres of RO tap water, with defined nutrients, pH'd to 6.3. She had a massive growth spurt this week and was stretching so fast, I had began plan's to bend her main stem, but thankfully she finished that and is now focusing on developing her bud sites 💪 This week, I removed a few leaves, but other than that, I've just let her do her thing.🙏

Likes
2
Share

Likes
3
Share

@Trichoma
Follow
@1.5 kPa
Partially harvested, waiting a week or mby 2 for the rest to ripen a bit more.


Likes
1
Share


@BruWeed
Follow
Esta semana ya realice la poda. Se encuentra en estos momentos en etapa de secado dentro de una caja especial para secados de flores que uso siempre y nunca me falla.
En humedo hay 195g y utilice una lampara led de 150w en todas sus etapas.
Próximamente estaré publicando cuando este en curado.

Likes
72
Share


@wolfvb
Follow
Week 5 baby! What a smooth ride this has been - these ladies are absolutely flying through veg. Gave them some cooler water today and they're vibing with it 💚 Still keeping nutrients minimal, just 1-2x weekly when they ask for it. Less is more with these girls!
12.01.26
The runtz is really going for it, I had to adjust the light to the maximum.
I realized that I wasn't sharing the size of this girl's
Blue cheese F1 33cm not topped
White Runtz auto 80cm not topped
Pineapple Express F1 40 cm topped
16.1.26
The stretch is insane runtz has grown so big I had to give her some minor LST so she dose not go over the light, I did not want to train her at all and see what she has to offer.
Likes
7
Share


@OfficerJoe
Follow
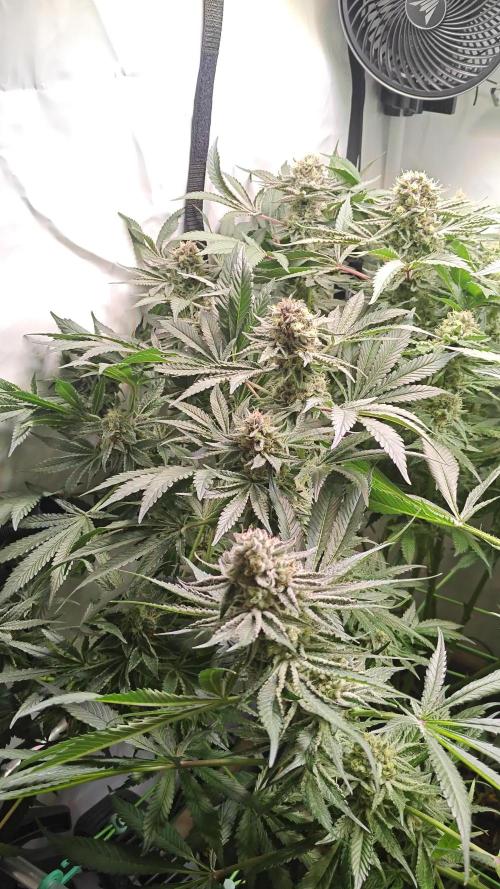
So things are getting serious!
The smell gets stronger and was amazing when I defoliated the plants.
The G-13 is forming very nice buds, but the reason it is a bit later than the Strawberry Banana is I accidentally used Strawberry Banana auto, so as soon as the first pistils appeared and I realized what was going on I switched the light schedule to flowering to have it on a similar time. This is also the reason why I started flowering them so small.
Looking forward for next week!
Likes
3
Share


@CaliJ
Follow
fast eddy measures 60 cm, the 3 gelato cookies between 70 and 80 cm, the 3 northern light from 90 cm to 1 meter 20, the smell is stronger when the tent is opened, major heat problem solved thanks to a portable air conditioning🍀
Likes
8
Share


@Dapper_Buds
Follow
Week 6 and these girls got a scrog net added. As the plants are getting extremely heavy. Started to unfold an open up eagle spread style. So had to lend a helping hand. They got a scrog net added an the untrained plant got tied up from tents upper support bars an lower branches got some support also from the net. So far everything is going smoothly. The e680s light is putting in that work work

Likes
39
Share


@BelgianBudtender
Follow
Heya Bud, Hope everyone had a great week, my little plant sure did, there has been a lot of green growth after topping, she's turned into a small bush.
I have been a bit under the weather, but I'm trying my best to keep up with LST and topping, I expect another week or two of veg, just to be safe. I don't know this strain at all and I really want to fill my tent, so far it reminds me of my very first plant which had long, dense colas, just like that plant, this one is starting out very short, dense with tight node spacing.
Unlike my first plant though, this one is a photo-period and I have hold of the reins, I decided to not add organics to my system this week, trying to hunt down the source of dark gunk that collects around my roots, i think it might be bits of peat from the starter plug, it rinses off easily.
My webcam froze a few times and I lost some footage, but you can still see the growth!
I have topped her a total of 4 times this week, the goal is an even canopy and I cant allow one branch to take over to much at this stage.
Trellis in next week? maybe? who knows, definitely a skirt clean-up in the future, I like it when my ladies can breathe down there.
Thanks for stopping by, stay safe and keep growing.

Likes
45
Share


@masterofsmeagol
Follow
8/7 Plants were still heavy this morning. Temperatures have been much milder. 70's is much better than 90's. I had to water twice a day for a while. I defoliated ahind found some heat stress ob the gmo canary on the end with some twisted leaves. Some leaves are turning purple on an event horizon and gmo. Night Temps are much cooler plus its probably a pheno thing. I defoliated everything dead yesterday. Found lacewind eggs. Saw an adult green lace wing this morning in the garden along with a couple more lady bugs. There were also some lady bug larvae so I hope the go right to town. It's getting cooler so if I'm going to poorly I need to do it. Sherb pie plant seems to he the pillars favorite. I've killed a few of them. Still need to fix supports and do a little more defoliation. I have a video too but it's too slow to upload now.
STOPPED AFTER GETTING MY TIRES PUT ON AND DAD SAID THE LITTLE PLANT IN THE 5 GAL BUCKET IS DROOPING. I WENT BACK AND OF COURSE IT WAS. I WATERED THAT AND THE ONE IN THE TEN AND THE 50 AS IT LOOKED DROOPY. 10 GOT A HALF GALLON AS IT WAS DRYING UP AND ITS GOING TO BE HOT TOMORROW TOO. NOT 90S PROBABLY 80S AT MOST BUT STILL. I GAVE PRETTY MICH EVERYTHING A HALF GALLON EXCEPT THE EVENT HORIZONS TGAT ARE FURTHEST IN FLOWER. WITH THIS SUPER HOT WEATHER AND LACK OF RAIN I DONT WANT TO OVERWATER. DAY AFTER TOMORROW IT SAYS WE ARE SUPPOSED TO GET AN INCH. IM DOING MY BEST. IM TRYING TO UPLOAD THE VIDEO I DID TONIGHT. ILL UPLOAD ThE OTHER ONE TOMORROW.
8/8 Went over this morning and it was 55°. I gave the event horizon in the back half a gallon of water. I gave the other event horizon a LITTLE water but it still is holding weight. It doesn't get the wind blowing through it since it's in the middle. Still need to do supports and decide about whether to spray BT. population is down. A couple plants look hungry so I'm going to have to look at nutes. I defoliated the toasted toffy some this morning. I have more to do on a few others.
TALKED TO MY BUDDY AND SHOWED HIM A VIDEO. HE WAS KINDA ALREADY IRRITATED AND SAID OMP WAS IN THE AREA. UE SAID MY PLANTS LOOKED DROOPY AND THAT I NEED TO GIVE THEM THE 10% AND AT LEAST WATER TWO GALLONS A TIME. HE ALSO SAID NOT TO BET ON THE RAIN. I DONT AGREE WITH THE LAST PART AS IVE STUCK A BICKET OUT DURING THESE RAIN STORMS AND EVEN PHED IT. I WATERED EVERYTHING A GALLON. PLUS THE HALF LAST NIGHT. I THINK MY BUDDY MAY BE RIGHT AND THAT I NEED TO INCREASE THE VOLUME OF WATER AT A TIME SO I DID. I NEED TO INCREASE NUTES TOO. ILL CHECK LAST TIME I FED AND FIGURE THAT OUT. KILLED A FEW JPN BEETLES, A LEAF HOPPER AND A COUPLE PILLARS WITH HAIR ALL WEBBED UP. IM WONDERING IF THE TOASTED TOFFY HAS SEPTORIA. IM LEANING TOWARDS PESTS THOUGH. IVE SEEN TONS OF PESTS IN THE GARDEN. I REALLY SHOULD SPRAY IF IM GOING TO. I NEED TO DO THE SUPPORTS AND REARRANGE A FEW THINGS FOR FLOWER. THE SEED IN THE 5 GAL BUCKET (I THINK ITS A BLUEBERRY IS VIBRANT DARK GREEN BUT THE TIPS OF THE JEWLY FORMED FLOWERS ARE TURNING BROWN ON SOME. ILL GET A PICTURE TOMORROW. A FEW OTHERS EXPERIENCED SOME BURNS AND HEAT STRESS. I HOPE ITS NOT ROOTBOUND OR A ROOT ISSUE. IF IT IS ILL HAVE TO CUT THE BOTTOM OFF THE BUCKET AND STICK IT IN A HOLE. IT WILL HAVE TO BE OUTSIDE MY CAGE WHICH WILL SUCK. WE'LL SEE HOW IT GOES.
8/9 Got like an inch of rain. Plants are looking great. Some look a little hungry. MY buddy was right about the water. I made a SHIT TON of bubble hash today so I'm barely able to type this. NY plant is the 5 gal has some burns that look like it could be root issues. I've finished in buckets before with no issue. I think it's just from being too hot. You can see at the end of the video what I'm talking about. Oh well. I'm tired and done for now. I made a large ice hash pizza now I'm waiting for it to dry so i can make a temple ball. Things are kicking off. We're in flower that's for sure.
8/10 Everything looked good bit I wad in a hurry and didn't get out of the car. I'll check things out when I get back.
HOLY FUCK. WE GOT SO MUCH HARD RAIN THAT I FOUND MY FAVORITE GMO PLANT PUSHED OVER AND LYING ON THE CAGE THATS USED AS THE FIRST SUPPORT. I DIDNT GET OVER THERE UNTIL LIKE 11AM. I IMMEDIATELY FIXED THE PLANT THAT WAS LYING DOWN AND PUT A TRELLIS NET OVER IT AS DEEP AS I COULD AND ZIP TIED IT TO THE PALLETS. I ALSO ADDED A PLASTIC GARDEN STAKE AND USED TWINE TO SECURE THE MAIN STALK HIGHER UP. I DID THE SAME THING WITH THE GMO NEXT TO IT. THE OTHER IN THE FRONT LOOKED BETTER THEN EVER. SAME WITH THE TWO EVENT HORIZON. IM GETTING LITTLE BUDS NOW. I SHOULD GO FEED TONIGHT. THE TOASTED TOFFY EITHER HAS SOME PESTS OR ITS GOT SEPTORIA. COULD JIST BE A DEFICIENCY. I WORRY A LOT. IT WAS SUPER HOT AND HUMID. I DID WHAT I COULD AND THEN I RAN SOME STRINGS ACCROSS THE CAGE TO TEMPORARILY HELP WITH HIGH WINDS OR RAIN (EVEN THOUGH THE STORMS OVER.) I STABBED MY THUMB TOWARDS THE END OF MY WRIST WITH A COLD STEEL RECON 1. WOULDNT STOP FUCKING BLEEDING. I SHOULD'VE KNOWN MY LIMITS AND WAS MORE CAREFUL. I TOOK A COUPLE PICTURE AND DID A MINUTE VIDEO. NO REST FOR THE WICKED. IM FUCKING DEAD TIRED. I RAN SOME MATERIAL FROM LAST YEAR THROUGH BUBBLE BAGS. GOT A TON OF HIGH QUALITY BUBBLE. IM ABOUT TO TRY IT. AFTER IT DRIES A LITTLE MORE ILL MAKE A TEMPLE BALL. I JUST CHECKED THE WEATHER AND THE RAIN TOTALS FOR TODAY AND YESTERDAY AND ITS A COUPLE POINTS UNDER 3 INCHES. I HAD WATERED A GALLON THE NIGHT BEFORE THAT. I HAVE NO IDEA WHY MY PLANTS AREN'T DROWNED BUT THEY ARENT.
8/11 Its going to be hot again today. Plants looked amazing. I took a video. I FED TODAY. EVERYTHING GOT A QT EXCEPT THE 10 GOT HALF A QT. THE 50 GOT SLIGHTLY MORE. A fucking chipmunk ran in my garden when the door was open. He was going fast and I couldn't find him. I looked under the pallets the entire length. Hopfully he just ran out of a hole or up the fence. I'm going to get an air horn and blow it inside the cage. I need to get some zip ties and do a little rearranging before I setup the other supports for flower. Suprisingly the plantvin the 50 went from the furthest from flower to having little budlets on it. Can't be an auto or I think it would've flowered already.
8/12 Ending of the lions gate portal. Everything looked good this morning. The one in the 5gal was removed until I figure out its issue or trash it. The yield would be less than a branch anyway. Probably chronic underwatering. The 10 was bone dry despite the 3in of rain. Some bags seemed light. Looked at last years diary and went with my intuition. WATERED TODAY. Gave everything a gallon. I moved the event horizon to where the 5gal bucket wad and STARTED reorganizing to use the most of my space. I gotta pick up some zip ties and finish the supports but I'm happy. Plants look happy. Not as tall as last year but they are SUPER bushy. I'm going to have to open some up and spread the branches. I'll keep this updated.
WENT OVER AROUND THREE. I CHECKED OUT THE LITTLE PLANT AND NOTICED MULTIPLE BUDSUTES DIEING. I ALSO SAW WHAT "COULD'VE" BEEN A MALE PREFLOWER. MY INTUITION TOLD ME TO GET RID OF IT. ITS LESS THAN A BRANCH OFF THE CROP IT COULD HARM. LUCKILY I HAD BAGGED IT UP BEFORE IT BEIBG REMOVED AND IT WAS FAIRLY WELL SEPERATED. AFTER CUTTING AND DISPOSING OF IT I BROUGHT THE BUCKET TO EMPTY. IT WAS EXTREMELY ROOTBOUND. THE ROOTS WERE WHITE EXCEPT THE ONES ON THE OUTSIDE WHICH WERE A NEON GREEN. THE INSIDE OF THE BUCKET HAD WHAT LOOKED LIJE GREEN ALGAE ON IT. I IMAGINE THAYS PROBABLY WHERE MY PROBLEMS CAME FROM. I'VE USED THIS BUCKET SECERAL TIMES AND IVE SEEN TJIS TYPE OF ALGAE BUT USUALLY ONCE I SANITIZE ITS GOOD TO GO. IM NOT SURE IF IT WAS BEING ROOTBOUND OR THE ALGAE THAT DID IT IN BUT I HAVE MUCH BETTER SPACING NOW. THIS WAS THE RIGHT DECISION. I COULDNT BEAR THE RHOUGHT OF MY GIRLS GETTING POLLINATED. I DID A VIDEO TOO BUT ILL HAVE TO UPLOAD TOMORROW. ALSO CAUGHT THE TINIEST EVER MOUTH LARVAE. I SEE TINY GOLD FINCHES AND OTHER BIRDS DARTING IN MY CAGE AND AWAY WHEN I APPROACH. I THINK THEY ARE GIVING ME A HAND.
8/13 Thought thos was a new week so I took a ton of pictures and did a video. Who knows what will upload. Plants look hetter with the increased room spacing. I have the materials to finish final supports. I've just got to do it. Same with the BT spray. I'm thinking I should've upped the water to a gallon and a half or two but I'll do that next time I guess. Only problem I can see is some septoria looking spits on the toasted toffy and one gmo looks like itscrunning through nutrients quicker than others. Dad said he thinks this is my best year. He said they're more full and healthier looking. I looked at my diary last year and I had plants over the top of the cage. The weren't as bushy but I'm not complaining. These are far more indica dominant than last year so that's probably part of it. Leaves on the event horizons are starting to turn purple. I'll update what I do. I defoliated what needed it and combed through the plants hunting pillars.
I GUESS I FORGOT TO UPDATE THIS OR IT DIDNT SAVE. I BOUGHT A WATERING CAN THAT HOLDS A GALLON AND A HALF AND EMPRIED VERY QUICKLY IN SMALL STREAMS SO IT DOESNT HURT THE ROOTS. GREAT INVESTMENT. COULDNT GET OVER UNTIL 2 AND I GAVE EVERYTHING A GALLON AND A HALF. EXCEPT FOR THE ONE IN THE 10 TJAT GOT A GALLON AND THE TWO PLANTS IN THE MIDDLE THAT GOT A GALLON. ONE EVENT HORIZON AND THE TOASTED TOFFY.

Likes
28
Share


@basementgrown
Follow
Had a lot of fun growing these girls. They went through a lot off the bat due to my inexperience. Learned a lot during this run and it was extremely rewarding to nurse them back to health. I am very pleased with this grow for it being my first run. I had no expectations as I am just starting to learn and want nothing more than to acquire knowledge. The quality and yields will come once I get more dialed in. Once these girls got healthy they had no problems for the whole grow. I am already planning improvements for future systems and am extremely excited to continue on my grow journey. Thanks to all who helped me out.
