




Likes
6
Share

@Kellergaertner
Follow
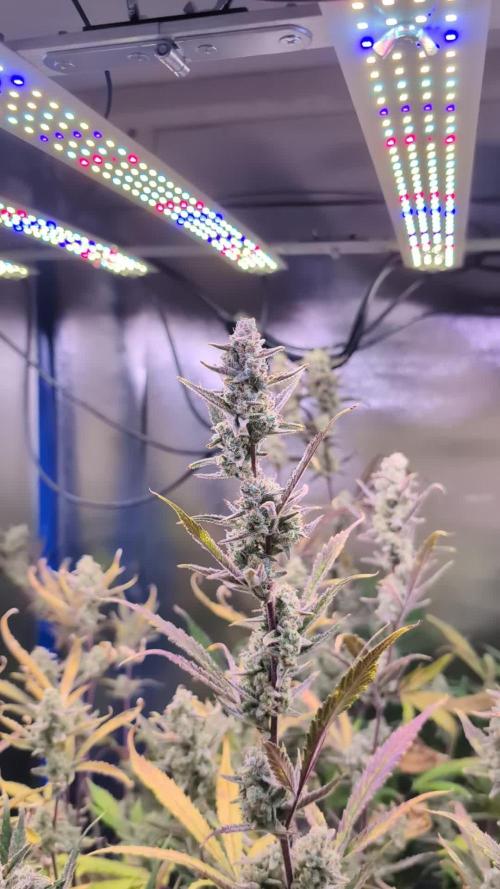
The Plant as a hole (without the main stem and roots was 1.4kg. due to German laws I could only keep around 250g of the nicest buds of it. This should end in around 50g of dried flower. The wet flower weight would likely be around 1kg which would have resulted in 200g dry.
For drying i took one nice branch of 42g and hung it on my ESPHome scale. That way I can track the weight loss. After a week at 60% humidity and 11°C (52F) the weight was constant at 10.8g. This is the time I took down all the drying branches, trimmed them and put them to cure (where they now are).
Overall conclusion and learnings of this grow:
- 200W might not be enough
- Growing in DWC without any media (like pebbles, rock wool or so) is absolutely doable
- Compo Expert Hakaphos Red/Green works but you will battle PH drops
- The UVC aquarium cleaner worked great. Never had to use H2O2
- Renewing the water only if really needed works fine for me
- 15L of Water should be the lower limit. The bucket I used was great but maybe a bit small
- Automatic PH dosing (based on ESPHome and Home Assistant) works great
- The cheap Chinese PH/EC probe did not drift much. I only had to recalibrate it once
- It is nice to have the plant elevated for working on it but can get tricky if the stretch is very high like in this case
Overall I'm happy. I did not have any bigger issue with pests or nutrient deficiency.

Processing
Likes
15
Share


@CannabisAprendiz
Follow
Hello, the babies have already recovered from the transplant of pots to an older one, diatomaceous earth was applied as a preventive measure for some possible plague, and in a few days they will go to flowering to seek to select the females and eliminate the male, after that apply a transplant to 7 L planters so that they can flourish better
Hola , las bebes ya se recuperaron del transplante de maceteros a uno mayor , se aplico tierra de diatomeas como medida preventiva por alguna posible plaga , ya en unos días se pasara a floración para buscar seleccionar las hembras y eliminar al macho, luego de eso se aplicara un transplante a maceteros de 7 Lts para que puedan florecer mejor
Likes
8
Share

@Mrs_Larimar
Follow
2025-09-18
A lot happened since the last Update
Yesterday i started the Autopot-System, and from now on just appreciating them no more work
because of the " only- add-water-Strategy By Biotabs.
i was cutting some lower leaves and shoots- and she got some supercropping.
to spread her more
and topping aswell
🔄 Transplanting Process
🏺Container Setup
Container: 35L Smart Pots
Growing Method: Autopot System with "Water-Only" strategy
🌿 Soil Preparation
Base Mix Recipe:
5g per liter soil - Startrex
5g per liter soil - Silicium Flash
Mixed thoroughly for optimal distribution
5x Fertilizer Tabs - strategically placed near bottom (20cm height) for autopot compatibility
1 tsp Mycotrex - applied directly in planting holes
Bactrex solution - used for initial watering
🏗️ Layer Construction
Bottom Layer (10cm): Drainage material (clay + perlite)
Air Circulation: Airdomes positioned
Growing Medium: Pre-mixed soil with embedded fertilizer tabs
Root Zone: Mycotrex application + seedling placement
Initial Watering: Bactrex solution
⚙️ System Activation
✅ Setup Complete - Autopot system now delivering automated water-only feeding
From this point forward: Pure water automation via Autopot system
🙏 Acknowledgments & Partnerships
Special Thanks:
Biotabs - Premium nutrient solutions
🏭 Puraplants - Autopot system provider
💰 Exclusive Discount Codes
🌐 Puraplants (Hamburg, Germany)
www.puraplants.de
Code: GrowBigger → 10% OFF
Biotabs Webshop
biotabs.nl/en/shop
Code: GDBT420 → 15% OFF

Likes
15
Share


@CG420
Follow
Tras acabar la segunda semana de floración así se presentan las pequeñas.
Hemos ido defoliando alguna hoja de la parte baja de la planta, aireando un poco a las niñas por la zona baja .
Las plantas ya empiezan a mostrar sus primeras bolitas y empezamos a añadir en la solución top Candy y pk13-14 para ver engordar esas bolitas💚.

Likes
37
Share


@FlavoursUk
Follow
Start of week 3. Still no nutes. Might top this week.
Day 18- Topped.
Day 19. Won’t post until the new week.

Likes
69
Share


@nonick123
Follow
Día 37 (08/07) Ajustes de LST en todas las plantas! 🚀
Día 38 (09/07) Ajustes de LST en todas las plantas. Las ramas inferiores están creciendo como un cohete! 🚀😍
Riego con 250 ml H2O pH 6,5
Día 39 (10/07) Las plantas se muestran sedientas! Creo que el cepellón está lleno de raíces y piden el trasplante!
El crecimiento no se ha visto afectado de momento
Riego con 500 ml H20 pH 6,5
Día 40 (11/07) Paso a regar con 500 ml / día, ya que hace mucho calor (30 ºC) y efectivamente las plantas ya han copado la maceta de raíces
Riego con 500 ml H20 pH 6,5
Día 41 (12/07) Riego con 500 ml H20 pH 6,5
Clones! Mi experimento vuelve a demostrar que NO necesitas complejos productos de clonación ni sistemas para obtener clones!
Hace 15 días puse 2 clones con el tallo sumergido en miel durante 5 minutos en una maceta de 400 ml con PRO-MIX HP BACILLUS + MYCORRHIZAE
He mantenido la humedad alta con una cúpula de humedad casera hecha con una botella de agua PET de 5 litros cortada por la mitad y pulverizando a diario.
Han estado los 15 días en mi terraza con luz indirecta, y temperaturas que rondan los 30 - 32ºC durante las horas centrales del día
Hoy los he trasplantado a una maceta de 1 litro porque ya habían formado raíces y empezaban a formar nuevas hojas!
🐥🐥🚀🐥🐥
Día 42 (13/07) Riego con 500 ml H20 pH 6,5
Día 43 (14/07) Trasplante a maceta definitiva de 21 litros de ROOTPLUS Pot de GSKOREA GLOBAL!
Estas macetas son una maravilla!
Proceso de trasplante:
Se prepara con 17,85 Litros (85%) de sustrato PRO-MIX HP BACILLUS+MYCORRHIZAE + 1,05 Litros de Humus de Lombriz (5%) + 2,01 Litros de Insect Frass (10%) + 210 gramos de Earth Vibes Super Soil (10 g/L substrato)
Se llena la maceta de sustrato con las manos (limpias) y rompiendo los trozos más gruesos, para que el sustrato esté aireado y esponjoso, sin presionar
Se coloca una maceta vacía de 6,5L para que quede la forma perfecta de la maceta donde están actualmente
Se espolvorea la parte proporcional de la probeta de microorganismos sobre el agujero de trasplante
Se saca la planta de su maceta actual (bonitas raíces 😍) y se coloca en la maceta final
Se riega muy lentamente hasta percolación profunda con H2O EC 0,5 pH 6,5
Una vez asentada, complemento con un riego de 500 ml con 25 ml/L de Humus de Lombriz Liquido
Se coloca mulch (acolchado) de paja para evitar traspiración excesiva y cuidar a los microorganismos del suelo
A ver como reacciona al trasplante!
Aplicación foliar Kelp hidrolizado de Lurpe Solutions a 0.25 ml/l
Realizo ajustes de LST aprovechando el trasplante a la nueva maceta. De momento tienen una canopia muy bien formada!
💦Nutrients by Lurpe Solutions - www.lurpenaturalsolutions.com
🌱Substrate PRO-MIX HP BACILLUS + MYCORRHIZAE - www.pthorticulture.com/en/products/pro-mix-hp-biostimulant-plus-mycorrhizae
Likes
13
Share


@YOUNGSTERBR
Follow
Estava sem celular, perdi várias mídias da semana passada e dessa semana

Likes
16
Share


@NAG420
Follow
Wow I can say she is doing great have done a lot of defoliation on her also have done lolipoping to get more energy to the top buds this my 1st time trying it let see how she does. Feed 8th week chart mix with my fox farm will continue on the chart schedule haven’t tried the sledgehammer yet but before the end of flower I will. Will start to post videos of the grow from now on also of course tons of more pics. Day time temp 74-76 and RH is around 50-56%.
Likes
Comments
Share


@GodlyGas7
Follow
Transplanting Into Permanent 5 Gals, Topping, And Going Outside At The End Of Next Week.

Likes
23
Share


@elementhc
Follow
The 2 GSC extreme and one of the GG4 got harvested this morning Dec 20th.
The rest are a week or two behind.


Likes
2
Share


@Saintvicious
Follow
She's unstoppable. Looks like we are about to be in pre flower. It's show time.
Likes
3
Share


@BigGGrows
Follow
Sticky harvest, had to run the clippers through a steel wool pad basically after every cola. She yielded 59 grams, little over 2 ounces. Smoke is smooth piney with a grape understond sweetness. Unfortunate she came down 3 weeks early, but the smoke is still pretty good. Got her in cure now.


Likes
54
Share


@rhodes68
Follow
3/18 Week 12 Day 33/Flower
Have a Norto virus in the house so being brief
All looks good no changes at this time waiting on buds to say when
Tricones 80% Milky 20% clear with no amber so at least a week to go before flush
3/19 Pics
Lot happened overnight, looking like end of week for flush.
Will continue PK for one more day as time for the last push here now as upped nuets about 200ppm.
PK ends Friday, nuets will drop back 200ppm at the same time.
Flush begins 3/24 Tuesday... 08:05 PDT ... 😏
3/21 Day 36/Flower
Ended PK dropped CT to below 900ppm
On track for flush mid-week which will be real close to Fast Buds estimate of 45 days.
3/22 D 37/F
Pics
Just waiting for the ripening and flush day next week.
Trics pretty much all white now, still no amber but that will come during flush.
Will be dropping nuets to half Monday on last feeding.
3/23 D38/F
Last feeding at half strength but tossed in a dose of Recharge just to see if it matters. doubt it would but it needed using as it hitting its effective date.
Flush begins tomorrow morning
3/24 D39/F
Flushed each using 10 gallons PHed tap water and 5ml/gal flushing agent.
Pics and vid
3/25 D40/F
Runoff @235ppm about 80 ppm over the water ppm so looks like the pot is empty and we can cease the FloraKleen those roots are stripped and I am no rush on this flush.

Processing
Likes
36
Share


@GeorgeMaas
Follow
its been ages since my last post. plants went through so much, can't believe they're looking so good now.
A fan inside my led light stopped working so light was overheating. quickly ordered a second hand light so i could let this one get repaired. now back with the original light.
finally also almost 100% thrips free (made a spray from neem oil and soap couple weeks ago)
just defoliated the plants for a second time to make sure all tops are in direct light.
only kept 4 plants by the way, I waited with switching the light schedule until they looked healthy enough, so they overgrew the tent altogether.
also had extreme humidity when lights were off (up to 80%) so i ordered a dehumidifier which took 2 weeks longer to be delivered. Jup, we been through hell and back, but we're still going, strong that isss.
I'm happy guys!!


Likes
2
Share


@RunWithIt
Follow
I'm going to give her the chop sometime this week. Giving her one final watering today, then I'm going to let her dry out til harvest. She smells fucking awesome, super aromatic. It's quite obnoxious not being able to find anything on this strain. But I'll try and describe what she's like. For one, I'd say that once you've got an established plant, it's very painless to grow. I didn't measure waterings or nute feedings. Treated her like a tomato plant basically.
The smell is incredible, super fruity with just a hint of skunk... and given the character this strain is named after(💩), let's just say that's a very pleasant surprise 😮
We're in the final stretch of her growth here. I'm not expecting too much yield wise by this point. I want an OZ, so I'm hoping this extra week will get her to chunk up just a bit more.
Cheers fellow growers, I would recommend other Ethos strains before this one. But if you're accustomed to their Genetics, this is definitely worth copping for the experience. Really excited to see how she smokes! 🤑😎
Update 10/28/21: Something made me decide to give her a flush and maybe a week or two of extra time. I think she'll start doing the purple fade thingy, as I see purple on some of the tips of calyxes and sugar leaves. I hope for one crop like this every year..
Flushed her yesterday and took the updated pictures(the ones in the dark) today. Looks like she REALLY put on some weight between yesterday and today. I mean I had to stake her up, that's how chunky she's getting. The stems and branches look like they're on the brink of snapping 😳
Looking back, I don't think I've had a plant get this chunky by this point in flower. Makes me super excited I have more beans of this stuff. I may end up leaving a lower branch to chuck her into the veg tent post-harvest, I'm seriously that in love with this strain.
Likes
Comments
Share


@Jungle_James_Grows
Follow
Pulled her a bit earlier than I would have liked, due to pest pressure


Likes
6
Share


@NLHydroponics
Follow
Day 27 of 12/12
Day 16 Flower
Ppfd 950-1050. S44-Ionboard
Ppfd 650. S11-Ionboard lightbars
EC 2.0
PH 6.0
I finally caught this diary up to the current date. I apologize for my previous entries that were all done last night and kind of vague and all over the place.
Today I'm doing a mild defoliation to open up the canopy and get some life pumped into these lower bud sites. She's still stretching some which I'm all for at this point although I have a few colas reaching for the sky that need dialed back a little. I'll most likely just LST them to the net if I can find spots to pull from.
Defoliation is a nightmare currently. I need some kind of mission impossible harness to hang above the canopy and save my lower back lol.
I ordered and installed the s11 Ionbeam led bars from AC Infinity. I currently have them in my lower canopy just below my scrog net to help her along a bit.
The first night I installed them they didn't sync up with my controller 69 and she had a night light for 12 hours. Pisses me off because I should have peeked in to make sure it shut off with the main board. So later on today I'll play around with the setting between the 2 controllers and get this UIS set right. This is a prime example of jumping the gun and letting the excitement of new gear get me doing shit hastily. These bars are weak and have to be placed within inches of the canopy and then will only cover a small area efficiently. I will most likely remove em from the lower canopy and suspend them over the colas on the edges. Not sure what I was expecting from 11" light bars. Maybe I'll add them to my seedling/clone racks.