
Likes
Comments
Share


Likes
26
Share


@Stash074
Follow
This week was good. Its been a week since I made the flip..the ladies are already starting their stretch. Pistils are showing up all over the ladies, which is a good sign of stable genetics being that I used feminized seeds. Right now I am giving them the transition stage feeding schedule. This will be my 1st time using bloom booster, I intend to start adding kool bloom to the feedings this week. Also I increased the intensity of the grow light to 100% Yesterday. I will keep yall updated in my next upload 😎🍃
Likes
5
Share


@ToastFarmer
Follow
Fall colors really coming on frost is building, weight gain is also happening
The terpene profile is now an OVERIPE strawberry
Likes
17
Share

@DevelGrow
Follow
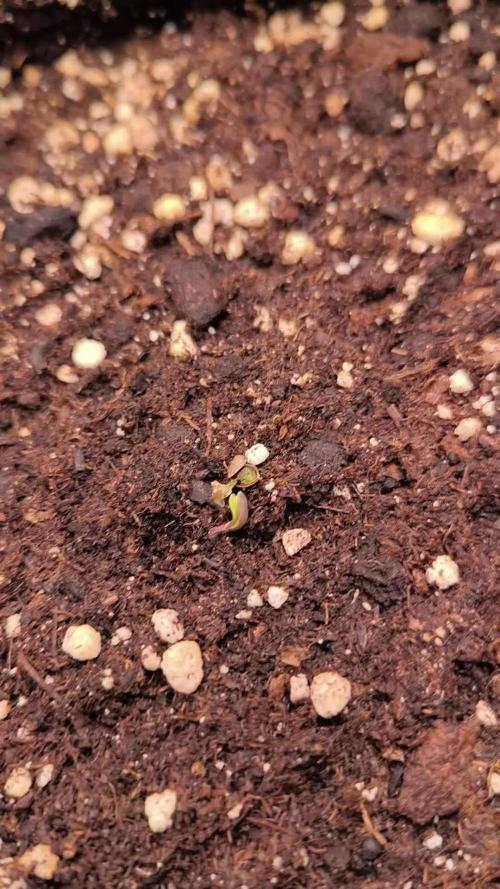
Hallo Freunde 👋 Velvet Candy Widow Auto von Monkey Genetics 🦍 ist zur Welt gekommen nach nur 3 Tagen vom Samen zum 1,5 cm Samling 👍 Respekt!!! Abwarten wie es weiter geht! ✌️Keep Green and grow High 🍀💚🍀
Processing
Likes
4
Share


@Andres
Follow
nothing to say ... that his growth is still good and he has a small greenhouse in a bottle to keep the humidity ..........

Likes
3
Share


@French__flair
Follow
N'hésitez pas à me contacter si vous avez des questions!
Pour préparer votre solution, dans votre réservoir ou arrosoir :
Mettre en premier la base (Iguana)
Ensuite Ancient Earth
Et enfin les bactéries
ASSUREZ-VOUS D'UTILISER UNE EAU DE BONNE QUALITE (EC < 0,2) POUR DE MEILLEURS RESULTATS.
J'utilise un substrat non enrichi pour permettre le meilleur départ à mes plantes.
Il s'agit du Promix de Plagron, il a une EC proche de 0, c'est pour cette raison que je commence les engrais assez fort dès le début. Les plantes sont très gourmande sous LED haute intensité et l'enracinement est rapide.
J'arrose tous les 3 jours environ avec 2 arrosages à l'engrais et 1 à l'eau par semaine. Je n'attend pas que le substrat sèche complétement sinon ça réduit l'efficacité de l'arrosage, ça détruit la faune et éventuellement facilite la cristallisation des minéraux.
Au niveau du volume d'arrosage, il faut prendre en compte 1/3 de la taille du pot. Pour un pot de 1L je vais donc arroser environ 300ml. Pour un Pot de 10L je vais arroser environ 3L.
Il est important d'arroser doucement pour éviter que l'eau ne coule tout de suite au fond.
Il est important d'avoir au moins 15% de drain pour s'assurer d'évacuer tous les nutriments non consommé et faire la place aux nouveaux.
IL EST PRIMORDIALE D'EVACUER L'EAU AU FOND DES COUPELLES, c'est une eau qui est chargée en nutriments non consommé et on ne veut pas qu'elle remonte dans les pots car cela risquerait de créer des blocages.
Au niveau de la technique de taille de formation, je réalise tout de suite une FIM que je reproduirai dès que l'apex aura repoussé. La première FIM est la plus longue mais les suivantes sont très rapide car la plante s'habitue à la technique et cela la stress beaucoup moins. En général il faut reproduire la FIM tous les 3 à 4 jours en fonction de la vigueur. C'est une technique très facile à mettre en œuvre et ne demande aucun matériel. C'est aussi la plus rapide pour obtenir des buissons.
N'hésitez pas à me contacter si vous avez des questions concernant la FIM!
Je retire également les feuilles supérieur (pas toute pour éviter de ralentir la plante) qui cache les secondaires pour augmenter l'efficacité de la FIM sur la croissance des secondaires.
Likes
13
Share


@FlavoursUk
Follow
So, things are going great. The RO water change left me with a nice sterile clean res. The plants are loving the lighter feeding and it shows.
The trolmaster has my light schedule dialled in with the sunrise and sunset setting
Make sure you follow my YouTube and Instagram accounts linked on my profile page.


Likes
44
Share


@The_garden_of_Vixen
Follow
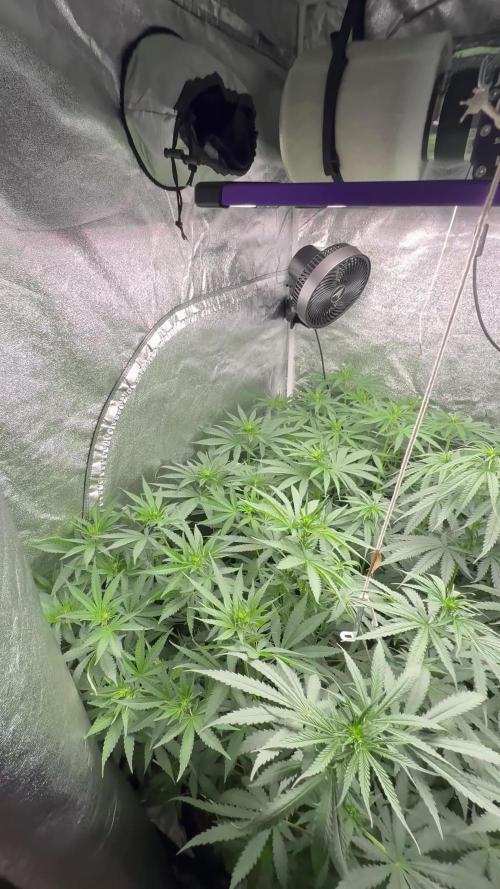
One step at the time! My plant got a new house. I love this tent! Also it keep the smell inside. Now it’s time to guess if it’s a boy or a girl! I bet for a girl 💖
Likes
69
Share


@nonick123
Follow
Día 9 (10/06) N/A
Día 10 (11/06) N/A
Día 11 (12/06) Llueve mucho. Humedad alta por aquí. Eso les favorece
Día 12 (13/06) Se empiezan a desarrollar las hojas verdaderas a una buena velocidad! Todo en marcha! 💨
Día 13 (14/06) Riego ligero 100 ml sólo H20 EC 0,5 en previsión del trasplante en el día 15 de la planta
Día 14 (15/06) Se nota que estamos en el día 14 desde germinación y la mayoría de las plántulas van viento en popa!
Día 15 (16/06) Hoy procedemos a trasplantar a las chicas a su maceta intermedia de 6,5 litros
Se prepara con 5,5 Litros (85%) de sustrato PRO-MIX HP BACILLUS+MYCORRHIZAE + 1 Litro de Insect Frass (15%) + 65 gramos de Earth Vibes Super Soil (10 g/L substrato)
Se llena la maceta de sustrato con las manos (limpias) y rompiendo los trozos más gruesos, para que el sustrato esté aireado y esponjoso, sin presionar
Se coloca una maceta vacía de 1L para que quede la forma perfecta de la maceta donde están las plántulas (ver fotos)
Se espolvorea la parte proporcional de la probeta de microorganismos sobre el agujero de trasplante
Se saca la plántula de su maceta actual (bonitas raíces 😍) y se coloca en la maceta final
Se riega muy lentamente hasta percolación profunda con H2O EC 0,5 pH 6,5
Se coloca mulch (acolchado) de paja para evitar traspiración excesiva y cuidar a los microorganismos del suelo
A ver como reacciona al trasplante!
💦Nutrients by Lurpe Solutions - www.lurpenaturalsolutions.com
🌱Substrate PRO-MIX HP BACILLUS + MYCORRHIZAE - www.pthorticulture.com/en/products/pro-mix-hp-biostimulant-plus-mycorrhizae
Likes
8
Share

@QualitySeeker
Follow
Week 8 day 2 of flowering.
Sha-boink and oreoz flushing is done and they have been drying 3days already
Both of the Grape balls of fires have been 4days in flushing. Ill give them one or couple days more :) they are frosty as hell and i cant say anything else but fuck yeah.


Likes
10
Share


@Kush_T_Big_Nugz
Follow
All looking good, was looking like there was gonna be a few mutants but they seem to have sorted themselves out. Topped most of them now at day 22, will start spreading them out a bit this week and start training them up

Likes
17
Share


@JonnyKush
Follow
hello growmies! day 51 finally the pre-flowers begin to appear. I apologize for the few photos but unfortunately they really filled the box and I find it difficult. overall I have to say they look in perfect shape! I will keep you updated thanks for passing by. like and comment! good day and beautiful growth to you 🌳🌱

Likes
20
Share


@apmcfly76
Follow
Surprised by the size and can’t wait for It wtf they growing big let’s go 💪
Likes
26
Share


@pifflestikkz
Follow
Day 17
17/07/24 Wednesday
De-chlorinated tap water pH 6 with calmag 5ml -5L.
Very humid week, noticed a green turning colour on top of soils where the humidity has been far to high.
I have installed door netting and recently left open all day and night now so they can condition over night in colder temps.
All are doing well, one overdose slightly behind and looking ABIT swifted. But she'll come around 💪💚
Day 19
19/07/24 Friday
Lite Feed today, 250ml each pot small run off.
Seeing excellent start to these babies. Let's get it 👌💚
Day 21
21/07/24 Sunday
De-chlorinated tap water pH 6 with calmag 5ml to 5L.
Watering in 1L each day from now.
Updated video


Likes
25
Share


@crystal_garden_0
Follow
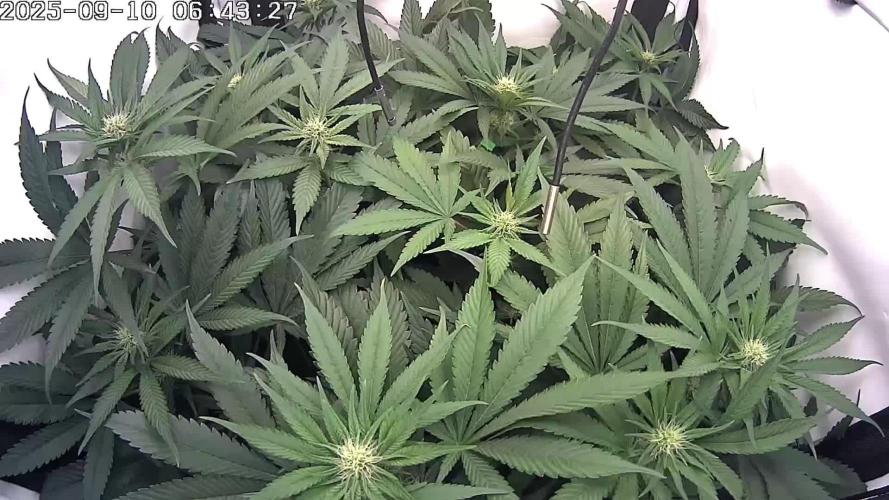
Great week. The ladies are healthy and happy. Thick and strong branches. Nothing to complain about at all. End of week 4. Should be nice ones if all goes well
Likes
Comments
Share


@GoodTimesOrganics
Follow
Jetzt lässt sich eine durchgängige Blütenentwicklung beobachten und die Grüße wird sich vermutlich nicht mehr Stark ändern. Allerdings bleibt die Blütenausbildung etwas hinter der Skywalker OG, was sich dann wohl in einer längeren Blütezeit zeigen wird.
Daher gehe ich davon aus, dass der Stretch allmählich abgeschlossen ist.
In der folgenden Woche bekommt die Pflanze nun einen Kompostee von Biotabs NL. 💚

Likes
8
Share


@Monkeyboy
Follow
OK so we are at day 57 and wer flowering. Looking nice and tall and green. Can't wait for the buds to come.
Not bad just tap water and watered down coffee grounds once a week.
https://home.howstuffworks.com/green-living/use-diluted-coffee-to-fertilize-plants.htm#:~:text=A%20weak%20solution%20of%20coffee,on%20the%20left%2C%20is%20perfect.&text=Don't%20just%20pour%20it,green%20growth%20and%20strong%20stems.

Likes
5
Share


@CannabisAprendiz
Follow
tercera semana de floración en la cual las flores ya empiezan a resinar y formando su estructura de la flor / third week of flowering in which the flowers already begin to resinate and forming their flower structure

Likes
7
Share


@Huckleberry39
Follow
I have 3 Strawberry 🍓 gorilla 🦍 in this run. I know there are going to be out off this world. I will have weekly updates for you every week if not more. Thank you so much @fast_buds for the awesome genetics!!!
Likes
5
Share

@AlpenZilla
Follow
🗓️ Week 8 complete – 4th week of flowering
A few days late with the update – been a busy week –
but Seriotica is doing just fine 🌱
I managed to bring the drain EC down from 2.4 to 1.8.
A couple of leaves showed minor signs of overfeeding,
but overall she handled it really well 👍
📏 Current height – Seriotica: 78 cm
Stretch is definitely over now – holding steady.
And the best part:
Frost is coming ❄️✨
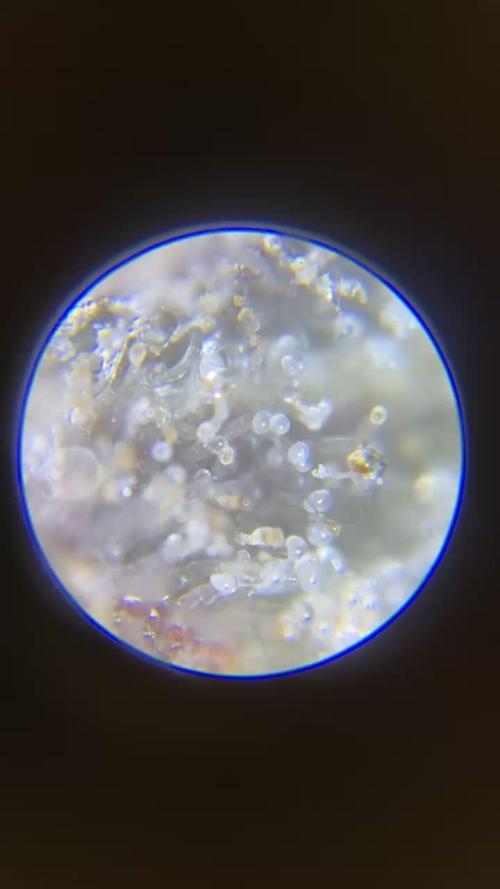
Seriotica is starting to develop a promising trichome layer already –
looking like she’s gearing up for a strong finish!
