
Likes
Comments
Share


@Hempy_The_Kid
Follow
08/10/22 watered with Recharge.
Welcome to motel 6
More ladybug porno. Now have yellow ladybugs
8/14/22 this plant is a magnet for ladybugs 🐞

Likes
8
Share


@STAYINGONMYMAINCBATORUNTWO
Follow
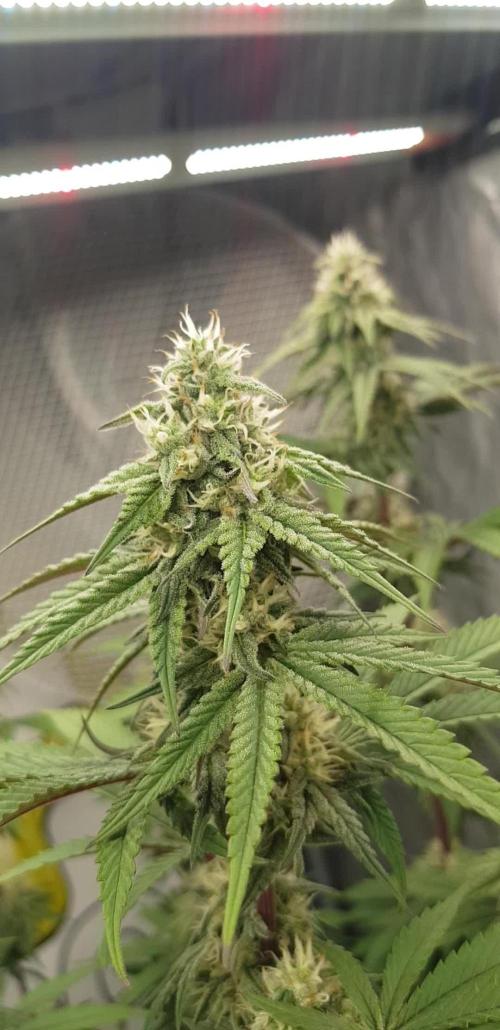
Was a bit worried in the first weeks of flower as the buds formed early but... i was left with the most densest of buds literally hard like arnie in his terminator days lol! I didn’t quite get the amount I expected but defiantly enough! Will defo grow again!
After time went on she developed so much frost literally like diamonds 💎
Resistance was very strong on this one too and drank so much more than the rest had to be smart with watering! I’m the end the result was as intended can’t wait for the next couple of weeks for the flavour to really come out but as of now really reminds me of skittles as you can taste the sweetness but also that cake 🍰 comes right through too and this is before a full cure. Happy growing buddies I say this one is a top one to grow!
Added a few photos since cure! These buds are dense and colorful and fruity! Tastes like it smells until you get a lovely bit of cake come through! Heaven!
High is full body literally one point I felt it in my feet rose to my chest!

Likes
30
Share


@deFharo
Follow
Bienvenidos cultivadores de marihuana clandestinos, y también, a los que tienen la fortuna de no serlo!🖐️👨🌾
Quinta semana de vida de esta semilla bastarda, nacida y ahora cultivada al calor del hogar.
Mucho vigor y crecimiento muestra esta planta, las ramas han perdido la simetría, espero que no sea un macho, estoy esperando a que su compañera de carpa de cultivo esté más fuerte para pasar ambas a floración, mientras tanto la vida sigue!
Hoy con inmensa tristeza digo adiós a Shane MacGowan que tan buenos momentos me regaló en los 80. RIP
Hasta la próxima...
SALUDOS A TODOS!!
================================
Semilla nacida de alguno de mis cultivos de la temporada pasada, sin padre conocido.
================================


Likes
6
Share


@Jrae420
Follow
All is well. Continue to defoliate. But I’m slacking lol. Will continue to defoliate


Likes
4
Share


@QixxGrows
Follow
I might switch the lights in the next days. Depending on her growth.
Day44: Added some water and moved the camera a little further away.
Day45: She felt lonely, so I got her a friend... Theobroma Cacao. New seedling that needs the warmth + humidity. Hopefully surviving winter.
Day46: I decided to take some zoomed in stills of her. To show off her beauty. The purpling of the branches really make this lady something special. In some of the shots it might look like her leaves are yellowing, but it's just the angle of the light. You can see on the photo that I took from the top, that all leaves are a healthy dark green. At least I now have proof that she's a lady. She's short and stubby, but I'm not really growing for amount. I just neeed 50g, after all (hehe)
Day47: She grew like a demon overnight. I'll check the height tomorrow.

Likes
14
Share

@GERGrowDesigns
Follow
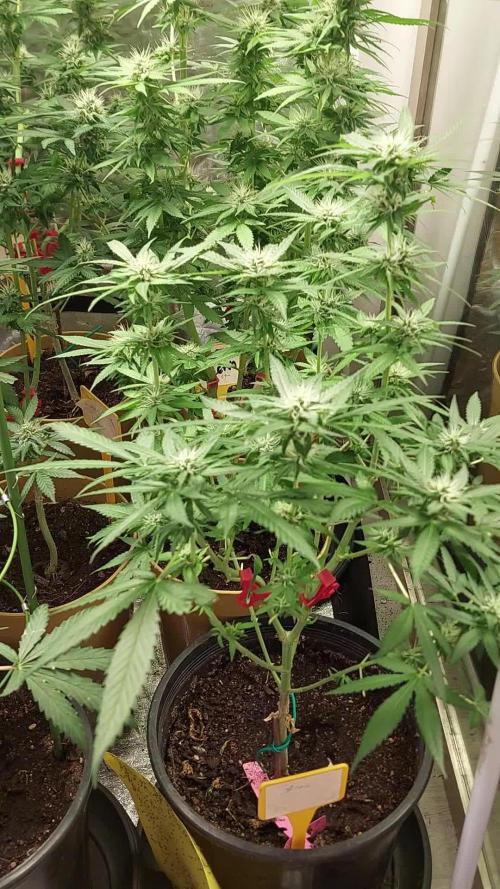
Welcome to Flower Week 5 of Sensi Seeds Purple Berry Muffinz
I'm excited to share my grow journey with you from my
Sensi Seeds Project . It's going to be an incredible ride, full of learning, growing, and connecting with fellow growers from all around the world!
For this Project , I’ve chosen the Feminized Photo Strain Purple Berry Muffinz:
Here’s what I’m working with:
• 🌱 Tent: 120x60x80
• 🧑🌾 Breeder Company: Sensi Seeds
• 💧Strain Info : 26%
• ⏳ Flowering Time: 6-7weeks
Likes
5
Share


@pzwags420
Follow
Cantaloupe haze needed a good flush brought runoff from 2000 ppm to 1100ppm will continue to monitor.


Likes
18
Share


@Pennuts
Follow
Harvest time has come. It was an excellent cycle without any problems, in fact the plants were doing great and produced some beautiful buds. Now I will dry for 2 weeks plus cure for 1 month.

Likes
36
Share


@BonkEyesCZ
Follow
Just first Plant harvested
5.10- second big sister harvested And two Lil Sisters too..Now theyr already drying in room ....next update in few days cause our weather Is not going to be so good ...
8.10 some of dried buds already cuted.. And puted to glass jars

Likes
14
Share

@Z420Organics
Follow
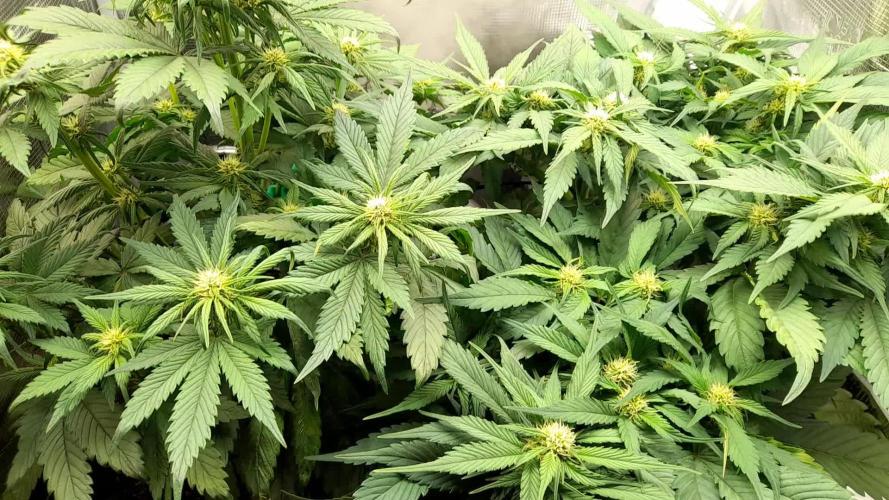
All the plants are absolutely covered in trichomes right now ❄️🌿 It’s getting exciting!
RS11 — One of the phenos seems to be a fast one ⏳🔥. The buds are already chunky and it really looks like it will finish earlier than the rest. Another RS11 shows classic sativa traits — small buds, spaced out, but wow… trichomes everywhere 😳✨
Monkey Grease — No drama, no stress. This one has been on autopilot from day one 🚀🙌. Looks like it will be one of the first to finish!
Cherry Dream — Recovery in progress and it’s showing 🌱💧. The buds are turning back to a healthy green and they’re swelling nicely now. Seems like that mini flush did the trick.
Amnesi-K Lemon — I’m pretty sure I’m going to love this strain 🍋💚. The buds are fattening beautifully and look super juicy.
Apple and Bananas — Especially one of the two plants is showing amazing structure and frost 🍎🍌✨.
Everything is moving strong and steady. If I had to guess which plants will finish first… it’s probably Monkey Grease and one of the RS11 phenos 🥇✂️🔥

Likes
13
Share


@420DeepGrow
Follow
Gracias al equipo de AnesiaSeeds y XpertNutrients sin ellos esto no sería posible.
💐🍁 Frozen Face Auto
Nueva variedad autofloreciente, tan refrescante como una mañana helada con un toque de cereza y lavanda. Esta variedad es una auténtica obra maestra de la cría, con un linaje dominante 70% Sativa que aporta una vibración edificante y energizante a tu cultivo. Perfecta para los que aprecian la belleza veloz de las semillas autofeminizadas y la mezcla única de dicha aromática.
Con un contenido de THC del 30%, Frozen Face Auto promete una experiencia tan estimulante como una zambullida en un lago fresco, dejándote fresco y vigorizado.
Ofrece rendimientos impresionantes de 550 g/m² en interior y hasta 300 g por planta en exterior. Con un ciclo de 70-75 días.
🚀🌻 Consigue aqui tus semillas:
🍣🍦🌴 Xpert Nutrients es una empresa especializada en la producción y comercialización de fertilizantes líquidos y tierras, que garantizan excelentes cosechas y un crecimiento activo para sus plantas durante todas las fases de cultivo.
Consigue aqui tus Nutrientes:
https://xpertnutrients.com/es/shop/
📆 Semana 10:
Parece que el tiempo va mejorando, los cogollos son grandes y siguen acumulando resina.
Engorde final y lavado de raices


Likes
42
Share


@Gabarram
Follow
Day 152 from seed ( 98 days since I changed photoperiod) and I'm harvesting after one week flush. A few buds seemed to have started decaying inexplicably, like burned, and had acquired a grayish- brownish coloration that I didn't like at all. I think she's caught a fungus.
Besides I also think spider mites have done they job well because I was amazed at the extent they had sucked the sap on almost every leaf of the plant, fan leaves mostly. They have weakened the plant so much that she may be int he process of a more terrible thing that could be fungi. Back to spider mites, it is indeed nasty to see the damage this pest has done so far, because I see they have chewed almost -if not all- leaves, and fortunately they hadn't started to form webs, which I abhore seeing. I had started to see adult spider mite forms into the very inside of buds, while I was inspecting the thricomes, so before this nasty pest would eat up my precious buds, or any other cause (mold, etc) I took the decision to flush and harvest her progressively.
First I'd harvest the most ripen buds or those that show signs of decaying and leave to the end the most immature (those that were far from lights, which are terminal and very big and dense though a but immature and bright green.
The plant looked overall ready and I preferred to harvest the most bud I could, as you may imagine, but I would have liked another week for flushing more thoroughly.
I've been flushing with tapwater and 2 mL/L Flawless Finish from Advanced Nutrients. In the next few days I'll be finishing her completely, drying won't take long and as for curing I think a couple of weeks.
The smell in the room is really heavy (in fact it has been heavy for the last month), it stinks oif citrus here.
Likes
Comments
Share

@ThreeLittleHerbs
Follow
As you can see both plants exploded over the last 7 days and they stretched a lot during their first week in Flower.😎 😎💪
Lemon Cherry (left) now finally starts growing well and looking very healthy now. Papaya (right) ist procucing all the small sidebrnaches with buds, that i hoped for. 😍
Processing
Likes
5
Share


@sercultiveta
Follow
35 dias de actividad en el indoor, foto periodo de 20 horas de luz y 4 de oscuridad


Likes
8
Share


@IndoorHealer
Follow
Its was great to finally grow my own weed , i felt really good and im so happy with the result , my best choice was to get a experienced guy to help me trought the way , it definitely saved me a lot of time and mistakes , thanks to @bengrowerbr instagram . Now i have two headbangers already flowering on my grow , those are not from any seedbank but they are looking great , i will give her a diarie as well , thanks for being here and lets get medicated!


Likes
21
Share


@MG2009
Follow
01/27/2021
Flowering going well
Flowering #2,#3,#6 #6 is a week ahead of#2,#3 will put others in on week 4 for a staggered harvesting
01/30/2022
watered with fungal tea and some aloe mixed in for amino acids and other goodness. Well see how she progresses in 4 days
Also working on some banana peel tea to give a boost of potassium if I do next week it should be available for week 6-7.
Ps.
Fuzzy Mellon (bag seed male)
I will pollinate one lucky branch on #6 as she is my favorite. But number 3(tall and lanky one) will get pollination of one branch as well.
I can't wait to see how they recombine with fuzzy melon smell mixed with burnt rubber and model glue and pine.
#2 no pollination (smaller one) #5 (bonsai) and #8 are males. So 3 female out of 8 seeds. Going to make some feminized seeds next time,so I'll have plenty of female's for a staggard harvest.