
Processing
Likes
Comments
Share


@Budcrack
Follow
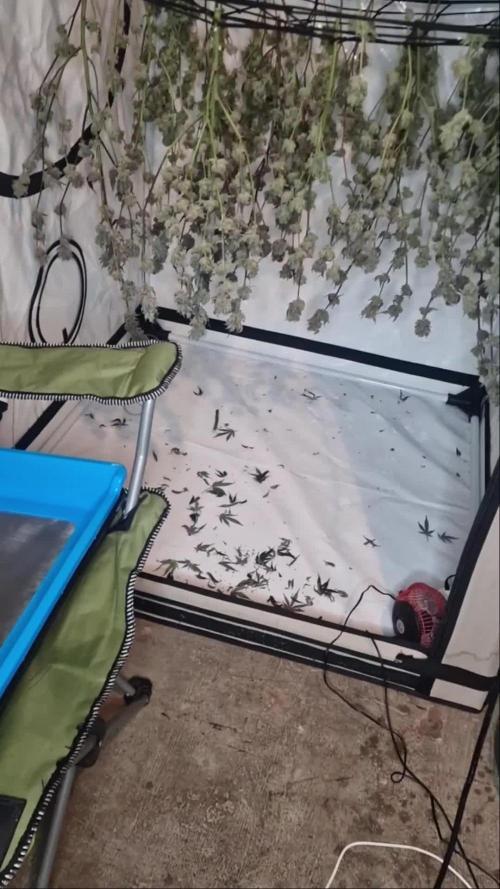
New update for week 12, concluding week 8 of flowering:
Hi(gh) Folks! Thanks everyone for your input on my second grow question. I’m going for HighTV’s answer, the SOG with 9x4 main buds. Very nice to get everyone’s input on this, appreciate it!
So another week done! They got their last nutrients Tuesday and on Thursday the 5 early ladies from Hempire got their first round of plain acidulated water. I flushed them a bit on Friday and Saturday to. Now they can dry out for a couple of days. I will flush them for the upcoming week and let them dry out before harvest next weekend. Im counting on them to swell up even further during this week.
As for the rest of the 4 plants from Hempire, 4 from Royal Queen Seeds and 3 from Hy-Seeds, I will treat them as if this is another week 8, and they will get another dose of Flowering nutrients and PK. Then next week I will start to flush them also. I will have 2 full weeks to flush and let them dry out until my planned harvest on Saturday 5 January. I’m not even sure that will be early enough for the 4 RQS’s since they look like they have even more bud-growing to do, before they can start swelling! I will keep an eye on that.
The 5 tall ladies, 2 from Hempire and 3 from Hy-Seeds show the nice thick Kushy buds i’m craving for, can’t wait to see the becoming nice and heavy! On the photos you see the slight diverence between the pheno’s, the left 2 plants grew the popcorn-buds on a stem, and the right ones have nice thick popcornbuds against the stem’s. The other to remaining Hempire plants also show these, apart from the early ladies offcourse. The early birds show a little stretching buds and nice purple colours.
So next week will see the early ladies harvested, I hope?
Look out for my next update and don’t forget to like!
Thanks and see you!


Likes
33
Share

@GrowBro1981
Follow
Runtz von Barney's Farm 😎 die unteren Buds sind bißchen fluffi, aber sonst Top Pflanze, etwas anspruchsvoller als die anderen.
Für mehr Bilder, Videos und Infos Facebook: " Green Room Anbau und Austausch" !!! Kommt und schaut, es lohnt sich🤗

Likes
24
Share


@Bawzs
Follow
A nice Harvest From a nice plant , she had some nutrients problems but she din't care .
Gave me a nice 40 Grams yield I'm just realy satisfied nice's looking and smelling plant i ever had!


Likes
22
Share


@m0use
Follow
***Sponsored Grow*** = Medic || https://medicgrow.com || Grow = ***Sponsored Grow***
Still have some issues with the feed and this pineapple dream, they are getting some burning in the sides on some of the larger fan leaves, I would say it could have been over feeding but the runoff is not that bad, and I would expect more burning on the other plants as well. Its smell has changed a bit as well, its not as fruity as it was earlier on or its diluted by all the other smells in the tent, might be a sign I am giving them to much water at a time as well. Still giving them a 2:1 or 2.5:1 grow vs bloom nutrient. Its helping with some of the pink stems from last week. Feeding strength is up .2 point to reach 900ppm or aorund 1.8EC will leave it here fro the remainder of Veg. Prob will do for 2 more weeks then flip to flower as I just topped them and want to give them some time to recover.
NPK ratio of 7-7-14 1:1 equal parts grow/bloom.
Grow=8-4-15
Bloom=6-10-14
Boost=1-15-30 "not yet used it yet"
Also took some clones from the plants as well, took two main cuttings from each plant, forgot to do the one so its not shown in the first video up the updated clone pics later in the week. If any of these impress me then the clones will go outside and grow there all year for a extra special harvest. Or I'll give them out to some friends and family maybe a little gorilla gardening project, but I will wait before getting ride of them all as I'm still kicking my self in the ass over the Blue Cindy loss. really liked that plant and wish its clones I gave out where still aorund.
Lights doing well. The V1 spectrum is good on the medic grow mini sun-2's 240w. No issues so far, dimmed at 80% till flower is initiated then up to 100%, Will test out 13/11 I think as the schedule to give them some more photons for an extra hour vs 12/12
.
Till next week.
***Sponsored Grow***
Official Website:
https://medicgrow.com/
+
https://www.kannabia.com/en
Facebook:
https://www.facebook.com/medicgrowled
+
https://www.facebook.com/kannabiaseed/
Twitter:
https://twitter.com/medicgrow
+
https://twitter.com/kannabiaseeds
Instagram:
https://www.instagram.com/medicgrow420/
+
https://www.instagram.com/kannabiaseedsint
YouTube:
https://www.youtube.com/channel/UCNmiY4F9z94u-8eGj7R1CSQ
+
https://www.youtube.com/c/KannabiaSeedCompany
Growdiaries:
https://growdiaries.com/grower/medicgrowled
https://growdiaries.com/grow-lights/medic-grow
+
https://growdiaries.com/grower/kannabia
https://growdiaries.com/seedbank/kannabia

Processing
Likes
24
Share


@rasta_puri
Follow
Finally did the last topping and achieved the shape i wanted so much! Can see the "H" on top, this gonna serve as base for the next following branches. quite symmetrical.
Likes
55
Share


@Max1973
Follow
Day 93 - Fattened up good, getting really heavy....posted pic of test bud.... vid of the led uv globe i got on ebay...
works awesome.... highly recommend...... 😎
maybe 1 more week.... they smell delicious, not very strong smell....
just normal water in bottom drip tray, dutch master one gold ....next week, flush em and next sunday pull em..... idk....
Day 95 - had a good look at both girls and worked out a harvest plan...... i've started flushing/watering on the smaller one,
and sunday (day 100) will be her last. i'll leave the larger one (she's still quiet white) for another week and re evaluate her fate next week.
Day 97 - 4 vids .... looks good 😎
getting a 1600x Camera Endoscope USB Digital Microscope from ebay, see if it will help with harvest........ 😎


Likes
3
Share

@CalGonJim
Follow
2/9 for 40 9 AM. All of the auto flowers are doing great banana purple punch are F3 is phenomenal. The smell is unlike anything I’ve had before. It’s very very nice just perfect so far.
2/10, 5:45 AM. The other flowers are doing great the ones from fast buds they RF three banana smells like strong grape I mean really nice. I’ve never had this before. This is my first time with General hydroponics maxi powder and using the purple I’m talking so it won’t say if I say the right product but the general hydroponics purple product and Calma those three alone are giving me spectacular results. Everything smells so clean and fresh. It’s gonna be nice.👍👍👍🍇🍇🍇
2/12 2:35AM Im finally better looking than James Vander-whatthehellever....HA! I am outliving people now!
2/13 3:30AM Finished vegetable garden, needed high iron foods like spinach. Using Amino Acids in soil as primer


Likes
12
Share


@420DeepGrow
Follow
Gracias al equipo de AnesiaSeeds, Marshydro, XpertNutrients y Trolmaster sin ellos esto no sería posible.
💐🍁 Coco Jambo:
Con una composición genética 60% Sativa y 40% Indica, Coco Jambo es tu billete dorado a un verano sin fin, ofreciéndote una escapada a un mundo donde el sol nunca se pone en tu felicidad.
Con unos niveles de THC que oscilan entre un relajante 30% y un estimulante 34%, Coco Jambo es un faro de euforia que guía a sus usuarios en un viaje a través de olas de serenidad y vibrante alegría. Su aroma es una celebración de los sentidos; imagina el momento de euforia al abrir un coco y descubrir que rebosa de las frutas tropicales más suculentas.
🌻🚀 Consigue aqui tus semillas:
https://anesiaseeds.com/es/product/coco-jambo/
💡TS-3000 + TS-1000: se usaran dos de las lámparas de la serie TS de Marshydro, para cubrir todas las necesidades de las plantas durante el ciclo de cultivo, uso las dos lámparas en floracion para llegar a toda la carpa de 1.50 x 1.50 x 1.80.
https://marshydro.eu/products/mars-hydro-ts-3000-led-grow-light/
🏠 : Marshydro 1.50 x 1.50 x 1.80, carpa 100% estanca con ventanas laterales para llegar a todos los lugares durante el grow
https://marshydro.eu/products/diy-150x150x200cm-grow-tent-kit
🌬️💨 Marshydro 6inch + filtro carbon para evitar olores indeseables.
https://marshydro.eu/products/ifresh-smart-6inch-filter-kits/
🍣🍦🌴 Xpert Nutrients es una empresa especializada en la producción y comercialización de fertilizantes líquidos y tierras, que garantizan excelentes cosechas y un crecimiento activo para sus plantas durante todas las fases de cultivo.
Consigue aqui tus Nutrientes:
https://xpertnutrients.com/es/shop/
💻 Trolmaster Tent-X TCS-1 como controlador de luz, optimiza tu cultivo con la última tecnología del mercado, desde donde puedes controlar todos los parametros.
https://www.trolmaster.com/Products/Details/TCS-1
📆 Semana 3:
Muy buena semana, he aplicado un riego solamente con agua de manantial para reducir la cantidad de sales acumuladas en el sustrato y se ha notado una mejoria .
Creo que le quedan unas dos semanas por estirar, parece que va a ser una buena cosecha.
Se mantiene un buen control del cuarto de cultivo gracias a @marshydro y @trolmaster.
Mantengo las dosis de 1/3 de nutrientes recomendados por el fabricante.
Potencia del foco 80%

Likes
17
Share


@Leonardo_DaGrower
Follow
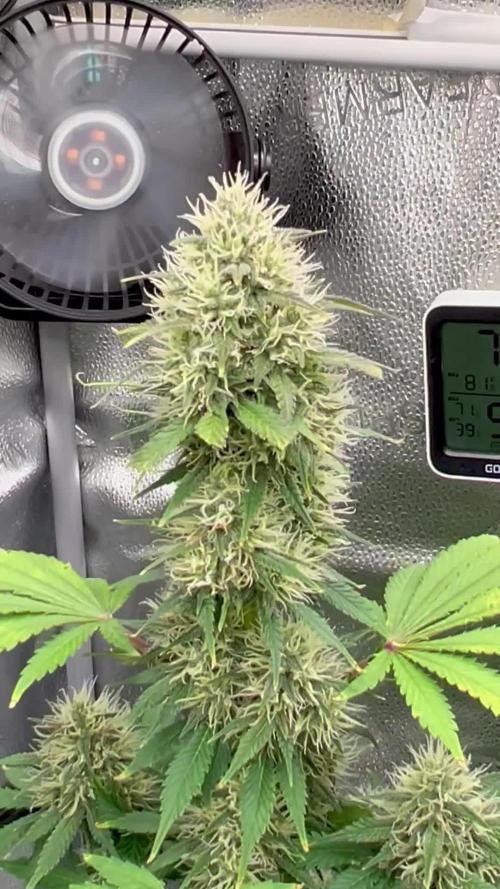
This weeks nutrients were identical to last minus the CalMag. The smaller of the two plants continued to stretch until the end of week three of flower. The larger plant already started to bulk. Trichome development is ramping up.

Likes
55
Share

@Max1973
Follow
Day 57 - The girls are bursting with flower....... looked abit light (the main tops looked a light green, showed signs of nutrient deficiencies), so upped the Dutch Master Gold One Flower, it's 1000 ppm now.... thinking about Defoliation... outside temperatures are middle of winter, 0oC to 20oC (32oF to 70oF) .... but typical high low is 5-15oC (40-60oF)......... surprisingly the LED's warm the tent upto 20-24oC,
this is important point.... i am running the lights, 6 pm to 6 am... 12hrs lights on all night, and all day is night mode...... during the day is the highest temps of the day... and during the lowest temps, they have the light heat .......
Day 61 - I trimmed em .... this was the third defoliation..... things are starting to get sticky..... ah i'm just going to wing it.... they are 2 months (8 wks) from seed.... idk what i'm doing.......
i did some serious stress bending today, and had to put afew tie downs in..... my theory is to hurt em as much as i can without killin em....
to make em harder, stronger, faster, more stressed, so they can survive anything..... grow em stronger......
the smell is zero in the home, but once i got them out for their 2 week haircut, they started producing some strong wet kisses, that were sticky and wet.... the
aroma of heavenly ladies was abundant...... 😎😎
idk... this tastes so good.... it's like some kind of weird berry combo goodness.... i'm vaping vanilla custard atm and this is so good with vanilla custard.... vanilla custard kush n cookies... haha
watch the video......... 😎


Processing
Likes
4
Share


@Thechefgrower
Follow
It's very hot today, It's clover must be covered not microbes die by sunlight.

Likes
13
Share


@SgtDoofy
Follow
March 18
Sherbet has the tent to themselves now. I've flipped to a 12/12 flowering light schedule for Sherbet. You're supposed to imagine what the current plant looks like doubled in size, and flip to flowering according to what you think your tent could handle. The other tent is larger than this one, but it's in a much colder room, so having 12 hours without the heat from the lights could have been harsh for the plant. This room can hover around 50-60F on cold nights, so Sherbet will just stay in this tent to grow.
Temps have lowered 5+ degrees by removing the other plant and it's light.
Processing
Likes
21
Share


@Siriuz
Follow
Had some busy weeks before but we finally back to add more content

Likes
11
Share


@tangie
Follow
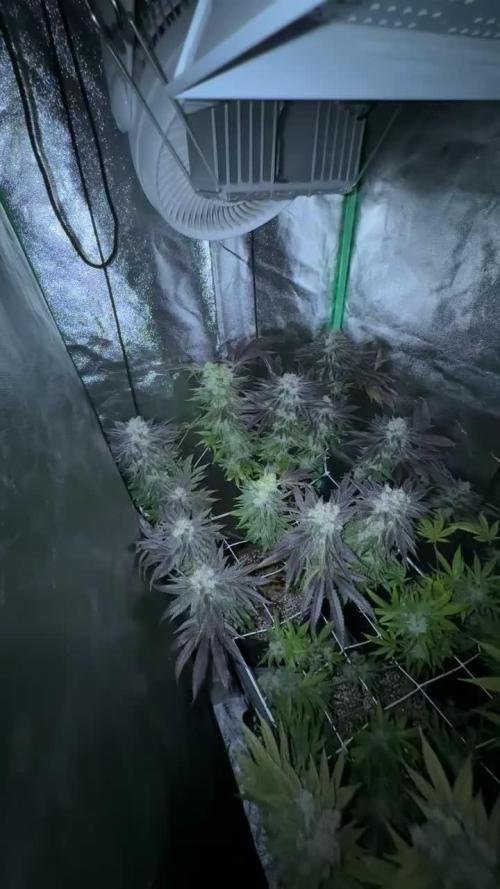
Chopped her two days into week 14.
What else. Buds. There are a lot of them. And they are quite large. And they look like they will require little effort to trim.
What more can I wish for? I am a very happy man.
Upd 1: Trimming is SO SIMPLE! Not much sticking out to begin with, because of the amazing bud structure and me plucking most bud node fans. Solid nugs which are not bothered by anything, so pulling smaller sub-bud fans is very simple too, while the buds are what I would call moist. I'll call this Moist Trim 😄
✂️✂️✂️ Went for the best trimming tools available on the market (well at least my research concluded so) and LOVING every minute of trimming with the B-500SRF. Why would I or anyone else use something less suitable or less comfortable for such a delicate and long job is beyond me, except if you cannot afford one right now, in which case I wish you to experience it one day.
Fiskars are also very good in therms of the blades, coating and cutting ability and precision, but the spring is just too stiff, like way, way to stiff for something that is to be used for hours on end. One might argue that such spring force helps overcome resin buildup, but please just rinse your instrument regularly in an appropriate solvent (ethy, iso, whatever — consider you instrument materials as well) and wipe it after. Why would you let significant amounts of resin to accumulate on such a gentle and precise tool? Kinda defeats the purpose?


Likes
55
Share


@w33dhawk
Follow
26.04.21 so Woche nummer 6 hat begonnen und ich habe heute an gelato #1 und #2 ein paar Blätter entfernt und die Pflanze gelato #1 ein wenig auseinander gespreitzt so das die buds ein wenig mehr Luft bekommen morgen nehm ich mir dann die anderen beiden vor, ein paar Blätter weg für mehr Luft Ach ja und unterm netzt hab ich heute noch die vergilbten und vertrocknet Blätter entfernt war auch ne gute hand voll aber is ja eh nur unnötiger Ballast für die pflänzchen und zum Geruch kann ich nur sagen der limoncello Duft der anfangs da war ist nicht mehr so kräftig dafür erinnert mich der Geruch an eine berühmte eismarke Ben &...... Und zwar 1 zu 1 cookies&cream 😂😂😂 was mich natürlich heute dazu animierte gleich nen becher zu kaufen.....
27.04.21 hab es heute zeitlich leider nicht geschafft gelato 41 #3 und #4 leicht zu entblättern und ein wenig auseinander zu ziehen um den buds Luft zu machen, hab das jetzt auf morgen verlegt, dafür ist mir aber aufgefallen das gelato 41 #2 anfängt ihre stigmas zu Karamell Farbe zu wechseln😵😵😵😵 Sie ist viel früher dran als die anderen und ich habe nur mein anbau Zelt zum trocknen ich hoffe das die anderen auch langsam hinter her ziehen das sie alle zeitgleich fertig werden sonnst is die eine sicherlich drüber übern Zeitplan beim Schnitt und mehr amber als die anderen von den trichomen her naja muss ich wohl durch.....
28.04.21 so heute hab ich es geschafft gelato 41 #3 & #4 ein wenig von blättern zu befreien damit auch die buds mehr Luft haben war auch ca 1 1/2 Hände voll Blatt Werk bin soweit zufrieden fürs erste....
29.04.21 heute war nix los im Zelt hab den Pflanzen beim wachsen zu geschaut und mal die ganzen buds begutachtet ob irgendwas an Krankheiten oder schimmel anwesend ist aber war nix da läuft würde ich sagen die ganze arbeit zählt sich aus denke ich mal Ach ja und unter den Töpfen im video das ist mein buddy sein name ist barney und er wollte auch mal hallo sagen normaler weise darf er nicht ins Zelt aber heute war ich nicht aufmerksam genug sonnst sitzt er immer ganz brav mit seiner Freundin vor dem Zelt wenn es auf ist und begutachtet alles von aussen obwohl die beiden manchmal eher so wirken als würden sie gucken das ich ja nix verkehrt mache....
30.04.21 heute stand nix an, hab das Gras schon fast wachsen gehört so gut finde ich den Fortschritt. Die Rechte Seite meines Zeltes sind die buds eher kürzer dafür aber mächtig fett und die linke Seite naja die ist eher länglich aber auch fett vom Umfang her nur länger, dafür is die rechte seite mehr kompakt und die linke Seite baut grad erst die dichte auf is aber auch schon gut fest....
01.05.21 heute war mal wieder giessen dran 4,5 L für alle 4 Ladys wollte heute eigendlich noch mal von unter dem netz an die Blätter ran und ein paar entfernen hab es aber mal wieder nicht gepackt zeitlich werd ich also morgen machen.....
02.05.21 hab es heute Geschafft wieder ein paar Blätter zu entfernen dabei sind mir diese hässlichen goldfarbenen Blätter aufgefallen heut morgen war es noch ganz wenig und 12 Std später is fast alles an dem einem bud befallen werde morgen die Ladys mal durch spülen mit Ph 6,5 und schauen was passiert. Hab extra drauf geachtet heute Temperatur im Zelt war heute genau 24, 8 in der Nähe des buds bemessen rh liegt tagsüber bei 47% nachts bei 57% und die Nacht Temperatur liegt bei 16,9.....

Likes
23
Share


@adam_pawloski87
Follow
This week has been great ,today is day 78 and the girls are just doin their thang , 1 looks ready for flush already and the rest look about another longer then flush for them aswell,, can’t wait to see how these girls finish out over the next couple of weeks 😍!! Y’all keep them eyes peeled an stay tuned for next week! Peace love an positive vibes to y’all Cheers.💨💨💨