
Likes
Comments
Share


Likes
14
Share


@GoldenWeedGrower
Follow
D29/V25 - 29/04/23 - Benting
D30/V26 - 30/04/23 - EC 0.9 pH 6.5
D31/V27 - 01/05/23 - LST and Benting
D32/V28 - 02/05/23 - Some other LST
D33/V29 - 03/05/23 - Added water and nutes - EC=0,9 pH=6,5
D34/V30 - 04/05/23 - LST
D35/V31 - 05/05/23 - Nothing

Likes
17
Share

@DapperDabber
Follow
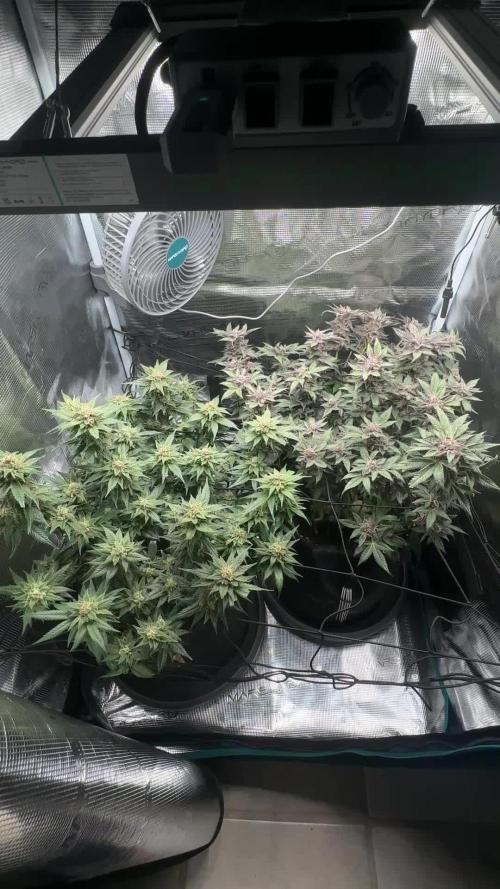
The second week of flowering and they're absolutely still stretching, hopefully it comes to a stop before the tops reach a 55 DLI level - height 😅
They've been so thirsty and blooming wonderfully!
Even the two pots with my pollen chucking Do-Si-Do/Blue Blizzard cross have been doing well 😎
Even though they haven't been top dressed or had direct light in a month! It's almost as if they grow like weeds 😆
It's been a pretty easy time so far, I think I might even be done tucking branches as I've got a canopy that's even enough for me.
Thanks for the read and take care!
Likes
1
Share


@Bwright_315
Follow
This week on a tale of two plants
Plant A she is going very well. She is very sticky and tricone starting to turn milky have no issue with her and she smell amazing
Plant b is feeding like crazy I water her at least 4 time a week I think that why she was delay maybe so I been making sure to keep on top of that her smell and getting stronger and she is getting thicker with tricones starting to produce

Likes
16
Share


@TerpTurtle
Follow
Okay, well imma be here for awhile longer than I did expect to. I was out of town, getting lost till I was rescued.. Now I'm in the clouds, come down when I run out of jet fuel
I will never run out of jet fuel
🐢⛽️🚀


Likes
34
Share


@MrJoint
Follow
✌️🎃 Thank you for checking my cultivation.
🌺 They seem to have liked defoliation.

Likes
5
Share


@Qatan26
Follow
Started removing leaves that were dying. Had to tie one plant down she grew bigger then expected and was getting to close to the light

Likes
16
Share

@H0BBYGAERTNER
Follow
#WEEK21 - HODL
Bad news. It's not time yet. still. i think. 😔
And scratch that, i am not harvesting early because of some theoretical schedule / information on the internet. But.. WHAT WOULD YOU DO? 😱
Well, trichomes haven't changed a bit again, at least to my perception. Only the top most buds of SMC show a few amber ones, although the plant feels a bit "crunchy" and matured now. Therefore a lot of the lower buds grew fresh calyxes, and a few upper ones, too. Someone was right around here, probably should have removed a few more of the lower buds after stretch.
But there's also a good cop: i found out my phone can take rather decent macro shots (though resizing of growdiaries doesnt seem to work well, will put a bit more effort in in the upcoming entry). It's on the edge even to check the color of trichomes. And holy moly, SMC is so photogenic, like big "ooof" 😍. Lively colors all around, frost like a tree on christmas (can you please tell me what to do, when leaves are 100% covered in trichomes, shouldnt be this A+ material was well?). Skywalker on the other hand is the "shy one", however i am sure is going to shine soon. Also very lovely coloration on top buds.
And the smell starts to mature as well: Skywalker super fresh lemony, SMC sweet-fruitiness with a touch of coolness - tempting!
Forgot CalMag this week. Shouldnt matter at all that close to the end. In fact the tips of some leaves started to turn a bit rusty.
Cant believe it has been 10/11 weeks of flowering so far, going to need a break after this run for sure. 😜


Likes
8
Share


@Zucca
Follow
Flowering stage looks quite promising. The plants drink lot more than veg stage and they grew a lot
Likes
26
Share


Likes
38
Share


@Wicked_Stix
Follow
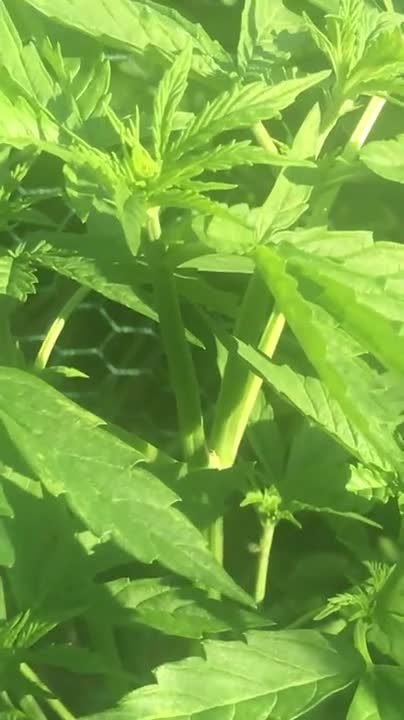
We are at day 21 on this gorilla cookies. I think she would be quite a bit bigger if I didn't break one of the mains on week 2 but she is still chugging along and growing well. I upped the maxigro to .5 tsp per gallon and started them on a little armor si so they can build some strong branches. Still running them on 24 hour light and 24 hour irrigation. They are going to stay under the blurple lights for a few more weeks until I can get them in the big room under the quantum boards. I'm hoping they will flower around 4 weeks but my autos seem to enjoy staying in veg so we will see what happens.
Likes
5
Share

@JVKdopegrow
Follow
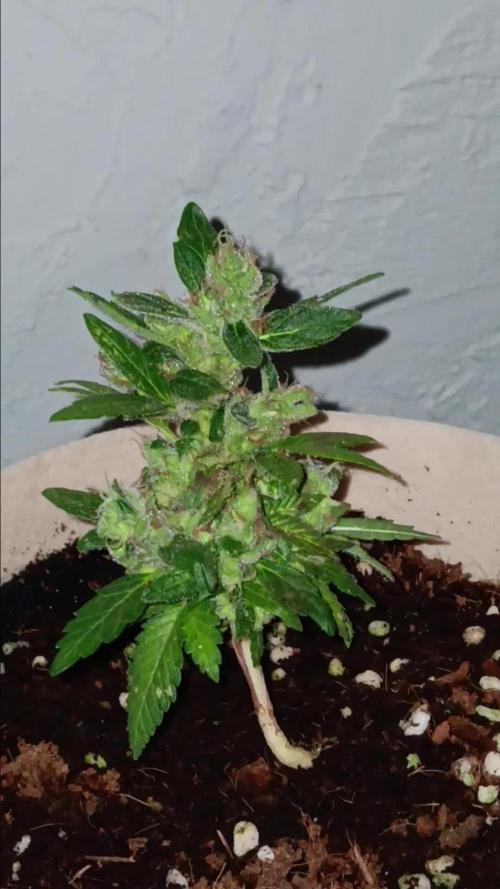
For a couple of runts I think I'll end up with a couple of blunts! Tight little buds. Lots of resin and great scent. I kind if wish I could just keep them going but they are nearing the end.


Likes
9
Share


@Luv2Grow
Follow
Day 50 - Starting week 8 today and she doesn’t look any worse thank yesterday with the lime green leaves so hopefully feeding her nutes hopefully helped her but we’ll see in the next couple days.
Day 51 - No significant lightning of the leaves today so I think I got her enough nutes in time so hopefully she’s got enough in the soil to now to push that bud development. She’s definitely a really dark purple and it looks pretty amazing in person, the pictures do no justice.
Day 52 - Looking really dark purple now and love the colors. She’s starting to put out a slight citrusy smell as well. Her leaves haven’t really lightened up anymore so I think she’s gonna be ok till the end.
Day 53 - She’s chugging along nicely and looking gorgeous. Tested the soil and still a bit damp so will wait a couple more days before giving her some water.
Day 54 - Things look great now with this girl. She’s starting to dry out and bit so will give her some fresh water and some cal-mag tomorrow. She’s really darkening up and looks gorgeous.
Day 55 - Gave her almost a full gallon of water tonight, she seemed pretty thirsty. I’ve been wanting to upgrade my lights and saw nothing but good reviews on the AGLEX 1200W COB LED and was a decent price so I ordered it today and should be here tomorrow. Really want to see if it helps keep the tent cooler than running 2 cheapo 1000W LED’s. I’m sure it can’t be any worse so can’t wait to get her hooked up tomorrow and see what she does for the rest of this grow.
Day 56 - It’s the end of week 8 and all is looking good. I got the new AGLEX COB LED hooked up so really looking forward to seeing if this light will help in the grow. She’s already looking good but hoping this light will push her over the edge. She doesn’t need any water or nutes today and will probably give her the next feeding of nutes sometime this weekend.


Likes
3
Share


@mquintero7
Follow
Very big plant, growing very well, nothing negative to report. Responding well to training.
Responding well to fertilization too.

Likes
20
Share


@TUMBLEWEEDMAN
Follow
All the plants are in various stages of flowering so it is starting to smell very interesting in the closet. The soil is becoming hydrophobic which makes watering an even more laborious task than it already is. I suspect the rewards will be well worth it though.
Likes
15
Share


@Uwish
Follow
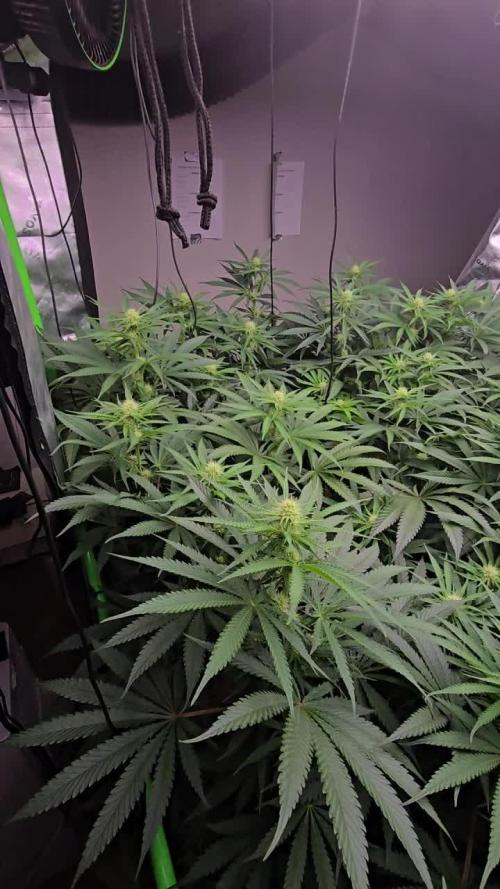
we continue the run with the slowing down of the stretch and the beginning of the beautiful flowers.
This week my EC indicated me some things...
It was at 1.8 and went up to 1.9, so I added water to lower the ec to 1.6.
When my ec goes back up it tells me that I have enough nutrients in my solution.
Now, the ph is back to 1.7, I will add more water to bring it down to 1.5.
We can observe on some leaf tips a beginning of over-fattening, this is what I'm talking about above, I'll let you know next week if I lower the ec or if I keep 1.5.
I did one last defoliation and it was needed!
If you look at my vitals, it's not crazy, 70% humidity at this time of the year can become problematic, so I'm going to take the dehumidifier out and set myself at 55%.
