


Likes
69
Share


@GMSgrows
Follow
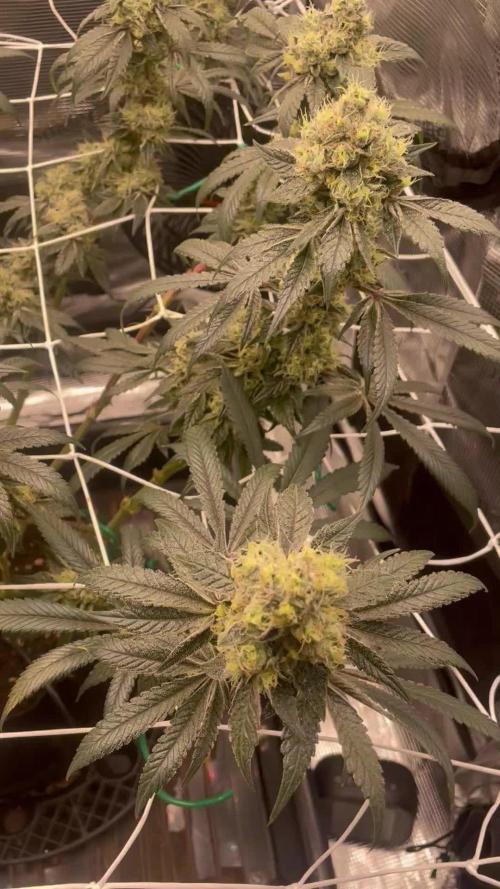
The Breakup Cake is into stack mode. The flowers are forming rapidly with real nice spacing. Going to be some big buds forming on this lady.
The ladies got their first feed of Massive Bloom Formulation with their floranova bloom and some Floranova grow. Mixture was 400 ppm 0.8 ec of Massive Bloom Formulation 400 ppm 0.8 ec of Floranova bloom and 400 ppm 0.8 ec of Floranova grow . Total of 1200 ppm of feed.
Thanks to all my friends that stop by with kind words and thanks to Kannabia for some great seeds. They need a cooler logo. Their packaging of their seeds rock though and so do their people. Look forward to more of their strains, but Ganja Farmer and Premium Cultivars will be next. First seeds sent, first seeds served

Likes
8
Share


Likes
207
Share


@PEAKYPLANTERS
Follow
Hi guys, how's it going?
We are out of strength but we want to continue our efforts on the platform
My God! If we continue at this rate....I think next year I will eliminate all types of soil from the list 😄😄😄
We're having so much fun with this tree😎👩🏼🌾

Likes
371
Share


@love_2_grow
Follow
D71.
Week five of flower and the girls are simply doing their thing.
I scouted the plants today and found thrips on the second girl. I was hoping the lacewings would have gotten them all by now, but no such luck. I'll give them a week before ordering another batch.
For some reason, the thrips avoid the first girl. Visually, there's also a clear difference between the two girls, with the first girl being darker and having more buds.
------------------------------
D73.
I brewed a short (6 hours) compost tea today consisting of worm castings, kelp meal, neem meal, humic and fulvic acid, rock dust, biochar, and molasses. After the brew, I added homemade Bokashi juice, which lowered the pH of the tea to 6.6. Each girl got 2.5 liters of tea (5% of pot volume.)
I also did another light round of defoliation, down low on the plants.
------------------------------
D75.
Each girl got 2.5 liters of water @ pH 6.5, with 5 ml of FFJ.
The plants stretched SO MUCH after flipping them into flower that it's challenging for the light to penetrate the canopy, and it's pretty dark further down. I bought some LED grow light strips and installed them in the tent to provide additional side lighting. It's only 36 W of extra lighting, but I hope it will help to develop the numerous buds down low.
I put the lights on the left side of the tent, around the first girl, since she has a lot more buds, but now that it looks like the concept works, I might get another set of lights for the right side of the tent.
------------------------------
D77.
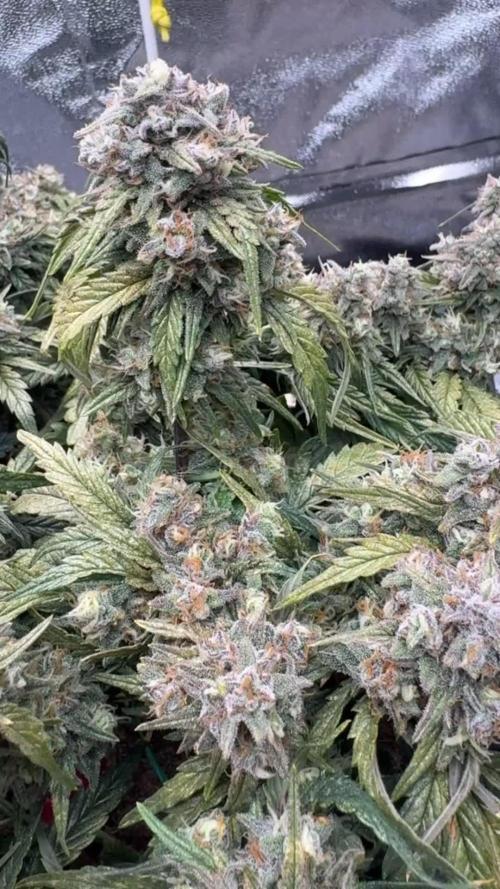
We've reached the end of the fifth week of flower, and all is well in the tent. Ahem, almost all since I still have the thrips to contend with, BUT I just put a bunch of Cucumeris predatory mites in the tent, so the war rages on.
A friend suggested adding white cloth below the plants to reflect more light toward the lower buds. Sounds plausible, but I didn't have any fabric, so I went all ghetto by simply putting strips of kitchen paper on top of the scrog net. Not the most fantastic reflector material ever, but it's what I had at hand. Plus, it's easy to work with and costs next to nothing.
I doubt it will make a big difference, but even a slight increase is still an increase, and I could see a visible difference in the amount of light hitting the lower canopy.
Finally, each plant got 2.5 liters of water @ pH 6.3, with FFJ and Bokashi Juice.
------------------------------

Likes
12
Share


@eldruida_lamota
Follow
esta Emana cambiaremos el foco a 12horas, y dentro de nada entraremos en l ase de floración .
Estiraron muy bien esta semana se notó mucho el trasplante esta semana.

Likes
16
Share


@Plantinator
Follow
Not sure about the pin down technique, although I will carry on until flowering. It definitely requires more practice.
Seems like the plant is willing to live, and the thing is I have only 3 months until my holiday, so there is no time to start over with an another grow.
The genetics in this one isn't the best in my opinion, one stem grows really odd leaves. I will wait a bit more and if the strange shaped leaves are keeping growing, then I will have to cut off that branch.


Likes
6
Share

@CadillacGreen_420
Follow
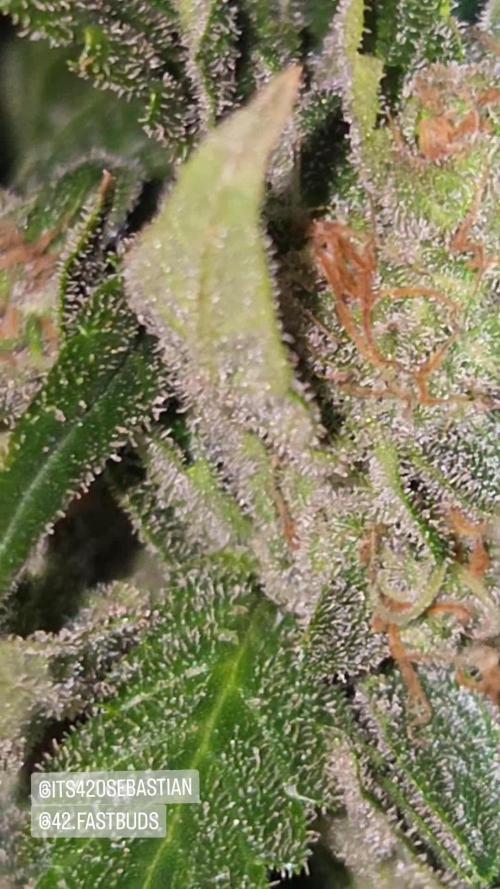
Balsamic and fruity aromas flood the air every time I open the tent. Nectar flows bright across the flower surfaces like sticky sugar glaze.
This time I will try to resist — I want those caramel-colored heads! 🍭🤤
Likes
62
Share


@HinduGod
Follow
WOW LOOK AT DAT!!!! DA PLANT IS NEAR DA END!!! I MADE AN ORANGE PEEL TEA WITH WORM CASTINGS TO GIVE IT A LITTLE BOOST!!!! DAT PLANT IS USING ITS RESERVES IN DA LARGER FAN LEAVES DAT IS VERY VERY GOOD!!!! SUN GOD AND RAIN GOD HAVE BEEN WORKING VERY VERY GOOD TOGETHER!!!! HARVEST IS VERY VERY SOON!!!!!😎
PLEASE COME AGAIN!!!!!
Likes
29
Share


@Omisan
Follow
i'm really lucky to be a grower, when cannabis came in my life, i can't expect that much love!
Ladies are growin' up fat and shine, despite the hot summer here 😋
2 different growbox and 2 different light for those sisters, but i'm shure that harvest will be gold!
that's the way, just a few veg days more and one box is not enough 😄
Be care of yourself!
Omisan 🙏

Likes
Comments
Share


@zombikush81
Follow
I start by saying that the genetics of this fantastic and super plant, the only exemplary because I was given after ordering, the first time I cultivated this variety .. I never had any problem from germination at the end of harvest, made grow for 6 weeks approximately with light hours 18/6, then kept in bloom for 10 weeks ...... and from about 10 days to dry with temperatures between 19/20 degrees, and humidity rate to 50% between today and tomorrow I'll make a nice manicure.


Likes
7
Share


@Athos_GD
Follow
D8 Top right plant is getting some heat stress from the heat lamp. Will try not using the heat and see how low temps get at lights out. Watering once a day. Still haven’t set up my irrigation. PPFD 400. VPD could be better.
D9 Lights off temp got down to 66. Plants seem happy still.
D10 turned heat lamp back on and adjusted heat temp. Getting really cold.
D11 Watering once a day by hand. Still waiting on Athena nutrients before I set up hydro halos. Increased PPFD to 500.
D12 pistils starting to show.
D13 EC 1.8 PH 5.8
D14 I can’t believe how much these plants have grown since the last defoliation. Tent is getting crowded. Thought about getting rid of the plant with the twisted stem. (Bottom Right)

Likes
3
Share


@Paul_on
Follow
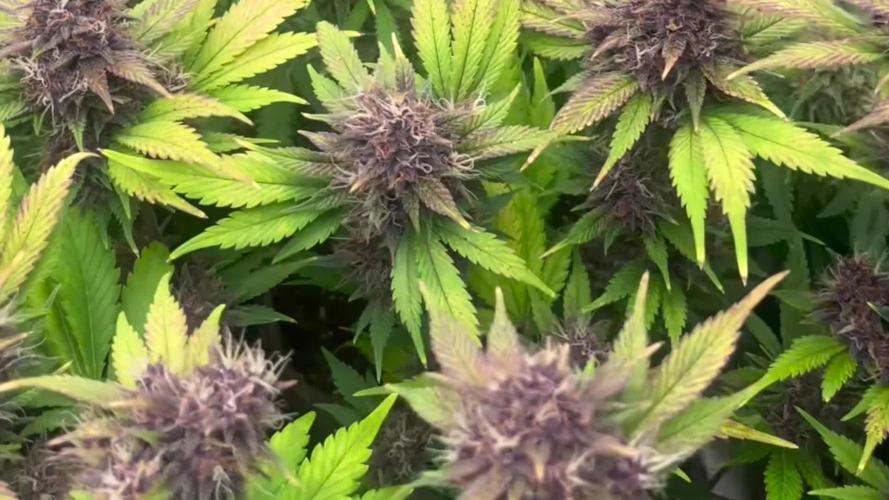
Terps on this cultivar are banging ,colours starting to show now some purples and pink plus yellow n green and she still has 3 wks to go , I've added a second Migro Aray 3 ,to try get fatter buds ,hope it works 💪, happy growing Growmies


Likes
3
Share

Likes
34
Share


@rhodes68
Follow
11/22 Day 15 and a new week begins!
Upped the nuets to 7ml/gal each of cocotek AB at 6.0-ish giving TDS of 510 after adjustment for water.
Forgot how tight these plants can be, raised lights 2" to increase inter-node a bit
Up feed to 700ppm adding 1ml ctab
11/25 Transplant into five gal pots
Feed 800ppm 10ml CT A&B 10 ml Kangaroots 5.9PH
11/26 First bend on Annie - Belle will do tomorrow.
They seem to be taking less than two cups feed in those pots to produce enough runoff.
No sign of any deficiencies as yet, liking the CocoTek so far.
11/27 Both trained life seems good :)
11/28 End of week and they look healthy
Continuing training and leaving nuets as is until I get a water filter to drop the TDS on the tap water. Needs to drop about 100ppm before I can add more
Likes
8
Share


@GermanGrower416
Follow
70 gramms trimmed buds.
I think we would have achieved 1 gram per watt if the third plant hadn't been hermaphroditic/ a male.