


Likes
18
Share

@Bncgrower
Follow
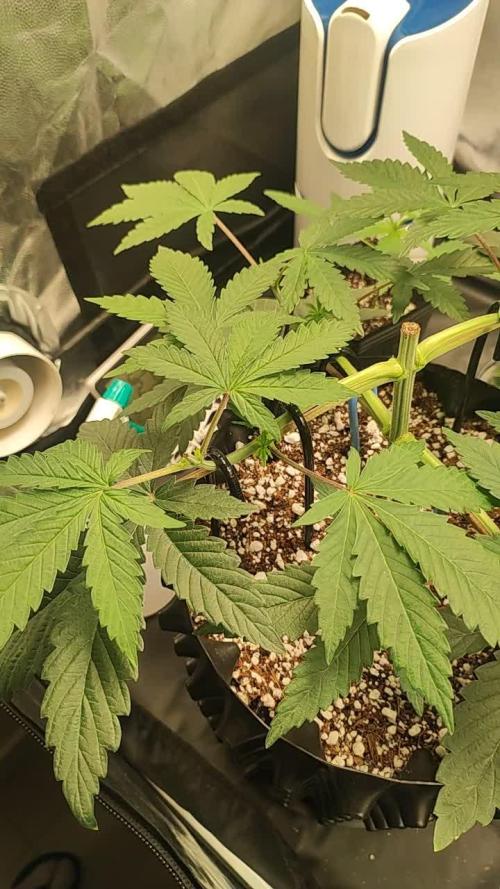
One more week passed, this girl have a very good structure and, i decide to make some clones because i was cutting the low brunches and it will go to trash, so i think is best i take some clones and stay with a plant principal and one or two with me and the others i will give to a friend who is having problems with ur first grow..
Happy growing 4 all 💪🌱🌱✌️

Likes
20
Share


@CzAlmighty
Follow
Zdravím vás ,
Tak konečně první týden květu. Když se podíváte na video který tu mám jsou to ty přední tři kytky. Super rust. Jsem zvědaví jak tohle cele dopadne. Cena semínek =kvalita. Je opravdu znát. O proti black Dog například.
Teď nehnojim vůbec. Počkám si až začne dělat květy. A rovnou prehodim i hnojiva. 😎

Likes
1
Share

@hassehujasse
Follow
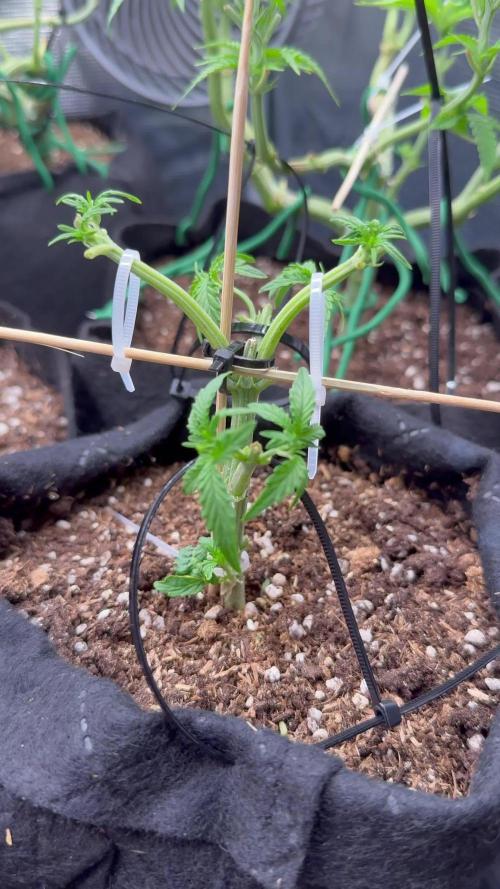
@Barneys Runtz auto 2 topped Twice.
Second topping after first node on second and third colas
20 days from seeding
Awaiting transplantation and cloning)
Likes
16
Share


@BluHaze007
Follow
Soo far I flushed twice. Run off water ppm is 290-319-328 I noticed on all three girlz, the trichomes are milky/cloudy with very little amber on the leaves. I'm waiting for more amber. Hopefully by tuesday when the soil id totally dry more amber will a appear. I purchased another 3x3 tent because I know for sure my 2x2 tent will not be enough holding room. Funny thing, I trimmed the baby buds at the bottom that wasn't going to grow much. I placed it on the side in the tent for two days and decided to roll them up and smoke it. Surprisingly, I did get a high but the tatse was a little strong.


Likes
9
Share


@DoctorCannas
Follow
Hello friends of growdiaries.
As you can see, the jungle is very difficult to manage.
Some tops of plants exceed the lamp, and also bending to extreme levels.
In two weeks and half maximum I will start the harvest, the tops bloom that a wonder.
I must admit that Apart from the lack of time I underestimated the power of nutrients.
See you soon

Likes
28
Share


@Theia
Follow
This may be the last week for the widow. She is huge..The last week saw her swell and eat most of the leaf on the buds. This week I am feeding her water only. She was flushed through with 2L of water at 6.5 with around 600ml run of which came through at PH 6.53. I will check her trichomes over the weekend once she has drunk some of the water she had. Not much else to say. She is a tough old bastard and she has made me want to test some other white widow genetics. Any recommendations please say.
Happy grows🌿🌱.
Stay safe😷😷😷

Likes
Comments
Share


@xHide_BG
Follow
Good Strain ..
it's not the best of all.
but the experience is worth it.
😀I think it's a great plant to test
xxxxxxxxxxxxxxxxxxxxxxxxxxxxxxxxxxxxxxxxxxxxxxxxxxxxxx
xxxxxxxxxxxxxxxxxxxxxxxxxxxxxxxxxxxxxxxxxxxxxxxxxxxx
xxxxxxxxxxxxxxxxxxxxxxxxxxxxxxxxxxxxxxxxxxxxx
xxxxxxxxxxxxxxxxxxxxxxxxxxxxxxxxxxxxxx
xxxxxxxxxxxxxxxxxxxxxxxxxxxxxxx
xxxxxxxxxxxxxxxxxxxxxxxxxx
xxxxxxxxxxxxxxx
xxxxxx
x
it's not the best of all.
but the experience is worth it.

Likes
69
Share


@SuggaShane
Follow
She’s caught my eye and my nose lol. She’s going great, nice and healthy! Smell is like a sweet skunky candy

Likes
11
Share

@MedicaL
Follow
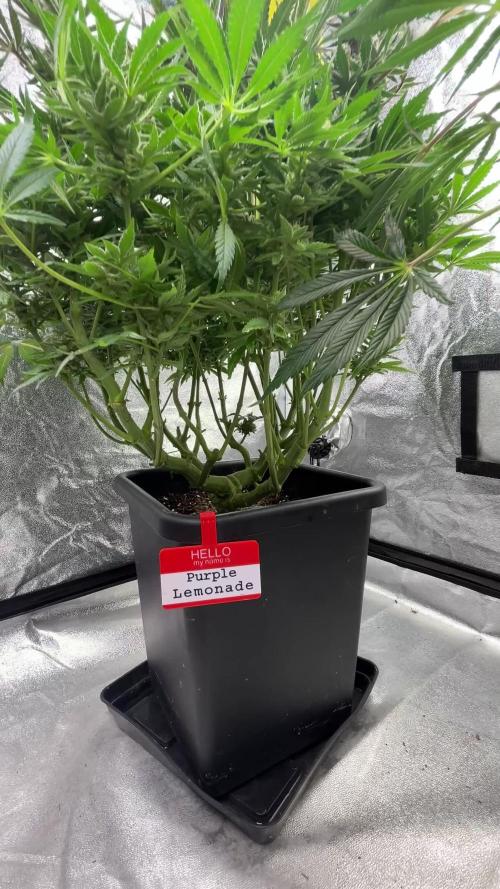
49 den od přepnutí
GG4 Sherbet krásně sype
:)
Purple Lemonade začíná házet barvy 👍🏻
Jinak spokojenost 🍀


Likes
20
Share


@Diariesweed
Follow
this plant took 85 days in total, didn’t make the buds too fat, but it’s very fragrant, I expect 40 to 45g 😊😊 maybe, I had a dry bud that I already took and it tastes like diesel lemonade, it’s very sweet, crystallized but the buttons were kind of weird, the other sister is perfect I hope she surprises me on the scale ostei I liked it, maybe this variety grows more often
Likes
96
Share


@The_Projexx
Follow
Things are going great with the Obiwan . Nothing to complain about with Obi#2 shes doing really well swelling very nicely and simply smells potent as all potent can be ! Going to be looking to flush in the very near future and then harvest this fine lady !
Special thanks that goes out to my followers and everyone who stops by the diary's to check them out ! Keep on keeping on folks .
-Happy Growing!


Likes
25
Share


@GreenHouseLab
Follow
She was a bigger stretcher leading into week 4-5 of flower. Definitely need to hunt this cross in the future, insane terps amazing smell overall shes a banger 🍪🔥
Likes
3
Share


@erpiccione69
Follow
prima settimana, germinata il 17 dicembre
temperature:
22 gradi 60% rh luci accese
15 gradi 60% rh luci spente

Likes
53
Share


@AutoCrazy
Follow
This plant is a Queen!! She is super healthy and has stretched like a champ. It seems like the stretch is slowing down which is good. She is the perfect size for my greenhouse at this point. I can still work around her easy enough at this point.
The pistils are flying out now and she is likely to start developing the frost that we all love and admire 😀.
I am watering with 7-10 gallons of water every 2-3 days at this point. I didn’t get around to top dressing her this week but I will this weekend for sure to make sure she stays happy.
Onward
😎🍿🍻🌱
Likes
142
Share


@Hologram
Follow
ACOP does not care about all those caterpillers and spiders (and other slimy mofos)...
She is just getting some highlights in her hair(and a perm!) .. to get ready for the harvest party soon!!👊
happy growing for all
✊

Likes
1
Share

@DogDoctorOfficial
Follow
🌱 8×8 Adventure | Folder 09
Candy Rain – Plant A | Week 4
The Little Survivor
Every grow tells a different story, and sometimes the most memorable stories begin with unexpected setbacks.
Welcome back to the 8×8 Adventure, a project dedicated to exploring multiple genetics grown 12/12 From Seed inside the same flowering environment. The goal is simple: document every phenotype individually, compare their development under identical conditions, and learn something new from every plant along the way.
Folder 09 follows our Candy Rain.
Unfortunately, she is the only survivor from this batch. The other seeds didn’t make it, and that’s entirely on us. Growing is a journey of constant learning, and sometimes the greatest lessons come from the mistakes we make. Rather than seeing it as a failure, we’ve chosen to give this little lady all of our attention and let her show us exactly what she’s capable of.
Every plant deserves the opportunity to tell its own story.
⸻
🌿 The 8×8 Adventure
This entire project is being grown inside our dedicated 8×8 flowering tent, where every cultivar begins life immediately under a 12 hours ON / 12 hours OFF light schedule.
There is no long vegetative period.
Instead, every plant develops naturally from seed while already living under flowering conditions, creating unique structures, shorter internodal spacing and allowing us to compare how different genetics react to exactly the same environment.
Although every plant shares the same room, nutrients and lighting, each phenotype expresses itself differently. That’s exactly why each folder documents a single plant from start to finish.
Candy Rain is proving that point perfectly.
⸻
🌡️ Environment
Despite summer temperatures continuing to challenge the room, the environment has remained remarkably stable.
Week 4 Conditions
• Light Schedule: 12/12
• Day Temperature: 33°C
• Night Temperature: 25°C
• Relative Humidity: 63%
• pH: 6.1
• EC: 1.35 mS/cm
• CO₂: 639 ppm
• Pot Size: 15 L
Even with daytime temperatures reaching 33°C, the plants continue responding well thanks to stable humidity, strong air circulation and careful environmental management.
Consistency is often far more important than chasing perfect numbers.
⸻
💧 Feeding Programme
Candy Rain receives the same balanced Plagron feeding programme as the rest of the room.
Current solution per litre:
• Terra Grow — 1.8 ml/L
• Power Roots — 1 ml/L
• Pure Zym — 1 ml/L
• Sugar Royal — 1 ml/L
The solution is adjusted to pH 6.1, maintaining nutrient availability while supporting healthy root development throughout this early stage.
Because this plant is hand-watered, every irrigation becomes another opportunity to inspect the substrate, monitor water consumption and observe her development closely.
⸻
🌱 Development
From the very beginning it became clear that this Candy Rain is developing differently from many of the other plants in the room.
She remains significantly smaller, with a naturally compact structure and shorter internodal spacing. While several of her neighbours have already begun stretching into flower, this phenotype seems to prefer building slowly, producing tight growth and a sturdy main stem before committing to vertical expansion.
Sometimes 12/12 From Seed reveals exactly these kinds of differences.
Certain cultivars explode almost immediately, while others seem to take their time adapting before accelerating later in flower.
At this point there is nothing suggesting poor health.
Quite the opposite.
Her new growth is vibrant, symmetrical and full of life. Every node develops cleanly, her stem continues to strengthen and the fresh growth emerging from the centre has a beautiful healthy colour.
She’s simply telling her own story at her own pace.
⸻
🍃 A Small Setback
One detail worth mentioning this week is the damage visible on a few of the older fan leaves.
After careful observation, the injury doesn’t resemble a nutritional problem. The new growth remains completely unaffected and the damaged areas are isolated to only a handful of older leaves.
The most likely explanation is mechanical wind damage.
With strong airflow inside the flowering room, larger fan leaves can occasionally fold onto themselves or vibrate continuously in the same position. Over time this creates dry, burnt-looking patches that may resemble nutrient issues but are actually simple physical damage.
Because the affected leaves aren’t getting worse and the new growth remains perfect, no corrective feeding changes were necessary.
Sometimes the best decision is simply to observe instead of reacting.
⸻
🍃 Gentle Training
Training remains intentionally minimal.
Rather than removing healthy foliage, we continue relying on leaf tucking to expose developing shoots to the available light.
By carefully moving larger fan leaves beneath the canopy, lower branches receive more light without reducing the plant’s photosynthetic capacity.
This gentle approach allows the plant to continue building energy while maintaining as much healthy foliage as possible during these early stages.
Patience often produces better results than unnecessary intervention.
⸻
🌱 Looking Forward
Although Candy Rain currently appears to be one of the smallest plants inside the 8×8 tent, that certainly doesn’t mean she’ll stay that way.
Some phenotypes invest heavily in root development before accelerating above the soil. Others naturally remain compact throughout their entire life while producing exceptionally dense flowers.
That’s exactly why projects like this are so enjoyable.
Every phenotype becomes its own little experiment.
Whatever path this Candy Rain decides to follow, she’ll receive exactly the same care, patience and attention as every other plant in the room.
Because every seed deserves the opportunity to reach its full potential.
⸻
💚 Final Thoughts
Growing has a funny way of keeping us humble.
Sometimes everything goes according to plan.
Sometimes we lose seeds.
Sometimes one little survivor becomes the most interesting plant in the room.
That’s exactly why we document every stage honestly—the successes, the mistakes and everything in between. Every experience teaches something valuable, and every diary becomes another chapter in the journey.
A massive thank you to everyone following the 8×8 Adventure. Your encouragement, advice and shared passion for growing make these journals far more meaningful than they would ever be on their own.
Huge thanks to Zamnesia for the genetics, Plagron for the incredible nutrition keeping this garden healthy, Future of Grow LEDs for providing the light that powers every day of this project, and to the entire GrowDiaries team and community for giving growers around the world a place to learn, share and inspire one another.
As always, thank you for stopping by, for reading, and for growing alongside me.
Until next week…
Growers Love and happy growing! 🌱💚

Likes
34
Share


@MisterSix
Follow
Week 5 for my plant so far it might be 4 more week to go, i have cut down a little bit of nitrogen
The bud get nicer and got more trichomes but it seem not harden up by now.
I have 5 large branches as in the video and 5 other small branches, how many gram dry will i get anyone have a guess i'm excited
the last picture is the bud i cut down because the downside of it has greymold, i dry it for 5 day and cure for 6 day seem pretty nice, enter your thought :)
If there anything i would do in this stay to maximize the crop, need suggestion