Likes
Comments
Share


@Stickygreens420
Follow
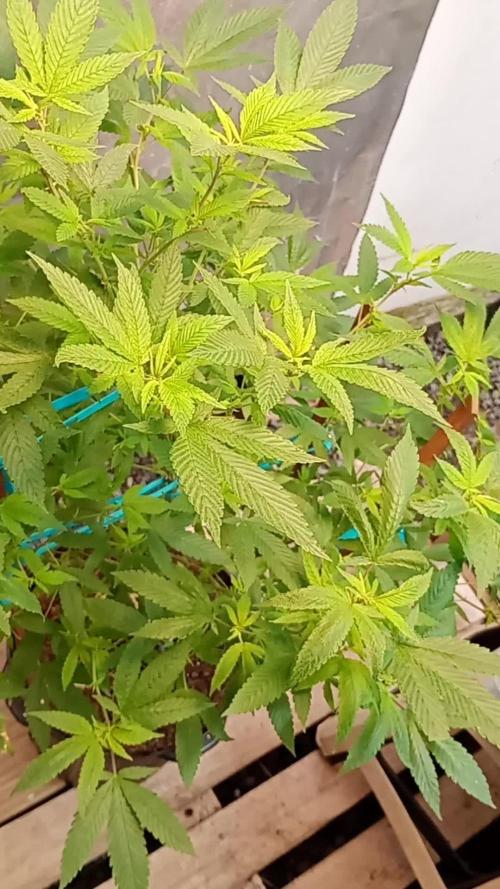
10/17/2022 start of week 3. Plants still look healthy. Been LST the Strawberry Gushers and Newberry for a few days and some of the lower branches are catching up. Trying to keep the canopy as uniform as possible. The Strawberry Gushers appears to be in preflower already, which is a bit concerning. Was hoping to get at least another week out of her. Orange Bubblegum is still the smallest of the three, but she continues to grow at a steady pace. I think someone pulled a fast one on me with my cover crop. I have what looks like blades of grass growing, with only a few small clovers showing up so far. Guess that is what I get for shopping on Amazon. Also, increased my DLI to 500. Not much more to report at this time.
On 10/19/2022 I watered 1 liter per pot with the Rootwise and ThermX again. This amount every 2 to 3 days seems to be sufficient for their current size. The pots are wet on the bottom, but no run off. Also, removed just a few of the lowest leaves and fan leaves blocking the lower branches. The LST is allowing the lower branches to catch up.
10/21/2022 watered both the Strawberry Gushers and Newberry with about 1.5 liters each. They are both really growing fast now. The Orange Bubblegum is beginning to speed up, it's just seems like a shorter plant with shorter node spacing. I just misted the surface of the Newberry since the pot was heavier than the other two. Still doing some minor LST on the main trunk and some selective deformation and leaf tucking of leaves blocking bud sites.
10/23/2022 was a big day for the Strawberry Gushers. Top dressed with Gnarly Barley, BuildASoil Craft Blend, and BuildASoil BuildFlower, then watered 2 liters. Plant is starting to stretch so I wanted to make sure she has access to the nutrients she needs. The Newberry and Orange Bubblegum just got 1 liter like usual. Plan to top dress them as well once they get a little bigger.
Avg. VPD: .8
PPFD: 500
DLI: 32

Likes
12
Share

@420DeepGrow
Follow
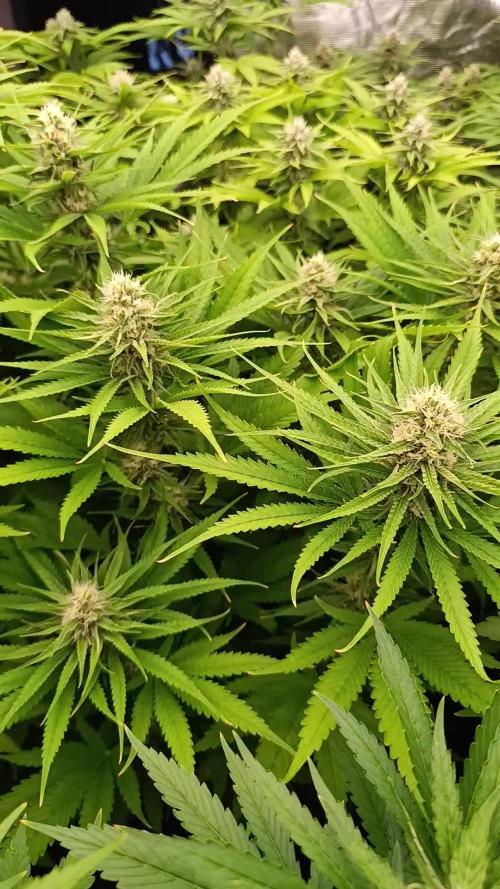
📆 Semana 5
El engorde se intensifica y los cogollos ganan densidad y peso con rapidez. Los cálices comienzan a apilarse formando flores más compactas, mientras la producción de resina aumenta de manera evidente y el aroma se vuelve cada vez más intenso. La planta alcanza uno de los mayores consumos de agua y nutrientes de todo el cultivo.
Bloom Booster sigue desempeñando un papel importante durante esta fase, apoyando el desarrollo continuo de las flores. Mantener una EC estable y un riego constante permitirá aprovechar al máximo el potencial de engorde sin generar estrés en la planta.
⚡ EC: 1.8–1.9
💧 pH: 6.2–6.5
🌡️ Agua: 21°C
🌫️ Humedad: 38–43%
💡 Intensidad: 1000–1050 PPFD
🔥 Nota: Los cogollos comienzan a compactarse y el consumo de nutrientes alcanza uno de sus puntos más altos. La constancia en el riego y el control del clima serán fundamentales para mantener un desarrollo uniforme.
Seguimos creciendo fuerte 💪!

Processing
Likes
10
Share


@BodyByVio
Follow
After 21 days in turbo cloner I transplanted 4 Sweet seeds Green Poison into 1 gallon plastic pots filled with Cana coco. Few days later I transplanted another 4 clones into DWC!
Stay tuned!
Coco feed at 700ppm
Dwc feed at 480ppm


Likes
16
Share


@UnkleSkunk
Follow
Bene bene..
La pianta continua a crescere le cime si stanno mostrando..e gli internodi allungano
Come anche il tempo..la davano x 10 settimane ma dovrebbe farne 2/ 3 in più...
Ma se la resa è come prevedo non sarà di certo un problema..
Cosa ho fatto...
Niente le solite regolazioni ho aumentato la frequenza di irrigazione leggermente
Ahh si siamo passati a 12/12 per questioni di femminizzate da fare fiorire purtroppo con un solo box è sempre un problema...

Likes
3
Share


@VTR90
Follow
Well we made it to the end with no mould or pollen sacs, no seeds and fairly nice bud
It's in jars at the min sitting between 65% and 69% sweating - a little high I know but don't wanna get them down to 62% too quick - and opening twice a day for an hour or two
Weighed it before going into jars before sweating them and there was 201g just hope it hasn't lost too much weight after cure
I do have another purple punch mainlined in early veg right now too but think I'm done with purple punch I've ran it a few times with varying results
Likes
22
Share


@Ferenc
Follow
FBT-29 and FBT-31 - Strawberry Pie will.be harvested next week. In the tent temperature is so.high because of summer poor plants are suffering. I keep removing leaves.


Processing
Likes
16
Share


@Joehydro
Follow
Finally starting to smell that heavenly smell and seeing budlets exploding everywhere. Both girls were defoliated a little at a time over the past week to expose any prime bud sites. So far both strains have been lovely and easy to grow as long as Nutes are fairly light. Will keep updates through the week and as always happy growing everyone!😊🤙

Likes
17
Share


@DudeGrowsWeed
Follow
Alien vs Triangle still going strong! Several weeks until harvest, but she STINKS! This is another girl I can't wait to chop down and do a smoke report on. But I'll be patient. 😎

Likes
8
Share


@Cali_Rayy
Follow
Ready to see what this strain can do I like the fact FB420 hast released any pictures of flowers yet kinda leaves it in suspense. Will be updating soon
Likes
169
Share


@SlowpokeFuegobud
Follow
🍊 🐶 💜 🍊 🐶 💜 🍊 🐶 💜 🍊 🐶 💜
Welcome to week 2, my fellow growmies!! 💚 💚 💚
I potted them on day 12. 🌱
On day 14 I watered nematodes, gnats are always with me, maybe they're my spirit animals. 🙏
They will receive Green Buzz Fastbuds now from next watering on til we see pistils, for fast flowering. Can't wait to see who's a girl! I already suspect number 4 to be a prince.. That one is massive. 😬
Thanks for stopping by, it's a true pleasure to have you as visitors!! 💚 💚 💚 😘
Stay tuned for next week, because I painted the pots! :brush: 💜 🐘
______________________________________________________________
About Sour Tangie Dawg cannabis seeds
Sour Tangie Dawg is a sativa dominant cross between the famous Tangie and Chemdawg. Expect a combination of sweet & fruity mixed with a gassy, jet-fuel flavour. The amazing mix of citrus, tangerine, pine and gasoline produces uniquely rich, dank buds. The powerful sativa high is strong, uplifting and long lasting, great for creativity and socialising.
Chemdawg is the parent of OG Kush, all Diesel strain originate from Chemdawg. The Tangie is originally a Skunk hybrid strain but extremely fruity with the trademark Tangerine flavour. This strain is potent with THC-levels over 20% alongside very generous yields of top quality weed, very suited for hash and rosin producers. If you’re looking for a strain to produce the best tasting concentrates this Sour Tangie Dawg is a proven winner! She easy to grow and the perfect choice for SCROG growing due to her growth speed and stretch. We advise switching to 12/12 light when 75% of the net is filled. For outdoor growers the harvest period is early October. Indoors she’s finished after 9 weeks of flower - fast for a sativa dominant strain. We recommend growing in soil with organic nutrients for the best tasting weed.
Get some fantastic genetics here: https://supersativaseedclub.com/ 💜 🐘
___________________________________________________________________________
SETUP:
80x80x180 cm Zelsius
240W Full Spectrum LED IR UV dimmable
DW240H-A6-HS
Heatsink color red
LED Chips:
512pcs SAMSUNG LM301H + 24pcs Osram 660nm + 8pcs Osram IR 730nm + 8pcs UV 385nm
Color mix: 2700K + 4000K
2,8umol/J
Driver HLG-240H-C2100B
Coverage: veg 5x3ft / flower 4x2ft
Product size: 628x205x68mm
Green Buzz Nutrients
Shouts go out to my sponsors @GreenBuzzNutrients, thanks so much for your support! ❤️
If anyone would like to try their amazing organic products, use code GD42025 for generous 25% discount (for orders of minimum 75€) ✨
https://greenbuzznutrients.com/
Biobizz Lightmix
custom exhaust fan 320/270cm³/h
Carbon Active Granulate 240cm³/h
tab water pH 8 - EC 0,25 with Calmag to 0,5
Advanced Hydroponics pH minus Grow + Bloom to pH 6.2
🍊 🐶 💜 🍊 🐶 💜 🍊 🐶 💜 🍊 🐶 💜

Likes
93
Share

@Ferenc
Follow
Plants started growing very fast. 20 hours light a day and 140 ml water for 2 plants so 35 ml each plant. (70ml -35ml one plant- morning, and 70ml -35ml one plant evening). From Monday I will start giving 200ml water 100ml in the morning and then the rest in the evening. Ventilation almost 24 hours, They are getting bushy and the color looks healthy green. I am excited. Purple Punch ( the right one) does not have the smell but the Gelato Cookie D'ohpe started smelling from the 3rd week, it is not strong, it is smooth, enjoyable. I still use trigger spray but I stopped triggering directly on the plant to avoid any fungee or toxicity, I just keep the soil moist. I surrounded them with kitchen foil around the lamp to have a more effective light. It reflects the light and the light goes everywhere. This step has been done because I have only the 60w LED each plant so I try to provide the maximum strength this way, and by keeping close distance also. The lamp is not hot so it ain't gonna burn the plant I had checked it before. I just purchased today a 600w LED because these plants look so good so I wanna provide the best circumstances for them. 4th-week 4th day I a just waiting for my delivery my 600 W grow LED light will come. From today I started watering with 50ml each plant 2 times a day so all together 200ml a day. Plus I always use trigger spray for the soil to be kept wet. They are looking better and better. Nice color and bushy appearance. Wonderful. I realized some holes on the Gelato Cookie D'ohpe's leaf but there is no insect I was checking. I do not really know the reason for that. Tonight I will set up the new 600 W LED so I am changing the current 120W. Big Step forward! It is not that easy that I thought, the lamp is great but the temperature raised up a lot, so needed to buy a fan also and the humidity went down. It is not easy to find the proper solution to be acceptable, good temperature and humidity at the same time. So I decided to program a 6/2 schedule, so 6 hours light on and the fan always with 15 min more, and 2 hours off so I do provide 18 hours light and 6 hours darkness but it is divided. The plants can rest after every six hours and use the energy they received. Last day of the 4th week, LST has been done with the Gelato Cookie D'ohpe, both are growing rapidly, let's see what the 5th week brings! End of he week Gelato Cookie D'ohpe is 25cm, Purple Punch is 20cm😇

Likes
39
Share


@BudsBanditUK
Follow
A nice stocky little plant. She is starting to get that nice smell. Taking heavy feeding nicely and also now fattening up. Still no purple colours yet. I love this strain.


Likes
2
Share

@Ninjabuds
Follow
Black Runtz has the best leaves out of all the strains I’m growing right now. The plant has great structure. I have a great feeling about this one
Likes
5
Share


@HempZ
Follow
All going according to the plan, some plants gained a lot of weight during this week, other just packed some resin.
Gave their last feed today, with 42 days of flower. Water with seaweed extract, molasses and micorrize.
Gonna harvest the smallest plant with 50 days cause i'm running out of smokable weed ;/
Mother number 1 is looking great, smells like strawberry with a really fresh, almost cold, smell. hoping this profile reflects on the joint.
Mother number 2 is the smallest of the mothers but smells the best, citrus with sweet, the closest to terp profile im looking for.
Mother number 3 is fat and smells like strawberry with something more cheesy on the background.
GDP is amazing! its packing a lot of resin, smelling great and producing heavy buds, think its gonna be the biggest yielder of the bunch.
Next week im gonna take some small branches to taste whats coming and decide who is gonna go to revegging after the harvest to become a mother.

Likes
21
Share


@DeepRootsGrowTrees
Follow
SATIVA DREAM by KANNABIA
Week #22 overall
Week #6 Flower
This week has been a good week no major issues this week she's looking good and has that sativa smell about her!! Stay Growing!!
Kannabia.com
SATIVA DREAM

Processing
Likes
7
Share


@Encuentra
Follow
24.11 : C+4
25.11 : C+4
26.11 : C+4 33cl of fertilizer for all
28.11 : the hydro are turning yellow, i think i will put them in soil, maybe they suffocate ?

Processing
Likes
4
Share


@Grownewgenetics
Follow
We have these week try all ready 3 day's to upload all the diaries, information,videos and pictures, but we decided today to try without the app , also let's hope we get some pictures up these Time and all the Videos and pictures are on all our Media
Processing
Likes
28
Share


@StunFlower
Follow
D49
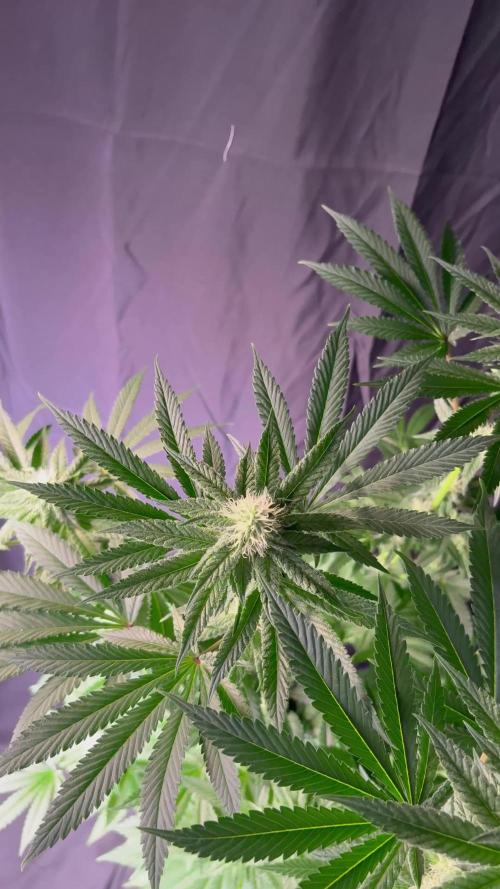
The Purps is rocking. I hope she's near done with the stretch as she's now approaching 40" tall. She's got a ton of bud sites and they're all plumping up and getting frosty.
She's been pretty hungry and thirsty, demanding 3 litres of water almost every day. Her PPMs have been running in the low 900s with stable PH. She's due for a rez change and will get one tomorrow after 2-weeks of top-ups.
Super happy with the way she is growing and she may actually finish within her 6-7 week advertised harvest time. 🤞
Thanks for tuning in ✌️