
Likes
Comments
Share


@WorldPeas
Follow
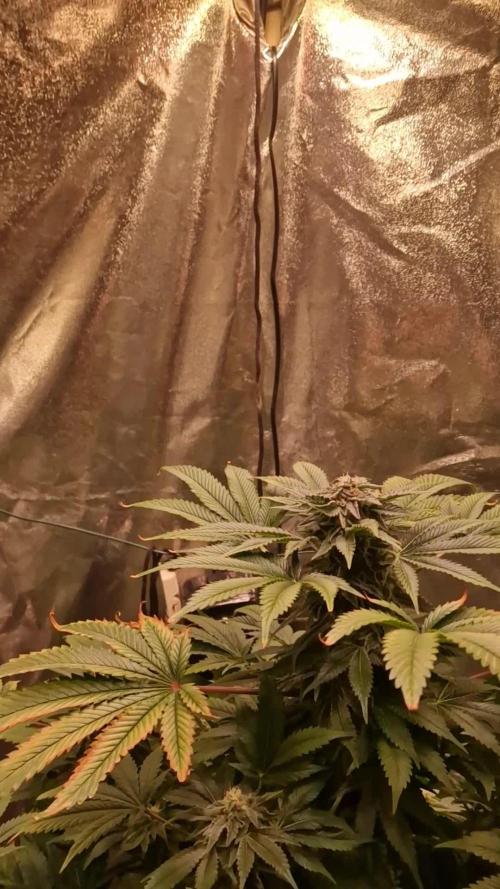
Week starting off a bit rough.
Massive temperature spike up to 29 degrees c and 30% humidity for a few hours shocked her. Some yellowing on the tips of new growth.
Starting off this week with lower A + B (1ml/l, 1/3 strength) and adding in some potash plus to prestart her for flower.
Midweek: Flushed with about 10L of Ph'd water because I was seeing a significant rise in TDS/EC.
Started feeding today with 1/4 strength Grow A+B and 1/4 Bloom A+B.
End of week: Very consistent growth. Amazed. Going to be a monster auto 😁
May have broken a branch while LST. Just put it back where I found it and tied it up. Hopefully the I didnt see it, it didnt happen method pulls through.
Started feeding with Bloom nutrient schedule at 1/3 strength and upped the dose of calmag to 1ml/L
Next week will see a steady increase in nutrient strength and additional bloom additives from cycos advanced line and her first hair cut.

Likes
4
Share


@SamDo
Follow
This week marks Week 18 of veg for the Pineapple Upside Down, and things are getting interesting.
The plant is still pushing hard, stacking growth on all sides — more height, more volume, more density.
She’s clearly in that phase where she’s comfortable, full of energy, and ready to take every bit of space you give her.
But that’s exactly where the challenge begins.
Right now, I still can’t move her into the bloom tent.
There’s another plant finishing inside, so the space isn’t free yet.
And that delay changes the whole strategy, because this girl is getting tall — fast.
So the main question of the week is the same one I’ve been wrestling with for a while:
Should I let her stretch and plan a SCROG, or should I top her to keep things low and contained?
And to be honest, I’m still not ready to decide.
I want to see her in her final environment before making that call.
Transplanting into the bloom tent will change the lighting, the airflow, the VPD, the root-zone rhythm — and I don’t want to shape her structure blindly before she settles in.
On top of that, she’ll need a short acclimation period once she’s transferred, so there’s no point in rushing structural training now.
It could do more harm than good.
So for the moment, the rule is simple: don’t touch anything.
I’m keeping her on the same settings, same nutrition, same EC, same feeding schedule.
She’s clearly thriving, and when a plant is this comfortable, the smartest move is not to interrupt her momentum.
You can feel she’s building up internal energy — thicker stems, fuller leaves, faster node spacing.
All of that will pay off in bloom, as long as I manage the height correctly once she moves to her final tent.
This week is all about timing.
Letting her grow, monitoring the stretch, and holding the decision until the very last moment.
The more I watch her, the more I realize that patience here is probably the winning move.
For now, she’s healthy, beautiful, vigorous, and still accelerating.
No signs of stress, no burn, no deficiencies.
Just a plant in full confidence.
Next week should be decisive — hopefully the bloom tent will finally be free, and I’ll get a clearer picture of the strategy: SCROG or top.
Until then, she keeps growing… and I keep observing.

Likes
11
Share


@Nookandplant42o
Follow
Week in the flush I've already done three flushes to force her to use what she has, very good appearance, sweet smell, with citrus leaves in the purple color they started to appear, they stick when touching the smell exhaling through the room, mixes with her sisters It's really an easy-to-take candy factory, it didn't present any problems at any time, I recommend it.
🤗


Likes
4
Share


@weed_gastro
Follow
on the video, the 2 on the right side are the Ayahuasca Purps, the other ones are Peyote critical.
getting real bushy, need to defoliate soon
day 32: they got their first feeding, I only use a minimal amount of blooming nutrients.
day 33: plucked some leaves , cuz there was no airflow at all, also installed a new ventilator.
day36: again, I had to defoliate a little

Likes
2
Share


@StonedBay
Follow
So 2 week update since last. They were transplanted on week 4. Then Ive been still playing around and dialing in the calmag portion of the nutrients. They seem to be responding well. got the net installed today and theyre already stretching. First grow in coco please dont come at me im learning. hoping to have it dialed in within a week or 2 since I need to flip soon.

Likes
68
Share


@Roberts
Follow
Auto Northern Dragon Fuel is growing good. She has been getting lst, and selective defoliation as she goes. Everything is looking really good. She has potential to get really big in a tiny Potter. Thank you Super Sativa Seed Club, and Medic Grow. 🤜🏻🤛🏻🌱🌱🌱
Thank you grow diaries community for the 👇likes👇, follows, comments, and subscriptions on my YouTube channel👇. ❄️🌱🍻
Happy Growing 🌱🌱🌱
https://youtube.com/channel/UCAhN7yRzWLpcaRHhMIQ7X4g

Likes
103
Share


@PEAKYPLANTERS
Follow
After two years of cultivation we wanted to re-propose one of our favorite strains 🤩
The first time we debuted we did it with her and we hit the box office by winning the first place in the competition ....
LET'S SEE IF WE CAN REPROPOSE US BY IMPROVING CULTURE APPROACHES !
I hope you enjoy the content and I leave it up to you to judge the progress of my growing experience


Likes
54
Share


@Fatnastyz
Follow
12-2
They both seemed to like the tea, no signs of burn or further self eating of hunger. 😂
Today was just observing and some pics. 😁
Triple grape smells like some straight gas with a hint of grape. Sticky af.
Strawberry Cheesecake smells like American Bologna. With the definite hint of cheesey stink. Kinda weird. 😂😂🤘
1-3
Watered both with cal/mag only. Ph 6.2
Run off 3x 710ppm ph 7.3
Scc run off 810 ph 7.4
So both rocking, but PH a little high.
1-5
Watered scc with cal/mag till run off was 625 ppm and ph 6.5
1-6
Watered 3x
Ppm 425 just cal/mag. Ph bit high 7.1 but acceptable
1-7
Nothing today. Scc giving me the finger, for so much water. 🤣 She shall feed tomorrow 💪
1-8
Scc booster and cal/mag. 575 ppm in. Didnt check runoff.
Processing
Likes
27
Share


@Silverback_Guerilla
Follow
2/17:
I spent a little time rearranging today. I bought some 32" x 14" plastic ventilated storage shelves and cut the legs down on two of them so I have some different-height platforms for the shorties in the garden. I should also be able to easily flush 6 plants in 5 gallon pots, or 9 plants in 3 gallon pots at a time now, that's a win!👈
2/18:
I debated whether to feed or not, and settled on watering them with about 1/2 gallon each. including bembe, cal-mag, signal, humic acid, and a little beastie bloomz.
The new dehumidifier is pulling about a gallon and a half per day from the air, so I should be able to feed them in a coupe of days.
I've reached the ceiling again with my lights and the tall one is still stretching a little bit. I sure hate to have to supercrop her too...my garden is looking so wild and untamed already...😳
2/19:
Rainy day outside, so I'm pulling in 99% humidity, plus the pots are still petty saturated, but the new dehumidifier is keeping up. RH is holding at about 45% today.👍
2/20:
Day 31 of flower...the taller plant grew another couple of inches overnight! Damnit!😟 After emptying the closet (again) today and supercropping more branches (and some of the same branches again), a semi-solution occurred to me that allowed me to raise the lights another 3-4 inches! Now I'm truly maxxed out...
These two plants couldn't be more different.
One twisted-leaf 2-footer that started budding up in the first week of flower, and one beautiful 4-footer that's been very slow to flower..
The structure on the taller/sativa-looking plant is very promising, though...many long colas, and stacking up well...👌
I really needed everybody to finish in the same week so I could get my Spring autos going...😶
I'm still hoping that the big one will hurry the fuck up and finish by the EHD(3/11), but it's not looking possible at this point...
I took photos and videos of all the plants today since I had to empty the closet and it wasn't a feeding day.
2/21:
I fed them today with about 3/4 gallon each including beastie bloomz, tiger bloom, big bloom, signal, bembe, and cal-mag...no grow big this time.
2/22:
The tall one grew another inch...i threatened to bind her up like one of Silky_Smooth's plants if she didn't stop growing immediately.
If she doesn't start budding up with serious urgency, she's gonna piss me off...my Spring auto grow must not be postponed!
2/23:
I ordered some terpinator because I'm not so sure about Signal's efficacy at this point....I'm usually dealing with odors more by now..

Likes
14
Share


@AndrewC
Follow
So this is the Tear Down week. The timing of it makes it so i will need to the harvest flag in a few days when I can weight and test the plants.
I have included the Cleaning, and Cutting and some Root Porn.
I will make the harvest post in about 4-5 days, when I can trim these plants. There is a lot of Plant here. I got way more than I was expecting. I don't have a scale that measure this amount of plant, without taking like 10 measurements and then adding them together. So I will just be posting the dry weight. I will post the wet weight as dry weight * 1.65.
Autopots: Wow, what a great product. I have been blown away by how well and how easy it was to work with them. They really did solve the watering issues. Excellent product. If you are a beginner, start with Autopots.
-= Lessons Learnt =-
- Overdrive the air to your Autopots. In my control plant, I used a small rectangle air stone (instead of a standard air dome). This lead to root rot and some other issues, it also put significantly less air into the water. The root rot, give the material for the Brown Algae to grow. Using a huge Air-disc-Air-Stone would be an excellent combo to mix in with the air dome itself. Something like this: https://www.amazon.ca/Pawfly-Diffuser-Suction-Hydroponics-Aquarium/dp/B01MY3AQ33 at the bottom and the air-dome on top of it, will be what I do with my next experiment.
- Air stone in the reservoir. I had two instances where algae grew into the res. An air stone would have helped. It would have also helped my control plant get less root rot. Given the amount that the air-domes and air sources got engulfed, having the water have more o2 in it would have only been beneficial.
- Don't grow 6 plants in a 4x4. Since my control plant was about 1/8th the size of the others, I think I could have grown 5 in the shape of a 5 (on a 6 sided dice)⚄ This placement would give a much more spaced canopy for airflow and more importantly light. The sides of some of the plants were lighter green and produced larf due to lack of light penetration.
- This tent was on 19-5 schedule. This worked out very well for this strain. After every lights on, they were in the praying position, so this strain was able to recover in that 5hrs off. If I had more seeds, I would run these again, and try 20-4. I think this strain could handle it. All for all, I think I'm going to 19-5 as my default timing. This kept up a solid DLI.
- Staring at .9EC (really .7 EC cause my water here is .2 EC) Then bumping up at .1 a week, until 1.6EC worked out VERY well. I experimented on this crop all the way up to 1.9EC, which burnt the tips of this plant. I think if I did this strain again, I would do 1.6EC until 3-4 weeks left then crank it to 1.9. It did plump them up when I went to 1.9, however it left them looking rough. Bulk was added though.
- Sticking to 6.0PH for all of veg, and 2 weeks into flower worked great. The plant had solid and consistent color and leaf shape . The plant's did get hurt, due to some issues (as noted on the weeks). I switched to 6.5 PH in the last 3-4 weeks and it helped them recover, and plump up noticeably.
-VPD. The #1 thing I focused on was VPD. I keep it .9kpa range, as best as humanly possible. It was honestly, HUGELY noticeable compared to my other grows. I know truly understand the value of properly dialed in VPD. This is the one lesson that will stick with me forever.
- Super-cropping: On the plants I give the chiropractic treatment too, had much thicker stems as much larger channel internally. I did this treatment to 4 of the 6, and the 4 that had it done has larger buds and recovered from defoliation faster.
TLDR; VPD is king. Super-cropping is worth the time. Keeping PH and EC dialed in were all wins. Autopots kick ass.
Likes
8
Share


@Mennowitsch93
Follow
Blüte Woche 8 es wird gespült bei 4 Ladys seit 2 Tagen und und die anderen zwei vom gleichen Schwung sind die Tage dran.


Likes
30
Share


@ArtisticGrown
Follow
Sooooo this has been an amazing and exciting week! Ive been patient with this last plant and really checking the trichomes i inly wanted a few amber caps on the nugs, was looking for milky on this one! Shes smelling amazing and the color change was such a sight to see! She did so well with the nutrients and loved the 2 week flush i did! I cut her down did a wet trim and have em in the drying rack! Im excited to see how she cures and drys ready for the smoke reveal! Much love and happy growing!!!
*check out the examples of the rewards from the traing i did with lst, hst, desolation love seeing this!!* learning this craft and style of growing is a blast! And everyone should try it!

Likes
18
Share


@JohnWickTH
Follow
I'm very exciting and a bit worried after move to bigger pot and DWC. I should grow them in DWC bucket at the first place but I have moved them from substrate to DWC. Let's see how it goes.
Week #3 Summary: The overall result is good but DWC is a bit better grow than substrate (only water). I did topping one of them to test and trim all of them.
Likes
16
Share


@Mrg7667
Follow
Day 15 of flower! Kinda goofed this week i gave the babies week two nutes after the last post wich was like day 10 and i noticed a little bit of nitrogen over dose. I think the Powersi is also helping nutrients absorption! So i actually did this week a little different then i planned just cut the bio bloom in half because i didnt realize the powersi npk ratio inceases p and k
Havent seen anymore aphids might do another couple sprays to be safe. Grow safe allows full spray through flower

Likes
2
Share


@EyeMKing
Follow
Started the first top dressing of Gaia Green All Purpose and Power Bloom at a 50/50 ratio of 1tbsp/gal each.
