
Likes
Comments
Share


@Roberts
Follow
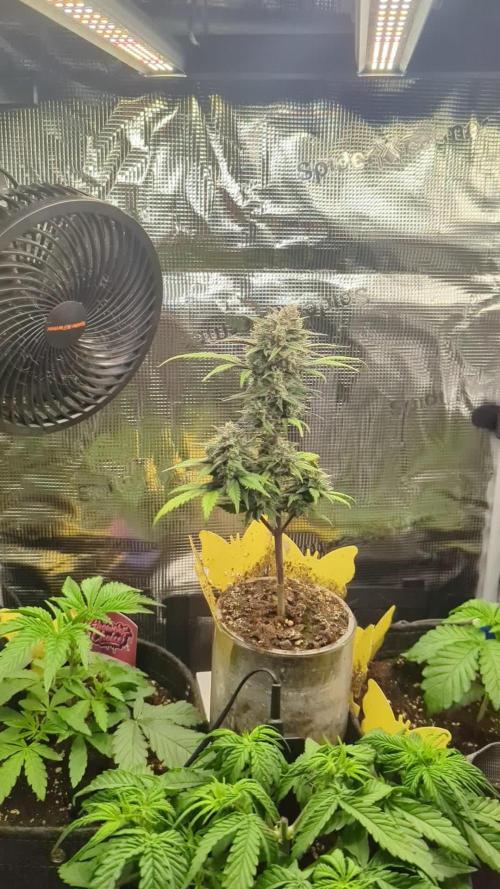
Alien OG Autoflower grew great, and finished beautifully. Strong smell, frosty, and sticky. She grew great under the Mars Hydro FC4800 light. It was my first time using the Gen 1:11 nutrients. I really like them, and will use again till I run out or get more. She will hang dry 24 hours then be put into the cannatrol for a 8 day cycle. I got a great grow to try it out the first time. 🤞. Thank you Aeque Genetics, Gen1:11, and Mars Hydro. 🤜🤛🌱🌱🌱
Thank you grow diaries community for the 👇likes👇, follows, comments, and subscriptions on my YouTube channel👇. ❄️🌱🍻
Happy Growing 🌱🌱🌱
https://youtube.com/channel/UCAhN7yRzWLpcaRHhMIQ7X4g


Likes
2
Share

@PapaTerps
Follow
Strawberry Gorilla Automatic - FastBuds
Day 57 - watered with 500ml of RO tap water with defined nutrients, mixed in order and then pHd to 6.3. Considering her pot size, I'm seriously impressed with the size of bud growing on this plant!! She's so beautiful too, a full spectrum of colour, from her flower to her leaves👏🏻 She's also started to smell really good, because she's the only flowering plant in the tent right now, you just get a wonderful bang off it when the tent opens 👌🏻. Not much work on her again this week, just her second daily watering with 500ml 👍🏻
Likes
33
Share


@FlavoursUk
Follow
Day 78 - pheno 1 was cut down, id normally hang dry the whole plant but decided to do it in branches instead. Second pheno has been left in darkness as i haven't had the time to cut.
Pheno one is hung up and drying.. Room Humidity 60/60. As soon as she's dry enough I'll finish trimming her up. Then put them into jars. Might use boveda 60% packs but I'll see. Smells strong! Will post a harvest when both plants have been dried fully an in jars. Hope you enjoy the videos and pictures.
Stay tuned.

Likes
5
Share


@jony5
Follow
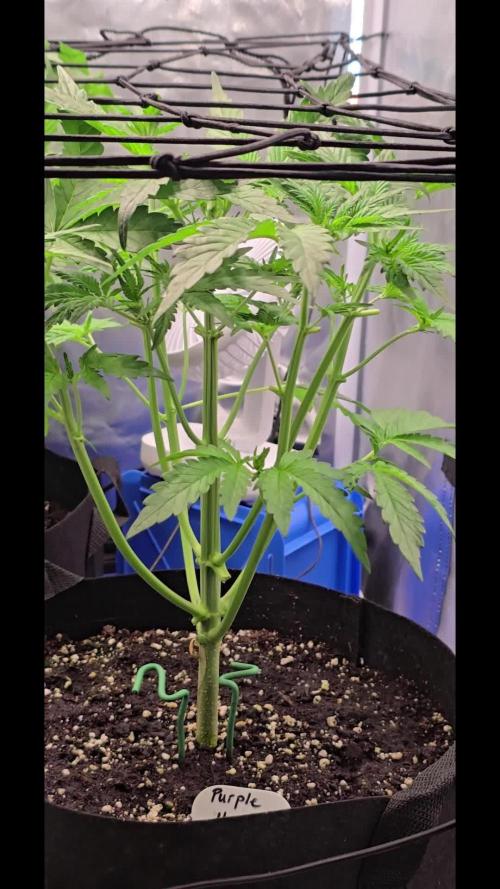
17,11,2023.
Пустил корень. Закинули в рассадочный горшок, 1л. После пророста переедет основной горшок.
- Температура 26,4
- Влажность 50%
- Верхний Свет 16вт
- Полив - 6 ph/180 ppm
- На данный момент нет питательных веществ
- график освещения 24/0.
4-й День. 21.11.
Скинули каску, Кайфуем.
- Верхний свет 24Вт
- Температура 27
- Влажность 49%
5-й День.
Похоже растюха тянется вверх, что не есть хорошо. Увеличил верхний свет.
- Верхний свет 30Вт + боковой красный на минимум.
- 110 ppfd 4700 lux
- Температура 27
- Влажность 45%
7-й День.
Вход - 0,2л (647/6.2) Выход - 0,1л (480/6.4)
убрал боковой досвет, увеличил верхний свет
- Верхний свет - 50Вт 20000 lux
9-й День.
Вход - 0,5л (680/5,9) Выход - 0,4 (550/6.4)
У растюхи листья светло зеленые, нехватка витаминов.
Буферизировал кокос в основном горшке 12L (Perfect Bloom/micro/grow/vj/b52 - 1/1/1/2/2 ml/l)
Вход - 2л (700/5.8) Выход - 0.75 (550/6.2)
13-День.
Пересадил в основной.
- Температура 26
- Влажность 60%
- Кольцевал

Likes
4
Share

@NSABND
Follow
Day 29 massive leave cutting in the morning... but the queens seems to be ok 😃🙏👌👍the Z-Up strain has 5cm more then the others


Likes
99
Share

@Mr_und_Ms_Lue_Roots
Follow
Hallo liebe Gartenfreunde,
Es gab Bei uns Standort Veränderungen. Der gesamte Damen Balkon ist heute Morgen in den Indoor Bereich gezogen. Die Umwelteinflüsse waren kaum noch auszuhalten. Alle samt haben vorher SF- Nematoden inkl. Raubmilben- Beutel verabreicht bekommen. Zusätzlich konnten wir auch die lästigen Ameisen bekämpfen bis stanDie re veg P.C.K. ist in das 60er Zelt und verbringt ihre Freizeit dort allein. Warum,? Sie befindet sich noch nicht wieder in der Wachstumsphase und kann natürlich immer noch im HEMA Bereich anfangen zu zicken. Bisher nach Kontrolle bei heutigem Entlauben, keine Anzeichen gefunden.
Ja die P.C.K Dame die sich gut im und hier noch gut erholt hat, steht wieder sehr nett da 🤩
Nach dem Umzug heute wird jetzt bis Samstag immer eine Stunde weniger Licht auf dem Programm stehen, so das sie am Samstag dann Blütetag 1 erreichen. Ja ansonsten freuen wir uns auf die kommende Woche und wünschen allen somit auch eine angenehme und erfolgreiche Woche!
Vielen herzlichen Dank auch im Voraus für das reinschauen, ggf. Liken und oder kommentar!
VG ✌️

Likes
2
Share


@KEVS_BEST
Follow
Woche 5 - Vorletzte Woche der Vegetation und beeindruckende Entwicklung
Die fünfte Woche markierte die vorletzte Vegetationswoche, und die Pflanzen zeigten weiterhin bemerkenswertes Wachstum und Gesundheit. Die Nährstoffe und das Gießschema blieben unverändert, wobei der EC- und pH-Wert sowohl im Drain als auch in der Nährlösung stabil auf optimalem Niveau waren. Die Luftfeuchtigkeit wurde leicht auf 60 % gesenkt, während die Temperatur weiterhin im Bereich von etwa 22 bis 26 Grad blieb.
Die Pflanzen setzten ihr Wachstum in beeindruckendem Tempo fort und entwickelten enorme Seitentriebe. SPOILER !!!: Ohne jegliches zusätzliches Training bildeten sich am Ende der Woche 16 bis 18 Hauptnebenbuds sowie jeweils ein zentraler, kräftiger Headbud. Die Genetik dieser Pflanzen erwies sich als absolut außergewöhnlich.
ENGLISH
Week 5 - Final Week of Vegetation and Remarkable Development
The fifth week marked the penultimate week of vegetation, and the plants continued to show remarkable growth and health. The nutrient and watering schedules remained unchanged, with EC and pH levels stable at optimal values, both in the nutrient solution and the drain. Humidity was slightly reduced to 60%, while temperatures stayed in the range of 22 to 26 degrees Celsius.
The plants kept growing at an impressive rate and developed enormous side branches. Without any additional training, by the end of the week, they formed 16 to 18 main side buds along with a strong central head bud. The genetics of these plants proved to be absolutely outstanding.

Likes
32
Share


@BigDaddyK
Follow
one is flushing, the otehr ill start next week
Starting the flush with DragonForce Sunday 5/1/20
Likes
25
Share


@Unkraut
Follow
This strain is just incredible, perfect indica high with a sativa sidenote
It grows strong and is quite resistent to mold. All plants were done after about 60 days of flowering.
First time i used a tumble trimmer and it works perfectly.
I didn't check PH or EC at all


Likes
18
Share


@VI_Cannabis
Follow
July 5 - The girls are still doing awesome. temps are between 21-26. Humidity is 40-50. Still feeding every 24-36 hours with 3L per plant.
July 6 - They are doing good. Showing lots of flower sites now. Unfortunately I did not get any pictures today.
July 7 - Tons of progress since last week. I don't see any signs of any problems, and still no pests! The smell is getting A lot stronger as it starts to flower more
July 8 - Still doing there thing, no problems, temps and humidity is fine. Have been feeding every 24 hours now as they seem to be really thirsty
July 9 - Super happy with how they are doing. No issues yet. Smell is heavier, and tons of bud sites showing up. Only issue is they are growing pretty uneven.
July 10 - Time to get a even canopy! First time doing some HST. I also did some defoliation. One of the stems split open a bit but it seems to be doing just fine. I did he HST and defoliation in the morning, i then took pictures of 12 hours later and everything seems just fine!
July 11 - Everything seems to be a lot more even and the broken stem doesn't seem to affect the growth.
Processing
Likes
16
Share


@Dunk_Junk
Follow
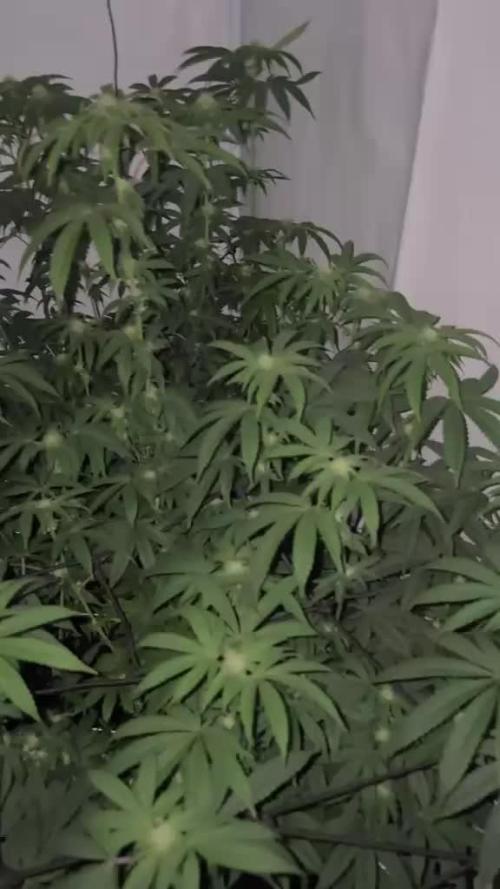
Well into flowering now.
She is definitely a more indica phenotype 😭
I must have lucked out first time round with such a Sativa phenotype 😍
I'd love to know more on this side. The likely phenotypes, and how and why they come about. Also what is the likelyhood/prevalence of each of the phenotypes.......
So many questions 😂
But anyway, she's looking absolutely fab. Flowers developing well so on she goes a few more weeks! 👌
Likes
27
Share


@Jungle_James_Grows
Follow
They are looking great really really nice now starting to put some weight on and the smell is sweet and stinky.
Might add some bloom booster to help them along as well as molasses. I've got 5 of the same strain and they are all different. The one I topped seems to be doing the best.
30/8 Did a bit of a defoliation and leaf tucking tonight. They are fattening up nicely now.

Likes
Comments
Share

@Pierito420
Follow
06/04 DEFOLIACIÓN NUEVAMENTE DE A POCO PARA QUE FLORES DE ABAJO COMIENCEN A AGARRAR LUZ Y ASÍ CRECER Y RESINAR MÁS.
DESDE 02/04(SEMANA 3) AGREGÓ B52 2ML/L AL RIEGO CON FERTILIZANTES

Likes
8
Share


@Ieiogrow94
Follow
Eccoci qui...
Ormai manca davvero poco ci siamo quasi.... Ora niente più fertilizzanti solo acqua ed attendiamo la maturazione..
Seguiranno aggiornamenti, grazie a tutti per il supporto🔥🌲❤️
Likes
11
Share


@BelgianBudtender
Follow
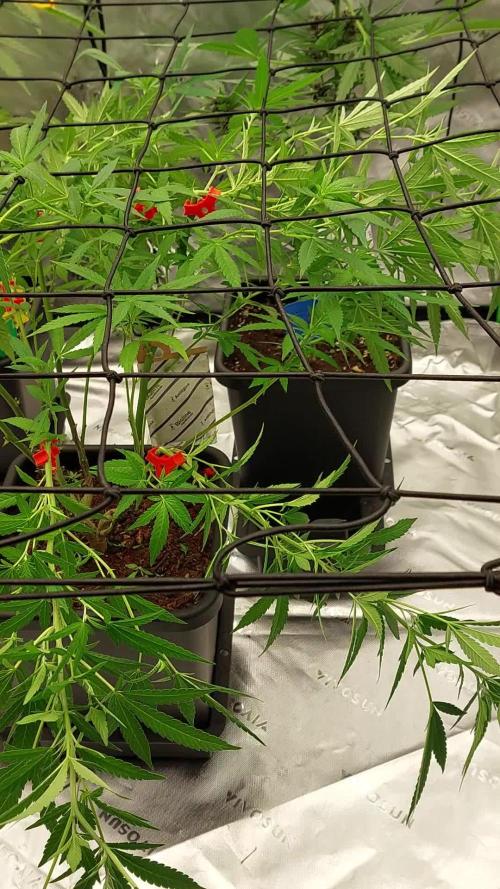
Hey hey growmies!
another longer week, as I wanted to show these girls bouncing back from some problems I ran into with my Kratky experiment.
about halfway through the week my plants started drooping and showing signs of overwatering, my guess is either the plant outgrew her air roots or the reservoir was too hot, inhibiting the plants ability to take up oxygen.
either way, a quick peek at the roots showed some very healthy looking noodles, so I decided to not take any chances and come up with a solution that would solve both those problems.
I took a 3 litre container, put a coat of primer and black paint on it to keep light out, then a layer of plumbers tape to bounce some of the grow lights off of the container, theoretically keeping the heat out, some other things I could have done was paint it white, or put some wall insulation around it.
I could have also kept my jars and tried some troubleshooting, fill them less and more often. but I am happy with the roots created by Kratky, that's the nice thing about that system, it forces the roots to grow more horizontally, the roots have now created a sturdy foundation for low stress training and are perfect for placing into DWC.
so that's what I did, I added a tiny pump and air stone, and for now both plants will sit in this tiny container, The Runtz will be moved to the tent as soon as possible, hopefully before these girl's roots get entangled, If that does happen, I will have to trim back some of the Runtz roots, I don't want to hurt the autoflower.
now you've likely wondered what is up with the host of deficiencies the plants are showing, honestly that's just neglect on my part. I can tell there's damage from overwatering, pH fluctuations and even some lockouts. I am more on top of it now, the pH is more stable, the plants are getting oxygen and will recover plenty before flower.
Plus I get to show off how hardy ruderalis is, look at the auto-flower compared to the photo period, she barely cares about the high temps, pH fluctuations all she appears to want is more food, so I have increased the ec to 1 ms, but most importantly, ill keep the pH in a range where they can actually take up the nutrients now
That's it for now Growmies,
Thanks for checking out my diary.
Would you like to grow Runtz by Zamnesia yourself? Be sure to use the Growdiaries discount code "GROWITGD" on their website for 10% off. 😉
this is a sister diary to my Zamnesia Wedding Cake Automatic grow over here: https://growdiaries.com/diaries/121785-grow-journal-by-belgianbaboon
Stay safe and keep growing!
Likes
2
Share


@ExterminatorX
Follow
I've been letting her grow. She reached the highest point under the lamp inside the tent which was 110cm, I'm hoping her flowering boots up and she has enough daylight everyday to create energy.
I use Bloom as the PK Feeding nutrient. I have to water her EVERYDAY btw it's strange how dry her dirt becomes during the day and over night,.
Water and PK And 10-14 daylight. Water at 6.5ph

Likes
Comments
Share


@Canha_Patch
Follow
Iv started my 9 beans out in jiffy pallets on the 29th of march so we are 2 days in and they are already starting to pop out!
I have 1 of each making way through the top layer of Coco in the pallet.
Likes
35
Share


@Rap_a_cap
Follow
Hey Growmies, some of you had asked to me if I prepare concentrates.......Yes I do!
I don't like modern rosin extraction but instead very rarely I like to smoke some oil.
The following is the recipe of cannabis oil made by ancient Mustapha's process.
It needs:
pharmaceutical grade ethyl alcohol (96.5% by vol.) or 95% for liquors
Weed
A jar with rounded bottom
A lot of time
This oil is 5 months aged, from 20 grams of weed I've obtained 3.5 grams of product.
Trim previously dried weed (20 grams) and put into a 500 ml jar. Cover with 200 ml of alcohol and leave it partially covered with cap. Let alcohol to evaporate on itself and shake the mixture 2 times a day. The most of the solution will evaporate within 10-15 days. When the solution is evaporated by 2/3 it needs to be filtered between 90 and 120 microns. Now is the time to finish and decarboxylate the solution by heating the jar by bain-marie until the green cream sticks to glass. The jar needs to be refrigerated before you remove the cream with a spatula to transfer it into a smaller jar. Store it in a dark place and open twice in a week for few seconds.
You'll obtain a petroleum green/dark amber cream (the green tone will turn into dark brown by time). If the job is well done the surface will crystallize and will shine like a mirror.
This cream is insanely sticky.
Smoke one drop a time. The collapse is around the corner.
Tips:
Best results, in terms of flavour/aroma, with single strain
Let alcohol to evaporate very slowly, take away some macerated weed (after at least 48 hours infusion) and add new weed/hash pieces little by little. Act as if it were a piggy bank.
The final product is a very strong shit, really narcotic.