


Likes
18
Share


@Earthsower
Follow
She has suffered some root damage due to lack of co2 at the root zone so I dried the cup out before I repotted her to give the roots some space. Good news is she seems to be bouncing back. She now stands at 7 cm


Likes
22
Share


@m0use
Follow
***Sponsored Grow*** = Medic || https://medicgrow.com || Grow = ***Sponsored Grow***
Ok, so first week of introducing the trip tonic line of feed into the medium and getting rid of the lotus crap, all of the newer growth is looking much better and some of the older growth is greening up but I don't expect a full fix for that. Gave some extra grow B in this week as it is higher in P and K and will act as a small PK boost for the stretch that is to come. Flipped my plants to flower as well so they are now on a 12/12 setting. Been using the medic grows mini sun 2's internal timer in the lights and they appear to be working just fine. They have pre-programmed setting of 12/16/18/20/22 "on" cycles, I thought it might have been hold the dial till the number you want came up but its not that fancy. As of now my photoperiod is from 1:30pm-1:30am but I might move this up to 12pm-12am so when I need to look at my plants I'm not waiting till the afternoon. Its really only an issue on the days I'm working. over all happy with the progress, Plants are drinking lots so I'm happy with that.
Lights still running at 80% with V1 spectrum, will increase to 100% after stretch, don't need to growing into them and burning up.
Till next week.
***Sponsored Grow***
Official Website:
https://medicgrow.com/
+
https://www.kannabia.com/en
Facebook:
https://www.facebook.com/medicgrowled
+
https://www.facebook.com/kannabiaseed/
Twitter:
https://twitter.com/medicgrow
+
https://twitter.com/kannabiaseeds
Instagram:
https://www.instagram.com/medicgrow420/
+
https://www.instagram.com/kannabiaseedsint
YouTube:
https://www.youtube.com/channel/UCNmiY4F9z94u-8eGj7R1CSQ
+
https://www.youtube.com/c/KannabiaSeedCompany
Growdiaries:
https://growdiaries.com/grower/medicgrowled
https://growdiaries.com/grow-lights/medic-grow
+
https://growdiaries.com/grower/kannabia
https://growdiaries.com/seedbank/kannabia


Likes
1
Share


@Billy_Piff
Follow
Decent strain to grow. Finished mid October. Did pretty good against mold and pests. Earthy lemoney smell. Fed 6 part GH nutes through a drip feed system.

Likes
8
Share

@k0nz1
Follow
Week 8 Flower now. The plants got a nice fade into purple and yellow leaves. The RJ is still 1-2 weeks behind, but looks and smells incredible. The LOs and BBP and quite there, just a few days left. Only feeding ph-regulated water to them now.
The BBP smell very sweet and fruity, lots of big trichomes on the flower, not so much on sugar leaves.
The LO smell like citrus and orange peel, trichomes over the whole plant. Just insane.
Close to final we are !
Temp 19 - 25 Celsius
RH 50-60 %


Likes
36
Share


@nonick123
Follow
Día 30 (01/07) Riego con 250 ml H20 pH 6,5. Se muestran sedientas
6 días después del topping, las nuevas ramas se están formando rápidamente!
Día 31 (02/07) Se muestran saludables y potentes!
Día 32 (03/07) Riego con 500 ml H20 pH 6,5
Día 33 (04/07) Las plantas están creciendo muy rápido! Me planteo hacer supercropping o LST en algunas de ellas...
Día 34 (05/07) Se muestran sedientas. Las macetas se le empiezan a quedar pequeñas
Riego con 250 ml de H20 pH 6,5
Día 35 (06/07) Training session! Aplico LST a todas y supercropping a la OnionOG mutante con 4 colas por nodo
Riego con 500 ml H20 pH 6,5
Día 36 (07/07) Riego con 500 ml de Té Vegetativo de Lurpe Solutions
Aplico foliarmente Kelp hidrolizado a 0.25 ml/l
Ajustes de LST. Están respondiendo estupendamente al entrenamiento! 😍💥
💦Nutrients by Lurpe Solutions - www.lurpenaturalsolutions.com
🌱Substrate PRO-MIX HP BACILLUS + MYCORRHIZAE - www.pthorticulture.com/en/products/pro-mix-hp-biostimulant-plus-mycorrhizae


Likes
67
Share


@HazeyBobby
Follow
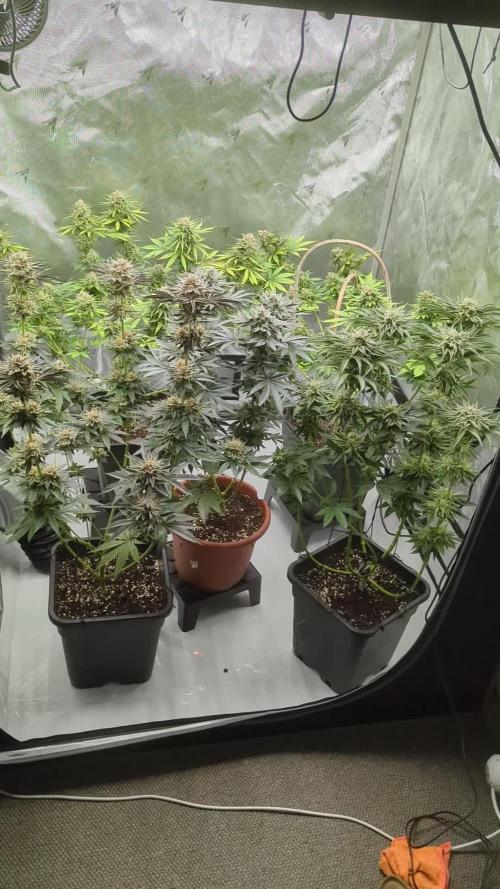
The week starts Monday, Jan-13 in flowering stage.
The plant is growing thick and fast, with very short node intervals creating a thick canopy.
Carried out substantial defoliation of almost all the big fan leaves and a few little stems that were not likely to make it above the canopy. Avoided defoliating the major cola branches. This encourages the plant not to waste resources on a node which is only going to produce “popcorn” buds.
The plants reacted well to the defoliation and were looking good by the end of the light cycle for the day. The net is completely full and this will be the last week of applying any LST as part of the ScrOG setup.
Light is maintained at 30cm distance from canopy, with daily fertigation at lights on - watering almost 2.5L per day. Lowered the average RH in the space to 50%.
----prior 4 weeks updates -------------------------------------------------------------------------------------------------------------------------------------------------------------------------------------------
-----------------------------------------------------------------------------------------------------------------------------------------------------------------------------------------------------------------------
The week starts Monday, Jan-06 in flowering stage.
The net is filling up nicely with the ScrOG process being enjoyable - just tucking branches nicely under squares once stretched enough. The Indica dominant strain is really shining with incredible dense growth and thick branches that don't bend as easily as it's Sativa neighbour.
Light is maintained at 30cm distance from canopy.
-----------------------------------------------------------------------------------------------------------------------------------------------------------------------------------------------------------------------
The week starts Monday, Dec-30 in vegetative stage - switching the light regime to flowering.
Initiated flowering with an extended dark period prior to switching light regime - this practice is supposed to promote a faster initiation of flowering by the plant. Maintain lights off from Dec-31, 10:00 until Jan 1 - 18:45 allowing a 32hr darkness period prior to switching the light regime. Light regime is set for 12.5/11.5 on/off allowing me a better maintenance window for my living situation.
Both plants are growing fast and strong, showing their genetic traits. Some shoots are going through the net already. Have started to tuck branches as they grow to fill up any gaps. Did minor defoliation on both plants near their stem base and centres.
Some green algae on roots/coco medium on the surface of the pot. Have defoliated some more which hopefully helps with air circulation at the area. Will monitor over the week - may need to decrease watering frequency, although they seem to be keeping up drinking.
Lowered the High Humidity setting of the extraction fan to 60% - which effectively keeps it running at least 75% of the time, and removed the humidifier. Will monitor and adjust as necessary lowering the setting to 50% in a few weeks whilst flowering.
-----------------------------------------------------------------------------------------------------------------------------------------------------------------------------------------------------------------------
The week starts Monday, Dec-23 in vegetative stage.
Installed the ScrOG net - Set at 20cm from the base of the plants, being 55cm from ground.
The plant is showing great growth, lots of branching and new growth sprouts. A few branches are beginning to come through the net and almost all main branches are now tied down horizontally after the two recent toppings. Applied more LST and will wait for the branches to reach the net and start tucking.
The AC Infinity fan is currently only running intermittently with its current settings. This seems to impact the utilisation and effectiveness of the carbon filter in use. The desired outcome is for the fan to be running for longer periods whilst in Auto config.
Lowered the High Level Humidity from 70% to 60%, and more importantly, lowered the Max Speed from 4 to 2 with the intent that a lower fan speed will result in longer periods where the extraction fan is operated to remain below threshold targets for the grow space.
Plant growth continues to be strong at the end of the week. Big fan leaves near the top are beginning to look a little serrated and dark, similar to the start of this grow. This may be due to the extra CalMag being added which was the issue at the start of the grow. Will keep monitoring and half the CalMag dosage on next feed. Importantly, I have learnt nutrient mixing of the CalMag should be done prior to the Canna Coco A & B. To date I have done the opposite which may explain my earlier issues.
Fertigating daily at the start of the light cycle. One more week of vegetative growth before switching to flowering although I may need to switch earlier due to the vigorous growth and considering the stretch yet to come.
-----------------------------------------------------------------------------------------------------------------------------------------------------------------------------------------------------------------------
My grow setup includes;
- Secret Jardin DS120W tent (120cm x 60cm x 180cm) placed inside the bedroom. Passive intake of air is from a closed off section of the room where the central heating boiler sits - the intake is warm air (20 degC.) and fairly dry (40% RH) during the winter months.
- Mars Hydro SP250 LED light
- extraction fan - AC Infinity Cloudline T6
- ventilation fans
- aquarium heater
- small oil heater
- small dehumidifier
- 20L Airpots and 3.5L general pots for seedling stage
- Canna Coco substrate and nutrients
- pH and EC/TDS meters
- Thermo/Hygro meter


Likes
Comments
Share

@Guerrilla_grower777
Follow
06/08/2025 20:15
Good climate but one day in the middle of the week had 2h of heavy Rain with some hail(FUCK) that damaged one branch of the frostbanger
Gorilla z bumping and frosting all good
Frostbanger unbelievable how frost It can be on her very first days of flower,this Will be frost and a banger😂
Apricot auto and Coco milk now transplanted ,had some problems bringing them here that's why they look sad
Fucking boars this place Is so dangerous right now

Processing
Likes
10
Share


@CanadianFillmore
Follow
Start of week 2, day 8 of flowering. The plants are sagging a bit in these photos, as I took them just before feeding, except for the pics in the grow room, they are just after feeding. So far, they all look good and healthy, a few leaves are showing some small deficiency signs, hopefully that will go away as additional nutrients are added over the grow cycle.


Likes
16
Share


@3lementa1
Follow
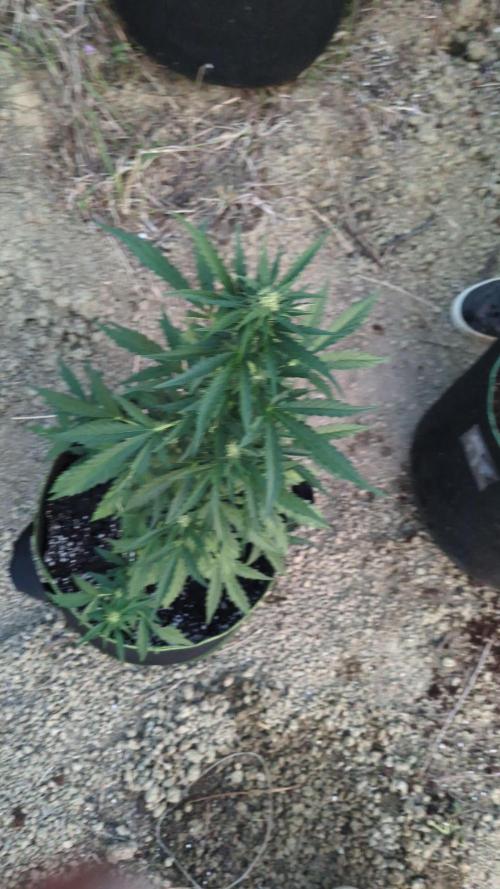
I was growing in closets with the doors open - not a very sealed or sterile environment. I saw some dirt/debris on the leaves so I gave them all a preemptive bath with insecticidal soap just in case it was an early sign of an infestation
Likes
1
Share


@ThatsmyGrow
Follow
Bisschen schwieriger start, viele tage weg gewesen aber trotzdem soweit alles super
Likes
12
Share


@ciansta
Follow
Germinated for 24 hours in a glass of water, 48 hours in a paper towel and then I planted them into biodegradable seedling pots. Northern Lights looking a bit ahead of the Dosidos seeds but that was expected I’ve grown Northern Lights before and they sprout real quick. One of the Dosidos’ first true leaves is looking a bit wonky but we’ll see how it goes I suppose.

Likes
16
Share


@BLAZED
Follow
Week 9 (24-3 to 30-3)
24-3
Temps: 19 to 23.5 degrees
Humidity: 47% to 69%
Watering: 1000 ml.
Did some LST and supercropped some branches.
Also removed some leaves.
25-3
Temps: 18.9 to 23.7 degrees
Humidity: 51% to 68%
26-3
Temps: 19.1 to 23.9 degrees
Humidity: 50% to 64%
Watering: 1000 ml.
Timer set to 12/12!
27-3
Temps: 18.5 to 22.9 degrees
Humidity: 54% to 69%
28-3
Temps: 18.8 to 23.3 degrees
Humidity: 49% to 70%
Watering: 1000 ml. EC: 1.5 (added CalMag)
29-3
Temps: 19.2 to 22.9 degrees
Humidity: 55% to 70%
Watering: 1000 ml. EC: 1.5 (added CalMag)
30-3
Temps: 18.6 to 22.8 degrees
Humidity: 59% to 67%
Watering: 1000 ml.


Processing
Likes
17
Share


@Mr_Bacon
Follow
Well... I just learned to be more gentle with my ladies I ve broken one of the leaves when I was turning the pot ... poor GG watered with Green Planet nutrients I just hope she won't get mad on me. Nothing really more exciting after those 15 days. Ohh I would forget, I bough a more expensive PH meter because I thought the cheap one that i get from Amazon is not correct. well...
...both of em are showing the same thing.
From 14th day I decided to add some silicone and calmag agent into the diet of RQS ldies because they definitely are growing slower and the EC of the solutions made with RQS GROW tablets were a bit too low.
I also decided to spray my ladies once a week with foliar from vitalink