


@Greenwizhun
Follow
Regular floral food 5:5:5
On BUD:
https://growbud.co/shared/sharedGrow?plantId=MSEevo942h


@autoseedsman
Follow
Well week 7 has seen a real amount of growth all which looks really healthy...
white hairs are popping out from everywhere and I maybe wrong but I can see around 8 or 9 healthy looking bud sites.
They seem to be loving the conditions and absolutely zero problems with soil and nutrients etc...
Heres to hoping week 8 goes aswell as this one...
Stay safe guys and girls and happy growing...


@Northerngrowers
Follow
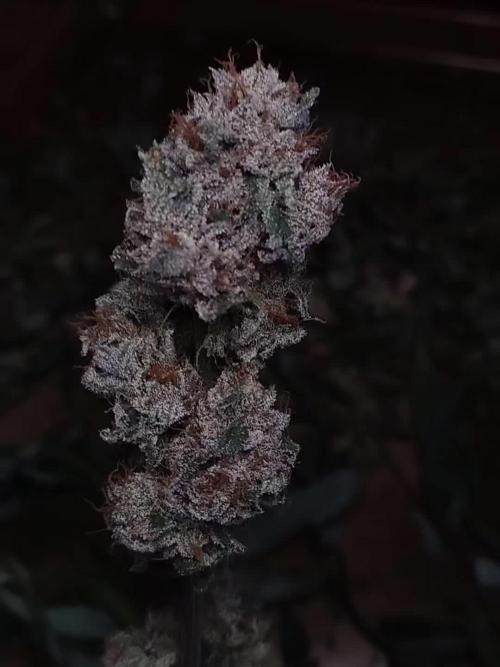
A pesar de los contratiempos en las primeras fases de crecimiento las plantas han conseguido exprimir todo su potencial y hemos obtenido unas flores de primera calidad repletas de tricomas y un alto porcentaje en thc.
Flores con tonos morados y negros hacen que su aspecto sea mas impresionante todavía.
Un sabor muy sutil, diferente pero muy agradable digno de paladares expertos. Efecto relajante, placentero, sensación de felicidad, apto para cualquier hora del día.
Una gran genética.
Totalmente recomendable.



@AestheticGenetix
Follow
About 4 days of drying as of today. She has a nice grape and kush smell to her


@UnorthadoxDude
Follow
Hello and welcome to week 7 beginning for Nesia, the largest and most advanced 6 week old plant I have ever grown.
I update daily so week 6 is now complete. Please do check it out!
I have added some comparisons shots of Karen, the oldest girl of this [G2] series to show just how impressive Nesia is. Nesia is 25 days younger than Karen and she is already a larger plant. This diary is not very popular or comment filled right now, but as this grow progresses I really think it's going to gain some attention. Nesia is going to be big.
Day 44: Nesia stretching fast now.
Day 45: Flowering is going well. I have adjusted the timer such that the main tent is now getting 20/4 upped from 18/6. After monitoring DLI at 18/6 for a week I am unhappy with the overall level but because of the varying heights of the plants I am limited in what I can do in adjusting the light height. Some areas were only getting 20 DLI. So I have rearranged to have the taller plants on the edges and the lowest in the middle and doing it this way all plants are getting between 35 and 50 DLI at 20/4 - although one or two cola tips here and there are getting 55. Will monitor for a week.
Day 46: Fertigated 5l
Day 47: Nesia is really moving into flower strongly now. Pistil development has started proper, stretching rapidly.
Day 49: Nesia starting to pose me a challenge. She is big. Now by far the largest plant. She has reached 50cm height and 70cm across.
I will add proper photos later and do a week summary.
Day 49: Nesia is stretching really fast now. I hope she doesn't stretch much more but I fear we're only halfway done. She's way bigger than Karen now. Taller, wider. Fertigated 5l
End of week summary... well what can I say Nesia has now surpassed Karen (25 days older) in every size and growth metric. She is following exactly the same pattern except without all the problems. I think she still has 2 weeks of stretching to go, on that basis I am expecting her to grow upto 25cm in the next week and the same again the week after - so I think Nesia is going to end up being about 1m tall. Honestly I hope not though, but let us see.


@RDWCGrowing
Follow
1/20/2023- So much to do pre grow and over the next 16 days, absolute first order of business is that I have to take down my current Grow---TIMBER-- Then I have a list of things I have to get done in order to be ready to start this grow 1 Feb.
With that said
T - 2 days until start 48 hour Flush
T - 2 days until Start 48 hours of Light
T - 4 days until TIMBER!!!
Items that need to be done before 1 Feb 2023
1. I need to clean the tent out
2. I need to clean the equipment- Proper Sanitization between grows in Hydro is a must!!!
3. I need to get the hole in the ceiling above my tent repaired- For my last grow I had a deep sink installed in my grow room, to make Hydroponics a little bit easier and have a water source in the same room. The seals on the pipes they were installing broke and leaked through the ceiling causing some damage all the way across my grow room, I was already weeks into my grow and couldn't risk them working above my tent and it would have been very awkward positon for them to be working in as well, so have to get this done quickly between chop and germination.
4. I have to install my new light- I was using a Vivosun 4000 and for this grow I am switching up to a Spider-farmer SF 7000.
1/20/23- For this upcoming grow I am working with M/F photo seeds so I ordered 4 Sex determination kits. I recieved my my 4 Sex determination testing kits from Rimrock Analytics today. I will be using these to test my plants at week 2 of Veg so that when/if I take clones I know I am taking them off females. As well as I don't want to accidently pollinate my tent during this grow I am looking for big beautiful buds not seeded buds. :-)
1/24/2023- Harvest of current grow- Started at 2:00pm and finshed wet trim and firt batch into the freeze dryer.
1/25/2023- Next batch into the freeze dryer and cleaning all my equipment for this Grow.
T-1 Day until the workers are supposed to be here to fix the hole in the Grow Room.
T-3 days until I instll my new Gorilla Grow Tent and my New Light Spider Farmer SE-7000 for this grow.
T-7 Days until Start of Germination
1/26/2023- Harvest is done ran through the Freeze dryer and dry tim completed.
1/27/2023- Grow Room repairs completed. Hole is gone Letting the paint dry before I install the new tent.
T-2 days until Install the New Gorilla Grow tent and the new Light
T-3 days until I put the hydro equipment in the new tent
T-5 days until Germination
1/29/2023- Day 0- Final Pre Germination activities
Germination Start T-3 days
The paint on the ceiling was dry and it was time to finish prepping for Germination. I got the following items knocked off my list.
New 4X4 Gorilla Grow Tent is up and ready
New Spider Farmer SE-7000 Light is installed- Thanks Moony Grows for the suggestion and for the Code that got me some money off and free shipping (Moonygrows)!! I turned the lights all the way up to max and set the timer to 18/6 0600-0000. I will keep an eye on the temperature and humidity without my plants and see how hot it gets with the new light.
I put my Hydro system back together and put in 40 gallons of water into it, time to monitor for leaks the next few days.
I Setup my cloning machine for Germination Days 3-11
1/30/2023
let me break down the situation, ROOM in the TENT.. Enough said.. No really I tried putting my exhaust system up in the new tent with my new light, The light is so big corner to corner that it really didn't give me enough room for the lights be be raised, with the exahust hanging the buckets my plants are Starting in are 2 and 1/2 feet off the ground, great for plenty of room for roots but not so great for upwards space for the plant to grow. In a 6' 11 tent with the exauhst in side and hanging that only gave me a little over 4 feet of grow room to play with. My last grow if you saw my diary, anyone could tell I was struggling to keep the buds off the lights. No good, Since space was such an issue I was running my carbon filter inside on the ground but It really needed to be up sucking the heat out not shooting the cool out. With that setup I was sucking air through the filter and pushing it out the tent at a bottom exhaust hole cold out. Wasn't doing me any good for my heat. I was hitting temps of up to 85 degrees. I bought a portable AC unit and have been running it in the grow room to try and keep temps below 85 and I have had to lower the power on my lights during grow also not ideal.. With that said a friend of mine MoonyGrows (Check out his diary) took the time to look at my issue send me a picture of my grow tent setup with detailed instructions on how to suck the air out from the top but putting my filter and fan on top of my tent so no room issue and I am sucking the air out from the top where the heat is instead of pushing the air out from the bottom where the cool is... THANK YOU MoonyGrows For taking the time to help me get this straightened out.. Now I have room and I have the exhausts working right and now my temps with everything at 100% are topping out at 80 this dropped the temp by 5 + degrees at 100% max.
T-2 days until Start of Germination
Prepped my seed tray with humidity dome
Prepped my Rapid Rooter plugs. I Used RO water, and I added a few drops of Hydrogen peroxide to Oxygenate the water. I then PH balanced between 5.7-6.0 the same that they will be getting in the Cloning Machine and when they get to thier final grow pod. I perfere the 5.8x range and I hit 5.84 for these rapid rooters. If you want to see a complete video on the process HowWeedGrow has an amzing video that shows step by step how to do it and explains it better than I ever could including how to plant the seeds. Which I will cover when I get to that step on Wed. https://www.howweedgrow.com/how-germinate-weed-seeds-cannabis-rapid-rooters/
1/31/2023
T-1 day until Germination Start
All set and ready have my Rapid Rooter plugs ready to go have my seeds out.. Have my seed tray warming up tonight. Tomorrow morning right into the Rapid Rooter then strait into the tray. I will spray the dome to start the humidity in there.
2/1/2023
Germination Day!!
Let the games begin!
0600am Put the seeds into the Root Riots. And then put the seeded Root Riots into their first home the Seed tray. I have them under the light 24/7. Sprayed the dome
7:30pm Sprayed the Dome to keep humidity going on the dome.
2/2/2023
Day 1 of Germination
Sprayed the Dome in the morning
Sprayed the Dome in the evening
2/3/2023
Day 2 of Germination
Roots are starting to come out the bottom of the root riot plugs and the heads are slowly popping out of Number 4 just below the surface.
Afternoon- Number 4 has popped up
Evening- Number 3 has popped up as well. Happy Dance!!
2/4/2023
Day 3 - Germination
Surprise Surprise Surprise- all 4 have now poked their heads up.. Happy day!! 100% Germination succeeded.
Now major milestone to track is how many are female and how many are male.
I will take look at the roots this afternoon/evening and see if they have enough root to go into the cloning machine for the next 7 days before they go into their Hydro Pods.
Day 3 - Germination - Evening..
Roots looked good and they were tall enough to make it into the cloning machine.
Now that they are all in the cloning machine I have switched the lighting to veg state 18 on 6 off.
2/5/2023
Day 4 - Germination - Morning
All the Ladies (fingers crossed) looking great stretching nicely and look nice and green, Photo synthesis underway....
UPDATE!! After a very interesting POD cast on FSTS by Dr. Bruce Bugsbee from Utah University, I have shifted my lighting to 24 hours on through seedling and then I am going to shift to 20 hours on the rest of Veg.
2/6/2023
Day 5 - Germination
While Checking on my conditions inside the new tent last night, I found that the Humidity was down to 39 Percent. I added an AquaOasis Cool Mist Humidifier, the reason I selected this humidifier is that I needed one that could be turned on and off utilizing my Inkbird Humidity Controller IHC200 that I have my Pro Breeze Dehumidifier currently running with.
Root structures are starting to get there about 1/4 of an inch.
2/7/2023
Day 6 - Germination
Everything seems on track more roots poking out of each today. They are each getting a little taller as well.
Checked in the evening and number 3 was drooping the Root riot plug on the bottome was dry and the roots were not in the water yet. I raised the water just enough that the longest root that was sticking out is now hitting the water.
2/8/2023
Day 7 - Germination
Everything looked good while checking in on them this morning number 3 is now full up and no droop again.
2/9/2023
Day 8 - Germination
T-2 days until Plant into Forever Pods and we start week 1 of Veg .. :-)
Surprising thing to me is that number 1 and 2 were later in popping then 3 and 4 but the roots are growing longer in 1 and 2.
2/10/2023
Day 9 - Germination
Number 1 and Number 2 are definitely ready for transplant today.. Based on how they were yesterday and where they are today I am hoping by tomorrow 3 and 4 are ready. Today they look to me where 1 and 2 did yesterday.. I really hope 3 and 4 catch up by tomorrow since..
T-1 day until transplant to new/ final home for grow.
Need the roots long enough to have some clay down in the basket to keep the root riot out of the water and only roots in the water..
2/11/2023
Day 10 - Germination
Today they got placed in thier forever Home, 7 days from Sprout and 7 days until Week 1 Start.
PPM- 180 this is water out of the Tap
Temp Water: 70.7
Temp Tent: 77
Humidity: 40% I have a humidifier going 24/7 to try and bring this up.. I also have Humidity Domes on each plant.
2/12/2023
Day 11 - Germination
Sprayed the domes, all are looking good.. Nothing much to do at this phase but Keep monitoring the PH level in the system and making sure they have a comfortable home.
T-6 days until Week 1 start
2/13/2023
Day 12 - Germination
Sprayed the domes, They were looking a little yellow today so I moved the light down to assist. Nothing much to do at this phase but Keep monitoring the PH level in the system and making sure they have a comfortable home.
T-5 days until Week 1 start
2/14/2023
Day 13 - Germination
Sprayed the domes, They were looking a little Florissant yellow today, with what looks like slight burn on the tips, I talked with a fellow grower and we agreed that It was probably that I was drowning them, Yes you can drown you plants even in Hydro, but only early on.. :-) It usually happens with the water being too high, which soaks not only the roots but the medium (root Riot plug in this case). I lowered the water from touching the bottom of the pot to about 1" away. This will probably take 3-4 days to resolve. I will continue my daily monitoring.
T-4 days until Week 1 start
2/15/2023
Day 14 - Germination
Sprayed the domes, continue my daily monitoring they look a little darker green instead of lime green now that I lowered the water levels in the system, so I think that I might have resolved the issue but it will take a few days for recovery to happen.
T-3 days until Week 1 start
2/16/2023
Day 15 - Germination
I looked in on them this morning, 3 and 4 look like they are doing well and recovering nicely. Number 1 not so much it has brown spots on the leaves, this very well can still be a side effect of the overwatering but I decide to go ahead and add Nutes earlier than I was planning just incase. I was going to wait until Saturday but I think intervention is necessary now especially after drowning them early on.
I added 1/2 what I am planning on adding for week 1 start. I also think I am going to adjust my chart to add 1/2 2 days after plant from now on. I don't think it would hurt it to have some Nutes to pull from.
.25ml/Gal Calmag = 12.5ml
1ml/gal GH FloraMicro= 50ml
1ml/gal GH FloraGro = 50ml
1ml/gal GH FloraBloom = 50ml
T-2 days until Week 1 start = I will drain the system and start it over on Saturday with Week 1 Nutes.
2/17/2023
Day 16- Germination
I didn't even want to post today after looking in on them this morning, 3 of the 4 are now showing signs of dronwing.. Brown spots on the leaves, the water levels were still too high.. I drained about another inch out of the tanks.. Will see how quick they recover.. I start week 1 tomorrow and will have to ensure my water levels are at least 1" away from the basket on this round.


@Canaryweed_tf
Follow
Ya tenemos la séptima semana de floración de esta niña bonita (PurpleKush) de Kannabiaseeds. En esta semana solo le estamos echando agua bajada de ph,ya que en nada cortamos y no queremos que nuestras flores huelan y sepan a líquidos 😜



@Ultraviolet
Follow
Permanent Marker weed strain possesses the genetics for high anthocyanin production, which is responsible for its signature deep purple. While the genes are present, the expression of these colors is often enhanced by "thermal stress" (lower temperatures) during the final three weeks of flowering, which triggers the production of these pigments.
👋 Raising the Carbon-to-Nitrogen (C:N) ratio in the growing medium to avoid over-immobilizing nitrogen, on the flip side, being careful not to trigger early autophagy. Moderate, controlled increases in sugar support the energetic demands of flowering and act as a signal trigger, but excess sugar is more likely to inhibit flowering or damage the plant. Balance, like everything else. Visually, when the chloryphyll green gets darker, it is a subtle indicator that the concentration of nitrogen is increasing / more is being stored than is being used. I noticed when you push very high intensity lighting, it slowly fades the green as the plant degrades chloryphyll faster than it can be replenished. When the green of the leaf continually gets darker, it is an indication that the concentration levels of nitrogen are increasing, and I dont want to increase light intensity.
Turn down the nitrogen faucet. C:N ratio dictates the rate at which nitrification occurs, if at all.
The Carbon-to-Nitrogen (C:N) ratio acts as a critical biological "on/off switch" (or regulator) for nitrogen turnover by determining whether microbes
immobilize (consume/tie up) or mineralize (release) nitrogen during the breakdown of organic matter. This ratio regulates microbial activity by defining the balance between available energy (carbon) and building materials (nitrogen). The C:N ratio in a medium acts as a critical regulator of nitrification, effectively functioning as an "on/off" switch for the dominance of either autotrophic nitrifying bacteria or heterotrophic bacteria.
The shade of green in chlorophyll is subtly linked to the enzyme Rubisco through a co-evolutionary, functional relationship designed to optimize photosynthesis. Chlorophyll absorbs blue and red light for energy, reflecting green light, a process that ensures the "light-dependent" reactions provide the correct, controlled amount of energy (ATP and NADPH) needed by Rubisco to perform its "light-independent" carbon fixation. Because Rubisco is a relatively inefficient and slow enzyme—often considered the bottleneck of photosynthesis—chlorophyll and the overall structure of the leaf have evolved to manage energy distribution to prevent overwhelming the Calvin cycle.
While chlorophyll absorbs mainly red and blue light, it is not perfectly efficient, and leaves appear green because some green light is reflected or transmitted. This reflection allows light to penetrate deeper into the leaf, preventing the surface chloroplasts from becoming overloaded and enabling a more efficient distribution of energy to the high volume of Rubisco located throughout the leaf's mesophyll.
The rate of chlorophyll-driven electron transport (light reactions) is matched to the potential rate of carbon fixation (Rubisco activity). If Rubisco were faster, leaves might be darker; however, the "shade of green" represents a balance that prevents chlorophyll from producing more energy than the inefficient Rubisco can process. The green color itself is a byproduct of a photosynthetic system tailored to feed a slow, yet crucial, enzyme (Rubisco) just enough energy to maximize carbon assimilation without inducing excessive oxidative stress or inefficiency.
The shade of green in leaves is directly linked to the concentration of chlorophyll, which is in turn strongly correlated with the amount of
Rubisco (Ribulose-1,5-bisphosphate carboxylase/oxygenase) and, consequently, the rate of carbon fixation. Darker green leaves generally indicate a higher concentration of both chlorophyll and Rubisco, signifying greater capacity for photosynthesis.
Increase output or reduce input. Subtle tells.
While an excess of nitrogen (specifically ammonium) can cause an imbalance, nitrification—the microbial conversion of ammonia to nitrate—is highly sensitive to a variety of environmental, chemical, and physical factors. Because it depends on specific, slow-growing bacteria (Nitrosomonas and Nitrobacter) and archaea, anything that stresses these organisms can disrupt the process.

shorts_status_processing


@GrowGuy97
Follow
Day 35, start of week 2 in flower, everything is going great so far✌️🏼🌱
Day 37 - All the ladies are looking great✌️🏼🌱
Day 38 - ladies got watered today, looking good & starting to put off a nice smell😍
Day 40 - Still have a lot of yellowing leaves towards the bottom of almost all the plants can’t figure out exactly what’s wrong😅😅

shorts_status_processing


@Kourtney80
Follow
I’ve started useing rain water to water them. They still look healthy as they are keeping they’re rich green colour I jus hope they’ll survive😅
I also have a new 600w light for them





@123Grow
Follow
Okay, Mos Cutty is coming to life. I still am having slow growth, but it’s going now.


@PopsFarm
Follow
Last few days - Day 65 - Toffee Pudding Auto from @anesiaseeds
Nutrients: @atami_deutschland / @atami.international / @stefan_atami / @daniel_atami
Soil: @promixgrowers_eur / @promixgrowers_global / @promixgrowers_unfiltered / @promixmitch
LED: @powerlux_spain
Tent: @secretjardin_
Thank you to everyone who follows and supports my work 🙏🏻💚
This means a lot to me and you should know you are a part of it and only with you all this is possible, you are the best community 😎
Growers love, love for everyone


@ImAGrowerNotAShower
Follow
At the beginning of the week I found many leaves with spots on them. I think I might have had some mites. I removed almost all of the leaves and sprayed the ladies twice with CannaCure.
Now everthing looks ok again at it should be only a few days until the first ones will come down. Checking trichomes everyday.



@BombBuds
Follow
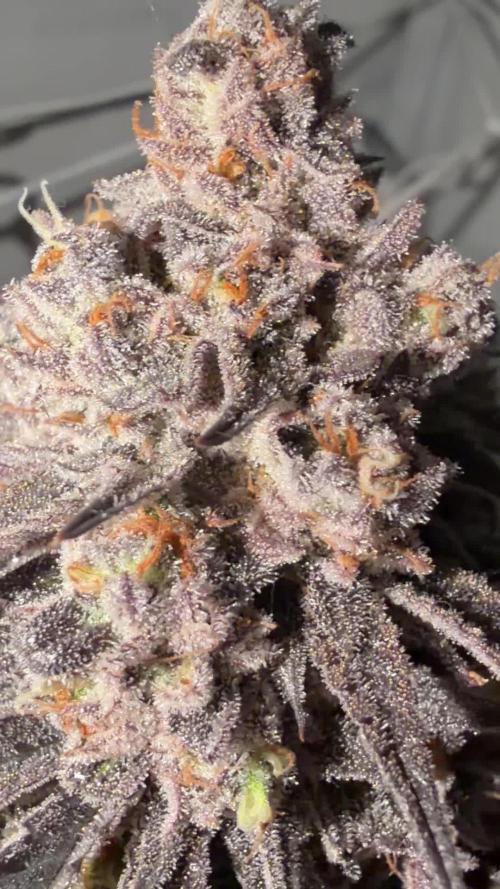
Das war’s!
Außer den vereinzelten Samen die ich in der seifuku gefunden habe bin ich sehr zufrieden wie alles gelaufen ist!


@nonick123
Follow
Día 85 (13/01) CBD Auto 20:1 #1 - Los cogollos se siguen formado y engordando. Muy sativa!
Es un poco misterio saber cuando estará lista!
Día 86 (14/01) CBD Auto 20:1 #1 - Cogollos engordando y poniendose duros!
Día 87 (15/01) CBD Auto 20:1 #1 - Se va la luz de mi casa durante 3,5 horas y la temperatura baja a 14,5 ºC... A ver como le afecta
Día 88 (16/01) CBD Auto 20:1 #1 - Retiro algunas hojas de abanico amarillas por senescencia. Los cogollos siguen engordando 😁
Día 89 (17/01) CBD Auto 20:1 #1 - Nunca tuve una Auto con tanto tiempo de vida. ¿Alguien tiene alguna idea de cuando acabará? 😵
Día 90 (18/01) CBD Auto 20:1 #1 - Busy day
Día 91 (19/01) CBD Auto 20:1 #1 - Muchas hojas de abanico amarillentas! Parece que se acerca la senescencia!
FastBuds 15% DISCOUNT code "NONICK" 2fast4buds.com @fast_buds_official_ @fastbuds.official
💦 BioTabs 15% DISCOUNT code "GDBT420" biotabs.nl/en/shop/ @biotabs_official
🌱Substrate PRO-MIX HP BACILLUS + MYCORRHIZAE @promixmitch @promixgrowers_unfiltered
💡2 x Mars Hydro FC1500 EVO Led Grow Light (2024 NEW FC 1500-EVO Samsung LM301H 150W LED) - https://marshydro.eu/products/fc1500-evo-led-grow-lights/ - https://www.amazon.de/dp/B0CSSGN5D8?ref=myi_title_dp
shorts_status_processing


@Cultivators_Dream
Follow
Day 29 and starting off Week 4 awesome even with my big mistake and not knowing that on mainlining you top first time at third node but the second toppings you can do at first with enough growth but in waited till 3rd on both new mains.. o well you live and learn but hey she looks like shes doing fine atleast will have some nice buds
Day 32 update: Now that I have the fungus gnats under control everything has been perfect.. used Foxfarm SledgeHammer to water her to flush all that extra leftover salts in the soil out from the grow nutes, because will be switching to my bloom nutes on next watering, and she seems to have liked it.


@Dmon88
Follow
First thing id like to say is last night the lady i have been growing this plant for sadly passed the cancer proved to be too much and she is now feeling no pain if everyone could please say a prayer for her and her family. Ive trimmed all bigger leafs off and started her flush my nute chart still calls for the Herculean harvest so ive continued only that with phing my water stillthe trichomes r still not amber in color so ill flush for another few days then will most likely stop all water and let the soil dry up hopefully having a harvest by next week to post this has been a fun way of keeping up with my grow i appreciated everyones help and comments for good luck


