Likes
Comments
Share
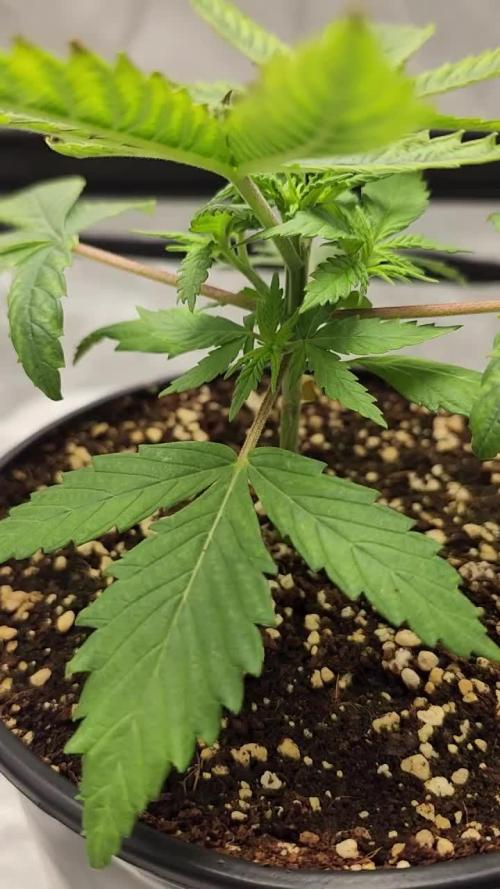
I had two sprouts in the pot. I will focus on the middle one for the majority of the grow. It had slow growth in terms of height by the end of week two. However, the first set of 3 fingered leaves had come in.
Likes
3
Share
@zulya
Follow
les 2 petites sont dans la serre 😀. le maintien du climat est plus facile que je ne le croyais, j'ai commencé les nuits et j'ai ramarqué que le taux d'humidité relative est plus simple a stabiliser. la nothern lignts est plus grande en taille que la stress killer et rattrape un peu son retard. j'ai fait 2 essais différents, pour la pousse, la stress killer est dans son pot definitif. La nothern light est dans un gobelet en carton pré-percé : pour constater, ce qui est le plus efficace. Mes doutes maintenant, se porte sur l'arrossage, j'ai peur du surarrosage. Et je me doute que si il n'y a pas assez d'eau que ça cause un retard de croissance. donc je mets peu d'eau. la temperature extérieur monte espérons que ça le fasse^^
Processing
Likes
6
Share
@Moss420
Follow
Got a new light this week, it's basically a HLG 260 R-Spec except locally manufactured using the same Samsung LEDs. Big Mumma got her 60x60cm tent today and will go in there under one Viparspectra 300W blurple (130w from the wall). I trimmed her, super cropped her main stem and added a scrog net in preparation of flowering her in the next couple of days. Because my other plants were getting up past 75cm after 7 days of flower (100cm is my absolute max) , I decided to supercrop the canopy back down to about 60-65cm - it was pretty scary and I definitely broke the outer stem on some of them. Also gave them a good trim. Fortunately most bounced back strong the next day which are the most up-to-date photos you see (17/4/20).
Likes
6
Share
i was surprised that she was done on 2/15/25 spidermites had completely taken over one bud so i decided to check trichomes and she seemed ready.
Likes
149
Share
Hi all the happy people here in GrowDiaries. This is my second cultivation ever and it will be fun to try a bigger space than my closet grow. First, I'm just going to say I'm done with the construction of my new growroom. I put some pictures on the construction here in week one. The room is 2.14 meters by 1.7 meters and has a ceiling height of 2 meters. It provides a floor area of ​​3.6 square meters. I use a 54 Watt Lightwawe T5 for germination and 2 Pcs 400 Watt HPS lamps. I have a channel fan that replaces the room air about 40 times an hour to get a comfortable theme in the room, the air enters a fresh air intake from the outside. The air is purified through a carbon filter to then leave the room to the rest of the basement. Then I use that heat to heat the rest of the basement. I will use 8 pcs 15 liter Autopots to grow with and a 100 liter water tank that supplies the pots of water and nutrition. I will grow completely organically in soil and will watercure my buds to get the best possible medicine for me. But there are no cultivation rooms to be displayed here, so I continue with what is most important. Today I have put my seeds in my moisture dome and hope the seeds have germinated within a few days. I am very excited to see how the new growroom will work and how this Blue cheese Auto from Royal queen seeds will turn out. Blue Cheese automatic cannabis seeds are a cross of Blueberry Automatic and Cheese Automatic that has been perfected over five years of breeding and careful selection. The result is a feminized, autoflowering strain with superior yield, flavor, and effects to either of its distinguished parent strains. THC: 16% CBD: Low Yield Indoor : 325 - 375 gr/m2 Yield Outdoor: 60 - 110 gr/plant Height Indoor: 40 - 70 cm Height Outdoor: 60 - 110 cm Flowering: 7 - 8 weeks Harvest month: 9-10 weeks after planting Genetic Background: Blueberry x Cheese x Ruderalis Type: Sa 35% In 40% Ru 25% Effect: Cerebral and uplifting Climate: Mild .............................................................................................................................................................................................................................................................................................................................................. Update 2017-08-15. All 4 seeds have germinated and planted in small pots inside the humidity dome. I'm so glad it worked so well and now it's just hoping they'll start growing and become 4 big healthy girls :) ............................................................................................................................................................................................................................................................................................................................................... Update 2017-08-16. I have mixed my own soil today. Its 40% sieved peat harrow H2-H4 0-30 mm, 45% sieved peat harrow H4-H6 0-30 mm. 5% sand and 10% of compost soil. And i use 15% of perilite and mix it all together. ................................................................................................................................................................................................................................................................................................................................................ Update 2017-08.20. Nr1 and 2 grow and thrive. Number 3 just got rid of the seedpod and is folding out the sheets. Number 4 is a bit shy and can only be seen if you look carefully into the soil. ......................................................................................................................................................................................................................................................................................................................................... Update 2017-08-21. Nr 1 and 2 is doing well. Nr3 is trying to catch up and Nr4 is still shy. -------------------------------------------------------------------------------------------------------------------------------------------------------------------------------------------------------- 2017-08-23. Transplanted 2 girls from humidity dome and the small germinating pots to 15 liter autopots. The other 2 girls have to wait a little more before transplant to the autopots. ................................................................................................................................................................................................................................................................................................................................................................................ 2017-08-27. The girls have settled in to there new home of the 15 liters autopot after a little transplant chock. Now the real week 1 starts for me and the girls. -------------------------------------------------------------------------------------------------------------------------------------------------------------------------------------------------------- 2017-08-28. New pic and movies. --------------------------------------------------------------------------------------------------------------------------------------------------------------------------------------- 2017-08-28. Nr3 is transplanted in 15 liter autopot. ------------------------------------------------------------------------------------------------------------------------------------------------------------------------------- 2017-08-29. New movie of the girls. Its no water for 3 days now for Nr1 and 2 so the roots develop more and match the plant above the soil. The temp controlled fan is awesome, its easy to set what temp you like to have in the room. Right now its 28 celcius. And humidity is 56%. ------------------------------------------------------------------------------------------------------------------------------------------------------------------------------------------ 2017-08-29. Hello to you who read my diary, I just want to say that I am pleased that you have chosen to check in with me and in my diary. I just want to say that I do this for myself and for a steady flow of my medicine. Everything you read and see in my diary is 100% honest and I will never distort or beautify anything here. I document my crops so that I can learn from my mistakes and also to look back at those different crops. I try to update with pictures every day and with text if something special has happened in the garden. This is my strainhunt for the best medicine and the beginning of my journey with cannabis and the cultivation of it. ----------------------------------------------------------------------------------------------------------------------------------------------------------------------- 2017-08-30. Cleaned the room this morning, just vacuuming and cleaning with chlorine solution. Im testing the fan to control temp and humidity, it works great. Added some pics with measurements and movie. Everything is looking great right now. --------------------------------------------------------------------------------------------------------------------------------------------------------------------------- 2017-08-31. New pics and videos. --------------------------------------------------------------------------------------------------------------------------------------------------------------------------------- 2017-09-01. New pics and videos. Gave each of the girls with 2 ml Alg-A-Mic, 4ml Bio-Grow, 4ml Bio-Heaven and 10 ml Formulex mixed in 2 liters of water. I hope they like it :) ------------------------------------------------------------------------------------------------------------------------------------------------------------------------------------------------------------------------------------------- 2017-09-02. New pics and the girls liked the water and nutrients yesterday. ------------------------------------------------------------------------------------------------------------- 2017-09-03. New videos of the girls this morning. Nr1 and 3 looks great and nr 2 is looking a little funny, maby a little stressed. Kl. 16.00. Did some defoliation on the girls. Added video. Kl.. 23.00. New videos, defoliation and leaftucking. ----------------------------------------------------------------------------------------------------------------- 2017-09-04. Kl. 11.00. Week 3 starts. Trying to LST the girls and defoliate/leaftuck. New picks. KL 23.00. New video. -------------------------------------------------------------------------------------------------------------- 2017-09-05. KL 08.00. Cleaned the room this morning, just vacuuming and cleaning with chlorine solution. KL 12.00. The girls got 2 liters of water each with nutes in it, added a video. ---------------------------------------------------------------------------------------------------------------- 2017-09-06. KL 08.00. The girls woke up after their beauty sleep, the leaves are always a bit down after 6 h of darkness, but they will stretch now when the HPS lamp starts. Everything looks good and I keep trying to tuck the leaves so they get the maximum amount of light where needed. Added pics and video. The Nr 3 girl is still a little bit behind the other 2 girls and all the 3 girls look like there 3 different pheno of the same plant. KL 23.30. Did some LST. ---------------------------------------------------------------------------------------------------------------------- 2017-09-07. Day 21 from sprouting, Nr3 is 17 days from sprouting. I have never tested PH in my grows, when growing organic in soil iv learned that it adapt PH by it self. But im curious by nature so i had to test. Kl 10.00 Tested PH in the soil, it was 6.9 and tested my tap water and it was 6.8. Added a video of the girls, its 10 H after defoliation, LST and leaftucking. I think its looking good. Kl 22.30. New pics.
Likes
Comments
Share
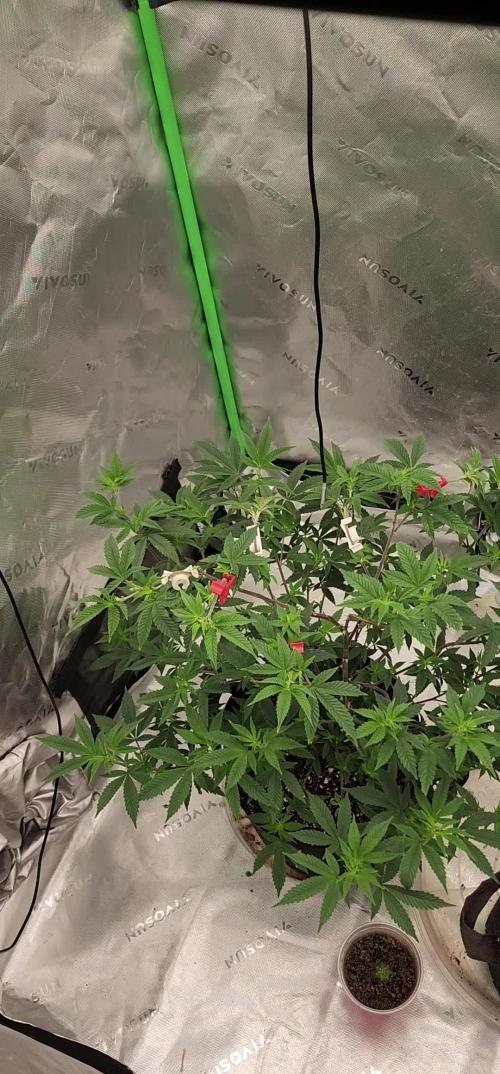
She has stretched a little I’ll top her and repot and start lst
Likes
35
Share
Bonjour à tous les padawans et les maîtres jedis Pour cette semaine je prévoit de pratiquer comme technique spéciale le LST et juste un arrosage. Pour cela comme à mon habitude j'attend le cinquième noeud ou que je juge la plante robuste. Je profite que cette semaine qui va être relativement calme pour faire un LST appliqué et vous faire un rappel de ce qui est pour moi la meilleure technique pour arroser une autofloraison et la façon dont je pratique le LST. En suivant ces quelques simples conseils vous obtiendrez un résultat optimal tout au long de votre culture : Le cannabis est une plante qui n’aime pas recevoir un léger arrosage en continu. Il est impératif de l’arroser en grosse quantité, puis d’attendre que la terre soit bien sèche avant d’arroser à nouveau! Pour calculer la quantité d’eau nécessaire à chaque plante, suivez cette règle : Le volume d’eau à donner lors de chaque arrosage doit représenter au moins environ un quart du volume du pot !! Exemples : pour un pot d’1L, donnez 0,25L d’eau à chaque arrosage pour un pot de 4L, donnez 1L d’eau à chaque arrosage pour un pot de 12L, donnez 3L d’eau à chaque arrosage pour un pot de 30L, donnez 7,5L d’eau à chaque arrosage !etc… Pour donner un tel volume d’eau, il est souvent nécessaire d’arroser en deux (voir trois) fois, lentement et uniformément sur toute la surface. Disposez de bonnes coupelles sous les pots, celles ci se rempliront d’eau qui remontera dans le pot par capillarité en moins d’une journée. Il est également très important d’utiliser un bon terreau de qualité, avec une bonne capacité de rétention d’eau mais qui assure également un bon drainage (celui ci doit contenir de la perlite, et/ou de la coco, etc..) Il vous faut alors maintenant attendre quelques jours en sous-pesant régulièrement les pot avec vos bras. Quand ils seront redevenus très légers, vous pourrez arroser à nouveau !! En effet, comme l’eau pèse beaucoup plus lourd que la terre, un pot gorgé d’eau pèse plusieurs fois le poids d’un pot d’une plante prête à être arrosée. Avec un peu d’entraînement, vous apprendrez donc très rapidement à sous-peser vos pots pour savoir quand une plante a soif. C’est une technique à la fois très facile et très efficace, et qui peut être appliquée à toutes les plantes en pots ! En arrosant de cette façon, en général vous devrez arroser vos plantes tous les 3 à 6 jours. Pour cette semaine 3 au jour 17 ma plante fais 12 centimètres et son cinquième noeud apparaît je décide donc de pratiquer un LST sur ma plante. Pour ce j'utilise du fil de fer galvanisé que je plante directement dans le substrat en faisant attention de ne pas endommagé les racines car n'oublions pas que ce qui pousse dessus pousse aussi dessous. Jour 17 je pulvérise du une solution composé d'une cuillère à café de savon noir mou dilué dans un litre d'eau en prévention d'éventuels nuisibles. Je corrige mon LST suivant la pousse de ma plante ... Pour ma par c'est la manière dont je procède. Comme promis petit rapel de: Quand commencer à appliquer la technique LST De nombreux cultivateurs commencent la manipulation dés que les plantes possèdent entre 3 et 6 nœuds ou une paire de feuilles. Durant cette première étape de la croissance, le tronc encore flexible est pliable sans risque qu’il ne se casse, même si au fur et à mesure du développement de la plante il sera de plus en plus difficile de le plier. Nous pouvons continuer à guider la croissance des branches durant toute la culture, même durant la floraison, ce qui pour cette étape représente un grand avantage face à la taille, qui n’est pas du tout recommandé une fois que la formation des têtes commence, cela stressera en effet la plante, ce qui aura pour effet de retarder la récolte. Comment appliquer la technique de guidage LST Si nous sommes prudents, la flexibilité naturelle des fibres du cannabis permet de plier leur tronc et branches avec une relative facilitée, même durant la floraison des plantes. En utilisant une corde fine, nous pouvons accrocher la pointe de la plante à la base du pot par exemple ou à un tuteur que nous aurons planté dans le substrat. Nous plierons le tronc avec précaution et nous le fixerons avec la corde, à partir de là, nous pouvons augmenter progressivement la tension de la corde, chaque jour un peu plus, jusqu’à obtenir la position souhaitée. Soyez attentif à la réaction de la plante, essayez de ne pas appliquer trop de pression sur la corde et rappelez-vous que la flexibilité des branches peut varier d’une plante à l’autre. Pour obtenir de meilleurs résultats, il suffit de suivre quelques règles simples. Pour commencer, nous devons choisir une corde fine mais pas trop pour ne pas blesser les troncs au fur et à mesure qu’ils grandissent et qu’ils deviennent plus gros. Nous pouvons utiliser des crochets en plastique souple ou de n’importe quelle autre matière flexible pour éviter d’endommager les plantes. Spécialement en intérieur, utiliser des cordons en plastique de couleur (voir les diaries de @Silky) est très pratique pour voir facilement les accroches et faciliter le travail au milieu du réseau formés par les cordes, les tuteurs, les mailles ou les supports que nous aurons dans la culture. Bien entendu, en culture extérieure et surtout en guerilla nous ferons juste le contraire et nous utiliserons des matériaux de couleur qui n’attirent pas l’attention pour que notre jardin reste discret. Pour stresser les plantes au minimum, la mieux est de réaliser ces manipulations le soir ou juste après que les lampes en intérieur s’éteignent, ce qui leur permettra de se remettre durant la nuit. Normalement, le jour suivant nous pourrons observer comme les pointes des branches que nous avons pliées se dressent de nouveau vers le haut à la recherche d’une source de lumière. Que la force soit avec vous
Likes
17
Share
@Fabhz
Follow
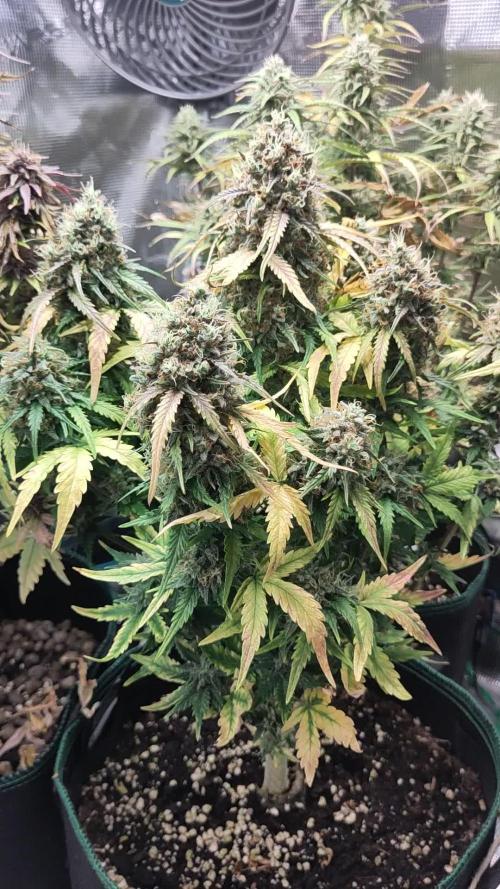
Hi!!!! week #12. 1-2 weeks lefts Im waiting for the lower buds to fully flower. Stopped fertilizing 1 week ago, harvest is coming. ...........
Likes
25
Share
@m0use
Follow
Easy going week. nothing much to report. The EC pen I got is acting weird already. sometimes I'll put it in the feeding liquid and it will display 400ppm something. Then if I move it about or drip it in and out it will jump up to 700ppm something. I doing it over and over till I get a base line and go from that. this weeks EC was aorund 680ppm but the video does not show the other dips I did. PH still kicking aorund 5.9. I find it more annoying to adjust just the waters PH for these plants on the balcony where everything else is "as is" Will try this again indoors in a peat and perlite medium void of any other additives when It can have more of my undivided attention. maybe on the other seeds I got from FB via a friend in the mail. Side note uploading videos into the diaries is great and all, but takes to long to resize and process, can't hit save till its all done... no idea what its doing in the backend. stupid rule on contest must have videos every week,
Likes
35
Share
Welp, These took a Bit longer than my Cream Cookies and still didn't fill out quite like I thought they would.. But they are still a very beautiful strain and a joy to have grown. They smell stronger and way more lovely than the cream cookies thou just a beautiful aroma I'd really like to grow these again Indoors where I can control them easier. (Sadly they dried into wispy nothings and we turned them all into bubble hash) #3 took the hit of some aphids and ended up in a frozen hash pile in our fridge along with two cream cookies from the run. It's frozen weight combined was 203g. *will update with dry*
Likes
17
Share
@Naujas
Follow
She is much prettier than she was a week ago :) I remembered that I have my first grow light, which is more compact and it will give me more space, so I changed my light, now the girl's side branches get light too:) I add a lot of video memes, because I really want to win Iphone16 pro ;) and those who don't take risks don't drink champagne:) good luck to everyone.
Likes
Comments
Share
April 28 - May 5 This week the nutrients have been completely phased out and they are now just sipping plain TO water ph balanced to 5.8 still. As they start entering into the flushing zone with harvest day quickly approaching. Daily tricome inspections become the focal point In these final days and or weeks. I
Likes
40
Share
Week 9 she is huge and I'm running out of space. So far she is growing well and very fast I hope she will not stretch any more because there will be no space 😀
Likes
3
Share
@Moli77
Follow
Vorab, die sind bisschen durchs Zelt gewandert. Beschriftung von links oben nach recht unten, von links nach recht. Ich habe mich gescheut viel auf einmal abzuschneiden, hab lieber 2-3 Tage gewartet, geschaut wie sie es annehmen, bis es wieder notwendig war zuschneiden, um die Mitte der Sherbet Queen freizuhalten und Blätter die kein Licht bekommen wegzunehmen. Bei der Sherbet Queen habe ich die ersten Seitentriebe der unteren beiden "Haupttriebe" entfernt, da diese eh lost sind und die Pflanze sich deshalkb auch mehr gestreckt hat. Die Cherry Pie, mein eigentliches Sorgenkind, sieht mittlerweile aus wie ein richtiger Blumenstrauß, hier habe ich das LST zum richtgen Zeitpunkt angwendet. Bei der Hulkberry ist mir einer der ersten beiden Seitentriebe, der zu einem fetten Arm hätte werden können, leider abgebrochen, außerdem zeigen zwei weitere Risse durch das biegen der Stiele. Sind schon wieder verheilt, nur jetzt angeknackst und nicht mehr allzu stabil. Ansonsten immernoch sehr zufreiden.
Likes
18
Share
@soloczek
Follow
Smells very fruity and Sweet. Very dense trichomes. Very dark and frosty buds
Likes
1
Share
@GoodBudz
Follow
Pineapple Express was an exciting plant to grow. It grew fast and stretched nicely. Purple Kush was just a runt. It did not like the hot climates from the previous week but grew it out anyway. By weeks end was feeding Remo's full flower lineup. Pineapple - 8ml per 3800ml Ph between 6 - 6.1 Purple - 5ml per 2000ml Ph between 6 - 6.1 No change in light scheduled as with Auto's they do not require the 12 hour darkness period to flower. **Spider Farmer lights generate a lot of heat.
Likes
7
Share
@Mo_Powers
Follow
not much has happened this week. there is still some sun per day. however, the temperatures drop to 4-8 degrees at night. these are not exactly the best conditions. maybe this late outdoor experiment was not a good idea after all. however, they have not died yet.
Likes
9
Share
@Dmon013
Follow
I add many a bit less fertilizer. I noticed from the past planting. My plant is organic planting, so the problem is how do I using the nutrients from the soil slowly?. Nutrients can be used immediately like synthetic fertilizer. Please share your experience if you have more techniques.🙏🙏💚🥦 #Livingsoil #Notill
Likes
9
Share
📆 Semana 1: La planta acompaña el ciclo del sol y se adapta al vaivén del clima. 🌞🌿 Los brotes comienzan a tomar forma y los entrenudos se estiran, preparándose para sostener las flores. El verde sigue intenso y saludable, reflejando unas raíces activas y un entorno equilibrado. Las horas de luz van marcando el cambio. Es buen momento para pequeñas limpiezas de hojas bajas y revisar que el aire circule bien entre las ramas. ✂️ Todo se alinea con la temporada. La transición se siente en cada amanecer. ¡Seguimos creciendo fuerte! 💪
Processing
Likes
8
Share
@Max1973
Follow
Day 8 - Decided to put em in a diy dwc hydro setup till oxypots arrive.... initially was planning on soil pots and the roots are coming out the sides of the jiffy pots... so, 2L ice cream container, mix up 6.2 ph 500 ppm solution, cut a few jiffy sized holes .... blow bubbles in the water afew times a day.... lol Using abit of old Dutch Master Gold One Grow atm.... and i'll look at using some Nutrified elements grow, Crystalic, rock nitro, dutch master gold one grow/flower.... :) ice cream containers worked out perfect for jiffy... ....perfect for the seedling stage.... baby dwc for baby seedlings.... also gave me a chance to test out dwc....... i'll build this as i go... going to be a interesting grow for me.... 😎