




Likes
4
Share


@pzwags420
Follow
On day 1 the reservoirs PH is 6.3. The rez is 483 ppm. The girls are looking good and nitrogen toxicity seems to have stopped.
On day 2 the reservoirs PH was adjusted from 6.1 to 6.3. The rez is 477 ppm. Trichomes seem to be 10% cloudy so I still have a bit to go i'm thinking 9 weeks should be a good bet!
On day 3 the reservoirs PH was adjusted from 6.4 to 6.1. The rez is 500 ppm.
On day 4 the reservoirs PH is 6.2. The rez is 503 ppm. I lowered the ppfd so my tallest received 900 ppfd and an average of 543 ppfd.
On day 5 the reservoirs PH is 6.2. The rez is 519 ppm. I removed some of the extra fan leaves blocking bud sites.
On day 6 I changed out the reservoir with only tap water and adjusted the PH from 6.7 to 6.1 with a ppm of 249. The trichomes are maturing and I plan on harvesting on week 8 day 4 of flower.
On day 7 the reservoirs PH was adjusted from 6.5 to 6.0. The rez ppm is 250.
Likes
5
Share


@SmileyMorgen
Follow
6/4/22 - 6/10/22
6/5/22
Today I tied Harlingen branches to the sides of the tote with pipe cleaners to open herup eve more andI carefully places lst clips to arrange her smaller branches outward.Excitedto seewhat growth week 8 will bring 😀
6/7/22
Zam got lst a few days ago and has really stretched the past few days. I'd say she is ready to kick her room mates to the curve. This girl is getting biiiiig.
6/8/22
Today my girl is really getting her stretch on ad lovinglife. Her root issues have completely resolved with her peroxide routine. (I cup in the tote Daily and spray roots with 3% hydrogen peroxide to control root rot and fungus gnats.
6/9/22
Not alot of change today. But man is she a doll 😍
6/10/22
Can't wait to see what week 8 grow will be like🤗
Likes
Comments
Share

@Ogba_Ibukun
Follow
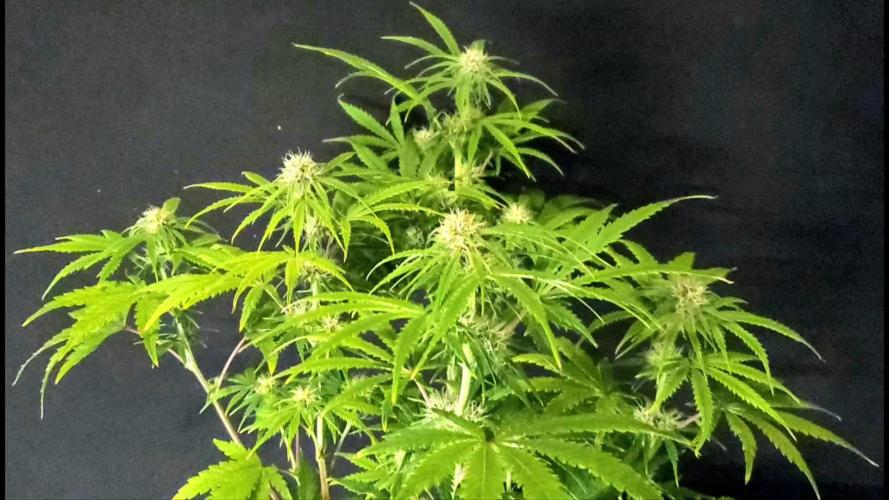
She didn't like the toping done at week 3 at all! She it's by far the shortest in the tent.
She does make up for her size by how pretty she is. Already peach/off white pistills she is going to be a beauty!
Like her size she doesn't drink much .5 gal every day and she's fine!
Likes
19
Share


@nonick123
Follow
Día 6 (29/04) Spray solo agua el top del sustrato. DLI 13
Día 7 (30/04) Spray solo agua el top del sustrato. DLI 13
Día 8 (01/05) Spray solo agua el top del sustrato. Subo a DLI 17
Día 9 (02/05) Elimino la cúpula casera de humedad y empiezo a regar con 300 ml solo agua
Día 10 (03/05) Empiezo a luchar con una ola de calor inesperada para esta época, que me trae temperaturas exteriores de 30 ºC y humedad relativa del 30%...
Mantengo la cúpula casera de humedad
Día 11 (04/05) Hace muchísimo calor.. 30 °C. A ver como lo llevan
Hago un invento casero para aumentar la humedad
Día 12 (05/05) Primera alimentación con Aptus! 300 ml H2O + Regulator 0,15 ml/l + CaMg-Boost 0,25 ml/l + Startbooster 0,25 ml/l - pH 6.2
Creo que las plantas se ven un poco pequeñas para tener 12 días... esperando por explosión de crecimiento en los próximos días....
💦Nutrients by Aptus Holland - www.aptus-holland.com
🌱Substrate PRO-MIX HP BACILLUS + MYCORRHIZAE - www.pthorticulture.com/en/products/pro-mix-hp-biostimulant-plus-mycorrhizae

Likes
20
Share


@gr3g4l
Follow
Con 79 dias lavado de raices a todas.
La aparición de botritis ha forzado el lavado a todas ellas para no arriesgarme más.
Dejo un histórico del tiempo que han sufrido las Auto desde el dia que pasaron a exterior. Un tiempo generalmente nublado y bastantes dias de lluvia.
Es lo que tiene el exterior, se depende muchísimo del tiempo y esta vez ha salido así. Otro año será diferente y saldrá mejor o peor.
De la jack tube que sacar parte del apical que se vió afectada por la botritis por lo que la altura seria áproximada.


Likes
21
Share


She starting to stretch

Likes
59
Share


@ButtersStotch
Follow
2020-07-24 (Day 129)
This girl and her GSG sister have cow manure mixed in and this is the first week I’ve added nutes. Leaves weren’t yellowing but I felt that overall the plants were pale throughout, especially compared to her clone.
From here on out I’m more or less letting her do her thing. I’ll likely have to add supports once she starts bulking up with flowers. I’ll also have to move her and her GSG sister in my yard once flowering initiates as the sun will be blocked more by my hedges come that time.
It’s been sunny and warm with little rain, so far knock on wood an amazing summer for growing outdoor. Stay tuned, flowering is just around the corner!

Likes
28
Share


@SooSan
Follow
Dans l'ordre :
Blueberry
Dutch Passion
Blueberry
00 Seed
Blueberry
PEV Seed
Blueberry
Bulk Seed
Animal Cookies x Blue Monkey
Exotic Seed
Red Hot Cookies
Sweet Seed
DoSiDos x Purple Punch
PEV Seed
Purple Shot
Exotic Seed


Likes
4
Share


@Growin_Ish
Follow
Somehow I miscalculated the days and started week 6 prematurely. I will just continue here thru to week 7
Day 32 From Seed
NYD#2
Started LST. Pot was light, watered at 6.3 including Fish Sh!t.
NYD#3
The pony tail backfired. The main is mangled. Despite small nodes, I started LST and watered at 6.3 including Fish Sh!t.
Day 33 From Seed
Did some research and found out the ponytail should only be used during the light cycle and removed for the dark period. I left it on, which caused the ugly. Lesson learned!
Day34
Adjusted and added LST. Watered #2 at 6.5. #3 was still heavy, no water needed.
Day 37
Watered, adjusted LST
Day 39 From Seed
Watered, adjusted LST. Found a bug that isn't a fungus gnats (NYD#3). Inspected both plants for more. Did a neem oil top drench and added Vicks Vapor Rub to the pot rims (bug deterrent). So raised light roughly 4 inches.
Day 41
Light watering, adjusted LST ties, top drenched with Neem Oil. Added a few ounces of peroxide to the humidifier. They'll both need a top dress soon.
Processing
Likes
36
Share


@Island
Follow
Week 6 -
Week without surprises.
No-till cycle working well, watering only with water, but note that the companion plants still grow crooked.
Soon the soil still shows signs of excesses, I believe that in the next cycles these excesses will be fixed.
Hugz from Brazil.
Likes
49
Share


@Mosquito_Haarlem
Follow
Week 10 is begonnen.
De buds zijn flink in massa toegenomen.
Hoofd bud is dikker dan een cola blikje.
Echt een superstrain van Weedseedsexpress!!
Ik zal gedurende de week nog verse foto's updaten dus hou het in de gaten.

Likes
11
Share


@RFarm21
Follow
Week 26 August - 1 september
26 August - just water (1.5l)
29 August - feed day
1 september - feed day
Likes
21
Share


@darb35
Follow
Last week was a short one, decided to chop them on day 80.
Both plants weigh at 800g wet, hoping to get a bit over 100g dry.
They could probably go for another week to get fatter, but I was feeling ready looking at the trichomes.
Hope the dry slow, I can't get RH above 50% so hoping that won't be so bad.
Likes
65
Share


@daggaDNA
Follow
6th week of 12/12 ended for my Big Block by Cannabis Brothers California.
Here I am exposing pheno number 8 this week as it's turning out great. I took it out on natural light and made few fotos so you can see it in more natural way. Besides having the nicest structure among 4 phenotypes, it's also developing the nicest flower structure and it looks like it will also finnish as first. Deffo a keeper in my eyes, but the final test will be smoking it, but we are still long way from there.
Other than that, video shows current situation in my 4x4 tent. Absolutely jaw dropping cultivar, growing in 6L pots but exceeding 1m in height and also it looks like a descent yielder. Not to mention the aroma intensity. It's just proving what I was hoping for - true OG bred by true OG's - the Cannabis Brothers.
Lineage
Blockberry x Motorbreath 15 (Legend OG)
Tap water feeding (Premium program)
Aptus
Light (BS600) + UVA/UVB 3hrs daily
@future_of_grow
Soil (lightmix) & pH
Plagron
Tent size
4x4 (120x120)
Pot size
6L (1.6 gal)
Stay tuned for few weeks more to see the final outcome, but pheno #8 is deffo the one I'm keeping. Peace out 💚
Likes
5
Share


@Mondolibero
Follow
Manca poco😰 ancora 3 settimane.....💚🌱💜🆓🇵🇸🇵🇸🆓le due auto ora sono nel barattolo di vetro a fare la concia...presto aggiungerò nuove foto.
Likes
14
Share


@Momgrowsthechronic
Follow
So it’s the end of Week 5, Day 35 for the Sweet Seeds Gorilla Girl XL auto flowering grow. I have come to the conclusion that these four plants are not going to be XL after their pre-flower stretch. Overall the plants are healthy but the prolonged low humidity and temperatures have robbed them of the vigorous growth documented in my previous Sweet Seeds diary (Cream Mandarine XL Autos). I am disappointed that this will most likely be an XS harvest but a tiny quantity of quality bud is better than nothing. I gave them their first feeding of GHE FloraNova Grow fertilizer at a rate of 1.25 ml/gallon and this is 1/4 of a full dose that would be given to a photosensitive strain. I am still watering every fourth day at a rate of 2.8 litres per plant or 0.7 of a litre per plant per day. I will only be using the fertilizer every other watering or every eight days. That’s about it for this update and on to…
Mom’s Tip for Week #5- To Tuck or Take? The when, where, why and how to defoliate Autoflowers successfully…. Lets start with some basic Biology- Photosynthesis is the process by which green plants take in sunlight, water and Carbon Dioxide and transform it into energy in the form of sugars that feed the plant and make it grow. So essentially, every fan leaf on your plant is a solar panel collecting light and therefore valuable in it’s own right. I always try to tuck my leaves if possible before considering removal as my plants need all the energy they can get to power through until harvest. But sometimes tucking isn’t enough or just isn’t an option anymore so here are my suggestions for taking the fan leaves from your Cannabis plants if needed.
When- defoliating Autos can be done anytime throughout the grow although it’s generally not done within the first 3-4 weeks. The plants are usually quite small and those early weeks are valuable growing time that these plants simply can’t afford to miss. This is when I find leaf tucking to be most valuable, allowing the plants to keep what few solar panels they have while also allowing the grower to position the leaves so that they are out of the way. I personally find that I defoliate my plants the most over the final 3-4 weeks of the grow as foliage is dying off on it’s own by that point and a few less leaves at harvest time is always a good thing! Of course anytime you see dead/dying or diseased foliage, it should be removed as needed throughout the grow.
Where- defoliating Autos is a delicate balance due to their small size and short lifespan. If my plants are healthy, thriving and tucking is no longer an option, I will only remove fan leaves if they are covering/blocking new growth or potential bud sites. As the plants age and the foliage begins to die off naturally, I tend to remove the oldest, lowest growth first working my way up the plant as needed until harvest.
Why- defoliating Autos is done for a few basic reasons but only as an extreme in my garden when all else fails. Removing certain large leaves will allow more light into the lower portion of the plant’s canopy reaching young branches or potential bud sites. As the plants age, it also helps with increasing airflow around your swelling buds thus reducing your risks for mold and fungi in humid grow environments. Removing any and all dead/dying or diseased foliage is absolutely necessary in keeping your plants healthy and the grow room clean and pest free.
How- defoliating Autos is simple if you keep it simple. Only remove what you absolutely have to and use a sterilized set of sharp pruners for a clean, controlled cut. As the plants age and the foliage begins to die off naturally, just wait. What doesn’t fall off on it’s own will snap off with a simple twist of the leaf’s stem. If the leaves don’t come off with ease, they’re just not quite ready yet so be patient.
Be mindful that removing the solar panels from your Cannabis plants is always risky business but Autoflowers are even more challenging in their own way. Smaller plants with a lower leaf to bud ratio and a short lifespan means less room for error so paying close attention to the when, where, why and how is crucial for successfully defoliating Autoflowers. Tuck if you can, only take what you absolutely have to and of course- never take more than 25% of your plant’s overall foliage at one time as this can be devastating or deadly to even the healthiest of plants. Allow your plants to take the lead and they will show you which leaves are ready to go- at what time, all on their own just as nature intended.


Likes
15
Share


@Luckydope69
Follow
In der zweiten Woche sind die Ladys schon ein ganzes Stück grösser geworden. In dieser Woche werde ich nach und nach mit dem binden der Triebe beginnen und aus den Mädels richtige Büsche zaubern.
Likes
2
Share


@EtnoGrow
Follow
todo muy bien! esperando paciente el desarrollo de los cogollos, conociendo y viendo los puntos de maduracion asi como la fertilizacion ajustando a su maximo que creemos posible para incentivar que los cogollos engorden, ahora en adelante les hare segumiento de la grande principalmente, que es la que cumple con la edad del diario, ya que las otras como se explico en un principio venian recien cultivadas por eso tienen un par de semanas de retraso , tambien hay una hermafrodita, que al detectar como comentamos semanas anteriores aplicamos al tecnica vista de un cultivador mexicano, consistia en romper los brotes de machos las pelotas con el fin de que no vuelvan a salir, dejando solo los pelos estigmas de las hermbras, si bien el cogollo queda maltratado, al parecer se detiene el crecimiento, asi que estamos viendo como rinde ese experimento.