Likes
Comments
Share


Likes
9
Share


@Esoteric_growing
Follow
Canopy is totally packed, probably should have switched to 12/12 a week ago. Defoliated but still a very busy canopy. Will do again at day 21
Likes
9
Share


@Serhiosaez
Follow
Día tan esperado de esta cosecha de crítical mas con cogollos muy duros y muy apretado y compactos y grandes con un aroma muy fuerte con un olor a diesel

Likes
6
Share

@k0nz1
Follow
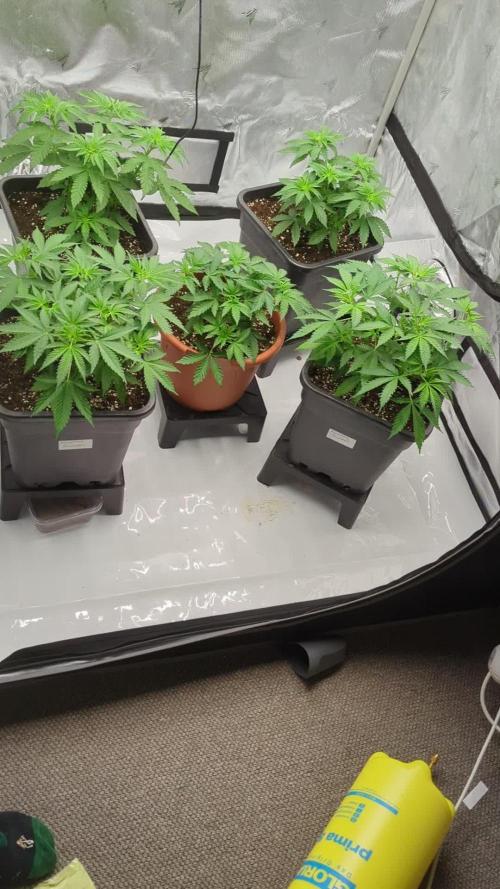
Fast Recovery from topping. Canna Nutrients and ph- for feeding. Little LST in the upcoming days. All plants are developing well.
RH 60
Temp 24 celsius
EVO 6 at 40%
VPD ~ 1.1
The new AC Infinity Setup is really good and intuitive so far.
12/12 and little defoliation next week


Likes
9
Share


@NordicCropz
Follow
Day 8. Beautiful looking, and my first Tri-leaf! Got big hopes for this one


Likes
26
Share


@KingSalomonsWeed
Follow
Ok on flower day 65 i did a prechop of sticky smelly Buds. This is the Rest for Ripening.
04.10. Its boring to wait. Just added some water.
Aphid shit on my buds (i wash),
Or using insectoxids.
Now you know why i can not use Insecticide.
Another part chop. On day 71


Likes
14
Share


@Downunder90
Follow
### Week 11 Update: Bubba Kush Needs Attention 🌿🌟
### 🌱 Flowering Phase Continues 🌱
Welcome to Week 11! The plants are progressing well in their flowering stage, although Bubba Kush is showing some signs of distress. Let’s dive into the current status and adjustments we’re making.
---
### 🌿 Current Plant Status 🌿
**Greenhouse Super Lemon Haze 🌞**
- **Growth:** Continuing to stretch, and the canopy is healthy and full. The plant has hit its peak height and is now focusing on flower development.
- **Flowering Progress:** More pistils are forming, and the early buds are starting to swell slightly. Things are on track for strong flower development in the upcoming weeks.
**Humboldt Seed Bubba Kush 🌿**
- **Growth:** The bushy structure remains, but the plant is showing signs of stress. This could be nutrient-related or environmental.
- **Flowering Progress:** Bud development is slower compared to the other plants. Leaves may appear a bit droopy or discolored, suggesting nutrient uptake issues or overwatering. We’ll need to adjust feeding or check for root health.
**Blueberry Muffin 🥞**
- **Growth:** The canopy remains strong and dense, continuing to support flower production. The structure is ideal for the upcoming heavier buds.
- **Flowering Progress:** Pistils and calyxes are developing rapidly. Bud sites are becoming more defined, and the plant is in a healthy flowering state.
---
### 🌱 Nutrient and Supplement Update 🌱
**Adjustments for Bubba Kush:**
- Bubba Kush’s slower progress and signs of stress could be caused by pH imbalances, nutrient lockout, or possible root issues. We'll do the following:
- **Check pH levels** to ensure they’re in the optimal range (around 6.0–6.5 for soil).
- **Reduce watering frequency** if overwatering is suspected.
- **Add a light flush** to ensure no nutrient buildup is affecting the roots.
**Current Nutrient Regimen:**
- **Power Roots (PLAGRON):** 1 ml/l to keep supporting root health.
- **Pure Zym (PLAGRON):** 0.5 ml/l to aid root health and prevent any potential nutrient lockout.
- **Terra Bloom (PLAGRON):** 2 ml/l to supply essential nutrients for flower development.
- **Power Buds (PLAGRON):** 0.5 ml/l to help boost bud formation and density.
- **Orgatrex (Bio Tabs):** 2 ml/l for a complete, balanced nutrient profile.
---
### 🌱 Environmental Conditions 🌱
**Temperature & Humidity:**
- Temperature and humidity are being carefully managed to prevent mold and encourage strong flower development. Humidity may be slightly lowered for Bubba Kush if mold or rot is a concern.
**Training & Defoliation:**
- LST and selective defoliation continue for all plants except Bubba Kush, which will need gentler care until it rebounds.
---
### 🌸 Looking Ahead 🌸
While Super Lemon Haze and Blueberry Muffin are showing promising progress in the flowering stage, Bubba Kush requires close monitoring and some care adjustments to help it recover. We’ll pay attention to its nutrient and environmental needs to get it back on track.
Next week, we’ll assess how these changes affect Bubba Kush’s health and check in on the overall flowering progress of the garden.
Happy growing! 🌟💚

Likes
6
Share


Likes
17
Share


@ScouseCityLX
Follow
End of week 4 marking around the half way point as both strains both have 8-9 week flower periods. Runtz Muffin #1 already looks like it's going to have more of a longer airy bud structure compared to the others


Likes
2
Share


Processing
Likes
35
Share


@hornato420
Follow
Week 11 has been exactly the same as week 10. There has been some light yellowing one Girl #1 and some of the hairs are starting to turn orange. The colas aren’t very dense. Girl#1 has been doing some weird fox tailing on all the colas.My temperatures haven’t been over 77 and my humidity hasn’t been over 55. I have seen this before in other diaries with other stains. Guess that’s just comes with the territory of ruderalis crossed strains. Can’t really complain cause this is my first rodeo with Autos so I’m just happy to have this experience.
I officially think the delayed Pineapple Express auto might not even have the autoflower trait. It’s been 11 weeks and she hasn’t showed the slightest chance of ever flowering. This is really frustrating and deflating. I’m gonna definitely have to put this girl into 12-12. That will have to be after girl #1 is finished.
I’m very appreciative of all who show your continued support and give insightful infomation. Can’t wait to see what this harvest will be. This is my first official auto grow. I wouldn’t change it at all. Thank you all for your support and time. More to come soon 💚👊
Likes
7
Share


@Thigh
Follow
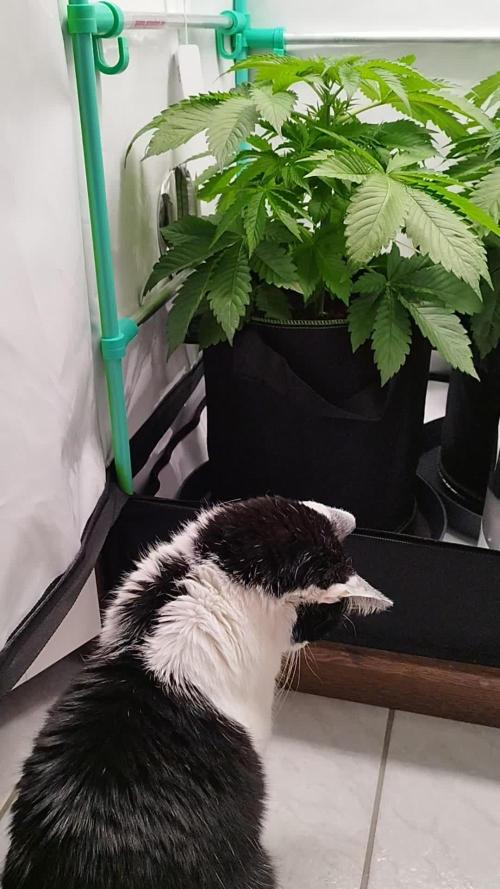
Shes getting bigger 😄 weather is also slowly gettin better👨🏽🌾 she is a little bit younger as my Zkittelz plant, but i think she is a Little Bit Slower as the Zkittelz. Maybe too much Stress.
Likes
9
Share


@dubmantiqeur
Follow
Week 5 28-35days was all smooth. Room is starting to smell alot more now

Likes
32
Share


@LION07
Follow
I will wait about 10 days before completing the cleaning of the buds and starting the tanning process.
Likes
4
Share


@PolezGardn
Follow
fifth week flower, the ladies are getting really tasty and developing well!!


Likes
8
Share


@GoldenGromie
Follow
Continuing to water almost everyday as the pot size is too small and the buds are packing on the weight and frost. I am giving them almost 4 liters of water everyday. I am going to skip today (monday) just to make sure im not promoting any root rot, although I know I will be sacrificing some microbes. I will water them on my Live first thing Tuesday morning. Im noticing a little bit of bronzing on the leaves of one, its something I get almost every grow in flower. Im thinking it is beacuse I need to change my RO filters, as I live in the country and use well water and I think It is a buildup of iron. I have crazy high iron even when I use an RO. I believe my TDS was still 400 with filtration lol. If I change the filters I should be able to get it back down to 100 to 150 ppm. We are on auto pilot right now with this garden, just have to water and nurture and I know I am going to get an amazing result in about 3 weeks or so!

Likes
14
Share


@MG2009
Follow
03/13/2022
Love the colors on Grape Skunk #1 others are not as purple, again i forgot Biscotti Skunk and lemon og.
03/14/2022
Uploading Biscotti Skunk pic's
I'm really loving 3 particular girls this run,all plants are exposed to PW intentionally I need girls that can take PW with no issues and three plants are spotless. The first is the only Biscotti Skunk that was female of 5 cloning for outside run but will do great in basement without PW issues. The second is lemon og spotless, and the third is the grape skunk thats got most color the second tallest of the grape skunks, cloning for testing in New England zone 7 should get at least one if not all 3 to finish before cold sets in.

Likes
2
Share

@Jabbamo
Follow
_______________________________________________________
Mo. 9.2.
- Pflanzenhöhe 25cm
- Topfgewicht 5700g / 6300g (l/r)
- 2,0 Liter pro Pflanze gegossen ( = 8300g )
_______________________________________________________
Di. 10.2.
- Topfgewicht 7300g / 7600g (l/r)
- Toplight Abstand auf 75cm erhöht
_______________________________________________________
Do. 12.2.
- Topfgewicht 6200g / 6800g (l/r)
_______________________________________________________
Fr. 13.2.
- Topfgewicht 5600g / 6400g (l/r)
- 2,3 Liter pro Pflanze gegossen ( = 8700g )
- 0,3 ml / Liter "Calmag"
_______________________________________________________