


Likes
Comments
Share


@Keep_it_Cleannabis
Follow
I hate citrusy bud and this one reaks of it lol. Other than that looks good smells good (not to me lol). Water day today

Likes
46
Share


@Seedler
Follow
Look what I did to my girl, poor lady. But i'm sure she will bounce back, but with all that leaf shit It's hard to properly tie them down.
So i broke off a total of 2 branches (yellow tape) and managed to attach one back to it. Otherwise she took all the stress LIKE A CHAMP - yet. We'll see.
To be honest, i was quite lazy with her the last days, it was pretty stressful but look at her, she is basically growing herself!
As long as you can cool it, have some sort of system to change water and some, basic nutrients and ph- DWC is the easiest system for me, 100%
Look at the roots and i did not fill up the reservoir for like half a week, so a lot of it wsd exposed to air for a longer time still she is growing and growing.
Two more weeks and i might have a problem with her in flower, because she will drink so much water the reservoir won't hold a long time haha.
Almost forget, i need to add either more fertilizer /ml or give extra calmag. will probably do both kekw
Cheers guys! (whoever reads this, this is your sign, get high 👌)

Likes
38
Share


@TheCannaProphet
Follow
--------------------------------------------
~DUTCH PASSION OUTLAW AMNESIA~
--------------------------------------------
Outlaw Amnesia is a top quality old-school Amnesia Haze dominant Sativa that will appeal to both beginners and connoisseur growers alike. She is 80/20 Sativa/Indica with around 20% THC and is a cross of our Super Haze with a very special clone of Amnesia. The high is powerful and fast with a clear uplifting sativa high and a strong Haze accent. The taste is fresh, sour, strong and old-school Hazy. Outlaw will stretch more than most, she can triple in height during bloom, and grows well with the SCROG method.
Although she can be harvested as early as 9 weeks, a full 12 week flower period may be required for best taste, yield and high. She grows well in all grow mediums with perhaps the best yields in hydro where yields of up to 500g/m2 are possible, classifying this as a high production variety.
*description credit to Dutch Passion
OUTLAW AMNESIA (DUTCH PASSION) FEMINIZED DATA SHEET
Breeder: Dutch Passion
Genetics: 20% Indica / 80% Sativa
Parents: Super Haze x Amnesia
Flowering Time: 11-12 weeks
THC: 20%
Yield (Indoor): 450-500 gr/m²
Height (Indoor): 50cm
Available as: Feminized seeds
Flowering Type: Photoperiod
Sex: Feminized
*Specified by breeder when grown under ideal circumstances
--------------------------------------------------------------------------------------------------------------------------------------------------------------------------------------------------------------------------------------------------------------------------------------------------------------------------------------------------------------------------------------------------------------------------------------------------------------------
THE SETUP:
~Planted into Jiffy Peat Pellets that were hydrated with de-chlorinated water with SuperThrive added then ph'd to 6.0 @ 80℉
~Grown 100% organic in 10g fabric pots with Mother Earth 70/30 Coco/Perlite medium amended with 2tbs/g of Down To Earth 4-4-4 / 2 cups/g of Earthworm Castings / 1tbs/g of Dr. Earth Flower Girl 3-9-4, 1tbs/g of Dr. Earth Bat Guano, 3/4 cup of Down To Earth Azomite and 1 tsp/g Down To Earth Fish Bone Meal.
~24hr light cycle during Germination / 19/5 light cycle for Vegetation and 12/12 for Flower
~Straight water ph'd @ 6.2-6.8 when needed and weekly Compost Tea's.
__________________________________________________________________________________________________________________________________________________________________________________________________________________________________________________________________________________________________________________________________________________________________________________________________________________________________________________
WEEKLY UPDATES:
9/13- With approx. 10 weeks of growth behind her now she's going into her 5th week of flower now and let me tell you the pictures don't do her justice... This is one phenomenal cultivar! 😍
She was given Compost Tea yesterday and today was still fairly heavy so I skipped watering and just removed a few leaves to maintain light penetration, turned her pot and sat and chatted with her awhile!
9/15- Well she really must have liked that last batch of Compost Tea as she looks exceptionally vibrant today!
She's continuing on her mission of stacking her flowers, which are developing beautifully and have a delicious earthy/hashy aroma to them right now.
I did not water yesterday, so today I watered with 1.5g of straight de-chlorinated water that was ph'd to 6.5 @ 72℉ and rotated her pot... Damn she is looking great! 🤩💖
9/17- Yesterday I top dressed her with 1/2 cup of Down To Earth Bio-Fish then watered it in with 1.5g of straight de-chlorinated water that was ph'd to 6.5 @ 72℉.
Her flowering is continuing beautifully and she's smelling stronger every day it seems! I'm staying on top of tucking leaves blocking light and turning her pot daily as well.
9/19- Five weeks of flower on the books! We're almost halfway there now, she's stacking her flowers tightly going into Week Six and she's looking phenomenal! 🤩
When I watered her today I added 1 tbsp/g each of Kelp Extract and Fish Emulsion (both liquid) to the 1.5g of straight de-chlorinated water she received, which was ph'd to 6.2 @ 74℉.
~Thanks for stopping in! Things should be getting a lot more interesting in the coming weeks...Stay lifted and be Blessed! 😎🙏~
Likes
14
Share


@TherealNICOGREEN
Follow
Jeg har nu min nr 2outdoor ( den anden har stået ude i over 12dage :-) og er til gengæld forret med jord og 🍁! Jeg er virkelig overrasket 😮 over at det har kunnet lade sig gøre at spirer direkte i underlaget. Men jeg har også lagt tørret blade 🍁 på toppen om natten 💚☮️HELD OG LYKKE TIL ALLE SAMMEN DER UDE

Likes
Comments
Share


@Santaclaus
Follow
Día 40 me ha dado carencias de calcio magnesio y posforo y potasio, me he dado cuenta un poco tarde... Las hojas estaban caídas y se me estaban poniendo amarillas con manchas marrones...les puse calmag y empezaron a buscar la luz ... También me di cuenta, que las Lili que no veía se me ponían las hojas moradas, creía que era exceso de nitrógeno, pero no era posforo y potasio... Así, que lo que no quería hacer, lo he hecho he metido a tope de nutrientes y más... Espero no liarla más...

Likes
202
Share


@CrazyHorse
Follow
Hello friends 😁
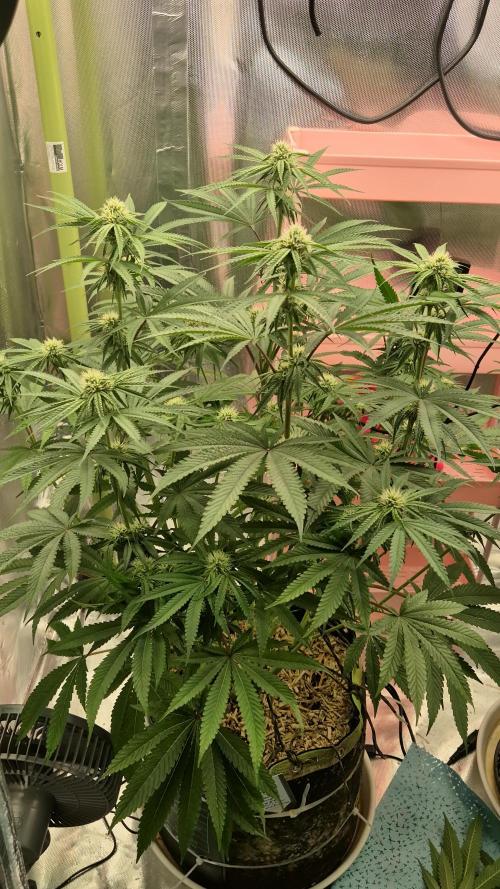
So far so good, Purple is nearly done, Cinderella start to develop a nice buds, Bruce Banner is very slowly recovering from problems. I think BB have got some roots problems, we will see in next 1 or 2 weeks a results.
Day 59 Purple Lemonade is running on regulate water, flush coming soon 😇
Stay safe, You Lovely Girls Growers 😇 💪 🙏



Likes
92
Share


@DogDoctorOfficial
Follow
🌟 Welcome to the TrolMaster Chronicles: Seed to Harvest Adventure! 1st run🌟
Hey, Grow Fam! It’s DogDoctor here, and I’m thrilled to kick off this exciting new series with you. Today marks the beginning of our journey through the TrolMaster sponsorship, and we’re diving right into the heart of the action with germination and unboxing. 🌱✨
We’re starting strong with the Germination Station by @thecannakan, a game-changer for this process. I’ll be showing you all the details as we delve deep into every aspect of our grow adventure.
Here’s today’s lineup for the germination extravaganza:
1️⃣ Mandarin Squeeze - Terpyz Mutant Genetics. 🌈 One seed germinated.
2️⃣ Punch Pie RQS and Tyson 2.0 Genetics. 🍰 One seed germinated.
3️⃣ RS11 by Kannabia Seeds. 🚀 One seed germinated.
4️⃣ Green Papaya by Super Sativa Seed Club. 🍍 Tester unreleased seed, one germinated.
5️⃣ Gorilla Mellon by Fast Buds. 🍉 Two seeds, one germinated (the first one didn’t make it).
6️⃣ Tropical Smoothies - Tried all seeds from the pack, but unfortunately, none germinated. 🌴
We’re also using the complete organic mineral line from @aptusholland, which includes top-notch nutrients to ensure our plants get the best start possible. 🌿✨ Plus, we’ve got the new ProMix Mycorrhizae soil, which will help create a thriving root environment. 🌱
Throughout this journey, I’ll be breaking down every step, sharing tips, and keeping it real with both the successes and challenges. I’m excited to share this adventure with you, and there’s so much more to come!
For more in-depth coverage and exclusive content, make sure to check out my YouTube channel and subscribe—where you’ll find full video breakdowns, detailed insights, and more. 🌟🎥 Follow me on Instagram for additional exclusive updates and behind-the-scenes peeks that you won’t find anywhere else! 📸✨
Your support means the world to me, and I can’t wait to have you along for every step of this amazing journey. Let’s grow together and make some magic happen!
#TrolMasterChronicles #SeedToHarvest #GrowDiaries #GrowJourney #TrolMaster #TheCannakan #GrowLife #PlantAdventure #HighFrequency #PositiveVibes #GrowWithMe #SubscribeNow #ExclusiveContent #AptusHolland #ProMixMycorrhizae
P.S. 🌟💚 I want to take a moment to express just how honored and grateful I am to be the first TrolMaster Maverick. This opportunity is a dream come true, and I’m beyond excited to embark on this journey with all of you. Being a part of this incredible community and pushing the boundaries of indoor horticulture with TrolMaster and ThinkGrowLED is a privilege I don’t take lightly. 🙌
A massive shoutout and thank you to the entire TrolMaster and ThinkGrow team for believing in me and supporting this adventure. Your trust and support mean the world to me, and I promise to give it my all to make this journey as amazing as possible. 🌟🙏
Thank you, Grow Fam, for being here from the start. Your encouragement and enthusiasm fuel my passion and make every step of this journey worth it. Here’s to making magic happen together and to many more incredible milestones ahead. Let’s grow, learn, and shine! 🌱✨
With all my heart,Growers Love and thank you. 💚
#FirstMaverick #TrolMasterFamily #ThinkGrowLED #GratefulHeart #GrowTogether #MakingMagic
Lets Play a game , FB Gorilla Melon Jump in to the future, can you guess the week ? Let me know in the comments before we get there , this is just for fun Lets Grow 💚💚💚 Growers Love everyone 💚💚💚


Likes
12
Share


@gr3g4l
Follow
estos últimos dias estiraron bastante los apicales aumentando la distancia entre nudos.
para bajar el PH utilizo ácido cítrico . El agua de grifo de base sale a 8,2 Ph y voy añadiendo hasta bajar a 6,7 áprox.
A los 25 y 26 dias estas plantas poco deberian de crecer más y todas ya han elejido por donde crecer y engordar. Llegados a este punto quité alguna hoja y algún chupóptero y até algunas de las ramas a los tutores como buenamente se pudo. El fin no es otro que mirar de acomodarlas por donde seguir creciendo y no tengan que soportar ellas solas el peso que se les viene encima cuando engorden los cogollos.
Como puede verse a una de ellas le salió una mutación genética llamada fasciación. una modificación cromosómica .
Likes
63
Share

@CrazyHorse
Follow
Hello my friends 😇
I'm very sorry for missing updates, I'm very busy man in last weeks so I have very limited time for myself thats why I get silent for a while 😑
Good think is all of my girls doing great or even better 😅
I didn't add any new pictures for few days, different between that days is amazing, what do you think ??
Have a good night 😴 You Lovely Girls Growers 😇 💪 🙏
Processing
Likes
15
Share


@FishTankGrow
Follow
Everything going strong.
Baby Yoda spreading his ears.
One leaf started to curl a bit. Maybe too much water?
Starting nutes tomorrow.
The more leaves. Wanted to start nutes but soil is too moist.
Will hold off for another day. Just misting the surface.
Started with Fox Farm at 1/3 dosage as my soil had organic nutes in it already. Starting slowly.
Saw a gnat running around. Stopped water and misting. Put some packing tape in. Should be ok. 😁
Temperature is creeping up as I add more light. Maybe increase distance soon.
Increased the light distance. Leaves were looking a little baked. Maybe too hot as well.

Likes
5
Share


@Faegrows
Follow
Some budrot showed up last week when I got back from a week away. Cut off the 2 Cola's 2 inch under the spots. Doesn't seem to have affected the rest of the plant thank goodness. Must have caught it while it was setting up. Would like to harvest her next week and flush her for a week from now on. Will seek advice in questions.
Likes
3
Share


@P_Silas
Follow
Season 2 is officially underway and so excited for this grow. Growing 4 plants, but space is a lil limited. Growing in an 80x80cm so using small pots. 2x 8l and then 1x 5l and 1x 4.7l (if you wanna be exact lol).
This time I decided to experiment a bit.
I'm testing 2 different soils, both in 8l pots, both Purple Punch Auto by Fastbuds, both in airpots. Their names are Robin and Lily.
Also testing fabric bags against airpots. Both in same soil, both in 5l pots, both Wild Dwarf Auto by Bulk Seed Bank (that was the plan but now it's 1 WD and another Purple Punch). Their names are Jess and Cece.
For this one, Robin, had the seed in water for about 24 hours then in paper towel. Then, into Living Organics soil.
If you check the pics, when she popped out the soil, the root was showing also, ouch. But she looks ok now.
Likes
1
Share

@420abbybox
Follow
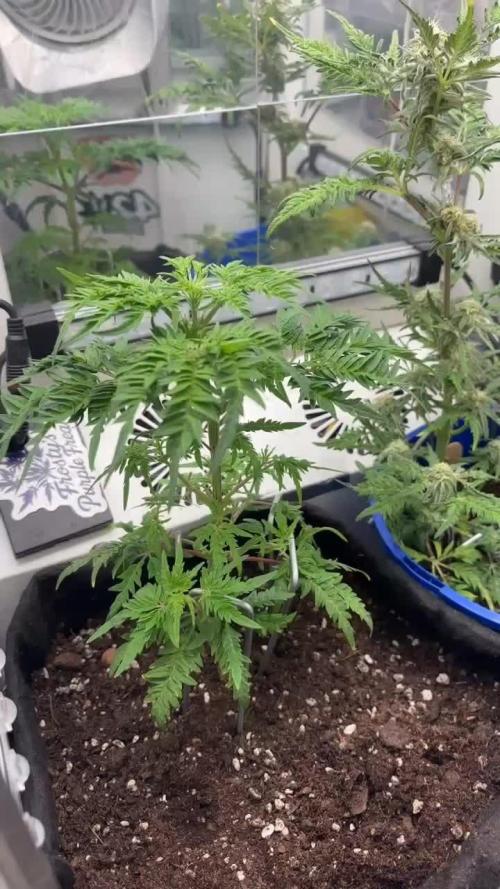
Frosty’s purple freak is now on week:10 of the vegetive stage with the 12-13th set of leaves and got multiple side branches with a few stretching outwards and lollypoped the lower branches to promote growth upwards/outwards

Likes
42
Share


@Dr_Boom
Follow
This was a big girl to harvest. She came in at 417.3 g dry, which is a personal best for me. Additionally, I received 36g of nice trim for my tincture. The buds aren't the biggest I have grown, but they are some of the tightest! I really enjoyed growing this clone. She filled out the tent well using a type of SCROG to get the most out of the grow area. I dried the buds on a drying rack for 10 days, and then gave them a nice rough trim. Since this is all for personal use, I don't worry about making them pretty, just functional. She is a sticky girl, and gummed up my scissors more than once. That is a good problem to have! I put the trimmed buds in my Grove 1/2 gal bags for the cure. I have found these bags to be EXCELLENT to cure my buds. No burping is required, they preserve the terps, and keep the humidity between 58 and 62. Perfect! My best harvest to date!
Likes
7
Share


@BioBlaze
Follow
The 4-week-old plant in the rapid growth phase is a fascinating organism to behold. It's incredible to witness the transformation of a tiny seed into a thriving plant with a sturdy stem, extensive root system, and vibrant green leaves. As the plant enters the rapid growth phase, it seems to come to life, eagerly soaking up sunlight and nutrients to fuel its growth, stretching its leaves towards the sun in the morning. The excitement of watching your plants reach this stage is hard to describe. It's a reminder of the beauty and wonder of nature and the incredible potential of life.
She is receiving 4 ml/l general purpose organic flower fertilizer based on guano.

Likes
1023
Share


@Grow3rPT
Follow
Cultivo LED The Smith 150w 4000k (Samsung) - Não tem opção de colocar esta marca no diário.
Também estou a usar nutrientes, da kayasolucions mas também nao tem disponível para adicionar ao diario.
Quem quiser saber mais, pode pesquisar The Jungle e uma growshop :)
Likes
8
Share


@frogDUDE
Follow
She’s looking large and in Charge...
Biggest single cola in the garden by far. Starting to Smell a little bit like Pineapple - so far quite happy with this!! Hoping for some consistency with the pheno bc this has the most
outstanding terps - I’d like to cross with a pure CBD strain and see if it’s possible to integrate the qualities of this strain in a high CBD version.
Likes
129
Share


@DreamIT
Follow
🎲➕ VLC Critical Plus + by PEV Grow➕🎲 https://pevgrow.com/en/5766-critical-plus-feminized.html
➕22.8 As you can see, it is a really strong and resistant genetics, tomorrow which stabilizes the flush starting with the new fertilizers
➕23.8 The loss of color due to the flush is evident, but today we start again in a big way with the new organic fertilizers, the now very famous Green Buzz Liquids. yeah !!!
➕24.8 What incredible genetics. She recovered in a very short time from the flush and although yesterday she was light green, today she is pretty healthy, and she started again great! the photos don't lie 🤘🤘🦄🦄
➕25.8 great recovery, I fixed the branches and watered again today
➕26.8 now no one stops it anymore, soon it will finally begin to bloom 🤘🤘🦄
➕27.8
➕28.8
__________________________________________
❓ Are you new to the world of cultivation and don't know where to safely buy your seeds?
😮On the Pevgrow site, you can find the best-feminized seeds indoors and outdoors. Achieved through totally natural stress methods and with guaranteed superior quality.
✅http://bit.ly/PevGrow
ℹ️Check out the marijuana dictionary
✅http://bit.ly/CannabisDictionaryPEVGrow
__________________________________________
👀 Are you looking for a good lamp to start with? 👀
🌞Viparspectra has something more than the others, take a look at their site.
⏩ Use "GDVIP" for an extra discount or "ViparDreamIT" for an extra 5 %% discount
👀 Search for it on Amazon
✅Amazon US: https://amzn.to/30xSTVq
✅Amazon Canada: https://amzn.to/38udUVe
✅Viparspectra UE: bit.ly/ViparspectraUE
👀 Watch my ViparSpectra XS1000 unboxing on YouTube, leave a like and write to the channel 🦄
✅http://bit.ly/UnboxingViparSpectraDreamIT
______________________________________________
📷🥇 Follow the best photos on Instagram 🥇📷
https://www.instagram.com/dreamit420/
🔻🔻Leave a comment with your opinion if you pass by here🔻🔻
🤟🦄💚 Thank you and enjoy the growth 💚🦄🤟

Likes
25
Share


@XperencdGmanXG
Follow
this should be the last week of vegetation. Flowering should be starting soon. Seems like no end to this drought we are suffering from in Southern Ontario.
