
Likes
Comments
Share


@Rinna
Follow
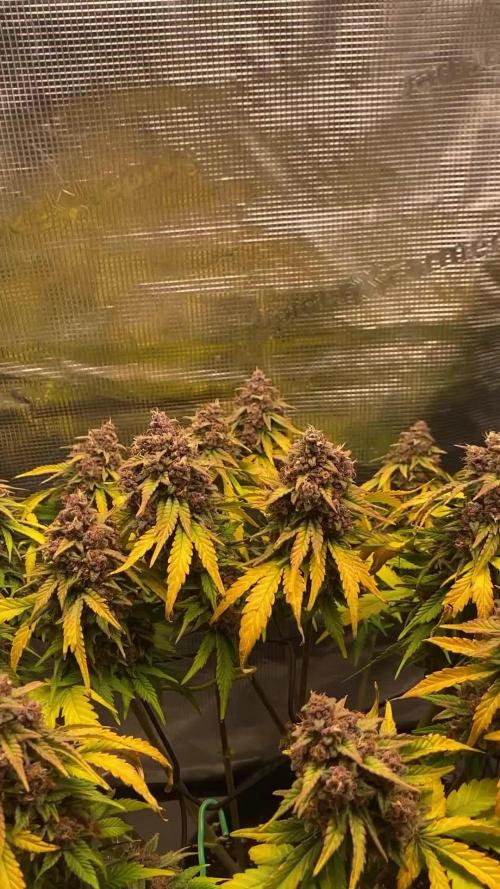
I would have let her go for another week but the other plant was more than done and I had no other drying space left. Amazing grow, should be a solid harvest and the buds smell and looks amazing. Very sweet, creamy and gassy artificial cherry terps. Very excited how they smell and taste after drying and curing!

Likes
24
Share

@DE_BW
Follow
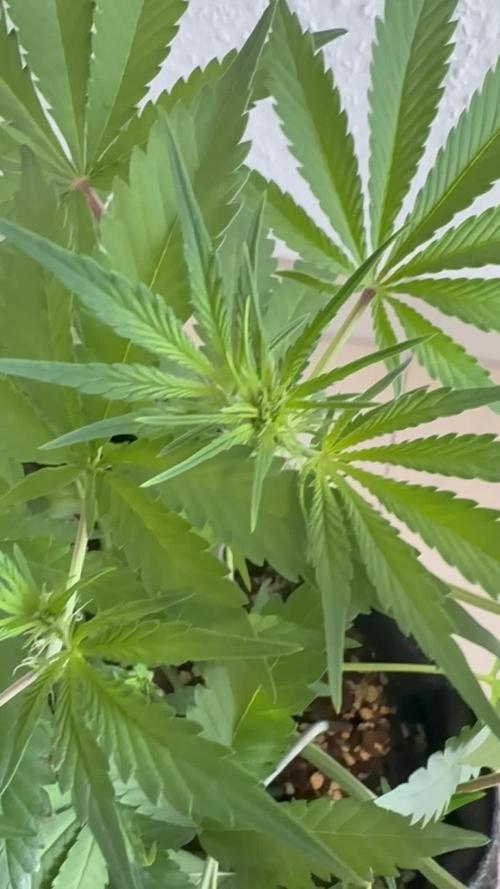
Week 5: Mendo Frost Auto is transitioning into early flower with visible pistils forming across the tops. LST is mostly finished now and the plant has developed a wide, open structure with multiple strong bud sites ready for the stretch phase.

Likes
35
Share


@valiotoro
Follow
Hello everyone 😎
Week 7 of flower for the Gorilla Cookies auto from Fast Buds 💥🍪
She grew fast with a beautiful green color,for the nutrient 4ml/L terra bloom & 1ml/L power buds & Green sensation 1ml/L from Plagron
Weight is coming 🦍
Spider Farmer SE-7000 100%
Have a nice day 😋
Likes
32
Share


@Hawkbo
Follow
Just started them all on the Green Buzz Liquid Organics and will run it the rest of the way. I'm not going to add much to the line just some calmag, enzymes maybe terpinator I have to experiment with it a little bit. The first feed went extremely well the plants instantly reacted within an hour after the feed especially the next day. The additives in this line barely raised PPM at all which I liked. It also doesnt stink like other liquid organics I've used.
These 2 seem a little slower coming along than the others. I had to do a little defoliation to open up some space but other than that not much to update. Have had some high humidity the past couple days.
Likes
15
Share

Likes
6
Share


@RzDreams
Follow
18/10/2022 Se controló la plaga de mosca del sustrato, no están exterminadas definitivamente pero no se siguen reproduciendo a la misma velocidad.
19/10/2022 Mediados de la 4ta semana de crecimiento se trasplantan 03 y 09, queda pendiente 04 no contamos con más macetas y el espacio no es suficiente dentro de la carpa se deja dentro la semana completa.
22/10/2022 Se aplica tierra diatomea para exterminar por completo la plaga de la mosca del sustrato.
23/10/2022 Se quita excedente de tierra diatomea de las hojas para no ralentizar el crecimiento. 04 se saca del indoor para continuar con la semana 5 de crecimiento solo con 4 plantas y buen espacio para su correcto crecimiento, 04 se pretender pasar a maceta más grande y se deja en exterior esperando sobreviva.
No se agregan nutrientes específicos aún hay buenas reservas y restos de control de plaga
Likes
15
Share


@northern_rookie
Follow
Hifi 4G seems to be a bit sensitive to the current and previous feeding levels. Had multiple leaves exhibit nutrient burn. Otherwise all seem to be happy. Hifi 4G, NL/Skunk and Blueberry continue to lead the pack on Bud development. God I hope I don't screw this up!


Processing
Likes
12
Share


@Lennys_Laboratory
Follow
Feed Was MAde EC = 0.6 and ph'd to 6.2. Temp 21c .......... Put Into 12/12 flower :)
Ive Also Taken Lower Leaves Of To Give Power To The Auxiliary Stem, Only Folding & Tucking As Of Now 💪 9-10 Weeks Total Seed-Harvest Time Apparently So No Time For Shocking These Beauties 👊

Likes
1
Share


@RussianGrower
Follow
So it's time to harvest Russian machine guns. The plants were high because we pulled them with a lamp and did not use LST. The final product was removed on the shelf of the refrigerator.00

Likes
28
Share


@Mitch
Follow
Growing very well, nice colas cover in white, almost finishing 2 week with beastie blumz, starting to create huge looking nugs, really excited about the finish result.

Likes
6
Share


@MG2009
Follow
07/05/2019
Start of week 6 flower,Calyxs are swelling up more pistils popping out she should start bulking up this week I'm Told she puts on her weight in last 2 weeks. Excited to see how she does. Might add some Overdrive into her feeding this week what do ya think?
Likes
8
Share


@Mikeyc420
Follow
Week 5 off flowering
Buds have grow and are solid with the smell starting to get alot more potent the THC crystals are looking nice
Light 11cm from the top of bud
Humidity staying around 45-50%
Temp 23°c - 26°c
Ph 6-6.3
Over all I'm happy with my first grow so far
Likes
9
Share

@Borberad
Follow
Woche 4
Das neue Töpfchen wurde akzeptiert. Bisher sehr unkompliziert die kleine.
Tag 24 Das Blpmchen ist nun soweit, und wir haben uns für 6 Triebe entscheiden und entsprechend getoppt und beschnitten.
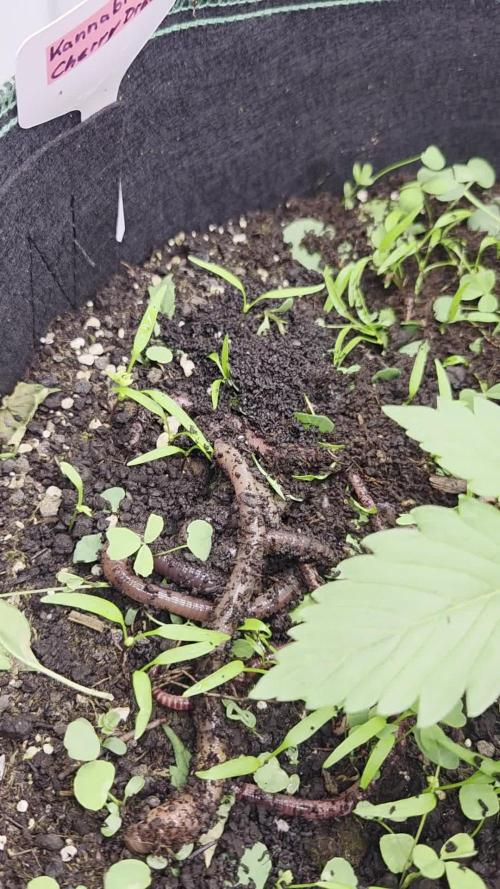
Tag 26 Kommt Zeit kommt Wurm. Das zusätzliche Leben ist angekommen: 10 Tauwürmer 20 Rotwürmer und 15 Dendrobena finden nun ein neues Zuhause und wollen gepflegt und gehegt werden. ?
Tag 28
Es gibt Bio Seemandelblätter als Langzeitfutter und etwas Kelp für die Würmer.

Likes
10
Share


@Chitown_grower
Follow
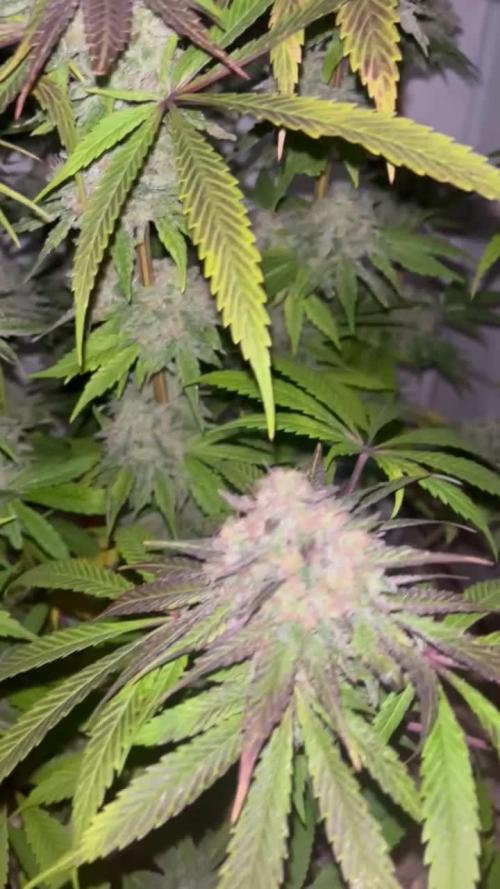
This tent is just crushing it this week! Everyone and their mother is covered in trichome-y goodness. These ladies definitely have that cookie-esk smell going on for them!

Likes
4
Share

@MyLittleGarden
Follow
Die Pflanze befindet sich jetzt eindeutig in der letzten Reifephase. Beim Blick mit der Lupe sind die Trichome größtenteils milchig, einige noch klar und vereinzelt zeigen sich bereits erste bernsteinfarbene Köpfe. Es kann also bald geerntet werden.
Ich werde die Trichome in den nächsten Tagen weiterhin beobachten, um den richtigen Zeitpunkt zu treffen. Ziel ist es, den Großteil milchiger Trichome zu erwischen, mit nur wenigen bernsteinfarbenen, um einen eher klaren und aktiven Effekt zu behalten.
Vermutlich wird sie noch ein paar Tage brauchen, bis der optimale Reifegrad erreicht ist. Insgesamt sieht alles sehr gut aus und die Blüten wirken voll ausgereift.

Processing
Likes
1
Share


@nausicaahime
Follow
everything changed on week 4
grow tent and cob led came to show how a good light is important.
from now til last 2 weeks, only indoor growing
goodbye CFL's, you worked well.
+ LST and ferts (2ml + 0.25)
Defoliation started
Removed branches from 1st node


Processing
Likes
15
Share


@GanjaFarmerGrow
Follow
The BEST plant From BIG SEEDBANK!!
Amazing genetics...
She is a heavy yielder...
Love the woody, fruity smell...
last week of feeding and then we go into flush...
fingers crossed she goes good until the end...🙏

Likes
23
Share


@nonick123
Follow
Día 13 (06/05) Nos acercamos al final de la fase plántula. A ver si ahora empiezan a crecer de forma explosiva!
He sido muy estricto con los riegos, dejando que el top hasta el nudillo se seque completamente!
Día 14 (07/05) Hago una mejora en la tienda. Hasta ahora tenia intracción pasiva, pero ahora he instalado una turbina para que impulse aire fresco dentro de la tienda
Día 15 (08/05) Con el calor que hace me sorprende que las macetas sigan aguantando la humedad, pero al hundir el nudillo sigue húmeda. Mañana haré un riego de nuevo
Día 16 (09/05) Relleno el top con sustrato para compensar la compactación y dar mas soporte a las plantas
Riego con 300 ml solo H20 - pH 6,2
Día 17 (10/05) Baño de sol de dos horas.
Día 18 (11/05) Baño de sol de dos horas
Día 19 (12/05) Riego 750 ml H2O + Regulator 0,15 ml/l + CaMg-Boost 0,25 ml/l + Startbooster 0,25 ml/l - pH 6.2
💦Nutrients by Aptus Holland - www.aptus-holland.com
🌱Substrate PRO-MIX HP BACILLUS + MYCORRHIZAE - www.pthorticulture.com/en/products/pro-mix-hp-biostimulant-plus-mycorrhizae
Likes
6
Share


@TheSurfBud
Follow
Ganja Farmer Seeds
Gorilla Cookies Auto
In @highpoweredorganics new ISLAND-BLEND.
Fed water soluble powders.
AQUA-MARINE Grow Formula 5.1.4 paired with OCEAN-POTION and RHIZO-MOJO in dechlorinated water.
Alternating ANTI-MATTER & DARK-MATTER feds weekly.
Foliar fed GREEN-SUPREME daily
Following High Powered Organics Island-Blend Feed Guide.
https://www.highpoweredorganics.com/
Happy growing friends 🇦🇺🇦🇺🇦🇺

Likes
43
Share


@TheBulldozerSicily
Follow
Questa settimana non abbiamo aggiunto ne acqua ne nutrienti, abbiamo controllato sempre ph ed ec e sono sempre corretti, fatto il secondo e ultimo trattamento contro OIDIO, la settimana prossima passiamo in fioritura, cambieremo la soluzione quando inizieremo a vedere i prefiori.
Per il momento sta andando tutto bene,
Mercoledì 14/02/2024
Inizio controllo ec 1607 ph 5.5
Aggiungiamo 30 lt acqua osmosi
Ottenendo ec 1208 ph 6.5
Aggiungiamo nutrienti per 40 lt
72 grow 48 micro 24 bloom
40 sensizym 40 calmag 40 rhino skin 40 bud candy
Ottenendo
Ec 1972 ph 6.5