
Likes
Comments
Share


@RastaRick
Follow
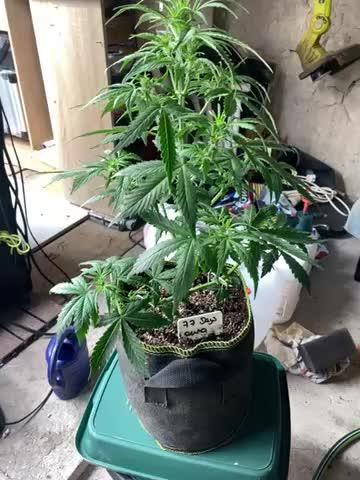
Coming on well. Turing into monsters... I need a bigger light. Day 45 got second dose of bio pk 5-8. I have a bad feeling i will have to do 3 separate harvest days hahaha

Likes
2
Share

@smoking_hills9
Follow
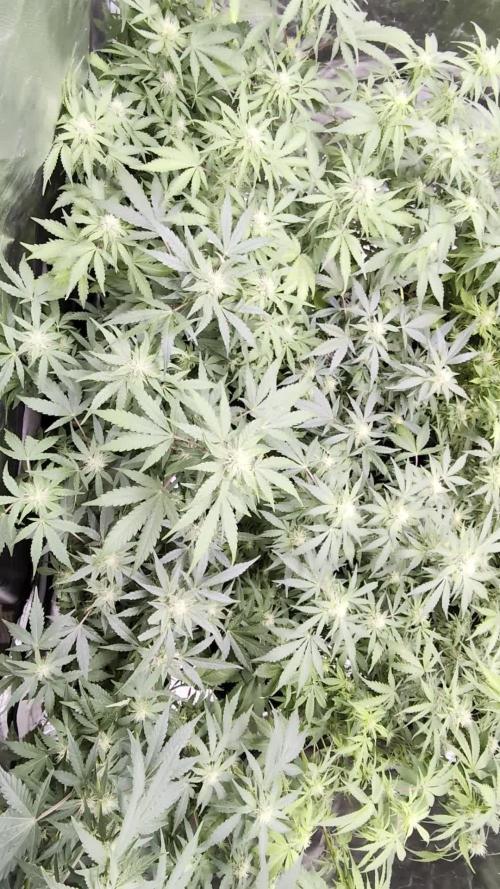
Done final defoliation 3 days ago. Took 2 kg of leaf from 43 plants. Now they all fully exposed to the lamps.
Buds will be fat on these girls . Smell is extra nice. Nice genetics. Start adding some magic juice.

Likes
4
Share


@Drtomb
Follow
Just starting day 14 of flower. Plant has been trimmed occasionally. Taking any Sucker branches that stray from the main stem by more than 2". Ill begin to be more choosy on the branches removed. Almost ready to set autopilot.. Just one more week folks!

Likes
22
Share


@Basementganja
Follow
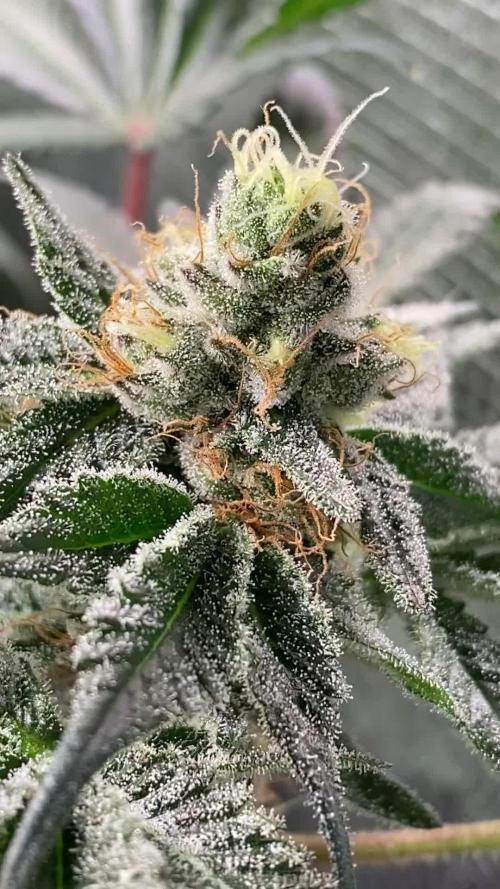
The final week!Just waiting for the trichomes to shift from milky/clear ---> milky/30% amber.
This girl was unfortunately nutrient locked since week 3 of flower, due to low ph (~4).
Yield suffered. Potency didn't!

Likes
7
Share


@Budking420
Follow
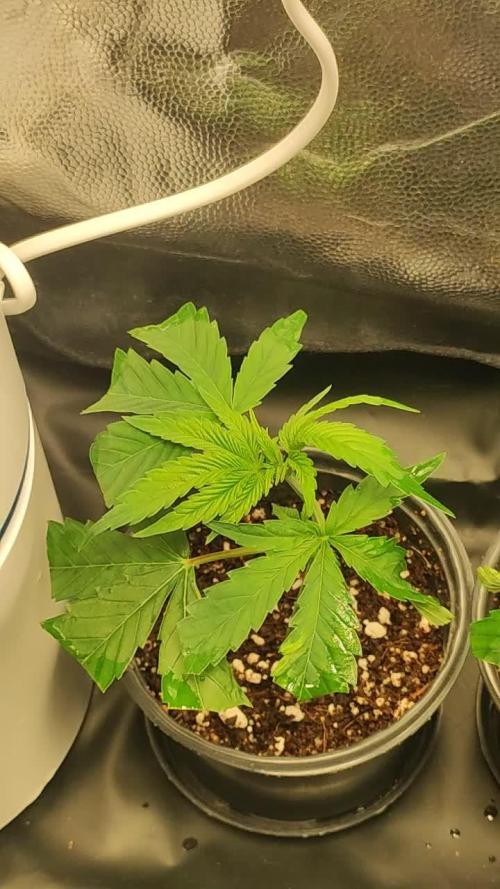
This lady is getting HUGEEEE. I see the sativa in her already. Shes starting to pre flower but I would say shes also still got a long ways to go. I'm super excited to have the experience to run this cultivar. This specific variety was special for me as I wanted a heavy sativa in an auto. I hope you guys enjoy this diary as much as I. Check back next week to see just how fast she buds & remember its 4:20 somewhere!!!!
Likes
Comments
Share

@Meckyman
Follow
H Gärtner 👨🌾
Die letzte drei Wochen haben die Ladys schön entwickelt duftet herrlich…


Likes
2
Share


@GermanGrow182
Follow
Fail. Diese 3 Apple fritter Auto haben 9 Tage nach Keimung einen Wetterwechsel nicht überstanden. Von 16°C und trockenem kühlen Wetter zu 28°C mit hoher Luftfeuchte innerhalb von 16h. Direkt über der Erde hat sich der Spross stark zusammengezogen, wie ausgetrocknet und ist umgefallen. Vermute irgend einen Pilz. Eine kleine hat noch gelebt, als ich das bemerkt habe. Habe um die Schwachstelle etwas Boden angehäuft, um sie zu stützen. Nach 2 Tagen hab ich nachgeschaut, der Stamm ist genau wie bei den anderen zusammengeschrumpft. Also schreib ich die ab. Hab heute 4 purple punch auto als Ersatz in den Topf gesetzt. Dieses Tagebuch endet hier leider 😑 danke fürs verfolgen ✌️. Hab wieder dazugelernt und die andern 28 und 4 neue sind ja noch da. 😉

Likes
62
Share


@Reyden
Follow
Nella tenda Iniziano a sentirsi odori floreali e alcune delle signorine stanno prendendo colore sulle foglie della parte apicale 💜
Sto innaffiando le piante 🌱 a giorni alterni perché ho diverse tabelle da seguire, le Gorilla 🦍 di RQS e Zamnesia sono a circa 1.9 EC mentre quelle di Seeds Mafia a 1.8, le altre 2 di Anesia invece sono a 1.7 e andranno ad aumentare a 1.8 alla prossima settimana…cerco di cambiare ogni giorno posizione a farle girare nel box perché almeno riescono a prendere luce da tutti i lati…sono molto soddisfatto della SF2000 di Spider Farmer sta facendo un ottimo lavoro e le bollette non ne risentono come pensavo 😆 oltre che avere un ottimo spettro che aiuta le piante a essere in salute il più possibile 😎
Ci vediamo con altri aggiornamenti tra qualche giorno!


Likes
9
Share


@Studabaker
Follow
Growing good. Trying to get fungus gnats under control. They are really loving this plant in particular. Giving mammoth p this week.

Likes
25
Share


Likes
42
Share


@MadeInGermany
Follow
Info:
Unfortunately, I had to find out that my account is used for fake pages in social media.
I am only active here on growdiaries.
I am not on facebook instagram twitter etc All accounts except this one are fake.
Flowering day 36
since time change
to 12/12 h.
Hey guys :-) .
The buds developed really well this week 👍.
They get wider, bigger, and firmer.
They are already starting to smell very tasty.
This week it was poured 3 times with 1.2 l each (nutrients see table above).
Unfortunately I found a couple of single trips that tell me that the trips still haven't completely disappeared.
Since I'm not a neem at this stage I will inject more oil and the lady has already finished over half of her cycle, I will let her run like this and the newcomers will be treated again 👍.
So I hope that at the next round all of them will finally be gone.
I had the problem more than 5 years ago and it took a long time until everything was ok again and there was no animal left.
Otherwise everything was checked and everything was cleaned.
I wish you a lot of fun with the update.
Stay healthy 🙏🏻
You can buy this Nutrients at :
https://greenbuzzliquids.com/en/shop/
With the discount code: Made_in_Germany you get a discount of 15% on all products from an order value of 100 euros.
You can buy this Strain at :
https://sweetseeds.es/de/cream-caramel/
Type:
Cream Caramel
☝️🏼
Genetics:
Blue Black
x
Maple Leaf Indica
x
White Rhino
👍
Vega lamp:
2 x Todogrow Led
Quantum Board 100 W
💡
Bloom Lamp :
2 x Todogrow Led
Cxb 3590 COB 3500 K 205W
💡💡☝️🏼
Soil :
Canna Coco Professional +
☝️🏼
Nutrients :
Green Buzz Liquids :
Organic Grow Liquid
Organic Bloom Liquid
Organic more PK
More Roots
Fast Buds
Humic Acid Plus
Growzyme Big Fruits
Clean Fruits
Cal / Mag
Organic Ph - Pulver
☝️🏼🌱
Water:
Osmosis water mixed with normal water (24 hours stale that the chlorine evaporates) to 0.2 EC. Add Cal / Mag to 0.4 Ec Ph with Organic Ph - to 5.8 - 6.4

Likes
91
Share


@FrontRowAG_BrianG
Follow
START OF WEEK 6 Day 35
—I AM NOT SPONSORED BY ANY OF THE PRODUCTS USED IN THIS DIARY—
⭐️Nutrients Used This Week⭐️
Front Row AG Part A 4.2g per gallon
Front Row AG Part B 2.8g per gallon
Front Row AG Phoszyme. 4g per gallon
Front Row AG SI .5ml per gallon
Front Row AG Triologic 1ml per gallon
Front Row AG CleanUp .2g per gallon
The room is running smooth this week. Pretty much set it and forget it. Tuck some leaves back under the net every night and refill the water reservoir every couple of days is all my duties right now.
This Super Lemon Haze is incredible. Every single node on every plant was topped at the start of the week. It must have been 100 nodes I topped. 2 days later the net went down.
I’m hoping to get one amazing pheno, so clones were taken from all plants in a hope for the lemon holy grail. HOLY TRINITY = SHARP LEMON SMELL/ROCK HARD CRYSTALLY BUDS/ SUPER LEMON TASTE
These nutrients are superb! No burning of the leaves and they completely dissolve in water. I actually spoke to Front Row over the phone about mixing instructions. Polite and well knowledgeable group of guys to say the least. Got my EC issues figured out and all is well.
Thanks for stopping by and see you next week!


Processing
Likes
37
Share


@MG2009
Follow
07/12/2018
All looking healthy and happy,females everyone!. In pre-flower 15.03 min of light by August 12, it will be down to 14 hours of light an in flower.
07/15/2018 Uploaded a couple videos enjoy


Likes
11
Share


@Lahuertade_Bototo
Follow
🌱🌱🌱Continuamos este cultivo, con esta hermosa cepa de FastBuds, Girl Scout Cookies Auto, de lleno en el periodo de Floración .🌱🌱🌱
👨🍳👨🌾🏻 Nutrición y Bitácora 👨🌾🏻👨🍳
-Día 29. Sigue creciendo vertical.
-Día 30. Se riega con una solución nutritiva NPK de 1.5 Litro con Plagron Power Roots (3.75 ml), Plagron Pure Zym (1.5 ml), Plagron Alga Bloom (3 ml) y Plagron Sugar Royal (0.75).
-Día 31. Se riega con una solución nutritiva NPK de 1.5 Litro con Plagron Power Roots (3.75 ml), Plagron Pure Zym (1.5 ml), Plagron Alga Bloom (3 ml) y Plagron Sugar Royal (0.75).
-Día 32. Se riega con agua 700 ml de agua declorada, y se realiza una leve defoliación para mejorar la penetracion luminica y despejar brotes tapados por hojas grandes hacia el interior de la planta.
-Día 33. Se riega con una solución nutritiva NPK de 3 Litros con Plagron Power Roots (7.5 ml), Plagron Pure Zym (3 ml), Plagron Alga Bloom (6 ml) y Plagron Sugar Royal (1.5 ml) + la adición de Trichodermas (1.5 ml).
-Día 34. Responde bien al riego con 3 litros del día 33, ya casi seca el sustrato y sigue creciendo y formando mas flores🌺💪.
-Día 35. Se riega con una solución nutritiva NPK de 3 Litros con Plagron Power Roots (7.5 ml), Plagron Pure Zym (3 ml), Plagron Alga Bloom (6 ml) y Plagron Sugar Royal (1.5 ml).
🚀Equipamiento🚀
Indoor de 60x60x159 cm y una iluminación BlackCob F320, se activa solo 1 modulo (160w) a 45 cm del canopy por el resto del cultivo. Intractor de 135mm, extractor de 135mm, filtro de carbón, ventilador "oscilofan", ventilador "clip fan", este ultimo ventilador se ajusta en la parte baja de la carpa para mejorar la circulación de aire bajo el canopy, 2 termohigrometros y una malla SCROG de kanovi a 15 cm de la maceta.
Acompáñenme para ver los resultados de este hermoso desafío, un saludo cultivadores 🔥🔥🔥
Likes
16
Share


@TooQuiikk
Follow
Let me start by saying, I'M SO GLAD I DIDN'T CHOP! THESE BABIES ARE GAINING SOME SERIOUS BULK!
I can not wait to see them finish out, It's really testing my patience, but I notice more bulk every single day!
It's about time to get the chop, they are maturing really quick and I love it. The smells are absolutely insane!!!


Likes
20
Share


@caliEskimo5
Follow
After exfoliation, leaf spot has virtually disappeared and main cola has really put on weight. Flowers are also growing much more densely than with my dwc grow but the blueberry pine diesel smell isn't there this time around.
I have also been fertilizing quite high this week, double strength because soil gets completely dry in under 24hrs and I'm not seeing any lockout or toxic signs.
9/15
Started flushing despite last dwc with Jack grow went 12 weeks. Bud was potent but lacked odor.


Likes
244
Share


@DogDoctorOfficial
Follow
So here is my week report on the fabulous Supafreak by HiElevation Genetics. Buckle up, because this girl is a wild ride!
Oh my, let me tell you about this Supafreak. She's like no other girl I've ever grown before. From the moment she sprouted, I knew she was something special. Her unique characteristics and unruly growth had me hooked from day one.
Now, we're approaching her final days, and it's time to make some crucial decisions. I've decided to stop all feedings and switch to just watering with Aptus Holland Fluvic Blast. Why, you ask? Well, let me break it down for you.
First, let's talk about this Fluvic Blast. It's like a secret weapon for plant health. Fluvics are organic compounds that enhance nutrient uptake and stimulate plant growth. It's like giving my Supafreak a supercharge of awesomeness. And let me tell you, she's responding to it like a champ.
One of the reasons I've chosen to go this route is because I believe in reutilizing my soil for future grows. It's like giving back to Mother Nature and keeping the soil alive and kicking. Fluvic Blast helps to replenish essential nutrients and promotes soil health, ensuring that my future plants will have a solid foundation to grow upon.
Now, let's talk about her close-up shots. Oh boy, the trichome production is out of this world! It's like she's showing off her bling, sparkling with potency and beauty. I can't wait to see how she develops in these final days.
And the smell, oh my goodness! It's unique and peculiar in the most delightful way. It's like a symphony of aromas that tickle the senses. I can't even put it into words, but trust me when I say, it's a scent that will linger in my memory forever.
So, my friends, there you have it—my joyous, knowledgeable, and fun report on the magnificent Supafreak. She's one for the record books, and I'm grateful to have experienced this journey with her. Stay tuned for the grand finale, where we'll uncover the full extent of her freakiness. Until then, keep growing and keep smiling!
As always thank you all for stopping by , for the love and for it all, i fell blessed to have you all with me for one more love journey, and a different one form the rest i did so far <3 <3 <3 Thank you Thank you Thank you , you guys are great and have been amazing , thank you for everything <3<3<3
#aptus #aptusplanttech #aptusgang #aptusfamily #aptustrueplantscience #inbalancewithnature #trueplantscience #dogdoctorofficial #growerslove
With true love comes happiness , Always believe in your self and always do things expecting nothing and with an open heart , be a giver and the universe will give back to you in ways you could not even imagine so <3 <3 <3
<3 <3 <3 Growers love to you all <3 <3 <3
Here are the words from this peace of art from nature creator Shapeshifter's @ HI-ELEVATION GENETICS <3 <3 <3
"FREQUENTLY ASKED QUESTIONS
Q. How did you create/breed Freakshow?
A. Methodical selection, line breeding, and culling is the short answer. Read our About page for more details.
Q. Is it an indoor or outdoor type?
A. Everything I've ever worked has been outdoors, including of course Freakshow. It has been our experience that outdoor (or sun grown, as it's recently being referred to) cultivars seem to perform extremely well under artificial conditions. This is true of seed starts or clones made from seed starts. The opposite is not always true; indoor clones often give an outdoor grower headaches because they don't always make the transition smoothly. This is due to light spectrum, temperature, and/or photoperiod changes. Yes, Freakshow will do exceedingly well indoors, and will thrive and mature just fine in a wide variety of natural environments as well, so it's definitely both and I think might even prove to be more resilient to those sorts of transitions.
Q. What are the potency and terpenoid levels?
A. Average 18-20% THCa, THC; negligible CBD, CBN with terps variable, averaging 2.5-3.5, primarily limonene and pinene, but this is variable, there was a lot of diversity in terp combinations and compositions in all the prior generations, it's just something that was left "as is" for now. The different parallel lines that we are developing can be directed in a few different pathways flavorwise.
Q. Why are the seeds white?
A. Why is the sky blue? No, the mature seeds are shrouded by a rice paper thin membrane which has coloring and mottling on it, but it's so fragile that it disintegrates in the process of shucking. Stripped of the outer layer the seeds are very pale, nearly white. It came as no surprise that this plant would have abnormal seeds.
Q. Is it a GMO?
A. Wow...? Well, it's seriously "modified" and the modifications are definitely genetic, and it is an organism. (Genuinely Modified Organically!) Uh, no. No radiation, no recombinant DNA, no gene splicing or editing, no TALEN or CRISPR! These biotechnologies don't belong in the food and medicine plant industries. Sadly, in the near future it will become commonplace and widespread in cannabis and other medicinal plants as it is already is with food crops and ornamentals. I'll avoid discussion on this topic for now, but we hope some people enjoy consuming Frankenbud!
Q. What's the floral period length?
A. 8-9 wks, finishes early Oct. at most latitudes and elevations.
Q. Is it a big producer?
A. Freakshow will produce nice, fat, dense colas (see gallery) with remarkable trichome coverage, and you can expect yields according to your veg. time, root space, and general knowledge and expertise as a gardener. The same set of variables apply to expected outcomes regarding cannabinoid levels and terpene profiles.
Q.What is the lineage?
A. (Bigbud x Skunk#1) x (Big Sur Holy Weed x Banana Kush). NLD("Sativa") dominant, but the afghanica influence is apparent. I'm pretty sure that Freakshow contains some Trainwreck and some Maui Wowie based on some research I did on the origins of the Pineapple Express. Interestingly Big Sur Holyweed, OG Kush, Banana, Trainwreck, and Maui Wowie are all of unclear origins. We have to remember that these are all just names and that they don't really mean much. The exact heritage of any cultivar today is impossible to determine accurately. Also, considering the amount of continuous shameless hybridization that has occurred in the last 40 yrs., any modern kind could easily contain over 40 kinds. In the case of Freakshow, it's much more limited because the ancestry is largely older "Sativas" that didn't go through as much outcrossing. In the 70s in Santa Cruz, Haze was a favorite among surfers for the pure energy and I still have (greatly improved) stock of it around, simply because even when I made hybrids with it I always kept the original in pure form for obvious reasons.
Q. What is the psychoactive effect like?
A. Like the flavors, many people have commented that the "buzz" is somewhat different than other mainstream types out there. It's not entirely out of the scope of imagination that given that this strain has new alleles in so many other respects, that it could also contain new, unique cannabinoids, as well as new and unique terpenoids, some of which may not even be among the standard 16 or so that the average lab is testing for. Aside from the up, cerebral, energetic boost, some report a mild time/space warp effect. Creativity and idea induction should be mentioned, for sure. Freakshow has the pure energy effect and greatly alters perception to the positive side, so definitely destroys depression. Appetite suppression is a side effect, but the enjoyment of food is enhanced. I personally will attest to all of the above. We all have different receptor profiles, so these are just generalizations. Couch unlock.
Q. Is it pest and mildew resistant?
A. Indeed it is. On many occasions in the last few years, it has been observed that when pest and mildew issues were affecting other plants adjacent to in the vicinity of Freakshow plants, for unknown reasons the freaks remained entirely unaffected. This includes 0botritis, PM, various mites and insects, soil fungus, etc. We haven't heard any complaints along those lines so far, so if anyone has any problems, especially with a rigorous IPM regimen in place, we would like to hear about it. And if anyone can attest to the extreme level of resistance it seems to have we'd love to hear about that as well.
Q. Does it contain web-leaf genetics?
A. I thought I better clarify this because there are a few people thinking that because of an article "Growing Marijuana that Doesn't look like Marijuana" that mentions that I had worked web-leaf types years ago and had eventually turned that into Freakshow. This is incorrect and I'm needing to get ahold of the writer to have him change it. When I read the piece and saw the mistake I figured it didn't matter that much, that the actual method of breeding could just remain a "trade secret". Recently, I noticed online that a posting, "Freakshow only exists because of duckfoot" by Curious Cannabis Connoisseur, where he explains how I developed Freakshow using Duckfoot. Let me explain, about 20 yrs. ago a friend gave me a jar of seeds labeled "BC Bigbud" and I sprouted flats of hundreds to look for oddities and had found one web-leaf pheno which we named Webster. It was a female so I bred it to a normal leaf male and began selecting and stabilizing a line of Webster. About 5 or 6 generations later I had nailed it to 100% webs and had also stabilized it for a deep purple color and a nice "gingerbread" terp profile. I was busy working other lines at that point so I put Webster in the library. Also, I was having a hell of a time getting a pheno of it that flowered to my satisfaction. (it seemed to finish with a limited number of calyxes). I knew I would have to outcross it to something with a big tasty bud and restabilize it for web-leaf, and I no longer had the original BC Bigbud. I still have the Webster seeds, and trust me the thought has crossed my mind to make the cross with Freakshow, but why? Why mess around crossing things just to create something even weirder? I have heard that the "Duckfoot" also doesn't bud up well so maybe there's a correlation there. Anyway, people can do what they want to and I will too, but crossing Freakshow with some low-THC crap like ABC is in my opinion idiotic. I worked extremely hard stabilizing and perfecting a beautiful new subspecies and I believe it should be kept pure. I won't go on a rant here about the rampant crossing and the lack of line-breeding in the cannabis world in the last several decades, or where this will eventually lead us, but I will say that it's not in a good direction. Bottom line....Freakshow has no web-leaf genes, it was made using top-grade tropical narrow-leaf drug (NLD) cultivars.
Q.Why is Freakshow patented?
A. Although I and most others (including all the folks at HSC) believe in and subscribe to the concept of "open sourcing" because sharing in cannabis genetics was always the cultural norm, it was decided that Freakshow should be protected (1) because it is a novel and unique, not a preexisting strain (or even subspecies), (2) To keep the greedy corporate big boys from exploiting it, (3) To maintain control of the genetic refinement of it in all future generations. We really can't wait to share it with the entire collective world of cannabis enthusiasts and invite experimental breeding for personal use and curiosity."
source https://freakshowcannabis.com
