
Processing
Likes
Comments
Share


@DudeGrowsWeed
Follow
March 7, 2019 Update:
I've been flushing the DinaMed CBD+ and Cherry Hemp plants since the weekend. I'll chop them down and hang them to dry this weekend. Critical+ and Cream & Cheese CBD have been fed this week with MegaCrop and Cal+Mag Pro. I'll start flushing the Critical+ and Cream & Cheese CBD this weekend for a week.
The Critical + has the best trichome coverage, DinaMed has the fattest buds and Cream & Cheese has the longest buds. Win-win-win!!! 😃


Likes
8
Share


@Hempface86
Follow
Pineapple dream is growing like a dream.. the medium looks saturated and the leaves are droopy I must agree but I haven't given her any liquid in 4 days so we wait until she dries up... she looks like in a week or so she will be ready for transplant into the 4 gallon pot for the rest of her life.. i have yeah at least 2 more weeks to go on the Sundae Driver and once that girl is done this pineapple dream will have her very own home where she will be flipped, and as I stated from the beginning, I think i'm going to let her grow naturally.. No topping.. no LST or HST .. i've noticed that I save around 2 months of growing by not doing a bunch of training and I still get a decent harvest.. That's it for this week .. Kannabia seeds thank you for the opportunity to grow this strain .. Definitely, check then out, guys. They have really good stuff. I hope all is well.God bless and happy growing ✌️.
Day 23: i transplanted her today into a 4 gallon pot. And in doing so, we had some issues, so i topped it and mainlined it which I said I wasn't going to do but I did it out of necessity, because she was too deep in the pot, because in transplant, she fell apart... Good news is it is a photoperiod so hopefully she recovers no issues.. Happy growing ✌️

Likes
25
Share


@MadeInGermany
Follow
Hey everyone 😃.
This week she has done great 👍.
It was done again on all the drifted topping and sprayed one last time with neem oil so that the last trips are finally gone 😁.
We haven't had any pests for so many years and all of a sudden we have such little shit parts 😅.
This week it was poured twice with 1.2 l of water.
GHSC enhancer was added during a pouring (1 g per l)
The tent was cleaned every day this week and the plants were checked for health.
The humidifier is filled once a day.
Next week I will decide how I will continue the training because I have space again in the flower tent 😀.
This week I'll decide whether it goes straight into the flower tent or is pruned again.
Until then, I wish you and your families a good start into the new year 2021 🙏🏻.
Stay healthy and let it grow 🍀
You can buy this Strain at :
www.Zamnesia.com
Type:
Purple Punch
☝️🏼
Genetics:
Granddaddy Purple x Larry OG
👍
Vega lamp:
2 x Todogrow Led
Quantum Board 100 W
💡
Bloom Lamp :
2 x Todogrow Led
Cxb 3590 COB 3500 K 205W
💡💡☝️🏼
Soil :
Canna Coco Professional +
☝️🏼
Fertilizer:
Green House Powder Feeding
☝️🏼🌱
Water:
Osmosis water mixed with normal water (24 hours stale that the chlorine evaporates) to 0.2 EC. Add Cal / Mag to 0.4 Ec Ph with Organic Ph - to 5.5 - 5.8 .

Likes
50
Share


@D33jW
Follow
🌸 Runtz - Week 2 of Flowering Update 🌸
This plant continues to impress me! 💜 The structure is beautiful, and it’s growing strong with a healthy appetite.
I can already see the first signs of fading, which tells me it's hungry for more nutrients.
Everything is progressing smoothly, and I’m really happy with how it looks at this stage.
For the last feeding, I gave it Plagron Terra Bloom with an EC of around 1.3.
The plan moving forward is to maintain stable conditions around 1.2 VPD until the first signs of frost appear on the buds.
Regular feeding will continue, keeping EC above 1.0 to support healthy flower development.
Grow Conditions (FLO Week 2):
🌞 Light schedule: 12/12
🌱 PPFD: 750 µmol/m²/s
💧 VPD: ~1.2 kPa
Can’t wait to see how it stacks up in the coming weeks! 🔥
Likes
22
Share


@Aeromax
Follow
23/4 :
Received the Migro Aray 240W so i switched the lamps in the box. I'm not using the old 600w LED fixture.
It will grow even better with the new light !!! 👽
Still don't have a basic grow nutrient, will try to grab one soon.
2 Pink Gasoline and 1 Capri Zun didn't make it unfortunaltely 😞
25/4 :
The Migro light delivers the first results !!
Also i ordered the whole FloraFlex nutrient line. Can't wait to receive these 😊


Likes
7
Share


@Mr_nugs_lover_David
Follow
The plants look stunning, beautiful strain to grow and work with for sure, I cannot wait to smoke those buds, the fragrance has instantly make me want to run her again most definitely, the stretch has been really noticeable and and both phenos have a lot of flowrs, looks very productive plants, looks like a solid strain, both phenos smell the exact same, this 4th week of flower it's gonna be very exciting, I only water 💦 the medium when dry and that's it, FLO Living soil blends does a sensational performance keeping your plants well fed all the way from seed and also provides you amazing results in terms of quality of the flowers, the smell is so pure and it makes every strain perform to its best, I'm definitely in love with this living soil blend, and also in love with this couple of badazz OG cheese guys. Please stay tuned to see how this ladies keep developing! ❤️💚✌️


Likes
2
Share


@CannaIGrow
Follow
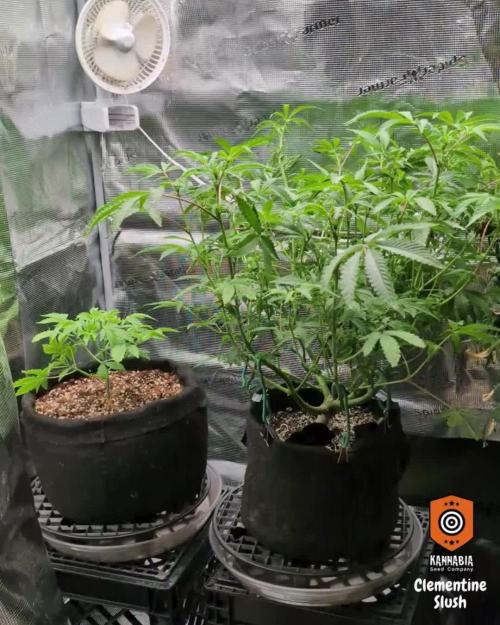
Trop Cherry #8 x BeeJayz hasn’t been topped, I transplanted the girls this week from a 1 gallon pot to a 3 gallon pot. Trop Cherry was in a plastic pot but now in a fabric pot. Plants seem to be growing well.


Likes
65
Share

@Fatnastyz
Follow
Day 29 - 8/12
- I took the day off! Didn't water and didn't measure. LOL I did peek at her once or twice though...
Day 30 8/13
- 8.5" today!
- 5.8 ph water as usual.
- Cut off a couple of fan leaves that were annoying me. Thinking about finally flipping her tonight, getting a bit bored LOL need a change up.
Day 31 - 8/14
- LOL Never mind on flipping her I guess, I ended up topping her! I wasn't going to, the furthest thing on my mind when it came to training her! But, I just did! I topped her! What can I say...I am very impulsive. I get an idea in my head and it's done before the next thought. I will change things up on a dime!
- Well, she is doing good after that sudden head chop though. Wish I would have decided to do this a few days ago...but whatever! I think I will let her veg out for a few more weeks and get tall before I flip now LOL I may change my mind before then though.
- 7" tall today now that she is topless.
- No water today, but bringing her new feed up to full strength on her next...It's coming! She wants it bad lol
Day 32 - 8/15
- Finally a full feed! Upped her Cal mag to 4ml/gal now too. May end up needing to go higher on that soon.
- 7" tall still
- She's already growing new pretty leaves and looking more bushy lol. I'm glad I topped her.
- Hoping her full strength will help her paleness now lol, and her big dose of cal mag of course.
Day 33 - 8/16
- 7.5" tall
Day 34 - 8/17
- 7.5" tall
- Still on every other day water with full strength Terra Grow from Plagron and 4ml of Cal Mag. Sometimes I feel like adding a ml or 2 of silica.
Giving 2000ml per water.
Day 35 - 8/18
- 8" tall
**Still going on about how much I love my low effort nutrient feed! Simplicity is the way ! LOL at least for me. She didn't seem to mind the switch up to Plagron at all, but she was really young though. She did yell a bit at me for starting her so low...but this was my first time using Plagron, and my first time not going off of someone else's chart so I was fine taking my time. And, as you can see, she survived LOL
She also didn't mind me suddenly cutting her head off.
LOL When will I flip.....now that will be a mystery. I'm sure it will just hit my head one day that "today is the day"....and I'm sure there will be no actual reason for that specific day either, just an "I felt like it".
Lana has not managed to nibble any this week, but she has stood guard to make sure no one else could either. She thinks if anyone is getting a nibble it's gonna be her! My little guardian.
Also included some beautiful pics of other kitties! The joys of my life!
Likes
33
Share


@Caukygrow
Follow
Wow, coming along. The girls are really getting smelly. I actually added a second carbon filter on the exhaust & have invested in a dehumidifier, keeping the humidity levels at 50% for the rest of the grow. It is running 24/7 draining into a bucket outside of the tent. I will use the water from the dehumidifier to feed my girls.
I also managed to get some cal mag to help my burnt edges. Other things I have changed for this week as we are preflowering is switching the schedule from 24 hours of light to 18/6. I think this has helped the plants get some much needed rest after vegging.
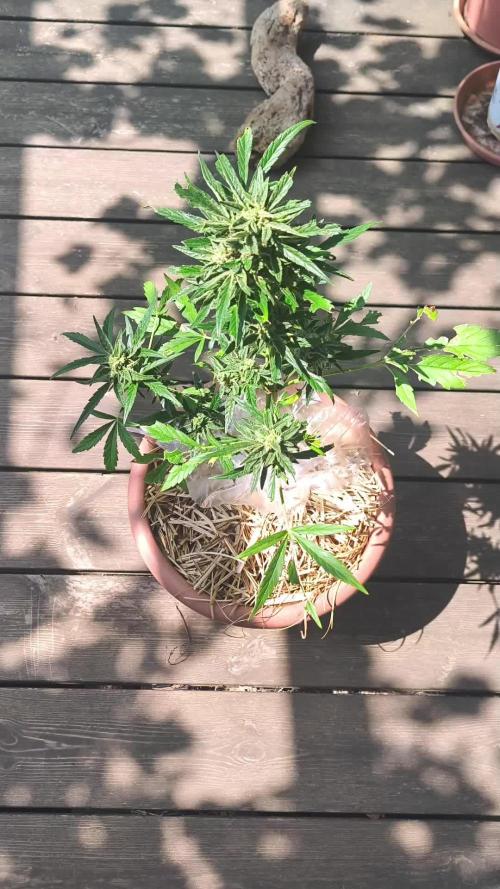
12th of August. I think I can see it starting to flower!!
* Minor defoliation to remove leaves that are damaged from watering at the bottom of the plant
16/08/22 Grow question
ADAM BASE A - NPK 3-0-1 (3 ml/l)
EVE BASE B - NPK 0-4-3 (3 ml/l)
LUSH - NPK 5-0-0.5 (1 ml/l)
RAPTURE - NPK 0.7-3-3 (1.5 ml/l)
Herbi Cal mag NPK: 4 – 0 – 0 (1.8ml/l)
1L ADAM & EVE: Your base Nutrient, used from start to finish.
1L LUSH: Veg stage focused nutrient additive.
1L Rapture: Applied in early Bloom/Flowering.
I water around 1.5 liters of mixed water PH'd to 5.8 to each plant, giving me about 20-30% run off. Am I overwatering my plants?
Update! 17/08/22
I flushed the plants with 4 liters of water each using half the nutrients I was using before
13ml to 9l Adam
13ml to 9l Eve
6ml to 9l Lush
8ml to 9l Cal mag
Left out the bloom - I'll add it again for the next feed.
The canoeing I had on the smaller plant already seems less intense - hopefully see some good changes as we head into the next week for flowering.
Today I will do a more invasive defoliation on the big plant, removing all of the fan leaves on the bottom - stay tuned for week 5 starting tomorrow. A few more weeks and hopefully we get some nice juicy buds!!!
Likes
24
Share


@TerpTurtle
Follow
14 day dry | Curing in Grove bags, filled 7 QP bags & got 56g of keif out the trim bin from only 2 plants!
More pictures coming! STAY FROSTY GROWMIES


Likes
101
Share


@DreamIT
Follow
🦅🔥 Dark Phoenix by Green Seeds House 🔥🦅
🔥6.7 quiet start of the week, for now muahuahua, updates later
🔥7.7 🤘
🔥8.7🤘
🔥9.7 🔥
🔥10.7🤘
🔥11.7 moved to final pot with addition of bio feeding growth and enhancer
🔥12.7 I really messed with the timing,I will start the new week along with the other diaries
🔥15.7 Sunday I update the week, not long. otherwise all right, new irrigated tomorrow
🔥16.7 irrigated with 0.5 of water at the correct ph
🔥17.7 Tomorrow starts a new week and a new diary, yeah. For today everything is fine, the humidity is high because I gave 0.4 of water at the correct ph before taking the photo
__________________________________________
❓ Are you new to the world of the cultivation and don't know where to safely buy your seeds?
😮The Green House Seed Company is the most successful cannabis business in the world.Winner of many international awards (40 High times Cannabis Cups, 17 Highlife Cups, and many more private awards in many countries), it is leader in cannabis genetics.
✅ bit.ly/GreenHouseSeeds420
______________________________________________
👀 Are you looking for a good lamp to start with? 👀
🌞Viparspectra has something more than the others, take a look at their site.
⏩ Use "GDVIP" for an extra discount or "ViparDreamIT" for an extra 5 %% discount
👀 Search for it on Amazon
✅Amazon US: https://amzn.to/30xSTVq
✅Amazon Canada: https://amzn.to/38udUVe
✅Viparspectra UE: bit.ly/ViparspectraUE
👀 Watch my ViparSpectra XS1000 unboxing on YouTube, leave a like and write to the channel 🦄
✅http://bit.ly/UnboxingViparSpectraDreamIT
______________________________________________
📷🥇 Follow the best photos on Instagram 🥇📷
https://www.instagram.com/dreamit420/
🔻🔻Leave a comment with your opinion if you pass by here🔻🔻
🤟🦄💚 Thank you and enjoy the growth 💚🦄🤟

Likes
8
Share


@Herbman420
Follow
Hello everybody and welcome to my grow diaries. this week went really well I noticed with these new genetics that there are a lot hungry .so I started to feed them for their second feed 400 parts per million they seem to have reacted very well. I'm going to feed them every three days but today I will feed them 400 parts per million as well just to make sure that they're okay and they have adjusted well .I don't want to push them. Have learned from that . As I say things are going very well .I appreciate you looking at my diary there will be an update every week and you always have to keep in mind that is 420 somewhere 🌱👍
Likes
1
Share

@Nistnov
Follow
I harvested the plant in week 9. I put her in dark room for 3 days before harvesting. I didnt flush her, just let the soil dry out.
I gave the buds 3 washes in water and one wash with water with lemon juice.

Likes
3
Share


@GelatoTerps
Follow
Deep watering on Sundays (buildaflower compost tea)
Moist watering on Wednesdays ( vitamin c water & jay plantspeaker )
Cut down 3 hermies from light leak
2 charmz
1 Apple fritter

Likes
46
Share


@Juschiln420
Follow
Well, I nutrient burned her 3 times in a row from 1st time growers mistakes. And she didn't take it too well. She got stunted pretty bad. But I still managed to pull her thru. I did make a huge mistake and used florakleen for 2 days longer then directions say and when harvested buds and stems had a werid wet stickiness and had a werid smell. So I'm pretty sure I ruined them. They are drying now I haven't weighed them and to be honest I am probably not going to smoke it and just throw it away after weighting it. I'm super sensitive to off smells and taste, so I'll pass after smelling during harvest. But I did cut one branch off before adding florakleen, so I will have a bud or 2 to try... I'll check back in after a proper cure of the branch I cut off before running the whole damn plant... smh...


Likes
Comments
Share

