
Likes
Comments
Share


@Spliffing_Around
Follow
Grower love ❤️!
Started trying out Nutra hydroponics (TH equivalent for GHE) on one of the racks , all others are the farms custom formula. Hope we see difference and move to another set of nutes.


Likes
12
Share


@GrowGuy97
Follow
This is honestly one of my favorite strains I have grown so far, it is amazing all the way around! Smell is like a funky ice cream, taste very fruity & very strong! Will have some more updates and a weight update soon, thanks for following friends!

Likes
12
Share

@farah4weed
Follow
Hello guys😍😍
Fifth week of growth.
Last week, the plants were a little shocked after topping, but after a few weeks they returned to normal growth.
To reduce this shock, I used BioEnhancer fertilizer.
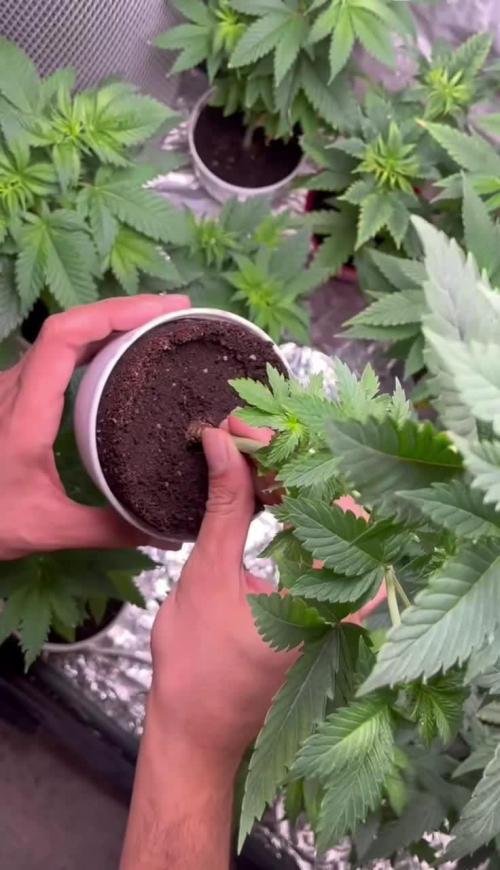
And this week I checked the roots.
The pots are ready to be Transplat.Thank you for following my project.
🌷farah4weed🌷
Likes
13
Share


@PrinceOfHerbs
Follow
The plants look very healthy, especially very resinous for the 25th flowering day.
On this day, the Sanlight 3-80 1.5 (200w) was hung in addition to the Lumatek Attis 300w Pro to achieve optimum results.


Likes
14
Share


@PREPPYPUNK
Follow
will have to see but at 8 & 10 weeks, i think they look a little small. as long as i continue watering, this new maxsisun mf2000 should fatten these buds up. cant wait for next grow with the new light in 3x3 tent. this is becoming the best hobby i can recall next to working in my garden all summer. and this grow diary is great as you can have an honest review of progress etc...i have learned so much from this community. Thanks and Blessings for all!

Likes
8
Share


@Totogrowuk
Follow
I was a little disappointed with yield but do have about 60g of trim that was too fluffy to bother with trimming . I’m thinking of making bubble hash

Likes
2
Share


@Pot_Portraits
Follow
Another week and flower and all is good! happy vibes in the tent, plants transitioned well even with some technical errors like power cuts etc.
Looking forward to the late stage of flower, structure is beautiful !!

Likes
64
Share


@Targona
Follow
Targona, 43 days since my little girl sprouted from the seed 🌱
Sixth week of growth for my Red Pure Auto CBD 💚❤️💚❤️
Nutrients:
As I mentioned last time, I switched to mostly organic nutrients from Plagron and Biobizz💓 -
Plagron Alga Bloom - is a complete fertilizer designed exclusively for the flowering phase. It contains all the important substances that the plant easily absorbs 🌸🌾
----------------------------------------------------------------------------------------------------------------
Plagron Sugar Royal - is a supporting enzymatic fertilizer designed exclusively for the flowering phase. It contains hormones, enzymes, vitamins and trace elements necessary for proper flower development 🍭🍭🍭
----------------------------------------------------------------------------------------------------------------
Plagron Green Sensation - Green Sensation is a professional flower stimulator and activator. It contains all the necessary ingredients that support flowering and also the formation of sugars, and thus the overall yield 🌊🌿
-------------------------------------------------------------------- ---------------------------------------------
JUNGLE X Environ is a highly effective complex preparation for stimulating the formation of flowers 🌸🏵️
----------------------------------------------------------------------------------- ---------------------------------
BioBizz Bio pH - is an organic pH regulator. An aqueous solution of citric acid, which is naturally found in citrus fruits 🍋🍋
----------------------------------------------------------------------------------- ---------------------------------
I am no longer fertilizing Plagron Power Roots this week, it should be fertilized no later than the fifth week of plant growth.
Anyway, this is the last watering that I mix like this. I will gently switch to mainly organic nutrients, with the addition of very gentle flower stimulants, which are only slightly or partially mineral.
In general:
Red Pure Auto CBD 💚❤️💚❤️ - It is a beautiful plant. It still has deep green leaves, those that are close to the flowers are dark purple. It is clear that the flowers will be dark red, even purple. The plant responds well to everything from temperature, humidity, to excellent nutrient response, especially during the transition to flowering. It also responded well to the nutrient change in general. The truth is that I was very careful. Anyway, it looks really healthy and is enjoying life💚🌺🌱
Training:
I did LST only on two small branches, which were blocked from the light by older strong branches and also a slight defoliation. It was really a few leaves that cast a shadow on the buds 💚🌞🌿🌞
Light: Mars Hydro TS1000 The plants respond effectively and the light is technically very well managed - I try to have 50 cm between the light and the plants, so I move it up regularly 💡💡💡
Thanks for the likes
See you soon 😍😍
Likes
3
Share


@TS_Greens23
Follow
This week has been a pleasure to experience,,,Pineapple Express is doing everything right,,, and as fast as possible I might add,,,! I’ve been able to get her pinned in the shape I wanted,,and I’m happy with how she setting up for the run home,,,a little extra Liquid Potash has been added to her diet,,,🍍

Likes
77
Share


@Jackweed77
Follow
La sposa chimica sta molto bene ha una bella struttura. .lei ha bisogno di 9 settimane di fioritura e visto che questo diario sta partecipando al contest della greenhouse che si concluderà tra piu di 100 giorni lascerò la ragazza ancora un po in vegetativa...devo dire che sono piacevolmente colpito da i fertilizzanti feeding forniti per la partecipazione al concorso dino ad ora stanno andando forte...vedremo con i fiori come si comporteranno....💚🌱


Likes
2
Share


@Gardens_of_Of
Follow
She completed the first week of flowering happily and she keeps stretching. Trailers net added to level the canopies.


Likes
16
Share


@MrWolfe
Follow
Last week of veg for this round, next Monday they will start 12/12 in the flower room and get stripped.
Watering daily and they are growing fast and looking great, can't wait to see how flower goes for these ladies.

Likes
9
Share


@karchutos
Follow
Por ahora todo va bien, la Mandarin parece un poco estancada en el crecimiento respecto a la Nl5.


Likes
Comments
Share


@Dankmark420
Follow
We cut her early due to a block off in the autopot system.. but she was frosty as a mofo for being cut way to early and the taste was surprisingly very sweet with a piney/spicy kind off aroma and taste
Likes
16
Share


Processing
Likes
43
Share


@Jack_Greenstalk
Follow
I topped both plants once thus far, cleared their lower nodes up to the 3rd node on "nemo" and 4th on "v" names are easier then saying seed 1 and seed 4. added pics and video of day 34/35 for these two. hope y'all can stand the slight off hue from grow light. pics/vids are taken on phone camera thru grow room glasses, when watered the 3 gal pots are heavy and not easy to yank out for a picture.
