


Likes
27
Share


@WestOzzie
Follow
She's grown about 20cm this week,branches are starting to stretch out,same watering cycle,definitely females hairs from top four branch nodes showing more now..she is booming along,looking healthy and cant wait till she pops out some sticky buds to stare at
Likes
96
Share


@Swollen
Follow
Finally it's flowering time!
I've switched to 12/12. Gigi is starting to stretch, 7cm in a week, not bad.
Day 57: Added Alga Bloom, Terpinator and a bit of powder kelp to the feeding solution.
Day 59: Turned on the dehumidifier. I want more high temps and less humidity. Rh% is now 50/55. I'm lowering the ph of my nutrients solution to 6.1
Day 63: I see lot of buds points, very good 👍 if this genetic grows rock hard flowers like a real GG4, I think this plant will be amazing! I've rotated the plant position 180° and added a reflective mat under the vase.
Next week I'll defoliate very well Gigi. It's time to see some beautiful buds.

Likes
30
Share


@buddin_onna_budget
Follow
These beautiful lil ladies are coming along nicely eating very well! Not bad for my first photos


Likes
17
Share


@Colin087
Follow
One plant is very small cos when I transplanted it to the 5g pot I brock all the roots off it its slowly starting to come back to life, as for the other ones there doing good lots of new growth starting to come out under main big leaves i am not adding any nutrients yet and will probably start LST by the end of this week
Likes
6
Share

@J4kpvp
Follow
Hello:)
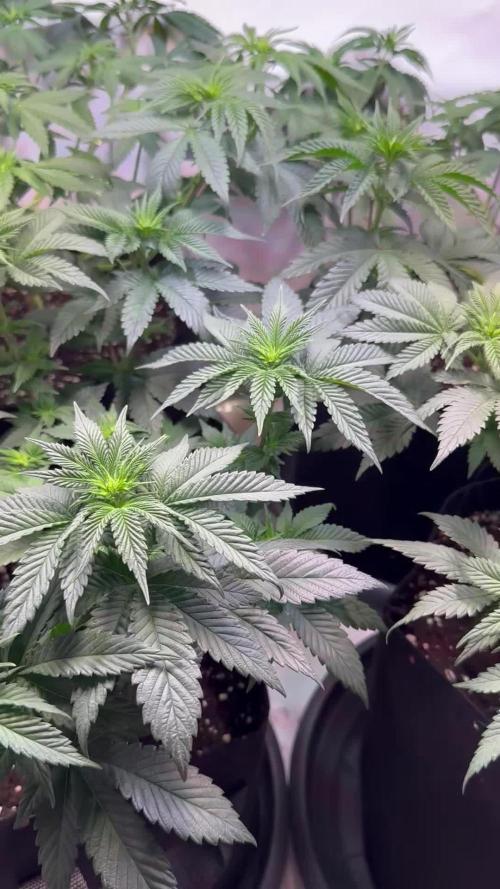
really nice first week of flowering:) they show me some signs of overfertilization, so I don‘t add anything at the moment, even though I should add some bactrex and orgatrex now:)
Did some more LST and defoliated them quite a bit. This time I try to go a lot more aggressiv concerning defoliation:). I managed to get the four plants fairly even in height, next week I‘ll install the net and let them grow in peace after that:)
All looking very promising so far

Likes
51
Share


@MadeInGermany
Follow
Info:
Unfortunately, I had to find out that my account is used for fake pages in social media.
I am only active here on growdiaries.
I am not on facebook instagram twitter etc All accounts except this one are fake.
Flowering day 1
since time change
to 12/12 h.
Hi guys :-) .
The time has finally come 👍
You have been switched to 12/12 hrs and are ready to flower.
Of course, cuttings were cut beforehand to keep the genetics.
For 4 days now she has also been getting Fast Buds from GreenBuzzLiquids.
They were also sprayed again with GBL Fast Plant spray.
She is very healthy and I am excited to see how she gets going again in bloom :-).
This week it was poured twice with 1.2 l each time (for nutrients, see nutrient table above).
Then I filled canisters with fresh osmosis water for the next few weeks 👍.
The tent was cleaned and every plant was checked for health.
At the moment I am tinkering with the ventilation because there are currently 4 fans with 4 activated carbon filters running, which I want to make more efficient by putting a hose through 2 tents.
These are the things about which you desperately at the beginning but learned from them in the end.
I wish you all a nice week.
Stay healthy 🙏🏻
You can buy this Nutrients at :
https://greenbuzzliquids.com/en/shop/
With the discount code: Made_in_Germany you get a discount of 15% on all products from an order value of 100 euros.
You can buy this Strain at :
https://www.exoticseed.eu/
Type:
Herz Og
☝️🏼
Genetics:
Larry OG X Kosher Kush
Indica 60 % / Sativa 40 %
👍
Vega lamp:
2 x Todogrow Led
Quantum Board 100 W
💡
Bloom Lamp :
2 x Todogrow Led
Cxb 3590 COB 3500 K 205W
💡💡☝️🏼
Soil :
Canna Coco Professional +
☝️🏼
Nutrients :
Green Buzz Liquids :
Organic Grow Liquid
Organic Bloom Liquid
Organic more PK
More Roots
Fast Buds
Humic Acid Plus
Growzyme Big Fruits
Clean Fruits
Cal / Mag
Organic Ph - Pulver
☝️🏼🌱
Water: Osmosis water mixed with normal water (24 hours stale that the chlorine evaporates) to 0.2 EC. Add Cal / Mag to 0.4 Ec Ph with Organic Ph - to 5.8


Likes
2
Share


@SSKNFbyHAZE
Follow
Hi Growmies~!
What This Post is About
Today, I'll be recording how to cultivate soil microbes at home.
These microbes offer numerous benefits, and they are simple to make.
How I Came Up with This Technique
Since 2014, I’ve tried synthetic growing methods like DWC. While they gave quick results, I often ran into issues with consistency.
Nutrients would expire during breaks, meaning I had to keep buying new bottles.
I strongly felt I needed a change.
A couple of years ago, after taking a break, I started to research and switched to organic growing.
At first, it felt overwhelming with all the steps and prep work, but I saw real potential.
After experimenting with different methods, I came across Korean Natural Farming (KNF) and JADAM, introduced by Mr. Cho.
His simple, ultra low-cost techniques inspired me. They focus on letting nature do the work.
While growing,
I noticed that synthetic nutrient bottles were expensive, especially when trying to complete a full nutrient set.
Organic growing may require more attention and can be costly when investing in organic materials.
Preparing the soil in advance and top dressing with dry nutrients every other week - just these two methods were consuming space, time, and money.
Indoor farming is unnatural, while organic farming is a natural approach.
I had to bring these ideas together, but organic farming often seems geared toward large plots like farms.
Incorporating organic techniques into my indoor garden requires a lot of effort and careful calculations.
So this is one of my techniques for keeping my plants happy:
supporting their daily needs helps them snap out of deficiencies quickly, allowing them to grow consistently.
It took me a while to adapt this technique for indoor use.
I hope this helps, guys!
Supplies Needed
- Potatoes: Provide nutrients and food for the microbes.
- Sea Salt: Stimulates microbial activity and controls harmful organisms.
- Dechlorinated Water: Allows the microbes to grow and multiply.
- Compost, leaf mold, or worm castings: Contains natural microorganisms that are key for this process.
How to Make (1 gallon)
1 cooked potato (about 2 golf ball-sized)
1 pinch of sea salt
2 tablespoons compost or worm castings
1 gallon dechlorinated water
1. Mix Ingredients: In a clean container, fill it with the dechlorinated water, dissolve the sea salt, and add the compost along with the mashed potato.
2. Ferment: Optionally cover the container and let it sit at room temperature for 24-48 hours.
3. Strain (Optional): After fermentation, you can strain the solution if you prefer a clearer liquid.
Note: Watch the timelapse video to see how the microbes activate!
**WARNING**
Wear gloves if possible and/or avoid contact with open wounds
How to Use
IMPORTANT: Always dilute the solution before applying it to plants.
- Use when bubbles form a "pizza shape" on the surface.
- Dilute 5-10 ml per liter of water for bi-weekly feeding. (Test a small batch first to find the best rate for your setup.)
- Once the bubbles disappear, the microbes are likely inactive. You can either mix the rest with water as fertilizer or discard it.
Pros
Promotes Plant Growth
- Usually fixes deficiencies in as little as 6 to 72 hours.
- Improves nutrient absorption, and helps plants thrive.
Boosts Plant Immunity
- Works as IPM: Can be used as foliar sprays (no staining on leaves).
- Lowers the risk of powdery mildew and other diseases.
- Helps the soil ecosystem with beneficial organisms like predatory mites and springtails.
- Naturally reduces pest pressure (Less risk of fungus gnats and other pests).
Improves Soil Health & Supports Composting
- Quickly breaks down organic matter and nutrients.
- Makes growing organically in small containers, like 1-gallon pots, easy.
- Over time, soil becomes softer and richer, even in small pots.
Cost-Effective, Sustainable & Eco-Friendly
- No need for complex equipment like pH pens, air pumps, or other tools.
- Reduces the need for CalMag, N-P-K, or micronutrient supplements (just add a little bit of sea salt to every watering).
- No sugar sources needed in the soil.
- Works for all types of plants—houseplants, exotics, ornamentals, and crops.
Cons
- Limited shelf life; the solution will develop an unpleasant odor after a certain period.
1 Corinthians 10:26
Likes
21
Share


@cheetah844
Follow
This is the shorty of the bunch.
I topped and defoliated every plant. I'm trying to form them into canna-bushes. Hopefully I'm doing the correct training procedures to make them all grow that way both indoors and out.

Processing
Likes
8
Share


@TheFairyBudMother
Follow
Watered and fed 6-9
6-11 foliar spray
6-15 watered and fed with enzymes. Sorry for blurry photos. Color and texture of leaves is improving as I allow her to dry more between watering. Topdressed with gnatnix


Likes
60
Share


@Lungboi
Follow
Not much to tell this week, happy to say that she's been doing well over the last week while she has been flushed with ph'd tap water! She is now getting close to harvest time, I think I might let her flush for a couple of days more before I harvest her😁 She is a little older and further along than the rest of the tent, so she will be the only one to be harvested and I will let the three other run until I see amber trichomes develop on them! I planted her a little earlier than the three others to allow me to use her as my "test dummy" for my first run, and so I could make corrections for the other three early on!
But even though she has been my tester and has taken a bit of abuse from time to time while I was still more unsure of everything at the start, she has still turned out way better than I ever had dared to hope for when I started this journey over 100 days ago, and the heavy aroma shes giving off is amazing and she has developed some of the more dense nugs out of my four girls so far! 🙏 But yeah I'm thinking that I will harvest her tomorrow or the day after at the latest to let me get a trail run off on drying before I harvest the other three girls, just to make sure I get that process down!
But the next update that I will come with will be after the harvest if things goes to plan, and like I said I am soo excited for that day to come and get my next run started! 😁
Happy growing everyone! and thank you for all the encouragement and comments, it has really helped a lot and I will for sure stay active on the community and make a dairy for my next run too!

Likes
12
Share


@Powface
Follow
Well that was fun. First time delving into the homegrown world and I’m officially hooked. Following the cocoforcannabis nutrient schedule and method, I ended up with 200 grams of dry bud and an extra 40 grams of trim/larf for edibles. I may have had them in the dry tent for a day too long, the hygrometers in the jars have settled around 54% RH, but they feel pretty damn sticky and moist to me. Been toking the larf and the high is really nice, definitely smoother than anything I’ve gotten from a dispensary. Can definitely taste the 🍇 and I’m excited to see what a little more cure will do. Already have my seeds ready for round 2, thanks for checking out the grow!


Likes
18
Share


@GYOweed
Follow
Lsted n defoliated the bruce and trainwreck.
My gg4 is doing shitty.
My Sorbet is????


Likes
15
Share


@Springbokke
Follow
Доброго всем дня
Сегодня 89 день жизни моей дочки. Ровно 4 недели как перевел на цвет. Рост прекратился в начале этой недели и я решил убрать азот. Но прежде я ее промыл хорошо, вывел все накопившие соли с горшка, и ее корней, думаю мне это удалось. На выходе из горшка вода показала всего 111ppm! Так же на этой недели стали желтеть верхние листья, считаю что это и за недостатка кальция. По этой причине стал добавлять CALiMAGic. Я его всегда использовал когда пользовался линейкой удобрений от General Hydroponics.
Вообще в конце я напишу свое мнение о использованных мной удобрений, может кому то будет полезен мой опыт.
Полил ( 1061ppm )-3л Sensi Bloom Coco A - 4мл/л; Sensi Bloom Coco B - 4мл/л; Big Bud Coco - 2мл/л; Bud Candy - 2мл/л; Влажность 32% - 43%; температура 21c - 28c 8 - й день цвета, Полил ( 1146ppm )-3л Sensi Bloom Coco A - 4мл/л; Sensi Bloom Coco B - 4мл/л; General Hydroponics Kool Bloom -1мл/л; B-52 - 2мл/л; Влажность 26% - 44%; температура 22c - 30c 9 - й день цвета, Промыл 36л Влажность 26% - 41%; температура 20c - 28c 10 - й день цвета, Полил ( 1056ppm )-3л Sensi Bloom Coco A - 2мл/л; Sensi Bloom Coco B - 2мл/л; General Hydroponics Kool Bloom -2мл/л; B-52 - 2мл/л; General Hydroponics CALiMAGic - 2мл/л; Влажность 22% - 38%; температура 20c - 27c 11 - й день цвета, Полил ( 1071ppm )-3л Sensi Bloom Coco A - 2мл/л; Sensi Bloom Coco B - 2мл/л; General Hydroponics Kool Bloom -2мл/л; Big Bud Coco - 2мл/л; Cal-mag Xtra - 0,5мл/л; Влажность 22% - 32%; температура 20c - 27c 12 - й день цвета, Полил ( 596ppm )-3л Sensi Bloom Coco A - 2мл/л; Sensi Bloom Coco B - 2мл/л; General Hydroponics Kool Bloom -2мл/л; Nirvana - 2мл/л; Влажность 23% - 32%; температура 20c - 27c 13 - й день цвета, Полил ( 970ppm )-3л General Hydroponics Kool Bloom -2мл/л; Big Bud Coco - 2мл/л; Cal-mag Xtra - 2мл/л; General Hydroponics CALiMAGic - 1мл/л; Sensizym -2мл/л; Влажность 26% - 35%; температура 19c - 26c 14 - й день цвета
Как видите влажность очень низкая. Конечно хотелось бы чтоб она была чуть выше, но лучше пусть будет ниже нормы чем выше нее.
Likes
54
Share


@Fatnastyz
Follow
11-22
Day 16
Water day!
Bpp got around 600ml, everyone else got around 1k.
had Silica, cal/mag, yucca and drops of balance.
11-24
Scc is a weirdo. She has 3 leafs, with 3 nodes on a pair? Whatever its weird and cool. Extra node didn't count on? 🤣
Removed the 1st nodes and their single leafs. Also removed the upper most leafs, for light.
.