


Likes
Comments
Share


@DeepRootsGrowTrees
Follow
SPEEDY BOOM 💥 AUTO
KANNABIA SEEDS
Week #11 Overall
Week #5 Flower
This week she's doing good for a auto flower dealing with the extreme heat we have been having here she's got some good genetics and she's easy to grow. Stay Growing!!

Processing
Likes
3
Share


@XxBILLZAxX
Follow
Increased their food by a tad. Looked perfectly health raised to about 1900ppm.
Again spider mites at it crawling up every leaf and creating a colony. I thought it was over until I sat there nearly every night finding the f*****s and rubbing the leaves with the spray.
Defoliation was needed ASAP due to them stretching nicely. Started slowly from the bottom up. (repeated this process every 3-5 days.)
Likes
Comments
Share

@Borberad
Follow
❄️🍒
Dieses Mal haben wir uns einer besonders edlen Versuchung verschrieben: Chilled Cherry – einer traumhaften Kollaboration von Zamnesia x Growers Choice. Klingt wie ein Cocktail aus einer interstellaren Rooftop-Bar? Schmeckt wahrscheinlich auch so!
Chilled Cherry ist wie die perfekte Sommernacht: fruchtig-süß mit einer angenehm kühlen Brise im Abgang. Optisch wirft sie sich ordentlich in Schale – dichte Blüten, eine frostige Harzschicht und Farbnuancen, bei denen sogar ein Sonnenuntergang neidisch wird. Ihr Charakter? Entspannt, kreativ, ein bisschen verträumt – genau das richtige Material für entspannte Abende, tiefgründige Gespräche oder spontane philosophische Ergüsse über den Sinn des Gießens.
🌿 Genetik & Charakter
Chilled Cherry ist eine moderne Hybrid-Sorte, gezüchtet für Aroma, Optik und ausgewogene Wirkung. Sie verbindet fruchtige Dessert-Noten mit einer angenehmen körperlichen Entspannung und einem klaren, heiteren Kopf. Perfekt also für alle, die chillen wollen, ohne direkt mit der Couch zu verschmelzen.
⏳ Blühdauer & Wuchs
Blütezeit: ca. 8–9 Wochen
Wuchshöhe Indoor: meist mittelgroß
Outdoor: mit genug Platz auch gern etwas stattlicher
Ertrag: solide bis üppig – sie weiß, wie man sich in Szene setzt
🎨 Optik & Farben
Hier wird nicht gekleckert, sondern gekirscht:
Dichte, kompakte Buds
Dunkelgrüne bis violette Farbtöne
Überzogen mit einer frostigen Harzschicht, als hätte man sie einmal kurz durch den Tiefkühler geschoben
🍒 Terpenprofil & Aroma
Das Terpenprofil ist ganz klar auf Genuss programmiert:
Süße Kirsche
Beeren & Dessert-Noten
Eine frische, leicht kühle Nuance im Abgang
Beim Öffnen des Glases riecht es eher nach Patisserie als nach Pflanzenzucht.
🧠 Wirkung
Entspannend, aber nicht lähmend
Stimmungsaufhellend
Ideal für entspannte Abende, kreative Gedankenreisen oder einfach zum Loslassen
Woche 1: Die Keimungwoche
* Tag 0.1: Nach dem max. 10 Stündigen Einweichen in 1 % H₂O₂ wurde der Samen ins Substrat gepflanzt, [ein Easy Plug]
* Tag 0.2: Die erste Geduldsphase beginnt. Wir warten darauf, dass der Samen seine Schale aufbricht.
* Tag 0.4: Die ersten Anzeichen des Lebens sind sichtbar. Das Keimblattpaar bricht durch das Substrat, nachdem wir eine erste Wölbung der Substratoberfläche beobachtet hatten. Wir haben daraufhin das DLI von ca. 12 auf 16 erhöht, um dem Keimling genügend Licht zu geben.


Likes
86
Share


@JuanHaze_Arg
Follow
18/05 se riega con 2,5L de agua (60% de agua de osmosis inversa + 40% de grifo) + 1ml/L de calmag de top crop, + 0,5gramos de trico+ de namaste nutrientes.
21/05 se riega con 3 litros de agua (50% de agua de osmosis + 50% de ml grifo) + 1,5ml de cal mag de top crop. + 0,5 gramos de monster bloom de grotek PH: 6.4 EC: 1.1

Likes
80
Share


@Fatnastyz
Follow
3-17
Photo bombs today 😂😂
Gave 4ml green sensation, 3ml cal/mag and 1 ml slf-100.
Run off ppm 1300 ph 7.0
Hope can get the ph down a bit.
3-21
1.5 grams game time, 3ml green sensation, 3ml cal/mag, 1ml Slf-100 ph 6.0 ppm 350
Runoff 1432 ph 6.9
Yo, dropped 1 💪🤘
See ya next week

Likes
28
Share


@GanjaGecko
Follow
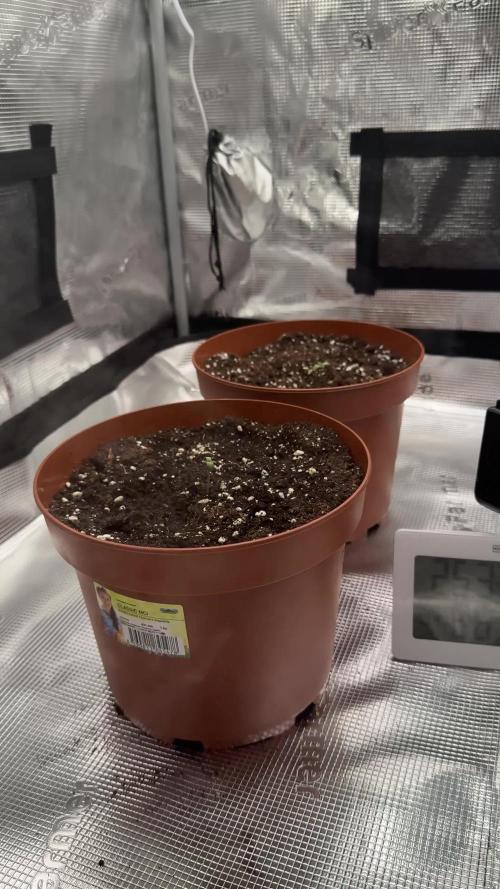
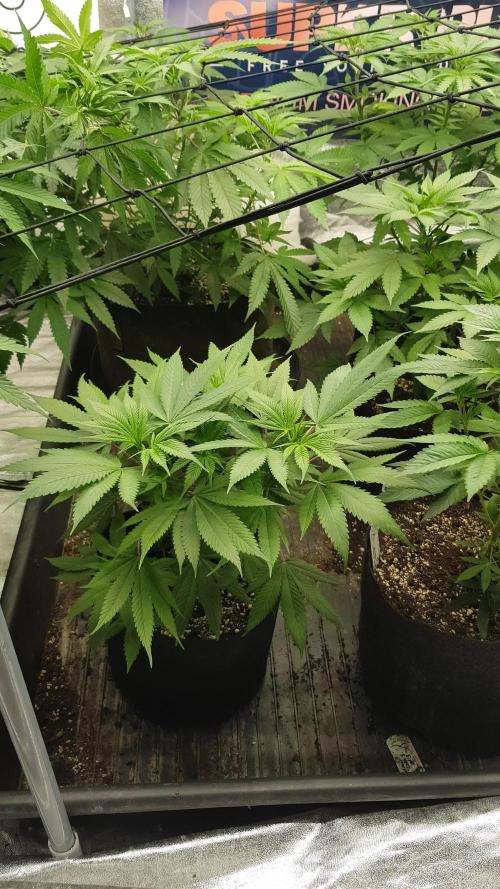
Woch 3 ist rum und die Ladys sind alle echt extrem in die Höhe geschossen. Ich denke das der eine wenig sonnige Tag unter den sonst recht sonnigen Tagen, die Ladys etwas nach Licht gesucht haben. Alle Ladys wurden soweit erstmal gestützt, das falls der Wind etwas stärker weht, die Ladys etwas Unterstützung haben. An Tag 21 ging es für die Ladys aus dem kleinen Anzuchthäuschen in die direkte Sonne, die sie soweit alle gut vertragen. Die Pre-Flowers waren bereits an Tag 18/19 zu sehen. Tag 21 ist deutlich zu sehen das sich an der Spitze Knospen entwickeln und sie auch schon minimal einen leichten Geruch verströmen :)
An Tag 21 wurde der letzte Liter Substrat aufgefüllt. Für die Blütezeit wurden 10g BioBloom von GreenHouseFeeding, 4 Teelöffel MegaWorm und 1 Teelöffel BatGuano von Plagron beigemischt. Dadurch das Automatiks etwas weniger Nährstoffe brauchen, gab es daher von allem etwas weniger. Das ganze wurde mit ca 700ml angegossen. In der Gießlösung war 1g/L BioEnhancer von GreenHouseFeeding, 1ml/L PowerRoots, 1ml/L PureZym von Plagron. Das ganze wurde mit etwas ph- auf einen ph-Wert von 6.5 gebracht.
Zwischendurch habe ich immer nach Gefühl gegossen, je nach dem wie leicht oder schwer der Topf beim anheben war. Anfangs ist es schwer zu sagen wie viel man wann gießt. Wenn der Topf gut durchwurzelt ist, gehe ich gerne nach der 10% Regel. Was bei einem 8L Topf eine Gießmenge von 800ml bedeuten würde. Das ganze dann alle 2-3 Tage. Deswegen aber anfangs eher nach Gefühl und etwas weniger gießen. Wasser nachgeben wenn es zu wenig war ist einfacher als das Wasser wieder raus zu kriegen ;)
Möge die Blütezeit beginnen💚🍀
Vielen Dank fürs reinschauen💚🤙🏻




Likes
12
Share


@Northern_Ent
Follow
Aug 16: Mimosa Shot is progressing but it has been cool and rainy lately. There are indications of P deficiency because of the cool weather. The top dressing of malted barley and Power Bloom will do its thing so I’m not worried about it. Hoping for more direct sunlight though.
Aug 18: video shows use of far red light at dusk. To keep on a natural schedule, I use Civil Twilight as listed on timeanddate.com for my location. At this time of year it is getting earlier by 2-3 minutes every night. The far red 730 nm light puts the plant into dark mode two hours faster and is like getting a 26 h day. It works and is a good trick if you have daily access to your plants.


Likes
8
Share


@Salokin
Follow
The week went very well, the plant stretched for an additional 15cm and is now showing the first proper bud-sites. Had to change the nutrient solution after day 5, as the tank was almost empty. I increased the nutrients to a 1000 ppm, which caused a tiny amount of tip burn, so will not be increasing it next week. The second scrog net helps greatly spreading out the canopy, I will continue with a very light LST during the flower as well to guarantee maximum light exposure for all bud-sites. I am enjoying this grow very much, first time in a while for me to grow photos inside and I think I will continue growing photos, it seems they are a bit more forgiving and I feel that I can take the time to really let them fill the tent. On my previous grows I usually had 3 autos in there, which would always lead to issue in regards to some plants growing quicker than others. I have a very optimistic outlook in regards to harvest, which I will keep yo myself in order to not jinx it, but as you can see it looks promising.
Thanks for reading. Until next week :)

Likes
3
Share


@Patillac31
Follow
Ended week three with a flush. I haven't flushed her since purchase. Switched over from FF Open Sesame to FF Beastie Bloomz. Going to add molasses to the next feeding cycle. Any comments or suggestions ste always welcome. ✌️ Happy Holidaze and Happy Growing

Likes
9
Share

@BLAZED
Follow
Week 21 (4-11 to 10-11)
4-11
Temps: 18.1 to 23.2 degrees
Humidity: 50% to 64%
5-11
Temps: 17.3 to 25.4 degrees
Humidity: 45% to 61%
Watering: Both 500 ml.
Strength of the light set from 75% to 80%
Dry Weight: Both 3.7 kg.
6-11
Temps: 17.4 to 25 degrees
Humidity: 49% to 67%
Watering: Both 500 ml.
Dry Weight #1: 3.9 kg. #2: 3.8 kg.
7-11
Temps: 17.9 to 24.1 degrees
Humidity: 49% to 67%
8-11
Temps: 17.4 to 25 degrees
Humidity: 49% to 69%
Dry Weight #1: 4.0 kg. #2: 3.9 kg.
9-11
Temps: 18 to 25.5 degrees
Humidity: 47% to 64%
Dry Weight: Both 3.6 kg.
10-11
Temps: 18 to 26.1 degrees
Humidity: 47% to 64%

Likes
91
Share


@MrCOCO
Follow
The girls grew 10 cm during the first week of flowering ... So far everything is going well and I am happy to see them 🍃🍃🍃

Likes
18
Share


@MadeInGermany
Follow
Hey everyone 😃.
This week she has done great 👍.
It was done again on all the drifted topping and sprayed one last time with neem oil so that the last trips are finally gone 😁.
We haven't had any pests for so many years and all of a sudden we have such little shit parts 😅.
This week it was poured twice with 1.2 l of water.
GHSC enhancer was added during a pouring (1 g per l)
The tent was cleaned every day this week and the plants were checked for health.
The humidifier is filled once a day.
Next week I will decide how I will continue the training because I have space again in the flower tent 😀.
Until then, I wish you and your families a good start into the new year 2021 🙏🏻.
Stay healthy and let it grow 🍀
You can buy this Strain at :
https://sweetseeds.es/de/red-mandarine-f1-fast-version/
Type:
Red Mandarine F1 Fast Version
☝️🏼
Genetics:
Red Poison Auto®️ (SWS39)
X
Tangie (California Orange x Hybrid Skunk)
👍
Vega lamp:
2 x Todogrow Led
Quantum Board 100 W
💡
Bloom Lamp :
2 x Todogrow Led
Cxb 3590 COB 3500 K 205W
💡💡☝️🏼
Soil :
Canna Coco Professional +
☝️🏼
Fertilizer:
Green House Powder Feeding
☝️🏼🌱
Water:
Osmosis water mixed with normal water (24 hours stale that the chlorine evaporates) to 0.2 EC. Add Cal / Mag to 0.4 Ec Ph with Organic Ph - to 5.5 - 5.8 .


Likes
35
Share

@TherealNICOGREEN
Follow
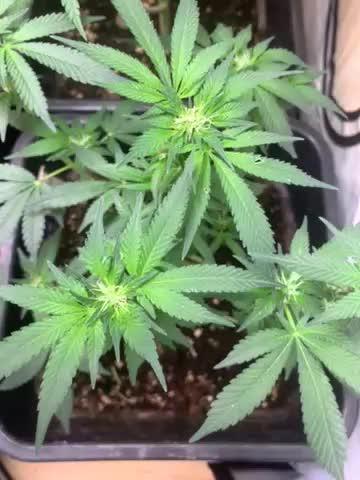
Hun er virkelig sød og dejlig og hun er virkelig smuk og spændende og se på hun . Jeg har gang i et forsøg med at hun kun skal lave topskud og gerne 3-4 pr gren ;) pt ser det ud til at lykkes. Håber i vil være sød at rette mig hvis i ser fejl ! Jeg overvejer brug mit sidste frø i DWC :)

Likes
37
Share


@OrganicPower
Follow
Heatwave is here:( Equipment is struggling. Hard to watch over grow room constantly. Surge protector tripping out as the equipment never cools down or has a break. A/C and dehumidifier running 24 hrs. Plus I had to hook up another a/c unit for the family. Got to keep them cool at night too. I’d feel bad if my ladies were cooler then my girls 😜 Got new lights but they were to intense even at the recommended distance. Just had to much light and to much overlapping made it to intense. I took out the 2 smaller 600’s and now just have the
2-2000’s in there but with the heatwave I had to dim them to 50% and now 25% incase I don’t get home in time from work and not able to open tent all the way as equipment is not doing the job in this heat:( also if the circuit trips out again then I don’t want the temps to sky rocket. Last few times it trip temps and humidity increased to 86F and 65% RH, mind you I corrected it within the hour of it happening each time, so not to bad and that’s at the top of the canopy and lower into it didn’t quite get that high as on the floor it only raised to 82F. And for my troubles I see what I believe is the start of burnt leaves:( I should have known better as the top growth seemed to be a bit lighter and stretchy:( I’ll have these lights better dialled in for next time! Grow on!

Likes
21
Share

@BLAZED
Follow
Week 17 (23-6 t/m 29-6)
23-6
Temperatuur: 31.2 graden (licht aan) 23.2 graden (licht uit)
Luchtvochtigheid: 71% (hoogste) 53% (laagste)
Dit is de laatste week bloei, dus geef ik geen voeding meer.
Watergift: (Flush) 1100 ml EC: 0.0 PH: 6.4
24-6
Temperatuur: 31.5 graden (licht aan) 24.2 graden (licht uit)
Luchtvochtigheid: 67% (hoogste) 50% (laagste)
Watergift: (Flush) 1100 ml EC: 0.0 PH: 6.4
25-6
Temperatuur: 32.9 graden (licht aan) 25.2 graden (licht uit)
Luchtvochtigheid: 72% (hoogste) 47% (laagste)
Watergift: (Flush) 1100 ml EC: 0.0 PH: 6.4
26-6
Temperatuur: 33.5 graden (licht aan) 23.1 graden (licht uit)
Luchtvochtigheid: 68% (hoogste) 48% (laagste)
Watergift: (Flush) 1100 ml EC: 0.0 PH: 6.4
27-6
Temperatuur: 31.2 graden (licht aan) 21.7 graden (licht uit)
Luchtvochtigheid: 61% (hoogste) 47% (laagste)
Watergift: (Flush) 1100 ml EC: 0.0 PH: 6.4
28-6
Temperatuur: 30.1 graden (licht aan) 22.4 graden (licht uit)
Luchtvochtigheid: 75% (hoogste) 47% (laagste)
Watergift: (Flush) 1100 ml EC: 0.0 PH: 6.4
29-6
Temperatuur: 31.4 graden (licht aan) 23.7 graden (licht uit)
Luchtvochtigheid: 75% (hoogste) 53% (laagste)
Yes! Ze kan geoogst worden!
Watergift: (Flush) 1100 ml EC: 0.0 PH: 6.4

Likes
3
Share

@Pheno_Minds
Follow
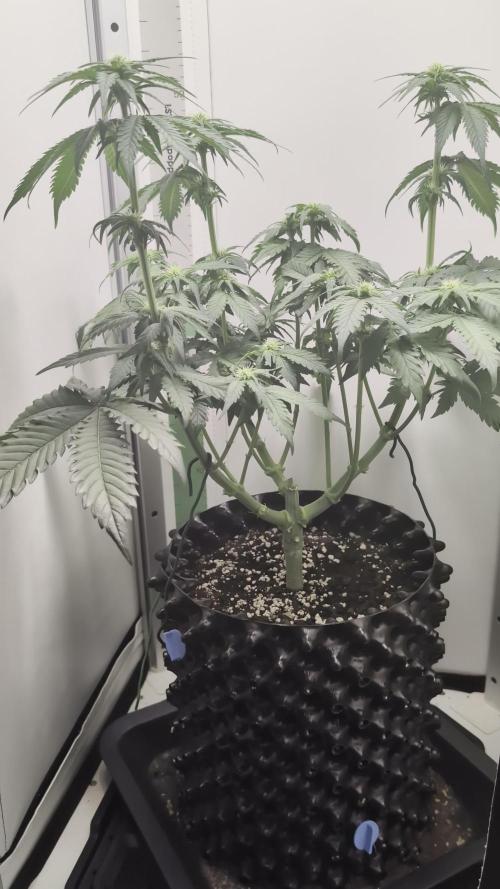
Diese Woche stand noch gut 15 cm Stretch an. Am Blütetag 21 habe ich gelollipoppt.
Bisher packte der Strain alles an Stress und das ganz ohne Zicken.