Likes
Comments
Share
Soaked in water for 18 hours then direct in coco/vermiculite/soil
Likes
24
Share
@Rangaku
Follow
She’s finally on the rack , absolutely chuffed with the finished product here. Great yield , sticky , chunky, sweet and tarps for days . The misso reckons it’s her fave tasting strain ever , fruity , sweet and a lingering paradise on the palette on exhale . Really really nice .
Likes
9
Share
Parfait elle se comporte bien les bourgeons gonfles énormément. Une odeur fruité se dégage de la tente.Les engrais bio RQS organic sont excellents elles font un super travail sans excès ni de carence. Rajout de guano au dessus du terreau pour l'explosion floral ☠️☠️ a bientôt pour plus d'informations.
Likes
24
Share
UPDATE: Day 1 of week 14- Thursday 19th Nov!!!! Woop woop! We’re getting close, my magnifying lense arrived and I’ve got my first real good look at the trichomes.. All looking fairly cloudy with about 10-15% ambers coming through. So as we’re super close now I’ve now started flushing. Not doing a run off as have been using Biobizz soil & Nutes. First flush is done and girls are looking happy. One lady seems to have really heavy colas as she’s struggling to stand up straight. So I’ve staked her to keep her more upright. Think she may bring the best yield of all four girls as it stands so far. Final couple of weeks now, I can’t believe I’ve made it this far and really can’t wait to try my first home grown bud🍃 UPDATE: Day 2 of week 14 - Friday 20th Nov: Had to water them early as the girls were very dry after their first flush.. I on average water them every 48 hrs, but they were ready after 36. Already noticing some slight discolouration on the leaves 🍁... Glad I didn’t jump the gun and chop them this week after seeing some amber trichomes.. A bit more LST as they had stretched a little. I’m short on lamp to plant distance but noticed what looked like a little leaf burn on one of the tallest nugs. So did what I could to bring the height of them down just a little 👌 UPDATE: Day 4 of week 14 - Sun 22nd Nov: As soon as the lights went on today, more water seemed required at around 36hrs since the last flush. The girls seem to be loving it! Buds do seem to be fattening up a little more each day and I think one girl is slight more ahead than the others as she has mostly orange pistils compared to the other three.. Still need to see more amber trichomes on all four ladies before they’re ready! UPDATE: Day 5 of week 14 - Monday 23rd Nov: Small amount of LST to keep the girls as even as poss.. Defo seeing some discolouration in the fan leaves now.. All but one of the four girls have nearly completely orange pistils now which are folding back in to the buds. But Trichomes need to be a little more amber before they’re ready.. The fourth lady however is slightly behind with less orange pistils, some white ones still to turn orange and trichomes are still a mix of milky and clear on the lower buds. When I topped this one it didn’t work as well as the others so she has one really massive cola and all the others are much smaller in comparison to the other three plants.. I think we’ve got a week to 10 days left roughly till harvest. UPDATE: Day 6 of week 14 - Tuesday 24th Nov: Another water flush again today.. All seems well, lower small buds still need a few more amber trichomes I think.. But gonna post a question on here to make sure.. Don’t wanna get this wrong. Sooooooo close now and I’ll be seeing 🤩🤩🤩
Likes
14
Share
Day 54 and as you can see guys she is finally producing trichomes and starting to look like blueberry if that makes sense.. if you look up close the buds have almost a bluish tint so I'm super excited and very pleased with Sensible Seeds so far.. they are two for two obviously I have not harvested or smoked this yet but this has been a breeze to grow from beginning to end or up until now anyway all I do is top dress every week and a half to two weeks and go between silica and recharge in between.. as you can see nitrogen levels are low but that is okay I'm used to synthetics so I'm very excited to see the fade I hope it looks like fall in my tent ... Big shout out to Sensible Seeds they are your place for bulk seeds I think they are the world's biggest Warehouse don't mark my words but they have a massive selection.. I hope everybody is doing well God bless and happy growing ✌️😎
Likes
20
Share
Day 35 The leaves are broad with multiple leaflets (likely 5 to 7 on the larger leaves), characteristic of a strong growth phase. The stem is upright and sturdy, and there is active new growth visible at the nodes, with bright green young shoots developing. 💦💦💦Watering💦💦💦 Woche 5 18.10.2025 – Watering 0 ml 19.10.2025 – Watering 0 ml 20.10.2025 – Watering 0 ml 21.10.2025 – Watering 0 ml 22.10.2025 – Watering 0 ml 23.10.2025 – Watering 0 ml 24.10.2025 – Watering 0 ml
Likes
27
Share
@ohserp
Follow
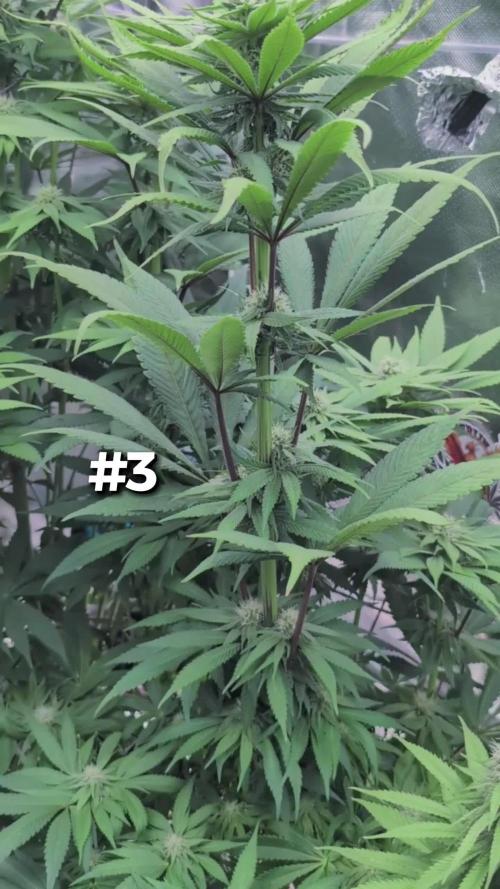
I’ll start out by saying I had to move plant 4 out because it was getting too big. So there’s three in the tent and one in a closet at the moment! May do some more moving around but not sure. So far plant 2 is flowering the hardest with plant 1 behind, then plant 3, and finally the monster plant 4. All same strain but different growth patterns, which is pretty cool
Likes
10
Share
Likes
67
Share
@PeaceLane
Follow
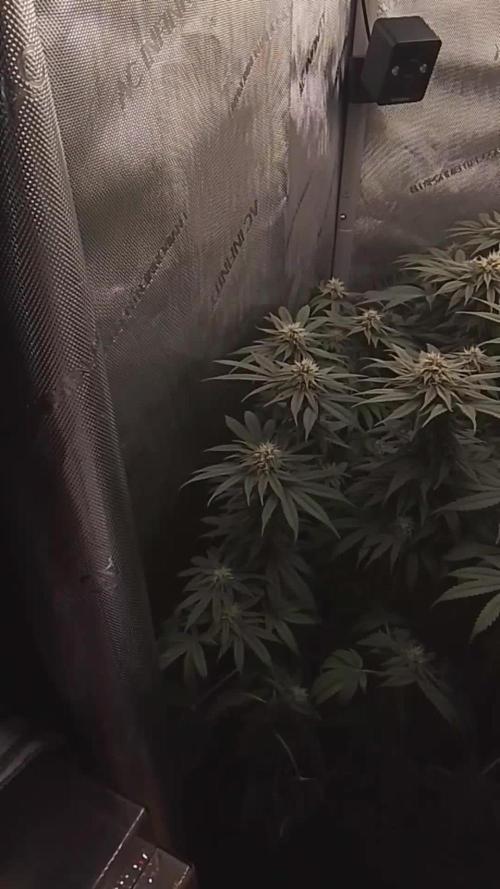
Everything is going amazing, nice trichome development and the smell is amazing. I'm going to keep a close eye on the trichome and maybe after next week I'll start flushing. Thanks for the support and keep on growing!
Likes
53
Share
end of week 7. ----------------- the last week for the Honey Cream and i give her only Water...maybe 1-2 days and i will chopchop... The gorillas have to stay for at least another week, if not for 2 weeks, but i gave them only water. week average RH: 55,3 % Temp: 22,9 ° VPD: 1,27 kPa --------------------------------------------------------------------------------------------------- Controller AC Infinity Pro - connector for the external light control, RJ-12 - 2 plugs with which I can control dehumidifier and humidifier on automatation. - 2 fans run 24/7, 1 Oscillating from spider farmer Light - 12/12 h | 2 x 200 Watt PPFD - 900-1000 µmol
Likes
17
Share
Day 42 - I swapped the plant side and trained them a bit. I also did one last cleaning on the lower buds spots, which it wouldn't get enough light. Day 43 - The plants were heavily defoliated, the one on the left side more than the other. I also watered them a bit more this week.
Likes
17
Share
This is my first grow, felt like now is the perfect time to start. 😅 Picture 1 - The plants will have a 24h schedule with both sun and LED light. The solution with the cloth in front of the window is only temporary, I need something thats easy to pull up as soon as the sun comes out. My light is about 16in/37cm away from the plants, please let me know if its too close or too far away from the seedlings. Up until this point I germinated both the seedlings using one of those 'Easy Start' Kits with Microorganisms, I then just transplanted both plants with the soil still attached to them in the final pots. I am using Bio Bizz Light Mix for the soil. In about 1 week I will start adding the fertilizers, I will go with about half of what it says on the nutrient schedule because these are autoflowers. Picture 2 - Day 1 - Seedling number 1 is looking healthy. (I think?) As you can see I put a hygrometer next to it so I can monitor the Humidity and Temperature levels. I currently have a humidifier running next to the plants and humidity levels seem to be good so far. I read online between 65-80% are good at this stage. Picture 3 - Day 1 - Seedling number 1 again. At this stage I only water around the plant and dont soak the whole pot, I read that soaking the whole pot while the plant is this tiny can overwhelme the plants. I also noticed that the leaves look kinda yellow-ish? Please let me know if thats normal. Picture 4 - Day 1 - Seedling number 2. I need help with this one I dont know why but he doesnt look good, from the beginning he was much slower than plant 1 and when he finally popped out he looked like he was dying, he is kind of gaining a little bit of color now again but I dont know if he will make it. If you know whats wrong with him please let me know. I hope he opens his two little leafs soon. I still have a third seed laying around so please let me know if it'd be smarter to just abandone number 2 and germinate a new seed. Thanks for reading this far and I'll update as frequent as possible. Day 1 Issues Update - After taking a look at seedling number 2 again and seeing that after all this time it still didnt show any progress, I noticed that one of the two first leaves is actually cut. I mustve damaged it while inspecting earlier because I, (stupid newbie move), touched it too much or whatever. Now germinating my last seed in hopes that all goes well. Since I dont have anymore 'Easy Start' kits im going to try a different germination method, I will put the seed in a cup of water with a piece of cardboard on top of it overnight (12-15h) and then plant it into the moist soil afterwards. 😄 Picture 5 - Day 2 - Seedling 1 is still doing fine. In the morning the temperatures went up a lot (29 Celsius), due to the sun shining a lot through the window, and the seedling was showing slight signs of heat stress (Leafs going up and small yellow-is tint), I then opened the window and the Temperatures quickly dropped back to normal (20-23 Celsius). Moisture levels seem lower than yesterday and Im not sure why (probably because of the heat and opening the window?), still at a solid 62% tho so Im not too bothered. Picture 6 - Day 2 - Since my last Seedling 2 died I germinated another one, I put it in a glass of water over night (~15h) and then planted it into the soil. Hopefully it'll pop out in the next few days... 💪 Picture 7 - Day 3 - Everything looking good with Seedling 1, I kinda felt like it was sort of streching too much instead of growing its leaves, so I put the light closer to it. I will water again tomorrow, the last time I watered was when I put it in the soil 3 Days ago. Picture 8 - Day 3 - The new Seedling 2 is still germinating and will hopefully pop out of the soil in the next few days. Picture 9 - Day 4 - Seedling 1 still going strong, leaves are praying but I read that that is a good sign. I watered both pots again today with just Ph-water, will add fertilizer in about 3 days for seedling 1. Seedling 2 is still germinating, will post a new picture as soon as it pops out of the soil. 😉 Picture 10 - Day 5 - Seedling 1 looks healthy, but is going kinda slow. Turns out I had the light far too high... 😐 Pulled it as much down as I could now and its already growing better! Main indicator for not enough light was the stretching and the thin leaves. I will probably have to invest into a bigger setup as soon as flowering hits. ✊ Picture 11 - Day 6 - Seedling 1 leaves are getting bigger and the next set is already on the way. Picture 12 - Day 6 - After 4 days germination, seedling 2.1 finally popped out the soil! 👏 Picture 13 - Day 7 - Seedling 1 leaves seem a bit curled up, probably because of the hot sun this morning, Im not too worried tho. Will water with nutrients the first time tomorrow. Picture 14 - Day 7 - Seedling 2.1 looking fine, soil was pretty dry so I watered it a bit with ph water.
Likes
12
Share
Off to the races after the first week of veg. And the girls are looking good. They had about 24-48 hours of transplant shock but have since turned over and look perky. They never fully transitioned and all of em look like they’re turning back around. Definitely starting to see some pheno variation on one of the indicas (F6) - trademark from the Skywalker 100%. A light bluish/purpleish hue on the fan leaves. We’ll see what happens over the next week then probably just pick a day and flip. We don’t need em huge - just big enough to show off dem buds. On the hardware side of this grow, the mods to the dutchy system look to be working well. It just makes plant management easier with a full trough drain as opposed to individual drainage holes. Really, the system isn’t a concern for the most part. It’s proven time and time again how manageable a recirc system can truly be. Scaling down to smaller pots and more plants has also been a revelation of sorts around here. We used to grow monsters and now the aim is strictly proportional yields across a wider array of genetics. Been a great trip so far🤟. Couple more boring weeks of veg. And as soon as the breeding tent is cleaned up and pollen free - it’s go for blast-off👍. Background This cycle of clones represents all the potential of this F1 line of WalkerBerry OG. Bred by myself over the last couple of years. This genetic shows excellent hybrid vigour, incredibly stable nutrition requirements to date and an eclectic mix of long and short internodal spacing bu specimen. We know we have indica and sativa dominant traits spread evenly across the 6 available clones. Now it’s just a matter of seeing them run out under controlled and pollen free conditions. We’ve labelled each plant and it’s resulting seed accordingly. Once we get to the F2 run, we’ll hopefully be able to isolate down to 2-3 phenos if the bud is any good. From there, who knows. It’d be great to get to a finished, stable generation that would be fem worthy but that could be a very long way off. For now - we’ll focus on this line and see where it goes🤞🤞.
Likes
18
Share
Today (49 day) heavy defoliation, few days ago add 0.5 ml/L PK additive. Plant height is 140 cm now! See videos
Processing
Likes
10
Share
lil be hide put in the work thought id share with you guys the 30 min ride 20 min walk boy im glad the hard works be hide me time to sit back and injoy the sunshine sound of water i love this beautiful
Likes
6
Share
@Naujas
Follow
My house is full of sweet chocolate and fruit aroma:) her flowers are full of shiny trichomes :) the girl only bloomed for 57 days, but she is already ready, maybe her flowering sped up in my grow box, high temperature 33°, because of that under my arm my light was set to 85%. From the first days, the girl showed fast and healthy growth:) I made a timelapse video, but unfortunately due to problems with the SD memory card, it takes 3-4 days at the end of the video, besides, my tent is too small for that :D I also made bubble hash from sugar leaves myself :) I tried Zamnesia seeds for the first time - I hope that someday this seed bank will offer me its products to try again :) thank you all. you were together :) good luck with the growing.
Likes
16
Share
@Ensign420
Follow
Introduction - Week 14|07 Summary - Ensign's log, stardate 9437.65, Great week of growing! Wow what a good week! Growth in the main tent has all around been incredible! Submitted my first submission to the Global Grow Cup! Filmed a video of the solo cup container (marked with the ticket/order number) that will be used for the competition. Also had to fill and prove the solo cup holds 2 cups of soil. Now I need to root a clone (for the first time), transplant her into this cup, and submit my 2nd entry before the 30th of this month. As far as my first attempt at cloning, have already begun the rooting process! Managed to take cuttings from 3 out of the 6 phenos in the main tent (the first cutting was also my first time topping). Soaked the cuttings for two days before planting them into Coco Coins. So far everything has gone surprisingly well! The clones are now rooting under the propagation dome with the vents fully closed. Will check for roots soon! At the end of the week, growth was just raging! Was planning on flipping to flower in a week, but decided to begin the first week of flower next week! Thus this is the last week of veg. Plan to flip to 12/12 next Monday! Onwards to next week! [START OF WEEK 14|07] ========================================================== Garlic Budder #1 - WEEK 14|07 - Full Veg Wk5 Garlic Budder #2 - WEEK 14|07 - Full Veg Wk2 Garlic Budder #3 - WEEK 07 - Full Veg Wk5 Garlic Budder #4 - WEEK 06 - Full Veg Wk4 06/03/24 → 06/09/24 This Week's Estimated Goals ---------------------------------------------------------------------------------------------- DLI: ~26 mol/m²/d PPFD: ~400 μmol/m²/s VPD: ~1.0 kPa This Week's Meter Readings & Averages [Lights On: 16:00 - 10:00] ---------------------------------------------------------------------------------------------- DLI: 24.56 mol/m²/d PPFD: 379 μmol/m²/s VPD: 0.91 kPa Soil %: [32.7, 37.6, 37.9, 34.1] ========================================================== Day 01 - Monday - 06/03/24 - Total Days: 098 ----------------------------------- Daily Averages [~23:00] - Temps: 80.7°F [27.1°C] - Humidity: 74.4% - VPD: 0.90 kPa - Soil %: [31, 34, 39, 35] ----------------------------------- - [09:57]: Quick morning check! --- #1 is looking a bit droopy, but almost lights off (at 10:00) so not concerned. --- Nice! Mainly wanted to check on #4 and she is looking great! She’s perked back up and looking good! - [23:08]: Evening check. --- Wow! It’s a jungle in here! --- #1 has gotten too big? Nah!? Keep on growing girl! --- #2 is growing and definitely getting bigger! Growth just looking really weird. --- #3 has continued to get larger and is looking quite uniform in growth! --- #4 is growing and looking perky again! --- Even the original #1 and #2 phenos (in the back) are looking good! --- Wow! #4 is really getting close to the light. - [23:14]: Checked down both fill tubes. --- Both reservoirs were completely dry! - [23:27]: Checked the Ecowitt soil moisture sensor data: --- 30% - [CH01 EB1 - Garlic Budder #1] --- 34% - [CH02 EB2 - Garlic Budder #2] --- 39% - [CH03 GFP - Garlic Budder #3] --- 32% - [CH04 FPT - Garlic Budder #4] - [23:32]: Poured 4 cups of distilled water down EB1’s fill tube. --- Poured 2 cups of distilled water down EB2’s fill tube. - [23:38]: Checked the humidifiers. --- Refilled the 4X4’s humidifier with distilled water. --- Tomorrow, plan to defoliate and start cloning for the first time! --- Going to take multiple cuttings from both #1 and #4 for sure, but still deciding on the rest. --- Getting hyped! Day 02 - Tuesday - 06/04/24 - Total Days: 099 ----------------------------------- Daily Averages [~23:00] - Temps: 81.4°F [27.4°C] - Humidity: 74.3% - VPD: 0.93 kPa - Soil %: [29, 35, 38, 32] ----------------------------------- - [11:59]: Time to film the first entry for the Global Grow Cup! --- Going to be using BuildASoil 3.0 potting soil. --- Filming the video using a stand and my phone. --- This video is mainly to establish the container that the plant will be grown in. Also to prove that the container is a 16oz container and that it can hold 2 cups of soil. --- The ticket (order) number also had to be written on the cup. - [12:36]: Done! --- The video had to be done in one continuous shot with no edits (my original submission does not have the logo). --- There was also a photo that needed to be shot which shows the cup filled with 2 cups of soil (just like the video, the original image submission did not have the logo). --- I think I did everything correctly, but also sent an email for verification of submission and validation. --- Getting hyped! --- [*smokes a bowl] --- Going to defoliate today along with for the first-time, going to take cuttings for clones! --- After a bit of online research, decided to split the cloning process into two days. --- Today going to take cuttings and will soak them in a solution of aloe for 24hrs. Afterwards will change the water out and use straight distilled water. --- Then in a couple days, plan to transplant into coco plugs (Coco Coins) for rooting. --- For optimal results, also be using a rooting hormone (Clonex). --- Well.. Here goes nothing! - [17:01]: Evening check. --- Wow! #1 is looking huge! Her main top is stretching above the lower canopy which is continuing to bush out. --- #2 is growing along. Growth is gnarly and a bit droopy, but she’s getting taller! --- #3 is looking great! Still a bit small, but she is continuing to get larger. --- #4 looks like she needs a watering. --- Both plants in the back are also looking surprisingly great as well! - [17:05]: Checked down both fill tubes. --- Both reservoirs were completely dry! --- As far as today's defoliation, going to leave #2 and #3 alone and will focus my defoliation and cloning on the rest of the plants. --- This will be my first attempt at cloning, also going to try topping for the first time today. --- No pressure Ensign. What can possibly go wrong right? - [17:27]: Time to start the cloning and defoliation process! --- Filled a measuring cup with 3 cups of distilled water. ------ Added 3/4tsp of Horticultural Aloe ------ Added 1 more cup of distilled water --- Mixed the solution and poured an even amount into three separate solo cups. --- Made sure to mark two of the cups (#1 and #4). The unmarked one will be for any other clones from amongst the 6 phenos (if any at all). - [17:43]: Time to top and defoliate #1! --- Using a pair of brand new trimmers (AC Infinity), --- Gently cut the main stalk to even out the canopy. --- Then trimmed and cleaned most of the nodes leaving the top node or two. --- Also trimmed the leaf fingers a bit before placing the top cutting into the cup of aloe solution. --- Now for the rest of the cuttings! --- [~45 minutes later] - [18:32]: Managed to finish defoliating and cutting the rest of the clones. --- Took two more lower cuttings from #1 (3 clones total). --- Took 3 lower cuttings from #4 --- While defoliating, decided to try and clone the original #2 pheno as well. Took 4 small cuttings. --- Similar to the top cutting, trimmed and cleaned each lower node for each cutting before placing them into the cups. --- Before finishing up the 2nd cutting, I noticed the first cutting (the top cut that was also trimmed) was drooping. --- So I did not trim and the leaf fingers for the other cuttings. --- In total there were 10 cuttings taken for potential clones. --- My main focus was to take cuttings and to clean up all the lower growth from both #1 and #4. --- Defoliated and cleaned up the back original phenos as well (also trimmed back the cover crop). - [18:35]: Temporarily placed the cuttings onto the floor of the 4x4 tent. --- Took the trimmings (about 3 cups) and spread them onto the top mulch of #1 and #2. --- Time to set the environmental controls for the 3x3 veg tent. - [18:43]: Within the AC Infinity App, --- For the Veg Tent [3x3] controller, --- Adjusted the 'Vegetative [18/6]' Schedule for the grow light. ------ Set the Mode to ‘On Mode’ ------ Set the START/END times to 04:00PM/10:00AM ------ Set the MAX to 1 --- The IonBoard S33 is now utilizing around 60.8W (at intensity 1 out of 10). --- Adjusted the 'Vegetative [18/6]' Schedule for the exhaust fan. ------ Increased the Humidity’s HIGH trigger value from 81% to 87% --- Adjusted the 'Vegetative [18/6]' Schedule for the humidifier. ------ Decreased the VPD target value from 1.5kPa to 0.8kPa - [18:52]: Moved the cuttings into the 3x3 veg tent. --- It begins! I think. --- Going to let these cutting drink some aloe for a day before switching to straight distilled water. --- Hmm. Could be the white floor of the 3x3 veg tent, but have noticed the S33 has a whiter spectrum whereas the FC-6500 seems to be warmer in color. --- Anyways, - [18:58]: Poured 4 cups of distilled water down EB1’s fill tube. --- Poured 2 cups of distilled water down EB2’s fill tube. - [19:06]: Filled a pump sprayer with 5 cups of distilled water. --- Focused mainly on the straw mulch of #4. --- But also misted the straw mulch for the rest of the plants a bit. - [19:12]: Checked the humidifiers. --- Refilled the humidifiers with distilled water. - [19:44]: Going to be using Clonex rooting gel before planting the cuttings into Coco Coins (pre-soaked with microbes and aloe). But before that begins, going to transfer the Clonex gel into a squeeze bottle. --- Gently peeled back the seal on the original Clonex bottle. Just enough make a tiny opening, --- Then slowly and carefully poured the gel into an empty squeeze bottle. --- Also removed the sticker from the original bottle and placed it onto the new one. - [19:54]: Perfect! --- Instead of applying the gel to the cutting, going to be applying the gel to the Coco Coin. --- This squeeze bottle will make applying the gel a lot easier. --- Will take PPFD readings tomorrow. --- Also will change out the aloe solution to distilled water. --- I really hope I didn’t screw things up before they could even begin. --- Don’t die on me ladies! --- Please. Day 03 - Wednesday - 06/05/24 - Total Days: 100 ----------------------------------- Daily Averages [~23:00] - Temps: 81.9°F [27.7°C] - Humidity: 75.5% - VPD: 0.90 kPa - Soil %: [29, 36, 38, 36] ----------------------------------- - [09:40]: Quick morning check! --- #1 is looking a bit droopy, but looking okay. Topping is a high stress technique so going to take some time to recover. Don’t plan on flipping the main 4x4 tent to flower for a good week or so which should be enough time. --- #4 looks great! The defoliation seems to have no effect on growth. Nice! - [09:41]: Also quickly checked on the 3x3 veg tent, --- Nice! The cuttings are looking great! --- No yellowing and they all seemed to have turned up towards the light. --- So far so good! - [22:53]: Evening check. --- #1 is continuing to dominate this grow! She has spread wide and looking incredible! --- #2 is looking gnarly, but getting there. --- #3 is getting larger! But still a runt. By far, her leaves are the darkest of the bunch, but she is still growing! --- #4 looks happy and growing along beautifully! Wow! - [22:55]: Checked down both fill tubes. --- Both reservoirs were completely dry! - [22:59]: Poured 5 cups of distilled water down EB1’s fill tube. --- Poured 2 cups of distilled water down EB2’s fill tube. - [23:05]: Checked on the 3x3 veg tent. --- Ooo yea! The cuttings are still green! Nice! - [23:07]: Took PPFD readings. --- The cuttings were around 121 μmol/m²/s which gives a DLI of 7.84 mol/m²/d --- Nice! These levels are on the lower range for seedlings (~100-300), perfect! I think. - [23:14]: Swapped the aloe water out to straight distilled water. --- Going to let these cuttings soak for one more day before planting. --- Please don’t die girls! - [23:15]: Checked the humidifiers. --- Refilled the humidifiers with distilled water. --- Ooo yea! --- Tomorrow is the big rooting day! Day 04 - Thursday - 06/06/24 - Total Days: 101 ----------------------------------- Daily Averages [~23:00] - Temps: 81.9°F [27.7°C] - Humidity: 75.2% - VPD: 0.91 kPa - Soil %: [32, 38, 38, 34] ----------------------------------- - [16:20]: Evening check. --- #1 is a bit droopy, but growth is looking green and healthy. --- #2 is looking bigger! She’s also looking sort of droopy. --- #3 is growing along nicely! Looking good girl! --- #4 is looking great! A bit droopy but plan to water today. - [16:23]: Checked down both fill tubes. --- EB1's reservoir still has some water. --- EB2's reservoir was completely dry! - [16:23]: Checked the Ecowitt soil moisture sensor data: --- 28% - [CH01 EB1 - Garlic Budder #1] --- 36% - [CH02 EB2 - Garlic Budder #2] --- 37% - [CH03 GFP - Garlic Budder #3] --- 30% - [CH04 FPT - Garlic Budder #4] - [16:30]: Using a pump sprayer, --- Misted the straw mulch of #4 with 6 cups of distilled water. --- Focused mainly on the straw mulch. --- Also misted the straw mulch of #3 (in the grassroots fabric pot) a bit. - [16:43]: Poured 5 cups of distilled water down EB1’s fill tube. --- Poured 3 cups of distilled water down EB2’s fill tube. - [16:52]: Checked the Ecowitt soil moisture sensor data: --- 56% - [CH01 EB1 - Garlic Budder #1] --- 44% - [CH02 EB2 - Garlic Budder #2] --- 40% - [CH03 GFP - Garlic Budder #3] --- 45% - [CH04 FPT - Garlic Budder #4] - [17:01]: Took general PPFD readings. --- #1 was around 379 μmol/m²/s which gives a DLI of 24.56 mol/m²/d --- #2 was around 333 μmol/m²/s which gives a DLI of 21.58 mol/m²/d --- #3 was around 293 μmol/m²/s which gives a DLI of 18.99 mol/m²/d --- #4 was around 378 μmol/m²/s which gives a DLI of 24.49 mol/m²/d - [17:09]: Took the weekly height and light distance measurements. --- #1 was about 21" tall. --- #2 was about 13.5" tall. --- #3 was about 9.5" tall. --- #4 was about 19.25" tall. --- Hmm.. - [17:19]: Adjusted the right oscillating fan a bit. --- Re-angled the CloudRay S6 oscillating fan upwards. Been noticing that the air has been hitting the tops of the plants so easing off a bit (#1 is still getting hit, but she’s huge so not too worried). - [17:23]: Back to the measurements! --- #1 was about 9.5" away from the grow light. --- #2 was about 17" away from the grow light. --- #3 was about 17.5" away from the grow light. --- #4 was about 11.5" away from the grow light. - [17:46]: Checked on the 3x3 veg tent. --- Cuttings are still green! They do look a bit droopy but no signs of yellowing. --- Okay! - [17:55]: Time to begin the rooting process! --- For my first attempt at rooting, going to be using Coco Coins pre-soaked in saponins, microbes and aloe. --- To further help with rooting, going to also be using Clonex rooting gel. --- Filled a measuring cup with 4 cups of distilled water. ------ Added half of 1/64tsp of Quillaja Saponaria Extract [60] ------ Added 1/16tsp of Horticultural Aloe ------ Added 1/8tsp of Mycrobe Complete --- Mixed the solution thoroughly. --- Time for the Coco Coins! --- 10 cuttings means 10 Coco Coins. - [18:09]: Dropped 10 Coco Coins into the measuring cup. --- The coins immediately started to expand. --- A bit too much.. Oops! --- Poured the solution and Coco Coins into a pitcher. --- Added 2 cups of distilled water to the solution (now at 6 cups). --- Great! The coins are pretty much fully expanded, but going to wait a bit longer to fully saturate each coin. --- [~20-30 minutes later] - [18:42]: Great! --- Took the seedling and flood tray from the AC Infinity propagation dome and placed all 10 Coco Coins into the slots. --- Gave each Coco Coin a quick shake to remove excess solution. The coins were not dripping with solution but still pretty saturated. --- Arranged them into 3 groups with the cuttings in mind. --- Also tried to keep the pre-made holes intact. --- Time to inoculate the Coco Coins! - [18:54]: Using a squeeze bottle, --- While keeping the nozzle from making contact with the coco, gently filled each pre-made hole with Clonex rooting gel. Just enough gel to fully cover the hole of each coco coin. - [19:00]: Time to plant the cuttings! --- Gave each cup a misting of distilled water. Focused on wetting the top growth with water. --- Okay! --- To avoid mixing cuttings up. - [19:01]: Starting with the original #2 pheno cup, --- For each cutting, --- Using a pair of clean trimmers, made a final 45° cut about 1/2" from a bottom node. --- Then stripped away and scared the protective membrane below the node before planting. --- Made sure the node was about 1/2" below the surface of the coco. --- To help with planting, while inserting each cutting, gave the Coco Coin a gentle squeeze to loosen the coco. This also helped to ensure the coco and gel was in good contact with the cutting. --- Once the cutting was planted into the Coco Coin, made sure to place back in the same spot (made sure to keep the cuttings in their groupings). --- Once a cup was complete, made sure to keep the label with the group. --- Re-misted the top growth as needed to keep it wet. --- Also wiped the trimmers with isopropyl alcohol in between cuttings (plan to use 10% bleach solution for next time). --- Repeated this process until all 10 cuttings were cut, planted, and in the tray. --- The coco coins fit perfectly into the tray and don’t reach the bottom. Nice! --- The bottom air gap is important. --- Poured a bit of distilled water through one of the empty slots into the bottom of the tray. Just enough to fill the bottom of the tray, but not enough to reach any of the Coco Coins (~1/4cup). - [19:35]: Placed the propagation tray with cuttings into the 3x3 veg tent. --- Placed the first layer of the propagation dome on before giving the sides a misting of distilled water. --- Also sprayed the top of the propagation dome before covering the cuttings. --- Vents are all fully closed. - [19:40]: Placed the bar lights onto the top of the dome before configuring the controller. ------ Set the START/END times to 04:00PM/10:00AM ------ Set the bar light’s intensity to 2 (out of 10). --- Also made sure the propagation light controller’s time was in sync with the Controller 69 Pro. - [19:47]: Took PPFD readings. --- The cuttings were around 136 μmol/m²/s which gives a DLI of 8.81 mol/m²/d --- The PPFD levels are similar to the floor. --- Perfect! --- Going leave the IonBoard S33 on during this rooting process. --- Will check back tomorrow to cycle the air under the dome. - [19:56]: Checked the humidifiers. --- Refilled the humidifiers with distilled water. - [20:17]: Quick night check! --- Ooo yea! Growth is raging and looking perky! --- Mainly checked on #1 and #4 which were looking incredible! --- Keep on growing ladies! Day 05 - Friday - 06/07/24 - Total Days: 102 ----------------------------------- Daily Averages [~23:00] - Temps: 82.7°F [28.2°C] - Humidity: 76.2% - VPD: 0.89 kPa - Soil %: [37, 40, 38, 35] ----------------------------------- - [10:03]: Decided to increase the ambient temp in the 3x3 veg tent. --- Within the AC Infinity App, --- For the Veg Tent [3x3] controller, --- Adjusted the 'Vegetative [18/6]' Schedule for the heater. ------ Increased the Temp target value from 78°F to 82°F --- Hopefully this will help to keep the veg tent at a more consistent temp. - [22:26]: Evening check. --- Ooo yea! The garden is looking incredible! --- #1 is looking perky and just bushing out! Wow! --- #2 is getting big! Growth is weird and leaf fingers are huge! Just going to let her grow. --- #4 is looking happy and growing along like a champ! Nodes are starting branch out and she is turning into a bush! - [10:28]: Checked down both fill tubes. --- Both reservoirs were completely dry! - [22:33]: Poured 5 cups of distilled water down EB1’s fill tube. --- Poured 3 cups of distilled water down EB2’s fill tube. - [22:40]: Checked on the propagation dome (inside the 3x3). --- Ah yea! Looking great ladies! --- Lifted the top of the dome to let some fresh air in for a bit. --- Wow! --- Leaves still look nice and green! --- So far everything looks great! --- Just going to continue on! - [22:53]: Checked the humidifiers. --- Refilled the humidifiers with distilled water. - [11:01]: Decided to adjust the humidifier for the 3x3. --- Within the AC Infinity App, --- For the Veg Tent [3x3] controller, --- Adjusted the 'Vegetative [18/6]' Schedule for the humidifier. ------ Increased the VPD target value from 0.8kPa to 1.5kPa --- The higher VPD level will essentially turn the humidifier off. --- I won’t be needing the humidifier for a good week so might as well save the water. Day 06 - Saturday - 06/08/24 - Total Days: 103 ----------------------------------- Daily Averages [~23:00] - Temps: 81.6°F [27.6°C] - Humidity: 74.9% - VPD: 0.91 kPa - Soil %: [35, 40, 37, 31] ----------------------------------- - [07:40]: Quick morning check! --- #1 and #4 are looking perky and happy! --- Also checked on the propagation dome, --- All cutting still look green! Hyped! - [20:02]: Evening check. --- Wow the garden is raging with growth! --- #1 has blown up! She has clearly recovered and growth is ramping up again! --- #2 is stretching upwards! --- #3 is now the smallest of the 4, but still getting larger! --- #4 is looking incredible! Wow! Growth looks perky and happy! - [20:05]: Checked down both fill tubes. --- Both reservoirs were completely dry! - [20:10]: Poured 6 cups of distilled water down EB1’s fill tube. --- Poured 2 cups of distilled water down EB2’s fill tube. - [20:16]: Checked the Ecowitt soil moisture sensor data: --- 35% - [CH01 EB1 - Garlic Budder #1] --- 40% - [CH02 EB2 - Garlic Budder #2] --- 36% - [CH03 GFP - Garlic Budder #3] --- 27% - [CH04 FPT - Garlic Budder #4] - [20:19]: Using a pump sprayer, --- Misted the straw mulch of #4 with 5 cups of distilled water. --- Focused mainly on the straw mulch. --- Also misted the mulch of #3 a bit (in the fabric pot). - [20:27]: Checked propagation dome (in the 3x3), --- To cycle the air under the dome, lifted the top off for a bit. --- Ooo yea! Everything is still green and looking great! --- Keep on rooting ladies! --- Oops! - [21:45]: Checked the humidifiers. --- Refilled the humidifiers with distilled water. Day 07 - Sunday - 06/09/24 - Total Days: 104 ----------------------------------- Daily Averages [~23:00] - Temps: 81.5°F [27.5°C] - Humidity: 74.8% - VPD: 0.91 kPa - Soil %: [36, 40, 37, 36] ----------------------------------- - [08:18]: Quick morning check! --- Nice! The main tent is looking great! #1 and #4 are both raging with growth! --- Checked on the propagation dome (inside the 3x3) and the clones are still looking green! --- Wow! Everything is going almost too well! Just keep on growing! - [19:08]: Evening check. --- Garden is just exploding with growth! Seems everyone has fully recovered from the defoliation and topping! --- Wow #1 is bushed out and looking incredible! --- #2 is growing really starting to get large! Growth still is funky, but stoked none-the-less. --- #3 is starting to fill in the pot! Getting larger! --- Wow! #4 is getting taller and looks healthy and green! - [19:12]: Checked down both fill tubes. --- Both reservoirs were completely dry! --- Wow the canopy is really starting to get taller and closer to the light. May need to raise it up soon. --- Absolutely surprised how low the light levels have been throughout this entire cycle. Barely moved the light and have not increased the intensity past 2 (out of 10). Less is really more. --- Anyways! - [19:18]: Checked the Ecowitt soil moisture sensor data: --- 36% - [CH01 EB1 - Garlic Budder #1] --- 41% - [CH02 EB2 - Garlic Budder #2] --- 37% - [CH03 GFP - Garlic Budder #3] --- 34% - [CH04 FPT - Garlic Budder #4] - [19:19]: Poured 6 cups of distilled water down EB1’s fill tube. --- Poured 3 cups of distilled water down EB2’s fill tube. - [19:24]: Checked propagation dome (in the 3x3), --- To refresh the air, lifted the top off for a bit. --- Sweet! Still green! Wow! --- Using a spray bottle, misted the top growth with distilled water. - [20:35]: Checked the humidifiers. --- Refilled the humidifiers with distilled water. --- Wow what a week! --- Growth has been just insane in the 4x4 tent! All plants have fully recovered and have just exploded with growth. --- I think it’s time to flip to flower! --- Also, I’m absolutely baffled about how well the cloning process has been going. --- So far no issues! --- Not complaining, but just surprised. Keep on growing ladies! --- If all goes well, should have fully rooted clones soon ready for transplanting (into solo cups of course). --- Absolutely hyped for next week! --- Maximum warp Ensign, Engage! [END OF WEEK 14|07]
Processing
Likes
20
Share
@UK420
Follow
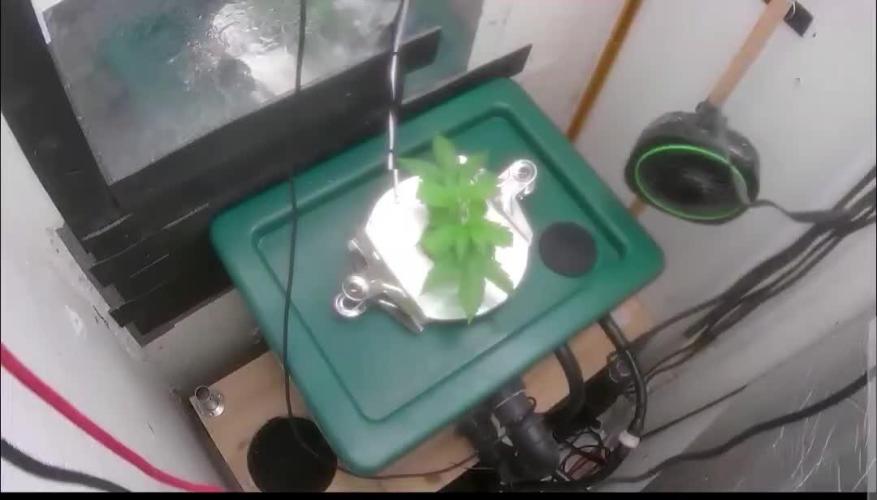
Possibly transplanted into oxy pot a little early. But seems to be settling in now. Just need some more root development. Root Update 27/8 - both oxy pot and 5 plants still in grow cubes, have all had a good increase in root development over night - 27 August Root Update 28/8 - all grow cubes and one in oxy pot developing well. Set up: 1 CFL 300w Dual Spectrum light with reflectors 1 kaizen carbon filter and air out. 1 eco fan air in 1 oxy pot 1 9 inch oscillating fan
Likes
11
Share
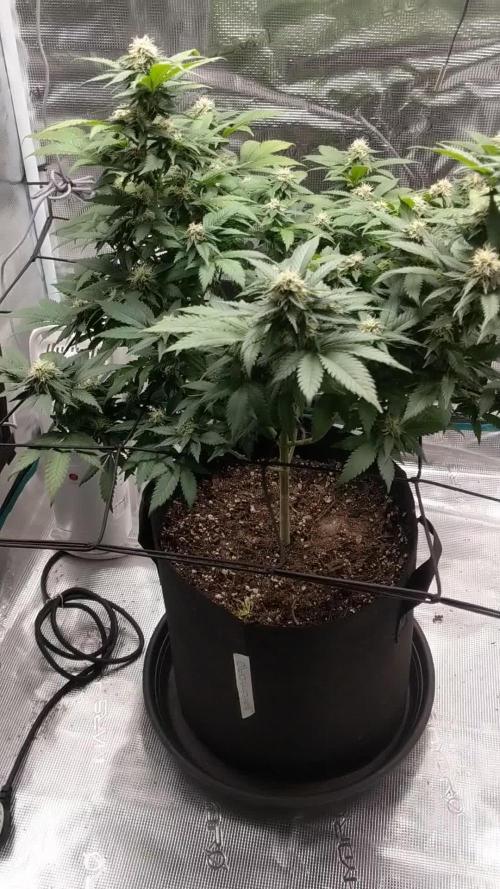
I should have used a net as they are starting to fall over! Next time 😅