The Grow Awards 2026 🏆 


Likes
Comments
Share
@I_Identify_As_A_Dan
Follow
Week 21 for Black Lebanon by SSSC
Shes been doing alright no real issues no pests/ no bud rot.
Now just to watch her bulk up her flower size.
Not watering the plants whatsoever with this weather.
Weather has been terrible just storms after storms of heavy rain 😐 dark clouds not much sun, we still have more rain coming with highest of 21 degrees...😒


Likes
4
Share
@JayKane33
Follow
This week I began to remove fan leaves. Looking back I wouldn't do it at this stage again. The plants did well for being so young and growth wasn't stunted but esthetically next time I'd like to have more leaves at this stage.

Likes
7
Share
@Chrisandweed
Follow
Muy buena planta, me ha gustado muchísimo este cultivo, va a salir mucha producción, además que hiper resinosa! Huele fuertisimo a frutas! Cualquiera que le enseño la planta coincide en eso.
Creció muy grande, muy fuerte y muy resistente.
Para un proximo cultivo de autos, que no sé aún ciando será, probaré una fertilización diferente, alargando el nitrogeno un poco mas, y todos los jaleos que explicaba por ahí en otra semana xD.


Likes
22
Share
@Wondrej
Follow
🌿 Week 12: Symphony of Growth (Flower Week 7)
We’ve officially entered Week 7 of bloom, and the energy in the tent has shifted. The plants are no longer growing tall for the light; they are focusing all their remaining power into hardening those colas and finishing the resin production.
🎼 The Vltava Ritual
I’ve introduced a new element to the grow this week. Every morning, as the lights roar to life, I play "Vltava" (The Moldau) by Bedřich Smetana. They say plants react to vibrations, and what’s better for a flow of life than a classic masterpiece? It’s become a ritual—the rising sun of the LEDs accompanied by the rising strings of the symphony. The girls seem to love the high-class treatment!
❄️ Status: The Final Ripening
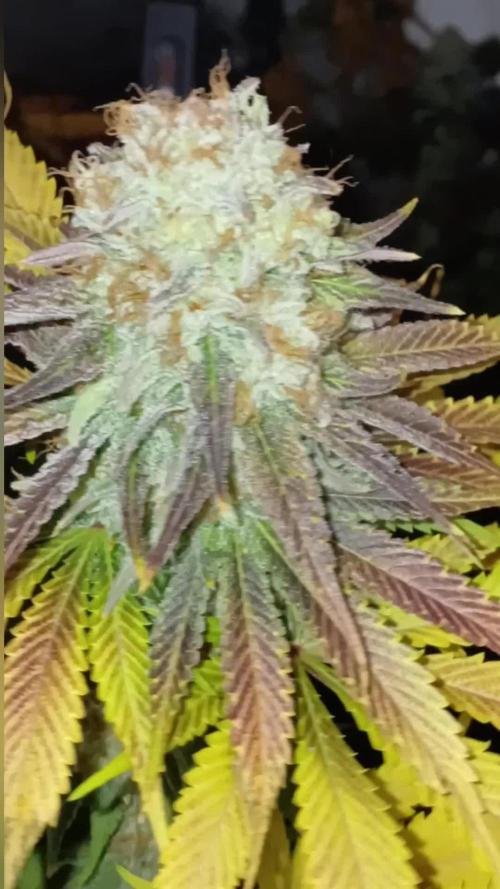
The Banana Purple Punch Auto is looking world-class. The frost has moved from the buds onto the sugar leaves, and the density is getting serious.
• Trichome Report: I'm seeing a sea of milky white heads. We are very close. I’ll be watching for that first 5-10% of amber to decide on the final flush.
• The Fade: The nitrogen yellowing we discussed last week has progressed, which is perfect. The plants are naturally depleting their stores, ensuring a clean, smooth smoke without that "chemical" green taste.
🛠️ Maintenance & Environment
• Defoliation Check: The air is moving freely through the canopy after my previous heavy leaf-stripping. No signs of moisture traps or stagnant air.
• RH: Kept strictly at 40-45%. In this stage, humidity is the enemy.
• Smell: Overpowering. A thick, sweet, fruity scent that hits you the moment the tent zips open.
Update- week 8 is finishing and that smell is insane, but trychoms are not even cloudy yet 😜😜😜
One love growmies 💚🇯🇲
Wondrej

Likes
2
Share
@morganfreeman420
Follow
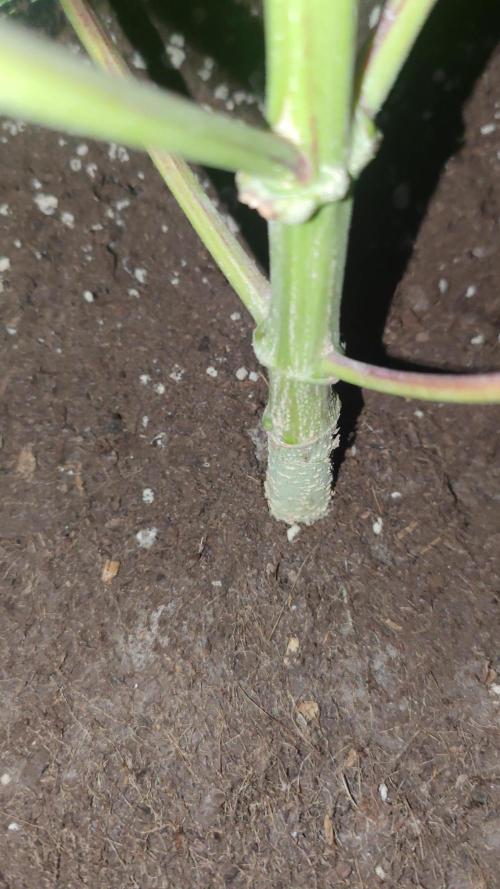
Okey, ya pasamos a la maceta definitiva de 50 litros y aplicamos poda apical todo fue realizado el mismo dia. La planta recibio muy bien la poda y sigue creciendo
Likes
22
Share
@GermGrowFox
Follow
Ein weiterer grow geht zu Ende und ich bin sehr zufrieden :) Updates gibt es sobald es trocken ist und fermentiert werden kann.
Likes
80
Share
@Qlimax
Follow
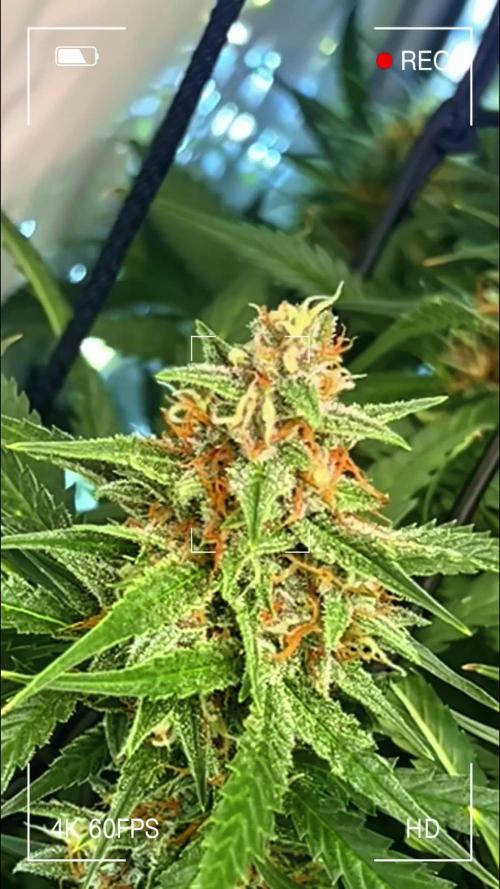
👉Day43- buds getting fatter and fatter every day :) i can just watch nothing to do rly..:)
👉Day44-Did little deformation and changed 22h>21h lighting since i saw info abt this strain 20h is best they say..... Week or 2 and will change from 21h>20h sleping time so they can rest little bit loonger🤣🤣👍
👉Day45- spoted calcium deficiecy onley on the biggest plant od 3..or 4 leafes.... 😣😪 overall all is well :)
👉Day46-flowers start to smell rly rly nice!!! U can alredy smell that orange/citrus/sweet strong smell when u smell it closely💚🤗🤗🤗💚
👉Day47-2flowers had sings of heat strees(expected that!) so i change height of lap for 10cm,reorganize positions of flowers,so the lower buds are in the middle..... and change fann position, they also kinda stopped rising in to the high white&blue sky!! Height info:cca 85,cm 70cm,66cm,64cm,64cm and the farthest bud away from lamp is like 65cm 🤗👍
👉Day48-flowers flowering rly good :) little calcium deficiency..and did kinda big deformation .... nothing to do now anymore rly ......can just water them every 2days and wait :)🤗🤗
👉👉Have fun mates and be safe!!!😷🤣👍💚

Likes
26
Share
@Young_agronomist
Follow
28.07.23-день тренировок для начала сделал агрессивную деволиацию , затем без труда растянул все ветки по периметру . Теперь новые побеги получают свет и воздух !
После тренировок принято решение поднять ппм до 750-800 и пш 5.9—выход ппм 700-670 , пш 5.6.
Наблюдаем дальше , почтение очень
красивое и пушистое .
02.08.23-Сделал сильную дефолиацию , растение очень компактное с небольшими листьями и выглядит как зеленей шар )
Все колы находятся на одном расстоянии . Честно говоря это мой любимый цветок 🌹 увеличил ппм до 900 и дал больше места для растяжки !
В планах дать еще 4 недели вегетации и сделать из нее монстра )
Likes
6
Share
@StarSkream
Follow
12/12 first week #starskreamstash looking pro,ising Dropping the night temps.... Happy Growing added some strawberry fields soil repotted to gallons

Likes
8
Share
@RhynerWongl
Follow
Harvested her on day 70. Very loud smell and dense nugs, like expected. Very excited about how it turns out after curing. Absolutely recommend fastbuds if you are looking for high quality seeds for a reasonable price.


Likes
26
Share
@SmokeableHobby
Follow
12/28 - Day 43 / Day 15 Flower - Feed Day
Pots were mostly dry on this day. It has been about a week since I last fed them. I've only had two small waterings since last feed, about a half gallon of water for each of my 5 gallons and about 8oz of water for my bonsais. My plants are drying out within about 48 hours of each small watering.
For today's feeding I decided to pull Grow Big out of the solution and focus exclusively on bloom nutes. My solution consisted of:
- 1 gallon distilled water
- 4ml CalMag
- 2 tsp of FF Big Bloom (2/3 dose)
- 1 tsp of FF Tiger Bloom (1/2 dose)
- pH: 6.7
- TDS: 582
- EC: 1.2
The pH of my solution was down around 5.3 when first mixed so I pH'd up with baking soda to get to a final pH of 6.7. I gave each of my 5 gallons about a half gallon of the fertigated water each which wasn't enough to produce runoff. I gave them each about another 1/4 gallon distilled water to generate enough runoff to test. I tested the runoff of my Z52 which gave me readings of:
- pH: 6.4
-TDS: 1620
-EC: 3.3
I gave about 12oz of fertigated water to each of my bonsais. My ZB2 runoff posted readings of:
- pH: 6.8
- TDS: 718
- EC: 1.5
****************************************************
12/30 - Day 45 / Day 17 Flower
Pots were close to dry so gave each of the girls a light watering. Gave about 1/4 gallon of de-chlorinated, pH'd water to each of the 5 gallons and 6oz to the bonsais. Everything looking good aside from the fact that my girls are getting too tall for my tent. I've ratcheted my lights up as far as they'll go but the tops are now starting to get within 12". May need to take action to lower the canopy.
****************************************************
1/1 - Day 47 / Day 19 Flower
Happy New Year!
Pots were getting pretty dry again so provided another light watering with no nutes.
****************************************************
1/2 - Day 48 / Day 20 Flower
I am officially concerned with the the distance between the tops and my lights. After reading a few forums to see what other growers have done in my situation, the consensus feedback is to do some supercropping. I ended up supercropping both of the main stems on my 5 gallon pots. I counted three nodes from the top, massaged the stem a little bit where I planned to bend and and then bent each branch to almost 90 degrees. Luckily, the stems didn't snap or show any signs of breakage.
Had to remove the shelf in what should be a second compartment of my tent and attempted to do a little LST to widen my plants and lower their canopy.

Likes
58
Share
@Bread_n_Buds
Follow
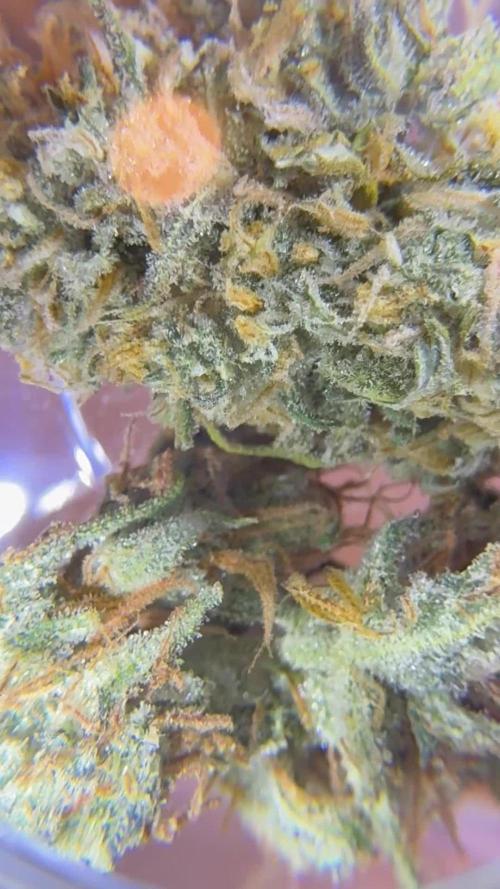
** A tip if you like trichomes have the patience to scroll down to the micro photos, they are scary.
Black Runtz is a crazy beauty, a black isolate phenotype of the very famous Zamnesia Runtz. In the last week before this one you will find the white phenotype with a green apple flavor, but here is the spectacle of nature that manifests itself in the form of a stunning red/purple plant with spectacular trichomes and buds.
**Remember that for all the varieties we have at least two plants, one left to grow straight and one worked with the techniques. This is the plant left to grow straight.
Technique used // In this case we let the plant grow up to the 6th internode then we did the FIMMING or FIM (Fuck the Missed) - This technique by cutting about 70% of the brunch and the leaves growing in the center is going to give the plant the indication to slow down the growth upwards and distribute the power on the lateral branches that with a bit of LST in fact gave some wonderful secondary flowers. No popcorn thanks to Pruning of the things at the bottom, guys leave only everything that sees the light well in flower.
Better with the techniques or the normal ones? This time we have two very different phenotypes, a plant with medium internodal distance. I prefer the plant to grow straight, but I know that it can be obtained very well with a main lining or repeated topping.
Flower quality // From one to 10 stars 15. The plant has resined very well on all sides, the resin is really abundant and above average. The color of the trichomes is something exceptional really we have dark purple heads, light purple, lilac, really a racobalen of shades of red / purple.
The buds were washed as recommended by Zamnesia.
Check the article in your language // https://www.zamnesia.io/it/guida-growing-cannabis/333-lavaggio-delle-ceme
Fertilizers// I am very happy with how I managed to dispose of the plant that at a certain point, before going to the wash, was fed for a few days only with additives and then went to the wash and we are very very well discolored. I predict a very tasty flower, grown organically and washed successfully, the flavor and taste will be epic.
All the Plagron fertilizers and additives in the green / 100% organic version have fully satisfied me. Choose the soil according to your style and calculate the sheet on the website www.plagron.com -
Brother, if you are stubborn use additives, listen every now and then... and then come and tell me about it.
Fertilizers are available in convenient all-inclusive packages on the Zamnesia website.
This strain is already a legend in the normal version, imagine in the Black version... try it!
--- https://www.zamnesia.io/it/11159-zamnesia-seeds-black-runtz.html
Zamnesia Description // Black Runtz comes from a truly legendary genetic heritage. Our breeders used three modern classics from the United States to create this strain: Zkittlez, Gelato and Runtz. With 20% THC and aromas of grapes and berries, Zkittlez has passed on its delicious flavors and relaxing effects. The ice cream contributed to Black Runtz’s immense flavor profile, giving it high concentrations of the terpenes limonene and humulene. Finally, Black Runtz inherited the high potency of the original Runtz, a strain with a respectable 21% THC. The end result of this three-way cross is a strain with 55% indica genetics and 45% sativa. Black Runtz boasts a fast flowering time, very high potency, and contrasting yet balanced terpenes that enhance its delicious flavor profile.
Music and Frequencies // For about 4-6 hours a day, my plants listen to 432Hz frequencies specially designed for their well-being, and sometimes a little black music to give them those vibes that only music can give. www.radionula.com
All the best that mother nature has to offer is available at
---- www.zamnesia.com

Likes
4
Share
@La_VecinaCannabica
Follow
La variedad Pink Truffle de lujo ,unas de las mejores cepas que he cultivado.
Likes
12
Share
@Pedro_88
Follow
Vamos rumbo a la cuarta semana ya
Ya está empezando a tener un olor débil

Likes
10
Share
@RookieGrower65
Follow
Fed all four twice with half a gallon nute water, PH 6.3, day 43 and 49. Video and photos from day 50.


Likes
3
Share
@Luke_Lee
Follow
—————————————————————
WEEK 8 / DAY 51-57
Mars Hydro FC-E3000
Floragard Professional GrowMix
11L Plant bag made of fleece
Light: 50cm
Schedule: 18/6;
PPFD: 900-950 umol/m2/s
21° C - 50 RH
1L per Plant
PH 6,5-7
2ml BioGrow; 1ml TopMax ; 3ml BioBloom
1ml CalMag
#1 Royal Critical Automatic
#2 Royal Critical Automatic
Fan, extractor and pump ON 24/0.
—————————————————————
-10.03.2025
The third week of flowering begins.
The plants look good overall. The light intensity was increased to 900-950ppfd (measured with the Photone app)
-12.03.2025
The plants were each watered with 1L of water with fertilizer solution and a few more leaves were removed.
-16.03.2025
The third week of flowering comes to an end.
The royals look great!
They were watered with 1.5 liters of water per plant. (With fertilizer mix)
Total Time: 1377:39 h
Total Energy: 222,79 kWh