The Grow Awards 2026 🏆 


Likes
Comments
Share
@Salokin
Follow
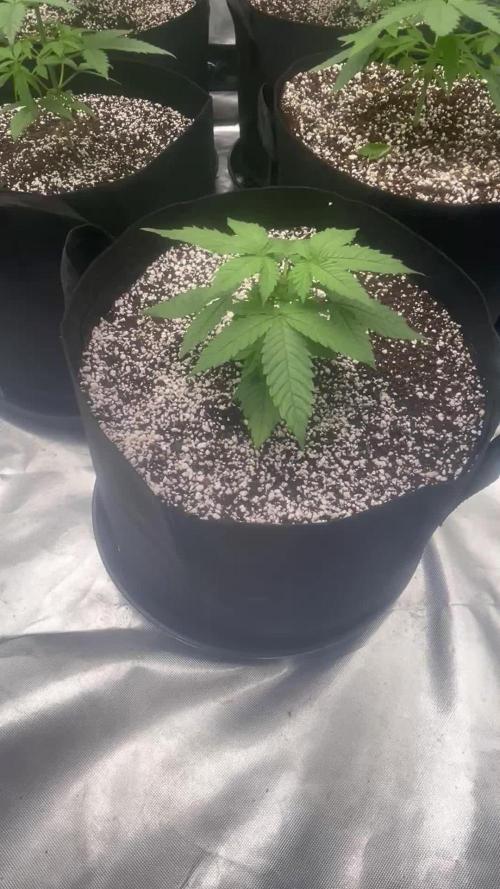
Hi Growmies,
She did not take well to the ec of 2.0 that I intended to feed her, so I changed the reservoir again midweek and went down to 1.6, after feeding her canna flush with RO water for 24 hours. She seems very forgiving, as she didn’t even get stunted by the lockout. 4 of the 8 shoots went through scrog and were super cropped underneath the screen. The others should catch up any day now and will be trained in a similar fashion. Rootball looks also amazing. I will experiment with continuously feeding her orca every 3 days, as it feels like the mycorrhizal inoculants seem to go down after 3 days and root growth slows down. Let’s see if it’ll work.
Here is the code that’ll give you 20% in Zamnesia‘s online store, just input ZAMMIGD2023 at checkout.
Thanks for stepping by and until next week!

Likes
7
Share
@Smokesomeweed
Follow
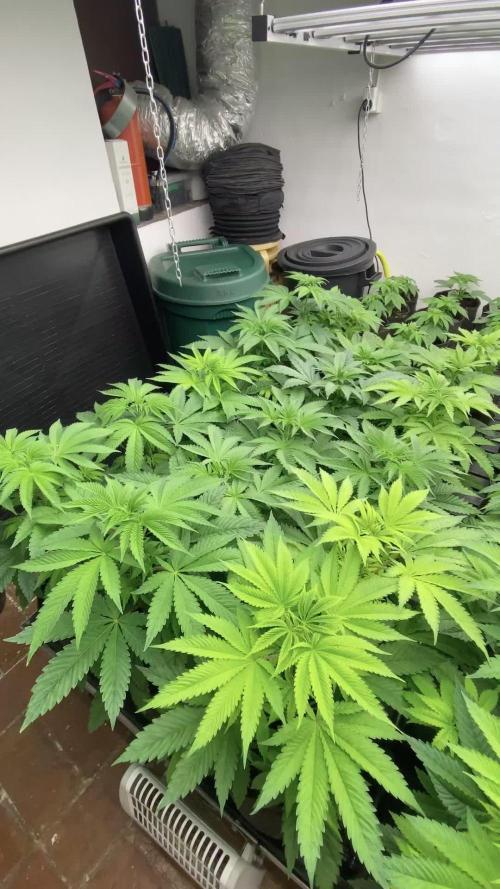
Here we are guys.
Finally I changed led, it suits for blooming /flowering. Now have 130w- full spectrum, 100w- warm white (3000k) and 30w- deep red. Gonna change last one cause it has 630nm, so I think it useless.
Last feeding was extremely strong, 1000ppm! WW ate without problem, but NL overdosed a bit. There is not a problem if you use organic feeds as A.C.T.


Likes
16
Share
@OwnWayGoodWay
Follow
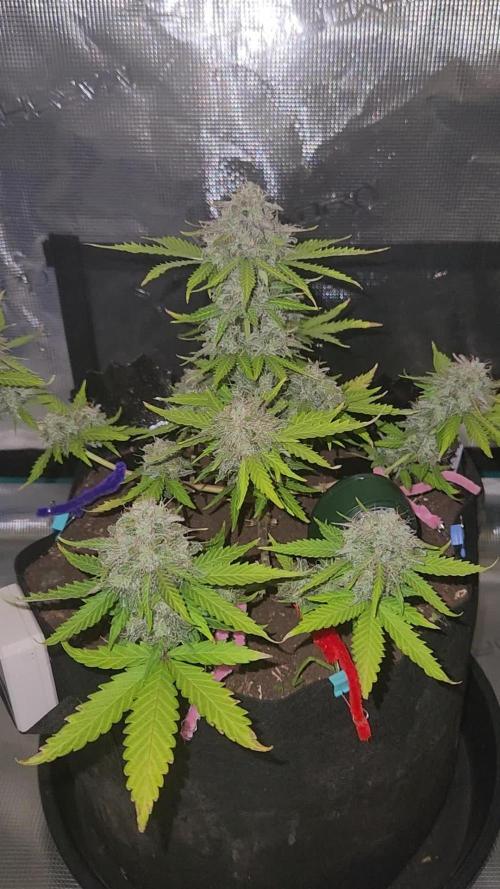
It's growing really fast !
The temperature was colder this week.
The LST is not what I wanted but every single bud gets light.
No monster bud mix for this week, I gave to much 😅.
Likes
13
Share
@Drawer
Follow
I still found a few places with bud rot and I keep removing every spot I see.
The plants have been doing fine beside that, they are looking and smelling great, they are super dense and I can't wait for them to be ready.
Most trichomes are still clear so I am awaiting for the first ambers to show up, aiming for around 5% amber and 95% milky.

Processing
Likes
13
Share
@Prozak
Follow
to mutch cold here 2 week with low temps at night cicle betwen 12 &16 graus in europe.
maybe this is the reason of that purple orange colors (:

Likes
9
Share
@Cultivate
Follow
Spent some time just defoliating the girls last night, tried not to go too far but you get lost😂
Also did some Pruning/Lollipoping to Increase that airflow 💨
Happy so far! Stinking now

Likes
574
Share
@TOTEM
Follow
HARVEST DAY!
162 days after the sprout, and 117 days after the switch.
It makes almost 6 months!! What a never-ending journey!
I chopped down the princess and decided to place the colas on the usual hanging net without trimming them directly.
I just couldn't. Every cola requires at least 30-40 mins to be trimmed properly. I got something like 50 or 60 colas in total.
It's a total pain in the ass believe me!!! There are layers consisting in calyx, leaf, calyx, leaf, and so on. You basically need to work between every couple of small calyxes in order to remove the leaf in the middle, while being very careful to not cut down everything. It's insane!!!!!!
So.... just wait a little more for the final harvest and the smoke report.
They will come, but definitely not now!
In the meantime I uploaded some harvest photos and videos.
;-)
See you soon!!!

Likes
3
Share
@Greybeardbud
Follow
Plants have recovered well from lockout, and have been topped. LST will start in 1 week. As stated previously have removed silica for now.
Likes
4
Share
@KannaGrowing
Follow
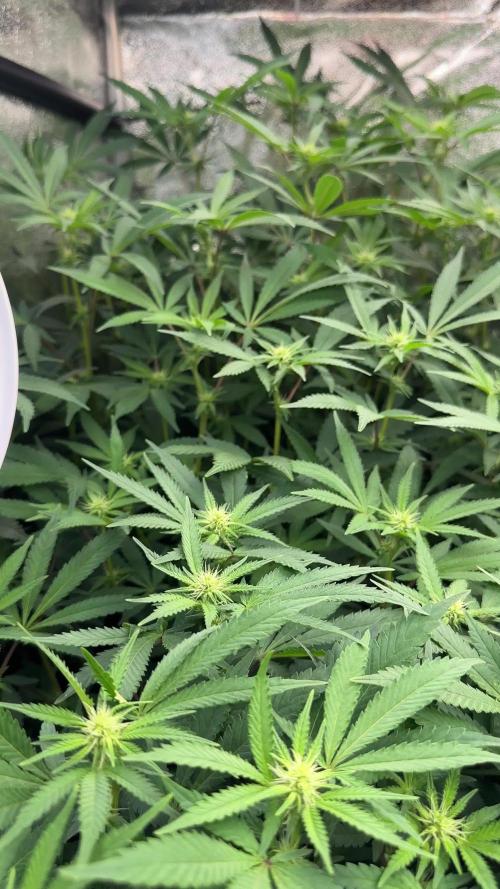
Ha llegado el momento de pasar a la fase floración.
Ajustamos nuestras luminarias LazerLite Pro 720w a 12 horas y subimos la potencia al 50%.
Seguimos con riegos alternos de fertilizante y agua.

Likes
14
Share
@ConspiracyFly
Follow
Day 75 Gorilla Glue Auto
This week I watched the gorilla glue auto gain weight, I continued with the Defoliation and took 1.5 L of water and nutrients every two days.
See you next week


Likes
6
Share
@masterofsmeagol
Follow
5/11 I DID NOT WATER. A COUPLE LOOKED DRY BUT STILL HAD HEFT AND I COULD FEEL MOUSTURE IN THE SOIL. I should've taken more pictures. I forgot it's a new week. Oh well. I'll be back over and I'm planning to bring the girls outside for the first time if it warms up a little more. It's windy as fuck but I can put them in the garage with the doors open. As long as that's not the direction of the wind. I raised the L.E.D light and lowered the hps. I also TRIED to FIM a 10th planet and an mk ultra. I may have just topped them. We'll see how it turns out before I do anything to the others. Pink kush grows slow and compact. Very similar to my experience with purple punch. I have two plants that have slightly twisted leaves. Nothing else is wrong with anything. Looking at the stippling on the leaf I think it might just be either low humidity or slight wind burn or a combination of the two. Now that I've looked again I think it might just be the first 5 finger leaf on those pink kush that I mat have mistaken. I'll keep an eye out. I feel better having done some research. I'll put some more pictures up and I'll update what it is that I get done.
EDIT: WENT BACK OVER AROUND THREE. EVERUTHING LOOKED GREAT AND THE LEAVES WETE PRAYING ON SOME. I MAY NEED TO WATER SELECT PLANTS TOMORROW. I'LL PLAY IT BY EAR. LOWER THE HPS AND RAISING THE LED WAS A WISE CHOICE I THINK. OH AND THE "TWISTED" LEAF I WAS WORRIED ABOUT IS NOTHING. JUST THE FAN TO CLOSE AND A FOMBINATION OF LOW HUMIDITY AND MINOR HEAT STRESS. ITS BEEN TAKEN CARE OF. I WANTED TO BRING THE GIRLS OUT TODAY. ITS SUNNY AND 60° BUT THE WIND IS WHIPPING! WE'VE GOT GOOD WEATHER COMING UP THOUGH WITH TEMPS IN THE 70'S. I THINK TOMORROW ILL CLEAN/SANITIZE THE CAGE AND WASH/SANITIZE THE GROW BAGS.
5/12 Looking and lifting some of the pots I found some that were pretty much totally dry. I watered the majority of all the plants. If soil was moist I left it alone. If it looked a little dry I gave it a little water. I didn't measure the water but it wasnt even ALL of what I had left from LAST WATERING (which was like a qtr gallon If that). I just don't want to over water. The ones that I went light on last time were the ones that were dry. Plants seem to explode after watering but this wasn't nearly as much. Everything is looking great. It's easy to tell these are all indicas due to the structure and leaf shape. Much different than even the Chem Dog #4 which doesn't LOOK as "indicay" as some of the others. I wanted to bring them outside today but it's only 50 out. I'm not going to make the same mistake as years past and stress the plants. When we get a nice warm day I'll bring them out. Other plants are ready to be topped or fimmed but I haven't done it yet. Also need to clean the cage and wash the bags.
5/13 It's 60° at 9am so I think the girls will be going outside for a little bit. Didn't fully water but I used what was left of the gallon and gave them that. Some are much drier than others. I'll probably give them a full watering tomm. I only gave them a little today because I didn't want them drying out. I FIMMed a Special Kush today. WE'LL see how the hst turns out.
EDIT: WENT AND BROUGHT THE GIRLS OUT FOR FOUR HOURS IN INDIRECT SUNLIGHT. THE TENTH PLANETS WERE THE ONLY ONES THAT LOOKED LIKE THEY HAD AN ISSUE. JUST MINOR HEAT OR LIGHT ISSUES WITH A COUPLE FAN LEAVES. EVERYTHING ELSE SEEMED LIKE THEY SHOT UP IN SIZE. THE LARGER CONTAINERS STILL SEEM KINDA MOIST BUT SOME ARE DRY. I NEED TO GET ON A STABLE WATER SCHEDULE. ITS HARD WITH DUFFERENT PLANTS OF VARYING SIZES. STILL HAVE A LOT OF WORK TO DO.
5/14 One plant was super light today and was a little droopy. I WATERED EVERYTHING TODAY USING APPROX A HALF GALLON. I brought them outside for the second day. I left them out for about 3hrs. It's hot today. I'm still floored that chatgtp gave me exact directions for hardening my plants off at my exact location taking the weather into consideration! That is awesome. They're all doing good. Pink kush is the slow starter this year. Kind of like purple punch was. The only plants that had ANY damage on them was the two 10th planet's and its not really damage. It's just a LITTLE mottling on the leaf and the serrations pointing down. It's weird because this strain did great here last time. The Special Kush #1 and the Pink Kush would probably be fine to leave out soon. Hindu Kush parents make those strains extremely resilient. The one chem dog #4 looks out of place with all tjis big fat indica leaves. I'm hoping the topping and fim-ing will take. It looks like it will.
5/15 Everything is looking great! I have some work to do bit then I'll be over to bring the girls out for a few hours. I'll edit this when I do.
EDIT: BROUGHT THE GIRLS OUT FOR THREE HOURS TODAY. I THOUGHT THE TENP WENT DOWN TO 73 BUT TUAT WAS INDOORS. OH WELL. THEY STILL DID GREAT! THEY WERE ALL LOOKING OUT OF THE LEAN-TO LIKE SUNFLOWERS! THE STRAIGHTEN OUT AFTER BEING UNDER THE GROW LIGHTS. I'M PLANNING TO CONTINUE TO HARDEN THROUGHOUT THE WEEK. STILL NEED TO CLEAN BAGS AND GROW AREA. I HAVE 'A' CAMERA DOWN. TRIED TO FIX IT TODAY BUT I WOULD GET RO THE LAST PART BUT THE CAMERA WOULDNT READ THE QR CODE ON MY PHONE. I EMAILED THE COMPANY BUT IF I DONT HEAR BACK BY TOMORROW AND I CANT FIX IT ILL JUST BUY ANOTHER CAMERA TO ADD TO THE SYSTEM. ITS THE OLDEST CAMERA I HAVE AND ITS DONE ME 5 GOOD YEARS. MAYBE ITS TIME TO RETIRE IT.
5/16 I watered a few of the girls this morning with a small ring around the pot. I brought them outside and am leaving them for 3.5 hours today in the lean-to. They get indirect light without all the wind this way. I'll slowly increase the hours outside until there is enough daylight for them to go outside without revegging. When I put them out I noticed that a few were light and since it was close to 80° I watered most everything. I used under a half gallon. I'll see how they do from here and then move forward. I fixed my down security camera and secured my cage. Now I just need to finish hardening off, clean/sanitize bags/environment and put them in tjeir final homes. I'm not rushing it though. I've learned my lesson with that.
5/17 Plants did great yesterday and were perky and praying this morning. It was HOT yesterday too. Got into the low 80's. It's 57° degrees at 9am and it's overcast and sprinkling. I haven't decided if I'm going to bring the girls out today. It might be a good day to try some direct sunlight. I'll update whatever I decide to do.


Likes
137
Share
@MrJones
Follow
🌱Slurricane #7 S1
@inhousegenetics_official
👨🌾🏽GD Grower: MrJones
🔹🔹🔹🔹🔹🔹GOALS🔹🔹🔹🔹🔹🔹
🌞Environment - 75/80℉ and 60% Humidity Good Old Mother Nature
💧 Feeding - The Green Sunshine Company - Earth Dust All-Natural Plant Nutrients
⚗️Soil - 35% ProMix MP / 25% Ocean Forest / 20% Tupur Royal Gold / 10% lobster Compost / 10% Additional Perlite
🍃Training / So this girl was 60 Inches and spread out under a 5x5 Trellis
🕷️ IPM - Will be using Green Cleaner" 1 OZ per Gallon, and CannControl from Mammoth alternating between products each month
🔹🔹🔹🔹🔹🔹🔹🔹🔹🔹🔹🔹🔹🔹🔹
📜 Rambling - Week 28, The bigger of the 2 plants is doing great, the smaller one is looking root bound, not a lot I can do for it at this stage, live and learn, next year all 50-gallon fabric pots.
🔹🔹🔹🔹🔹🔹🔹🔹🔹🔹🔹🔹🔹🔹🔹
▶️ Sunday - 08.15.21 / JJust watering daily with Dechlirnated H20 using the BOOGIE BLUE PLUS+ (High-Capacity Filter) to remove the Chlorine and Chloramine out of the water.
▶️ Monday - 08.16.21 / Just watering daily with Dechlirnated H20 using the BOOGIE BLUE PLUS+ (High-Capacity Filter) to remove the Chlorine and Chloramine out of the water.
▶️ Tuesday - 08.17.21 / Just watering daily with Dechlirnated H20 using the BOOGIE BLUE PLUS+ (High-Capacity Filter) to remove the Chlorine and Chloramine out of the water. IPM Treatment today.
▶️ Wednesday - 08.18.21/ Just watering daily with Dechlirnated H20 using the BOOGIE BLUE PLUS+ (High-Capacity Filter) to remove the Chlorine and Chloramine out of the water.
▶️ Thursday - 08.19.21 / Just watering daily with Dechlirnated H20 using the BOOGIE BLUE PLUS+ (High-Capacity Filter) to remove the Chlorine and Chloramine out of the water.
▶️ Friday - 08.20.21 / Just watering daily with Dechlirnated H20 using the BOOGIE BLUE PLUS+ (High-Capacity Filter) to remove the Chlorine and Chloramine out of the water.
▶️ Saturday - 08.21.21 / Just watering daily with Dechlirnated H20 using the BOOGIE BLUE PLUS+ (High-Capacity Filter) to remove the Chlorine and Chloramine out of the water.
🔹🔹🔹🔹🔹🔹🔹🔹🔹🔹🔹🔹🔹🔹🔹
Earth Dust - DESCRIPTION
🔹Earth Dust is our all-natural plant nutrient designed for indoor and outdoor flowering plant growers. You can grow easily by “just adding water” to your soil for the entire growth cycle. It creates a “living soil” so your plants thrive from seedling all the way through flower and harvest. Earth Dust represents an organic dry amendment method of gardening, it’s made of a natural powder of ingredients.
🔹Because you only need to water your soil with Earth Dust, you can concentrate on caring for your plants and getting a healthy crop “on autopilot”. Now you can grow without spending hours of your life mixing chemical nutrients, and you can do it naturally. What’s more, is you will enjoy the cleanest, most aromatic, and flavorful harvest you’ve ever experienced when a plant grows in a rich, organic web of living soil.
Product Highlights
🔹All-Natural Ingredients – Mostly plant-based – Safe around children and pets.
🔹Packaged in kraft paper bags that are recyclable and compostable.
🔹Easy to Use – Just mix the powder into the soil 3 separate times – then water only.
🔹Packed full of rich microbe food & contains billions of beneficial fungi and bacteria! Creates a resilient, living soil that defends against pests and diseases.
🔹Rich in trace minerals and nutrients for full plant expression. Sourced from rock dust, sea-farmed kelp, and land-grown crops.
🔹Soil Conditioners help balance pH and make nutrients more available in the soil. Achieved with ingredients like bat guano, worm castings, limestone, molasses, and humic acid.
🔹The correct balance of N-P-K nutrients for each stage of growth:
🔹Earth Dust Base (3-1-2) contains key nutrients for sustained vegetative growth. High nitrogen (N), Low Phosphorous (P), and Medium Potassium (K).
🔹Earth Dust Boost (2-3-6) contains accelerated-release nutrients for powerful flowering growth. Low nitrogen (N), Medium Phosphorous (P), and High
Potassium (K).
🔹Re-use soil harvest after harvest by simply adding more Earth Dust Base to begin again. Create your own living soil that gets better every time it’s used.
🔹Go organic, save time, and get predictable, healthy harvests.
🔹🔹🔹🔹🔹🔹🔹🔹🔹🔹🔹🔹🔹🔹🔹
Compost Tea for Vegetative Stage
Water 4 Gallons
3 Cups Composr (Your Favorite Worm)
4 TBL Molasses
4 TBL Seaweed Extract
4 TBL Fish Fertilizer
Use air Stone o the tea for 24/3 hours 70/75F, use at full strength for establishing plants and a half-strength for younger plants


Likes
59
Share
@Rap_a_cap
Follow
Well, my organic vegetables garden, in anticipation of growing weed has been at rest for twenty months. I started to amends with green manure from legumes and lawn mowing (expecially the last month, for ready availability of N). I've mixed 1 gallon of Vigor Plant Full (perlite, guano, peats) to improve drainage. All the roses around, the apple tree and the hedges were treated with deltamethrin so as to preventively reduce the population of aphids, whiteflies & red spiders.
My vegetables & weed eventually will receive only spraying of nettle macerated. My girls spent the previous week outdoors night and day in their pots savoring the discrete temperature changes in my area.
Now in the evening I will have to pay close attention to broadnose weevils and later to bedbugs. It will be a tough fight against the wind and heat. A whole week of full sun awaits them.
Pineapple Kush shows strong genetics, she has tolerated very well strong wind and full sun (28 C° average temp) asking for watering twice a day.
Maybe it will be the southern sun but she already smells slightly. 🤞


Likes
Comments
Share

