Recommended
Likes
Comments
Share
@Roberts
Follow
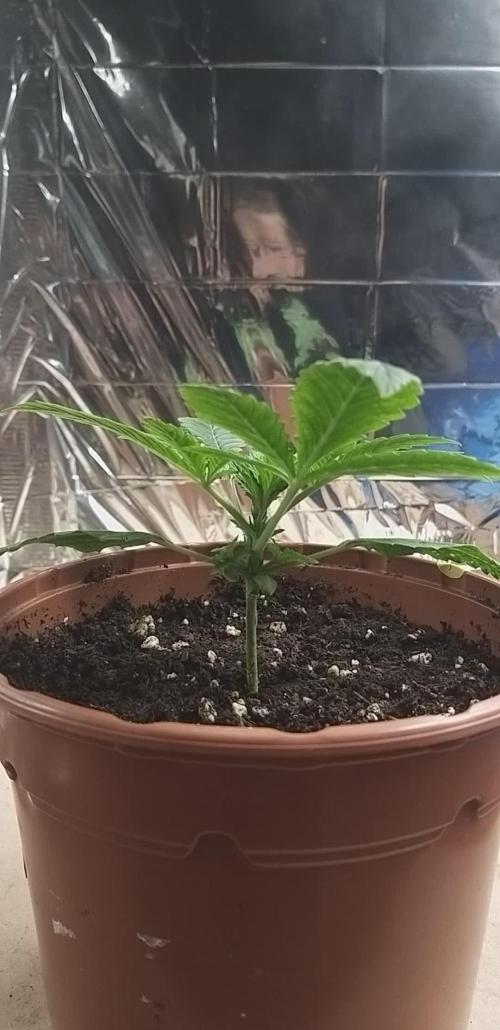
Fruity Pebbles #2 has sprouted and is getting acclimated. So far everything is looking good. She is growing in Athena nutrition while #1 plant is in Blue Planet. Everything is looking good at the moment. Curious to see how the results differ. Thank you ILGM, and Athena. 🤜🏻🤛🏻🌱🌱🌱 Thank you grow diaries community for the 👇likes👇, follows, comments, and subscriptions on my YouTube channel👇. ❄️🌱🍻 Happy Growing 🌱🌱🌱 https://youtube.com/channel/UCAhN7yRzWLpcaRHhMIQ7X4g
Likes
59
Share
@Salokin
Follow
They continue to be very hungry. Mid week I had to change the reservoir and decided to go with full flower nutes from canna. They seem to like it and the flowers start to stretch along the colas. So far so good, I am really curious how they Turn out in the end. Plants have been defoliated heavily one last time to enable more light in the lower canopy.
Likes
7
Share
Week 8 for Lemon OG by SSSC (indoor runt) 😂 She's still not happy whatsoever... don't think her roots are doing much when i feed her from the bottom her leaves don't perk up or anything only when I water from the top when she's unhappy. Think its going to take a while for her to start doing any serious growing to be honest. She's currently at 12 tops but just takes forever to bounce back. Have a new LED light coming in this week to handle the temps of the summer better. No more yellowish looking photos 😂
Likes
53
Share
10 September Harvest - see pictures. While some growers leave the plant whole when they cut, I do not. It is a personal preference and situational convenience if your a home grower. I chose to cut large, long branches, and remove any whole water leaves, as long as it doesn’t interfere with the bud formation. I don’t trim yet. This is done for a few of reasons: 1) It’s my last good close-up look at her until another 5 days or more, 2) I don’t want wet leaves drying on my buds if I can help it, and 3) I occasionally like being able to shine a small LED flashlight on the flowers while its drying. Mold is our greatest problem as growers, it can destroy a beautiful grow right up until the end process. Then I hang it in a dark closet, provide circulation and ventilation. Light and heat, anything above 80 degrees F, will start a break down in cannabinoids during the dry, it is ideal to stay away from both. I’m fortunate that a humidity level of 50- 55% and temperature of 65-70 degrees F is fairly consistent and easy to maintain. Anything below 60 degree F will prevent the adequate drying out of chlorophyll. Almost all my flower routinely take 5-7 days, some a little longer, to properly dry out. 15 September Trim - see pictures. First you’ll notice the buds have shrunk up to half their original size. This is just a fact that we growers have to deal with. Due to evaporation without uptake of water, it takes about 3 days for the chlorophyll to dry up, then slowly go through a chemical change. Along with the leaves, cannabinoids also begin a chemical change after 3 days called decarboxylation. A slow process where the THC level increases while curing. You want the leaf to be dry so they can be hand trimmed easily, but you do not want that bud so dry that it starts to fall apart in your hand. Try to handle carefully by the main stem to avoid touching the bud all together. A lot of these cut leaves will be covered with trichomes, good for making oils, or other products, it’s an option worth looking into keeping it. After trimming, I do separate a few premium flowers for my first smoq. Then loosely fill wide mouth quart mason jars with about 1 oz/28 gr of product per jar. I seal the lids for a few hours to determine what relative humidity they are at, see hygrometer pic, before making a decision to put in a 62% humidity control pack of my choice or to wait, then place in secure in a cool dark place with stable humidity and temperature. It is very important to then observe/burp or exchange the air as needed, up to several times a day, until 62% rh is achieved. Once your close to to your mark, put in your desired RH level control terpene shield. If you have a problem getting there: 1) it has dried out too much, no real solution, try to put several large cut stems left over from harvest into the jars with the buds to try and increase humidty, 2) it has not dried out enough, in this case no problem, just remove and dry out a little more. This is also a personal choice, some people like it drier in the 50% plus range. Whatever you do, research and preserve. At that time burping is no longer required. Cannabis will reach its peak potency potential at about 40 or so days into the cure. The finished product should be a perfect grind when cured correctly without clogging up your grinder, this could take a month. Now that I’ve said that, I’m sure someone has grown something that they have not been able to grind. It can remain in this state for an easy 6 months with little change, locking in all the terpenes and potencies. All you need to do is occasionally check the product to ensure there are no molds. If your grow/harvest/cure techniques are good this should not be an issue. It would not be uncommon to find many cannabis strains will last, with small degradable change, for up to one year after being stored this way. Using an airtight glass container, controlled relative humidity, maintained low temperature, and kept in darkness will equal maximum shelf life. Always avoid direct sunlight and temperatures above 80 degrees F. The reasons I’ve ultimately chosen Deep Water Culture as a grow medium. Each has their own pros and cons indeed. I found the most efficient, less maintenance and ideal solution for my situation was DWC. Burdens to overcome depend on size up set-up; initial equipment cost, size of containers, ph monitors, air pumps, type of water to use-reverse osmosis, RO cost/set-up/maintenance, ways to transfer/change water and nutrients, what nutrients to use and schedules, takes several grows to learn and understand, a 1 year learning curv, easy to nutrient burn. The Benefits of growing in water; no dirt, no bugs, no diseases, rare nutrient deficiencies/toxicities, steady and rapid growth that enables the plant to reach its genetic potential. After harvest, there is about a 1 hour equipment cleanup, sterilization and turn around process before replanting. Cannabis will perform in so many different ways and mediums, no one way is the best and the best way is the one you are using, right. Chose what works for you in the long run. There will always be an initial cost in set-up. My advice if one were in need to cut corners, I would not recommend cheap lights. This single factor is the most critical, afford for the best. The notion that organic and water has a different taste, flavor and potency effect is absolutely debatable. The more we learn the better we grow and experience is always the best teacher. This is what works for me and my methods of growing in general from beginning to end. A BIG “Thank You” to everyone who stopped by to take a look. My next diary will start at the beginning of October 2023 with a Forbidden Runtz Auto. There will be minor differences during the grow. I enjoy Auto strains simply by what can be achieved in a short time. No matter the strain they will unveil one thing in common, the demand for attention. Many times over it is the anecdotal gardener that surmount plant scientist. Last should I mention, do not forget to stop and enjoy the fruits of your labour...
Likes
7
Share
Likes
5
Share
@Bluemels
Follow
Tag 48: Die beiden Pflanzen sind sehr unterschiedlich geworden. Die Vordere hat nun auch noch ordentlich Pollen entwickelt! Ich werde Sie entfernen da ich auch schon Samen gesehen habe 😱 Vielleicht wird dann aus der anderen Pflanze noch was 😬 Tag 49: Ich habe es getan die vordere Pflanze ist weg...Vielleicht wird aus der 2. Pflanze noch was 😬
Processing
Likes
3
Share
@ZJRDUDEZ
Follow
Alright, happy month of 420 to all🤙🌲 This is 3 days into week 4 of bud for these ladies (day 25). They have all definitely started swelling up and putting on frost. For some reason I’m not recognizing any of theses bud structure. The two seed grown plants up front are way different phenotypes than the plants I grew last round. And even the clone I took that’s in the back is way crazy different than the mother I took her from. So I’m assuming these genetics aren’t to stable. But they aren't done yet so I guess I can’t quite judge till it’s finished. Anyways once’s I get a strong mother of that Dark Plasma and Tropic Moon I’ll probably stop running these strains and only run those two strains for a bit
Likes
410
Share
CANADA DAY UPDATE🇨🇦 THE TRAGICALLY HIP🤘🥁🎸🇨🇦 MY SAYING NOW IS: THE ONLY WAY TO GROW IS WITH THE HYDRO🤘 AND REACH FOR THE STARS WITH MARS🤘🤣. So it's been almost a week under the new MARS HYDRO FC4800 and the girls are loving it.. leaves were straight up like they were at a rock concert just blowing in the wind waving their arms like they are in the moshpit🤣🤣 looked so sweet👍. after a day they have stretched so much I had to raise the light already to keep it at 14 inches above the canopy. Plants grow so uniform under these lights, canopy is always nice and even👍. it has a whiter light than the mars tsw2000. Being side by side in my 8x8 tent, I can really see the difference in the color of light. The FC4800 is more of a white light like natural light. I think it might be the blue uv Diodes they added to the fc series lights. I'm amazed at how good this light is already. Barely any heat comes off it. I can rest my hand on it when the dimmer is at 100% and it's just warm. I have it daisy chained to my TSW2000 and it works awesome👍 and I dont have to reach for the other dimmer to do both. One dimmer controls both lights. When I add more lights I will daisy chain them too and control 4 lights from 1 dimmer👍. I still love my tsw2000. It's been going almost non stop since I got it and no issues at all. I take a picture of the Diodes to see if any have burnt out or anything, everything is fine.  same thing with the heat it gives off is just like the FC4800. I can rest my hand on it without burning me👍. Having both lights on 100% because I in flower now, only raises my temperature about 3°celcius. Make sure you got some calmag and if you use reverse osmosis water (bottled water) or filtered water you will want extra calmag because it's filtered out of it👍. These lights are perfect for every stage of growth for germination to flower. Just use the dimmers to reduce the intensity of the lights for whatever stage you are in. Plus they are easy to raise and lower them with the ratchet straps. MARS HYDRO'S recommended height for different stages is pretty accurate but different strains like different Temps and light sensitivity so that's something to look into, a more Mediterranean strain can take more heat and intense lighting. and you can just follow their recommendations for the height for each stage. I slowly turn it up in the later veg cycle until I'm at 75% about a week before I switch to 12/12 and after about 4 or 5 days into flower I'm at 100% with no heat or light stress👍. Mars hydro is awesome for their pricing for what you get👍. They should cost alot more than other brands but shhhhh don't tell them🤣🤣🤣🤣. Just kidding. they want to stay competitive with every brand but there stuff is always cheaper than SF and vipar etc. They know once you use mars hydro products you won't switch to another brand. Why pay more money for something that isn't as good. I've seen lights cheaper than mars but they are cheaper for a reason. They are built cheaper. My TSW2000 is fairly heavy too. But when it comes to getting lights you want some weight to it so you know it's built strong and sturdy and will last a long time.. I called customer service a few times and they will help you out with any questions you may have about the products and they are very well educated in their products👍 very helpful and very friendly. They are awesome 🤜🤛. I can't say enough about this grow tent too. The thing is a beast. I could use the canvas tent to make a trampoline and i doubt it would break its that thick👍 I've had some cheaper tents made of 600d canvas and they aren't that bad. But when you get a tent made from 1680D canvas material it's insane how strong and heavy it is. Before I put the tent together when I lifted the canvas to start wrapping the frame I said to myself.. LORD TUNDERIN JESUS this has some nice weight to it. It was the easiest tent to put together that I've ever had. I went inside with the lights off and got someone to turn it on after a minute or two to look for light leaks and there was none👍. It even blocks out some noise, so if your fans or filters are loud, once it is zipped up it gets quieter. this tent is awesome with So many ports and vents for whatever you need to hook up to it. It has frame bars down the middle and one vertical pole in the middle to keep it sturdy but the poles are made nice and so thick that they probably didn't even need a vertical bar in the middle. It has 2 separate 4x8 floor trays that divide it into 2 4x8 tents. All you need is a mylar divider to easily divide it in half. I love the stickers it comes with. It's nothing big to some people but I know there is lots of people that like them because you see them everywhere in people's tents and in pictures. I love them they are super cool stickers👍. It really locks in the light and temperature and humidity good. Lots of room for all the equipment I have to go in it and will get to put in it. Be good to bring camping too🤣🤣🤣🤜🤛. Thanks for stopping by and taking the time to read this and please leave a comment 🙏🤜🤛 if you have any questions about any of the products I use please feel free to ask me and I can help you out👍🤜🤛 I also know about all their other products too, so any questions about stuff I'm not using I can still help you guys out🤘 and ask about pricing if you're interested in anything and I'll see what kind of deals I can hook you up with. But don't just buy stuff.. let me know so I can talk to my friends at mars hydro and probably get you a better deal👍🤜🤛 https://www.mars-hydro.com Promo code: Rocknroll @marshydropenny Here's some more information about these products I'm using: The goal of MarsHydro is simply to produce the best value grow tents in the  growing field and they didn't disappoint me at all. I'm beyond satisfied with everything. And with the most up to date hydroponic equipment at the lowest prices possible. Their grow tents have combined all their engineers and customers' advice to produce these unbelievable tents.. they really listen to us and change things to our liking so if you own anything from mars just contact them and let them know.. they take our advice and considerations VERY SERIOUSLY so don't hesitate to let them know 💪🤜🤛 The MARS HYDRO 8x8 Grow Tent interior is made of a unique diamond design mylar which is highly reflective. (Other companies mylar and reflective rate is as low as 50%, and it won't provide efficient light. They use thick 1680D oxford canvas, and being double stitched, it is tear proof and perfect for locking in the light. Their grow tent keeps 100% of the light inside the tent and helps your plants absorb more light. EXTRA-THICK material means No light leaks or rips at all.👍 Strong Stable metal corner adapters and poles are the trustful supporters of the tent. It's very sturdy, neither rusting or paint flaking off. quick and easy tool-free setup. They use heavy-duty metal zippers, with double layer black lining, by far the best on the market which creates a light-proof seal. The Easy observation windows are made by double layers of cloth. Observe the growing conditions of your plants without opening the tent and avoid disturbing your plants. The observation windows also serves to dissipate heat and ventilate the air. The tent includes 2 removable waterproof floor trays to hold soil and water. The removable tray can be taken out to wash easily. They guarantee the grow tents are easy to install even if you've never done something like this before. Clear Instructions and no tools needed! They also offer 30-day unconditional refunds for quality problems. Just contact their friendly 24 hours customer service 👍 https://www.mars-hydro.com/ Promo code: rocknroll @marshydropenny GET THE MAX FROM MARS👍: Welcome one of  the newest members of the Mars Hydro family🤜🤛🤘. The Mars Hydro FC 4800 480W LED Grow Light can accommodate up to a 4' x 4' area for flowering. It has OVER 2000 LED chips consisting of the best selling Samsung LM301B diodes which has a Luminous Efficacy of: 220 lm/W 0.2 W, 3 V mid power, Osram 660nm Diodes, Infrared light and UV LIGHT👍. It boasts the incredible efficiency of 2.8 µmol/J, maximum 2.5gram yield per watt with 30% higher Average PPFD. This High-intensity spectrum is beneficial for plants at all stages - from veg to bloom, and creates Big dense Buds👍. achieve 50% higher yields & quality compared with the old lights! Only consumes 480W for 4x4ft personal grows, and 3x3ft for commerical grow. It comes with a dimmer and daisy chain function with a  maximum of up to 15 lights, the master light controls the rest👍. Wide 6-bar design offers even & wide canopy coverage and can maximizes your grow space. slim 180° FOLDABLE DESIGN... YES I SAID FOLDABLE🤘🤣 , making it compact and easy to install, it's IP65 WATERPROOF and will give you no worries while growing in a humid environment and makes it a flexible high performance commercial grow light for enormous  SUPER FROSTY yields.😛😛😛. MARS GETS EM FROSTY BOYS👍 AWESOME HEAT DISSIPATION: The Low energy consumption FC4800 growing light has 6 passive-cooled bars and an aluminum heat-sink a removable driver  you can upgrade later or have it outside your tent. with zero noise  you can save up to 50% in your electricity bill compared to HID's or HPS lights! It also has a removable driver so you can upgrade it in the future or have it outside your grow space for better heat control in your growroom👍 UPGRADED FULL SPECTRUM: Yield Max Spectrum with enhanced red (Top-Bin Samsung 3000k-5000knm, Osram 660nm Deep Red), speed up blooming & fruiting, perfectly suited for full-cycle growing. The FC4800 LED grow lamp was born for Big Buds, perfect for commercial, grow tent, grow room, hydroponics, and all soil grows.👍 THE BEST SAMSUNG DIODES: THE FC4800 has Top Bin genuine Samsung Osram Diodes, combined with remarkable 2.8 µmol/J Efficacy, 30% higher Average PPFD, 50% less energy consumption, to maximize your yields. They give you a TRUSTED 3 years warranty 100% Satisfactory guaranteed!!! https://www.mars-hydro.com         PROMO CODE: rocknroll @marshydropenny Happy growing to all my friends 🤜🤛
Likes
7
Share
@Dunk_Junk
Follow
Wow she's grown 34cm this week!!!! Monster!!!!!!!!!! I wish I knew what she was!!! If I had to guess a breeder I'd say this seed came from FastBuds as it was their type of container.... But what exact strain? I have no idea whatsoever. 😭
Likes
9
Share
So far so good with these girls my only complaint is the fact that I wish I had a bigger light but I will make this work until I can afford another one. Overall plants are healthy and are building thick branching. Gonna take down the wall and add another small light until I can afford a big one.
Likes
28
Share
I go into the local Hydro store and the previous owner happens to be there. We talk about my novice grow and I mention the "Calcium" issue as I show him a photo.... He immediately asks me " Are those pots on a concrete floor? Because if they are, your roots are getting cold making it look like a calcium issue".... The new owner gives me a nice slab of styrofoam from an old box to put on the floor of my tent as I go home. I sick my BlueLabs PH soil pen in a drain hole at the bottom side of my pot and HOLY CRAP its only 17c and the PH is 5.2 !!!!! I take the plants to the bathtub and flush them with clean water PH'd to 5.8, about 8L of rinse per pot. I check initial run-off and its a whopping 2300ppm/50!!!!! I also remove some of the effected fan leafs in hopes I dont get some sort of plant illness. A day later I do the same PH test, PH is 5.8 and temp is 22C...all is well again. I should have paid attention to growing saying...make sure you get run off checks.
Likes
5
Share
Likes
13
Share
@IQuSX
Follow
Hi, topman! This week report is add-the next week, and this happened, because between 10 and 11 weeks, i didn’t can reloading media-content! System KiT 1: Delivering Efficiency To Growers Everywhere. Compatible with all 8" rockwool cubes; also used with smartpots and fabric pots. 26 flower-designed louvers. Stakes on the bottom add extra stability. Holes in all four corners allow for leftover water drainage. Made from BPA and lead-free plastic. Dishwasher safe, stackable and reusable.(c) KiT2 System: With the FloraFlex Matrix System water and nutrients travel into the Circulator, hit the slope of the Matrix and are pushed outward into eight maze sections that have individual holes dripping the water and nutrients onto the Wicking Pad. The Circulator has two barbed nozzles to attach 1/4" OD FloraTubing that allows you to automate the Matrix System. Place the Matrix Pad on the surface of your plant, the Matrix Unit on top of it, press down, fit the Circulator into the center holes, and connect your 1/4" OD tubing to the Circulator. (C) Check next week now, because there are will be continuous!
Processing
Likes
4
Share
Week 9 - Venom OG and an unknown seed strain. Tap water and Espoma Bloom full dose - 12hr light schedule
Likes
9
Share
Ultima settimana di fioritura, tra 7 giorni si taglia tutto finalmente!!!
Likes
23
Share
Hi people and welcome to my grow diary, I have grown before a few times and have extensive knowledge in growing cannabis, I have been limited on space before and not being able to explore my potential to its fullest, I also tried hydro with not the best results you live you learn you come back better, this time around I have good space good tent size and it has all been set up to my specification, I am doing real Queen seeds Royal Highness which is a daytime smoke with high CBD which is what I'm looking for I have been smoking cannabis now for over 18 years now and love it, I like to share with other growers and other like-minded small growers and professionals out there in the cannabis cultivation industry, like others I am trying to perfect my craft and this time I will do just that, I germinated 10 feminized Royal Highness seeds with 100% success rate the genetics from royal Queen seeds are on point!, below I will explain the method I used and how I got such a good germination rate, I soak my seeds in water boiled first then cooled down to room temperature then left them in a cupboard for 24-hours, when I came back I tap the seeds they all sunk to the bottom of the glass, I then use the same water from the glass the seeds are within to wet a couple of pieces of kitchen roll and let the excess drain off, I then move the seeds to the kitchen paper giving them space between each seed I then put them into a heated propagator and left them for another 12 to 24 hours and they had all sprouted a tap root, While I was waiting for the seeds to Germinate I prepared 10 pots of natural coco mixed with perlite, I ran through just plain tap water a few times through each spot it was running clear I left them on the windowsill overnight to come up to room temperature I then planted the seeds into these pots the next day, 24-hours later and I had to carefully go digging just a small bit and I found and around eight of my colydons coming up through the coco I left these exposed to my viper spectra 600 watt LED but still in the propagator with the lid on, few more hours and they should be standing straight up and kicking. The light is just under 2 ft from the propagator, I will update as my grow progressive please pull up a chair and join me if you wish it will be a pleasure to have you along on the journey, I appreciate every single person who reads if you want to know more I will answer questions and also have a bit of banter thank you for looking please enjoy peace and blessings to UPDATE Friday 15th of November 2019............................................... Hello guys this is an update I have added an update to the comments but i will move that here soon also, so everything is together nice and neat, Today marks the end of week one from popping the seeds including germination time, All plants are growing their second set of true leaves so not long now until they make it out the seedling stage, hoorayyyyyy, Temps are perfect at 26c humidity up around the 60s in tent but I have them in the humidity dome so will be a lot higher in and around high 80s they are loving it, I have now changed out my Mars hydro 400w for my viper Spectra 600w LED and they're loving that also, I have now started to feed with plagron terra grow, Snoop Dogg radical roots and I am continuing to use calmag, as I had some of this left I'm only going to use this until these parts have been rooted once I transplant I will start to use the canna line, I will use my one question to ask you lovely guys and girls what are the best results in the dense buds you have had from nutrients in Coco, I'll put that up after this update I will take some more photos today and I will upload them and that will be the last of week 1 and I'm talking day one was when I put the seeds into the cup of water and within 7-days I'm on my second to set of leaves that it's not bad going happy with that, I don't want no mistakes on this group I want absolute perfection to maximize yields and maximize the quality and density of the bud, my skills and knowledge and the time I've spent learning and perfecting my craft is up to scratch now and I know I can do a successful crop without any problems, And we will achieve that guys positivity is the key To success i hope you are all enjoying my grow I update regularly with pictures every other day killing my data but it's ok I love you guys, peace love and blessings happy growing.
Likes
62
Share
@nonick123
Follow
Día 29 (18/11) Subo a DLI 45 CBD Auto 20:1 #1 sigue sin mostrar las preflores... ¿será una auto tardía o será una fotoperiódica? Cada planta empieza a tomar su ritmo de riego personalizado, así que allá vamos: CBD Auto 20:1 #1 1000 ml CBD Auto 20:1 #2 0 ml LSD-25 Auto 750 ml OG Kush Auto 750 ml He observado que regar 1 litro de golpe provoca escorrentía (llevándose nutrientes del Super Soil), de modo que riego primero 750 ml, y a los 5-10 minutos añado 250 ml adicionales y el sustrato es capaz de absorberlo todo😁 Día 30 (19/11) CBD Auto 20:1 #1 sigue sin mostrar las preflores... Debido a que no para de crecer CBD Auto 20:1 #1, decido hacerle una buena defoliación y algo de Lollipopping. A ver como reacciona! Riego H2O RO CBD Auto 20:1 #1 750 ml CBD Auto 20:1 #2 750 ml LSD-25 Auto 500 ml OG Kush Auto 500 ml Día 31 (20/11) Por fin CBD 20:1 Auto #1 muestra las preflores (femeninas)! 😍 Parece que va a ser una Late Bloomer! OG Kush Auto están empezando a estirarse, parece que va a ser un monstruo! Riego H2O RO CBD Auto 20:1 #1 750 ml Día 32 (21/11) CBD Auto 20:1 #1 se muestra imparable en su crecimiento a pesar de la defoliación y el Lollipopping de hace dos días De modo que me decido a hacerle Supercropping! Dicen que NO se debe hacer Supercropping a las Autos, pero siempre me gusta experimentar y ver que ocurre. Come on! Un día muy divertido! 😁 Riego H2O RO CBD Auto 20:1 #1 750 ml CBD Auto 20:1 #2 500 ml LSD-25 Auto 750 ml OG Kush Auto 750 ml Día 33 (22/11) CBD Auto 20:1 #1 se ha recuperado estupendamente! No deja de crecer y estirar cada una de sus ramas! OG Kush Auto está estirándose muchísimo (4 cm / día), de modo que decido hacer LST a la cola principal para buscar una nivelación de la canopia Riego H2O RO CBD Auto 20:1 #1 750 ml CBD Auto 20:1 #2 0 ml LSD-25 Auto 0 ml OG Kush Auto 0 ml Día 34 (23/11) OG Kush Auto se ha recuperado muy bien del LST! 😍 La rama principal ya está apuntando hacia arriba y creciendo! El resto de ramas de OG Kush Auto empiezan a estirarse igualando la canopia Le aplico un ligero LST para espaciar y distribuir las ramas Riego H2O RO CBD Auto 20:1 #1 1000 ml CBD Auto 20:1 #2 750 ml LSD-25 Auto 750 ml OG Kush Auto 750 ml Día 35 (24/11) Lollipopping & Defoliation day! 😍💥💨😁 CBD Auto 20:1 #1 Lollipopping de todos los nodos y hojas quedan por debajo del plano "virtual" que marca el supercropping CBD Auto 20:1 #2 Defoliación de algunas hojas de abanico que tapan a cogollos inferiores LSD-25 Auto Defoliación de algunas hojas de abanico que tapan a cogollos inferiores & Lollipopping de una par de nodos de las 2 ramas inferiores OG Kush Auto Eliminación de las ramas del 1er nudo (eran enanas y débiles) y defoliación de algunas hojas de abanico que tapan a cogollos inferiores. Riego H2O RO CBD Auto 20:1 #1 1000 ml CBD Auto 20:1 #2 0 ml LSD-25 Auto 0 ml OG Kush Auto 0 ml 💦Nutrients by Bio Tabs - www.biotabs.nl/en/ 🌱Substrate PRO-MIX HP BACILLUS + MYCORRHIZAE - www.pthorticulture.com/en-us/products/pro-mix-hp-biofungicide-plus-mycorrhizae "GDBT420" 15% DISCOUNT code for the BIOTABS Webshop https://biotabs.nl/en/shop/
Likes
8
Share
@hooolian
Follow
27/02: the plants that looked wilted in the previous week have come back to life as they are being fed 1 litre of water now - it was an underwatering issue. all plants including the ones that were lagging behind have exploded with their stigmas and there are plenty of bud sites throughout. humidity is still a bit of an issue though I am installing an industrial sized dehumidifier into the grow tent as of next week. again there is some over crowding though I do not want to stress the plants by taking too many leaves at this stage. will give it at least another week before another trim. plants are on average around 30 inches high. reacting well to the nutes and all is going well.
Processing
Likes
6
Share
Semanas andamento satisfatório uma esta com 4 semanas e as outras 2 com 2 e meia!nao vejo a hora de poder apreciar a engorda dessas plantas!
Likes
6
Share
@Lazuli
Follow
It was easy to grow i defoliated before flower kicks in, tje yield is decent i get around 90 grams out of these seeds