
Likes
Comments
Share


Likes
27
Share


@babyboo
Follow
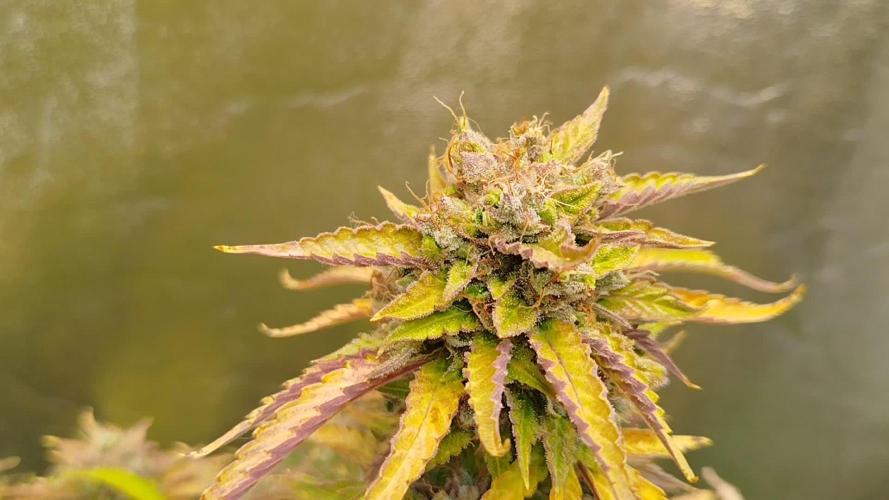
The looks on this one are sexy! It also burns even.
Effects wise, first 15 mins you perceive a high cerebral rush that peaks at 30 mins. Makes you feel creative and with energy. Later on, the cerebral effect dissipates and leaves you feeling all giggly and relaxed in da body.
The smell is all about sweetness and gas with a funky grapey smell hugging and keeping those close.
Colors didn't showed much cause of the 24/0 light cycle but it ended up showing some purple hues during late bloom.
Overall this girl was so fn grateful with the treatment she received.


Likes
8
Share

@MrWeeedWorld
Follow
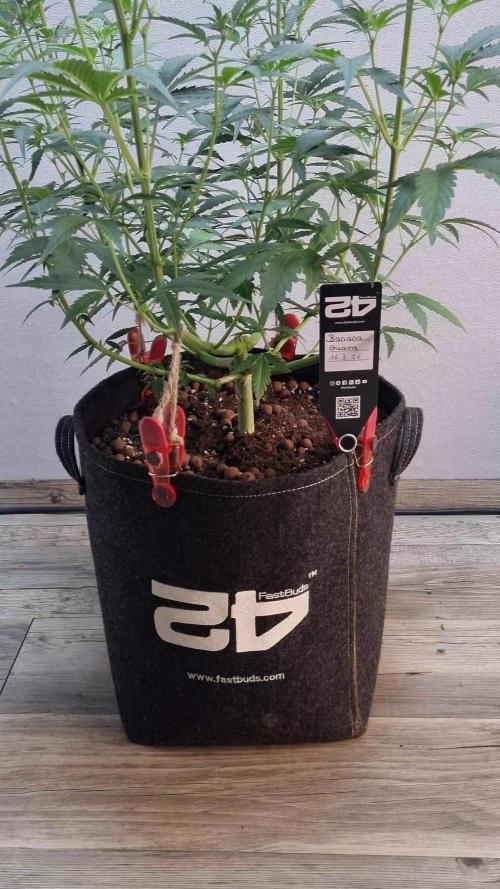
Banana Guava Automatic – Woche 6 (Blüte Woche 1)
Meine Banana Guava Automatic befindet sich aktuell in Woche 6 und hat in dieser Woche in die Blütephase umgeschlagen. Man erkennt deutlich, dass sie jetzt ihren Fokus auf die Entwicklung der Blüten legt.
Sie zeigt einen durchgehend gesunden und kräftigen Wuchs. Ihre Struktur wirkt stabil und gut aufgebaut, was eine ideale Basis für die kommende Blütezeit schafft.
Die Pflanze macht insgesamt einen sehr vitalen Eindruck und kommt hervorragend mit den gegebenen Bedingungen zurecht. Alles deutet darauf hin, dass sie sich in den nächsten Wochen stark weiterentwickeln und ordentlich liefern wird.
Neue Updates gibt es jeden Sonntag – bleibt dran!
---------------------------------------------------------------------------------------------------------------------------------------------------------------------
Banana Guava Automatic – Week 6 (Flower Week 1)
My Banana Guava Automatic is currently in week 6 and has transitioned into the flowering phase this week. You can clearly see that she is now focusing her energy on bud development.
She shows consistently healthy and vigorous growth. Her structure is strong and well-built, providing an ideal foundation for the flowering stage.
Overall, she looks very vital and is responding perfectly to the current conditions. Everything suggests that she will continue to develop strongly and deliver great results in the coming weeks.
New updates every Sunday – stay tuned!

Likes
9
Share


@Concrete_junglegrowers
Follow
So the gelato41auto and candy Dawg auto are in there last flush and looking and smelling beautiful if you have been following your know they took a beating and im very happyvwith how they have come out

Likes
104
Share


@Wastent91
Follow
Eccoci alla fine è andato tutto secondo i piani, la ragazza aveva però gli steli un po esili rispetto all enorme peso portato dalle cime fresche in fioritura, ho provveduto a legarle tutte a dei sostegni, xke erano davvero molto pesanti 750 grammi di pianta è davvero un bel raccolto! Per il resto è venuta davvero una ragazza con dei colori finali stupendi, cime dure come roccia, non stracolma di resina come le altre sorelle del box ma nel complesso sono molto soddisfatto! Grazie Barney per avermi dato la possibilità di provare questa fantastica genetica! E grazie a tutti voi che mi seguite e a selena di Mars y che ha fiducia nel mio lavoro! Un bacio a tutti! Non vedo l ora di fumare! 😁💪😸🌱🌲💐🧑🌾

Likes
144
Share


@roro_204
Follow
***I’m not sure why but it’s only letting me put 100 growing plants, but I actually harvested 180 plants in three separate rooms of about 300 sqfeet almost each, running in at 350 g per plant ***
Given her being my first grow, I don’t really have anything to compare to but me and my plants have gone through a lot this year.
Definitely going to need filters with this one, for the strong scent.
10 out of 10 would recommend this strain. I tried some fish fertilizer through some of the early growth and everytime I did, I would notice the plants beginning to burn so I completely stopped it, I learned organic is the best way to go if I’ll ever be using fertilizer again. This is the only way I would’ve learned it through experience!
I didn’t think I can make it all the way through with my harvest, but ever since I got on Growdiaries everybody has helped me tremendously with every question I had, without the site my whole to harvest would’ve went to shit along time ago. Haha I really can’t thank my Growmies here enough for all their support. Every time I thought about giving up I would have uplifting comments assuring me my plants we’re doing fine.
A message to all nee growers. Don’t be afraid of failure. Ask questions. I don’t know when my next grow will be but when, or if I decide to grow again, I’ll definitely document it on the best possible weed growing platform.
Cheers friends!
Likes
65
Share


@Dendegrow
Follow
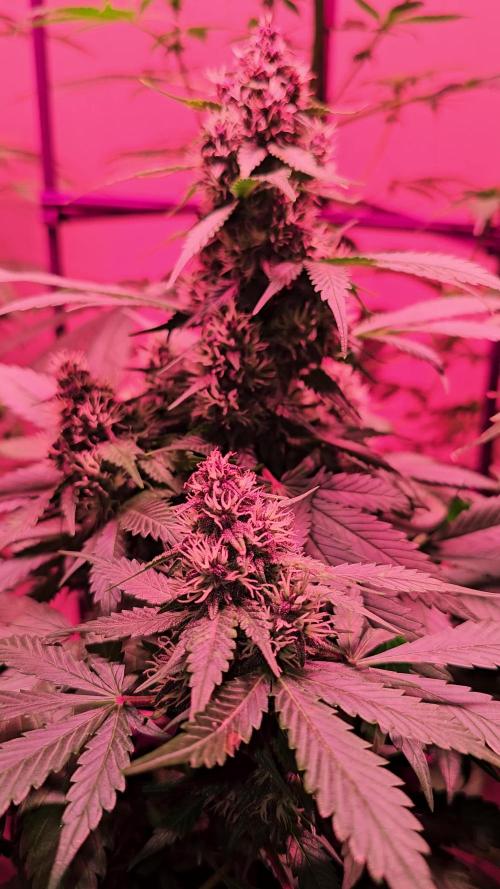
Week 2 of the flowering phase flew by 🌱💨. Unfortunately, I may have overdone it with potassium or kept the water level too high – the classic signs of clawing leaves were evident. Thankfully, they seem to be recovering now and are back under control 💪🍃.
My IR night experiment is showing clear results 🌌: The plants exposed to infrared radiation at night stretched significantly more. This might be especially beneficial for this indica-dominant strain as it leads to better canopy distribution, improved airflow, and reduced risks of mold and disease. Plus, the light distribution is much more efficient now, which I’m excited to see pay off.
On the downside, my Orange Sherbert turned hermaphroditic 😔. It’s hard to pinpoint the cause – overfertilization seems unlikely since I’m using only organic nutrients. I suspect it might be linked to an E-field experiment I’ve been running. To confirm this theory, I’ll conduct a new grow with a similar strain next year to see if the electric field negatively impacts cannabis development.
Stay tuned for updates! Drop a like and follow along for more grow insights 🌿✨. See you next week!
Woche 2 der Blütephase ist wie im Flug vergangen 🌱💨. Leider habe ich wohl etwas zu viel Kalium gegeben oder den Wasserstand zu hoch gehalten – die typischen Anzeichen von Adlerkrallen waren sichtbar. Zum Glück scheinen sich diese jetzt zurückzubilden und sind wieder unter Kontrolle 💪🍃.
Mein IR-Nachtexperiment zeigt bereits deutliche Ergebnisse 🌌: Die Pflanzen, die nachts mit Infrarotstrahlung bestrahlt wurden, haben deutlich stärker gestretcht. Das ist besonders bei dieser indica-dominanten Sorte wahrscheinlich von Vorteil, da es zu einer besseren Verteilung des Blätterdachs führt. Dadurch verbessert sich die Luftzirkulation, das Risiko von Schimmel und Krankheiten wird minimiert, und die Lichtverteilung wird effizienter. Ich bin gespannt, wie sich das weiter auswirkt!
Leider hat meine Orange Sherbert gezwittert 😔. Woran das genau liegt, kann ich schwer sagen. Eine Überdüngung halte ich für unwahrscheinlich, da ich nur biologischen Dünger verwendet habe. Ich vermute, dass mein E-Feld-Experiment eine Rolle spielt. Um das zu bestätigen, werde ich nächstes Jahr einen neuen Durchlauf mit einer ähnlichen Sorte machen und prüfen, ob das elektrische Feld tatsächlich eine ungünstige Rückentwicklung der Pflanze verursacht.
Bleibt dran, lasst ein Like da und folgt mir für weitere Updates 🌿✨. Bis nächste Woche!
Likes
11
Share


@Chubbs
Follow
420 Fastbuds
FBT2304 Week 3
Merry Christmas Grow fam. Week 3 for these beautiful plants. I upped the feeding to 1000ml every other day and so far seem to be handling it fine. Will do a mild defoliation this coming week removing the lower leafs at soil level. All in all Happy Growing
Likes
3
Share


@Cupboardgrowuk
Follow
Starting flush on both think blueberryz z will be ready by next week limoncello about 5 days after. Going to do a cold shock on then start of next week try get some purples. Blueberryz has stretched something rotten know what todo next time to stop that. Limoncello just perfect got 2 more seeds thunk may make one

Likes
4
Share


@603grower
Follow
These two girls grew in the back of my town with very minimal attention. I only had them in 3 gallon pots. I got about 2 ounces off each plant of top shelf didn’t even trim the larf there wasn’t much. I would definitely recommend Captain Redbeard’s genetics.


Likes
54
Share


@Ganjagrandaddy
Follow
Day 63 flowering (77 days since flip). This lady smells beautiful now. Her pistils are golden orange in so much of her bud but still pushing last ditch attempts to save herself. Bud size is good and they are rock solid too. love this girl and will be sad to cut her down. Yellowing off nicely ready to eat up those chlorophyll stores in the darkness. She will be in her dark period this evening , 48 hrs and she is going to be trimmed and ready to dry.
UPDATE☆☆
day 67 and she is out of her dark period trimmed and hanging for her final harvest. Some great buds on her and i think about 6 oz of solid , orangey nugs. cannot wait to try her out.

Likes
5
Share

@GreenEldritchGardens
Follow
Final days and going be chopped and dried! I think she struggled a bit too much without any nutrients in the final days but not too late as well imo.
Likes
7
Share


@CouchlockAussie
Follow
Day 69 late report this week, starting to turn milky so about another 2 weeks i think


Likes
3
Share


@Passionatos
Follow
Start of the bloom phase I got some nitrogen deficiency but I could handle the problem by giving them some extra nutes

Likes
9
Share


@d0cterstrain
Follow
end of week 3. bud sites formed. lowers trimmed and time to swell up. lezgoo. thanks for liking this hehe. grower love


Likes
43
Share


@Sabac
Follow
Última semana de mis plantitas
Hoy corto 12 de 16
Fue un cultivo sin problemas.
Y creo que viene buena producción
Recomiendo 100% los fertilizantes hesi buenísimos.
5 cultivos con ellos y 0 problemas.
El sustrato Biobizz light mix excelente
Las semillas de barneys farm uff pura crema. Eva seeds recomendables y las sweed seeds buenisimas semillas para seguir cultivando. Los Led yxo para ser de un perfil bajo qué no a toda la gente les gusta cumplen la. Función 480w de pura potencia en un espacio de 120x120 los recomiendo para gente que tenga un presupuesto bajo.
Ahora voy por unos sobre 600w aunque los reforzaría estos con unos led de 100w
.
Bueno feliz con los resultados.
Esta semana mostraré los resultados de las plantas cortadas.
Se vienen más cultivos
Salu2

Likes
4
Share

@Samsationalseeds
Follow
Day 57-63
Week 9
Halfway through last week, I noticed a issue with a wilting, deep water culture bucket.
I realized there was a possibility I created an imbalanced solution for my plant that shuts them out, even though it was in the correct p.H range I probably encouraged mold or stagnant root growth.
They are all picking up.Don't look stressed.They look happy and pointing towards the light.


Processing
Likes
Comments
Share


