The Grow Awards 2026 🏆 


Likes
Comments
Share
@ThinkDankGenetics
Follow
Closing thoughts. Damn easy plant to grow responds well to training have fairly uniformed plants only on kept the purple trait but that's ok we can selection breed for that. I am happy I decided to go this route with the breeding the girl scout diesel really complemented the mother plant

Likes
70
Share
@Kid_Colombia
Follow
They are doing good, flipping into flower next week. They love the new light.
It’s been a little too hot since adding in new light. 30-31 degrees during peak heat - thinking about getting an ac machine next week


Likes
13
Share
@masterofsmeagol
Follow
7/6 Plants looked great thos morning. I WATERED A GALLON to the 50 and split one between the two tens. Top of the bags are still moist amd they still have some heft. I'm hoping this will at least carry me 48hrs. These are BIG plants and the wind goes right through those bags and dries them out. I'd rather have that though than worry about overwatering. I noticed some minor deficiencies on a couple plants so it's time to start the nutes. Calcium I'd guess. Just a beginning stage but it's time. Next feeding they'll get some food too. I'll still monitor during the day to make sure they ront dry out. It's amazing how fast they come back after they dry out but it stresses them.
EDIT: I WENT OVER AROUND 2OM AND IT WAS OVERCAST AND 83°. ALL THE PLANTS LOOKED GREAT AND ALL OF THEM WERE STILL SLIGHTLY NOIST EXCEPT THE 10TH PLANET. THEY ALL HAD SOME HEFT TO THEM TOO. THE SUN IS OUT BRIGHTER NOW BUT IT MAY RAIN TONIGHT AND CONSIDERING HOW GOOD THE PLANTS LOOKED I THINK IVE FOUND MY CORRECT WATERING RATIO. IM NOT GOIMG TO 9VET WATER IN THESE GROW BAGS WITH ALL THIS WIND. I NOTICED SOME FOUR LINED PLANT BUG MARKS ON ONE OF THE LITTLE PLANTS AND REMOVED A FEW LEAVES FROM THAT THIRSTY 10TH PLANET THAT COULD BE SEPTORIA. IM GOING TO TREAT IT BUT I HAVENT DECIDED WITH WHAT YET. I MEAN I NEED TO MAKE SURE ITS NOT JUST PESTS OR WATER SPLASHES FIRST TOO. I'VE BEEN PRETTY SANITARY THIS YEAR. IF I HAD A PLANT THAT DIDNT RESPOND TO TREATMENT AND IT WAS INDEED LEAF SEPTORIA I THINK ID RATHER SACRIFICE THE PLANT THAN RISK SPREADING IT. IM PROBABLY JUMPING THE GUN BUT I NEED TO BE READY IN CASE THAT'S THE CASE. IF NOT FOR LOCAL LAWS I WOULD THE PLANT ISOLATED. BUT IM TALKING I PULLED MAYBE FOUR LEAVES OUT OF THE LEAFIEST BUNCH AND INSPECTED EVERYTHING.
7/7 We got thunder storms last in the afternoon and last night. For at least 45 mins it rained harder than I've EVER seen it. Pure sheet rain. It turned over to heavy rain before moving out. The plan was to water everything this morning and start feeding. As I said in the video the soul was still moist amd the bags still had some heft. Not like I just watered them though. I stopped by a local dispo on my way home and talked with the best grower I personally know (thanks Junior) and his advice was the same as what I was planning. I planned on going around noon to check them. He said I could probably wait until like six and then when I do water give them like a 1 1/2 gallons to make up for that monsoon we had earlier. I showed him the video and explained how I have been watering. My intuition feels good about this. I may go check on them earlier but I don't think it's necessary. As usual I'll update as I go.
EDIT: AS SUGGESTED (WELL I SPLIT THE DIFFERENCE) I WENT OVER TO FIND ALL NY PLANTS LOOKING GORGEOUS EXCEPT THE 10TH PLANET REVEG THAT WAS A "LITTLE" SAGGY. I LIFTED THEM AND FELT THE SOIL IN THE BAGS. I DECIDED ON WATERING AS PLANNED EVEN THOUGH IT MIGHT HAVE MADE IT UNTIL NORNING. THIS WAS MY WATERING DAY ANYWAY. HOWEVER I ONLY WATERED 1 GAL PER 20 1.5 FOR 30 AND .5 FOR 10. I THINK THAT WILL WORK OUT GREAT WITH THE UPCOMING COOLER TEMPS. IT WAS SO HOT. DIDNT HAVE TIME BUT SHIT IS LOOKING GOOD.
7/8 Finally that hot streak has broken. It's in the 70s and it rained a little last night. Had to use an iPhone and send it to me because my phone was dead. My plan worked out great and everything is looking fantastic. We may get some rain tonight but I'll be watching the forecast. I DO need to feed and may do that. I might wait until next week. I also need to figure out what to do about that four lined plant bug. The birds that perch on my cage do a good job getting pests. Knock on wood I haven't seen many. I killed one pillar and there's just that four lined plant bug. That's really the only damage. I'd Hate to spray my girls with a bunch of shit over ONE bug. We shall see and I'll keep this updated.


Likes
3
Share
@Willy_Balls
Follow
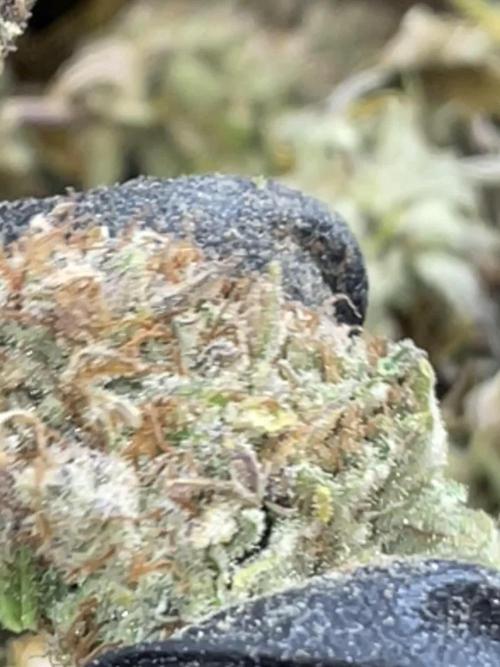
Getting chunky and frosty. Some very nice specimen in these. Lovely terps and I feel they are going to be a looker. Some colors are already poppin. And they still have a lot to go.

Likes
19
Share
@Sti_Cazz
Follow
The switch from last week to this week, veg into bloom, has gone super fast!
I've done 2 waterings this week, 1st with just water and second I added bio bizz bloom 1 ml/l, root booster and cal mag. All at 1ml/l and this time i took the time to check ph and ppm.
I had to lower pH (scary) for the second time from 7.1 to 6.1 and I'm seeing definate effect in the amount of white pistil growth! So much more vigorous the last grow, when I overfed.


Likes
20
Share
@MMSC16
Follow
Day 77 - June 18
June 18 - 06.00AM One Amber trichome found. Will water with 5L of water at 6.3PH this morning. Wilted leaves are still springy. I'd like to defoliate but will wait until they're completely wilted.
June 18 - 06.45AM Soil is still cold, a little moist. I'll water at approximately 9AM
June 18 - 10.45AM Removed dead leaves to avoid pests (as sharing tent with outdoor plants at night).
June 18 - 10.45AM Watered 4.5L to runoff at 6.3PH. Time taken approximately 1 hour to saturate soil.
June 19 - 09.00AM Trichomes are starting to morph from clear to cloudy. Each clear head is now about 50% cloudy. There are slightly more light amber trichomes appearing. I suspect just under a week remaining.
June 20 - 07.00PM Found another amber trichome on a more developed cola. With more half-clear trichomes becoming cloudy. I suspect I'll chop in 5 days or so. Leaf necrosis is developing further with some fan leaves (with trichomes) are decaying. I'd really like to see more purple by this stage, but I'll settle for a pineapple fade.
June 22 - 08.20AM Temperature ate 78F at ground level. TOO HIGH! Had to turn the AC off due to partner being cold overnight. Possibly lost terpines+potency - frustrated. Trichomes still seem too clear for my liking.
June 22 - 10.40AM Watered 4-5L to runoff at 6.3PH. Should have watered yesterday, though pot was still relatively heavy. Removed one dead leaf resting on budsite.
June 23 - 06.00AM Removed a few dead leaves. Trichomes are still cloudy. Some milky, it's close - though little to no ambers.
June 24 - 07.00PM Removed more dead leaves + 1 healthy accidentally. Trichomes are about the same. Removed all LST ties.
Likes
Comments
Share
@eldruida_lamota
Follow
Vamos familia, actualizamos la tercera semana de floración de estas Frosty tooth de Seedstockers, aplicamos varios productos de Agrobeta, que son increíbles para aportar una buena alimentación a las plantas.
Temperatura y humedad dentro de los rangos correctos dentro de la etapa de floración.
La tierra utilizada es al mix top crop, por cambiar.
De 5 ejemplares seleccioné los 3 mejores para completar el indoor y trasplanté directamente a macetas de 7 litros, el fotoperiodo a 12/12, aplique una poda de bajos, se ven bien sanas las plantas, tienen un buen color y progresan a muy buen ritmo por el momento, las plantas ya empezaron a formar las flores.
Agrobeta:
https://www.agrobeta.com/agrobetatiendaonline/36-abonos-canamo
Hasta aquí todo, Buenos humos 💨💨💨.

Likes
2
Share
@Bigzaddy42
Follow
Sorry been working a lot. But switched to outside grow . Plants have got huge.


Likes
4
Share
@knnabisgrower
Follow
En la segunda semana de vegetación fertilizamos con un estimulante de crecimiento, aplicando 1.5ml / litro con p.h regulado en 5.8.
Likes
11
Share
@Paradox_1ste1
Follow
The plants look very healthy and they have big and dense buds , ill havr to wait anothe week or cuple days until harvest even tho it may be a bit soon for it. One of the plants has started to root its top head of the buds , but i soupose its because of the temp . The air is getting dry cuz of the hot weather even tho im using 250w-400w lights on them . Trichromes look preety good and the bud is frosty . Some of the plants are not ready yet for some reason so i think i have to give them a bit more time
Likes
167
Share
@DeepWaterGrower
Follow
🗓️ 6° WEEK FLO // DAY 36-42 (from switch) // DAY 113-119 (from dry seed)
⚡- Light: 30 cm / 250 watt;
⌛- Schedule: 12/12;
🌡️- 22° C - 65% RH average;
📑- PH 5.9 - EC 2.3. PH is dropping on the #2. I'll change the DWCs next week, meanwhile I'm trying to keep the PH in the right range;
💧- 7° DWC change;
🍔- Flowering blend: tap water EC 0.4 + Silic 0.5 ml/l + CalMag 1 ml/l + Hydro A-B 1.8 ml/l + Oligo Spectrum 2 ml/l + Green Sensation 1 ml/l;
🌱- Things are moving forward, both are gaining weight.
🆕- Last week I got the TrolMaster TCS-1 (@TrolMaster_Europe) and I started to track my grow box data. I will add these info once I harvest!


Likes
8
Share
@Weedganja420
Follow
Muy buenas amig@s!!
Preciosos los colores de esta cepa!
Empieza a tener su olor tan unico, la que cultive en exterior olia igual y seguro que de sabor estara igual de bien o mejor!!

Likes
14
Share
@Boilly
Follow
Once again I was away the whole week. They are definitely starting to flower. My post next week they will be full flower. Got lucky all 4 are females. Some minor bug issues as some small holes on leaves. Going to have lots of buds sites. 1 more week of LST then its off. Going into week 5 and apparently 4 more to go. Happy growing


Likes
19
Share
@Philhsy
Follow
Its a vigorus plant, grows steafy and gets somewherw about a mette if a little lst complied! Huuge colas on all plants but one stood out so, it had treal csn sized rock hard nuggets. Full of trichtomes sticky as hell. Smelling like hash candy Growin it twice now and i will grow it again, its a lovely smoke

Processing
Likes
1
Share


Likes
75
Share
@Mr_und_Ms_Lue_Roots
Follow
Hallo alle miteinander,
Leider einen Tag verspätet das Update, doch als wir gestern Abend noch feststellten, dass wir in dem Pot mit der Purple aus unserem Garten Ameisen bzw. Fliegende Ameisen im Substrat haben, sind wir erst einmal erschöpft ins Bett gefallen hehe. Wir bitte dahingehend um Verzeihung und ggf. Verständnis!
Vielen Dank im Voraus dahingehend 😉
So nun wird sich jetzt erst einmal mit SF- Nematoden um die Ameisen und auch zur Sicherheit gegen weiter Trauermücken gekümmert. Wir haben noch Zeot bis Anfang August und somit kann die Purple die sich im Wachstum befindet, noch ein wenig austoben. Insofern auch wiederum positiv, denn würden wir die Lampe anmachen, würde es wegen der Trocknung noch wärmer werden. Also soweit alles ok bis hierher. Nur die eine Auto von Fast Buds überrascht uns sehr 😄 Es lohnte sich sehr diesen Breeder auszuprobieren, keimrate von 2 Samen bis hier hin 100 %
Bisher sehr begeistert 😎
Ein kleines Tagebuch wird jetzt baldig auch existieren dahingehend 😎
Die Purple haben wir noch mal entlaubt damit sie besser Atmen kann und oder auch kein Schimmel sich bildet.
Ansonsten läuft alles wie gewohnt.
Vielen Dank im Voraus, an alle die vorbeigeschaut, geliket und oder auch Kommentieren! 😉
VG euer Team Roots✌️
