
Likes
Comments
Share


Likes
4
Share


@Creme_De_La_Creme
Follow
day 70 was harvest day !!
really fast strain, 24h light ON really played a big role as well
frosty buds and amazing strawberry smell, now lets dry it !!

Likes
5
Share


@Ninjabuds
Follow
My gorilla cookies from fast buds is really starting to fill in now the buds are getting nice and large. Also the buds have really really pretty tricombs there super white and just pretty. The plant has a super strong smell a carbon filter is a must with this one for sure. Even with one plant it’s to much for my carbon filter you can smell it thru the hz. This plant has a very high potential for making extracts
Likes
11
Share


@Willies_Organic_Gro
Follow
Great flowers with beautiful colors! Smells of sweet oranges and grapefruit sour grape woody spicy chem aromas and tastes of earthy sweetness with a hint of citrus.

Likes
8
Share


@GERGrowDesigns
Follow
Dear Growers ,
Welcome to Week 8 or Flower week 5 // Day 56-63 from WeedSeedsExpress Wedding Cake Auto.
Incase of Moving to a New Home . I Decided to skip 3-4 Weeks from every Diarie of the 12x12 Automatic Project . Everything should be Normal in the next Weeks .
Whether you're a beginner or an expert, you are warmly invited to join, ask questions, and share your own experiences along the way!
Project Setup & Conditions:
• Brand/Manufacturer: WeedSeedsExpress
• Tent: 222cmx150cmx150cm
• Light: 2x 720 Watt Full Spectrum
• Humidity: 50%
• Soil: Narcos Organix Mix
• Nutrients: Narcos Products
• pH Value: 6
If you want Germinitation results like mine , check out Kannabia Seeds with my link [https://www.kannabia.com/de?ref=61966] and grab the germination device or the strains I used . Trust me – it’s worth it for sure !
Get another 20% Discount at all products using the code [GGD] at the Checkout .
Stay curious and keep up Growing —we look forward to welcoming you back for the next chapter soon!

Likes
4
Share


@LittleBigTrees
Follow
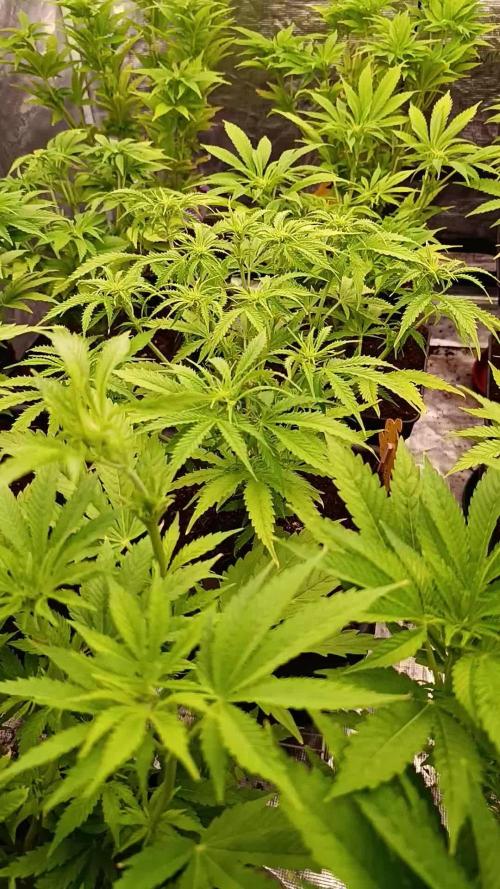
The plants have limited space and are in 4 litre pots too keep them controlled.
This week I defoliated again and started adding sugar royal.

Likes
67
Share


@BarneyRumble420
Follow
Welcome back guys 💪💪 this week has been astounding in the trichome production and bud production absolutely blown away with the frost this gorilla cookies auto is producing, and a smell that can back that up holy cookies 🍪🍪🦍, very impressed with this strain, thankyou again to everyone that stopped by 💪 happy growing ✌️
www.2fast4buds.com


Likes
2
Share

@420DeepGrow
Follow
📆 Semana 3:
Con la EC ya controlada y estable, se termina de ajustar el pH en el coco, afinando la disponibilidad de nutrientes. Las raíces se mantienen blancas y activas, con buena colonización del sustrato y absorción uniforme.
Las plantas consolidan el estiramiento, mostrando ya preflores claras y una estructura más definida. El verde lima se va equilibrando hacia un tono más sano, manteniendo buena turgencia y orientación hacia la luz.
Se intensifican los primeros aromas y la entrada en floración es ya evidente, con una transición limpia tras la fase de ajuste.
Seguimos creciendo fuerte 💪

Likes
7
Share

@BalconyBoy
Follow
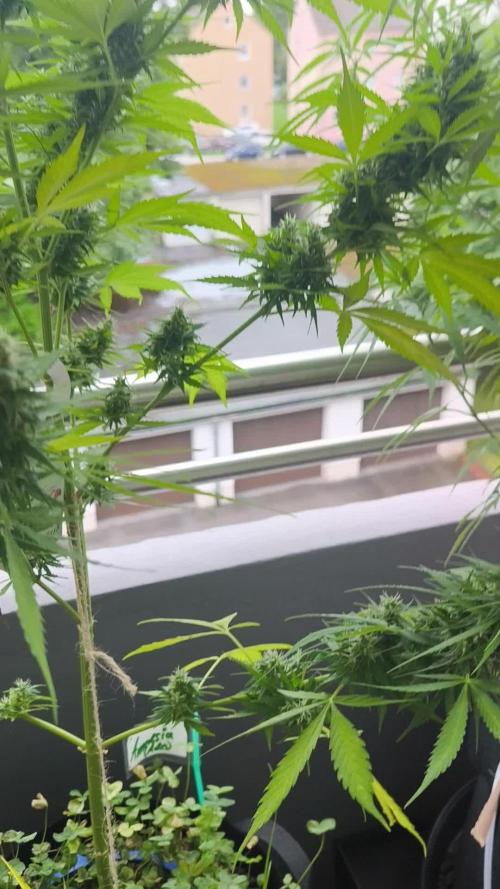
04.08.25 the Auto Amnesias budsites are thickening up week after week, my guess is four more until chop, let's see. No bugs, fungus or other pests visible. Amazing to see this with powdery mildew present on the Quick Sherbet right next to it. It gets whiffs of peroxide spray but I don't drench it to avoid damage to the developing buds that are unaffected. Midweek the sun is said to pick up again at least for a few days in this unusual cloudy and cold stretch of summertime.

Processing
Likes
1
Share


@Ganjagrandaddy
Follow
DAY 49 : Another week passes and these 2 ladies are still up for the fight to another week.
Banana is still struggling g in the middle and cant seem to get ahead. She smells beautiful up close but is sadly not a great competitor so far. What she does have in buds is smelling nice and they are fairly solid to touch , just not a big plant really.
Monster Zkittelz on the other hand is a beast of plant . I Have been pulling lowers up to the light this week and she is so covered in secondary growth with nice sized , glistening buds that smell candy sweet . Grows very like GG in her thin arms and bigger buds but with a scrog net this strain would produce so well. I am not disappointed in her in any way. Another week and let's see where she is at then.
Processing
Likes
7
Share


@Kushizlez
Follow
Day 49-56
(Day 50) I hooked up my carbon filter to the humidity controller and it is keeping the room exactly at 65-70% RH night and day. It looks like it turns on about every 45 minutes for about 5 minutes so it allows me to run the co2 bag properly. I don’t even have to use my dehumidifier. The room is 100% dark now too. Even the small red lights on the space heaters.
Not going to feed anything other than foliars this week.
(Day 51) Blackberry #4 & #8 #9 and white widows #2 & #3 are all confirmed males. Chopped them down and recycled the soil. White widow #1 is the first official female and I’m starting to see pistils on the m39/zkittlez too.
Plants seem to be responding to the light fairly well. It’s hung 32 inches above the canopy which is as high as it can go without strapping it to the roof, which may have to happen one day. The plant can get within 6 inches of the light so I’m probably good. The ppfd output is 1800umols which is super high so I want to hang them as high as possible in veg. I wish I could rent a ppfd meter to see if I’m in range at 32”.
(Day 52) Blackberry breath #3 is the first official bbb female to show. I decided to scrap BCTG #2. It sounded like a good strain but after looking at pictures of people who have grown it online, it doesn’t look up to my standards. I found a very small patch of powdery mildew on one of the leaves so I’m not even going to start with that shit again. I’m really thinking about scrapping the m39/zkittlez and the white widow too. I’m praying that I get at least 4 females of BBB.
I tried super cropping for the first time today. A few of the branches I definitely squished a bit too much as they turned quite brown and looked dead within a day.
(Day 53) Despite the m39/zkittlez vigorous growth, I know it will be a shitty strain that will most likely herm as it’s from a bag seed of low grade weed. I’ve decided instead of scrapping it, I will use it for experimenting with a new chemical powdery mildew preventative. If it dies oh well. I doused it and chopped a limb off a few hours ago during lights on and it seems fine.
(Day 54) I’m about 90% sure BBB 6&7 are both female. #2 & #5 are looking like males but too early too tell. #1 is really tough to say. Just gotta be patient I guess. #3 has a great spread out structure, I hope it doesn’t stretch too much. The scrogging is a priority. I put up the scrog net just to see how it fits. It’s a little small around the edges but that’s fine. So it’s looking like out the 9, I would be lucky to get 4 fems if #1 & 7 would show forsure already. If #1 is a female I have my 4 and I can throw out the white widow. The white widow is just insurance at this point.
Super cropped plants have recovered nicely. Going to continue doing this more.
I’ve noticed that the plants that were put into my custom soil mix have very small fan leaves compared to the fabric pots of straight promix and dry amendments. Could also be the fabric pot is helping dry downs too.
(Day 56) I’m seeing some yellowing so I’m going to give a foliar spray just too keep some deficiencies at bay. All of the plants are stunted except the m39 and bbb#3. Node spacing has also reduced significantly. I can’t help but feel it’s from the intensity of my lights but maybe they just need a transplant into some new soil something. Luckily the stunt and droop is only really happening to what I suspect are male plants anyway.
Leaves are looking twisted and gnarled on #5. Going to move it into the veg tent for a while.
I’m going to mix up and amend my Destiny/coco blend today and transplant bbb#3 and 6 & 7 in a few days.
I mixed them up in contractor bags making sure to toss and turn vigorously.
Here is my blend:
2 bags 40L Destiny soil
2 bags 40L coco
700ml glacial rock dust
700ml oyster shell flour
700ml nature’s pride bloom
300ml basalt rock dust
150ml langbeinite
150ml nature’s pride veg
I am also going to try the Destiny top dress as it’s only 13 bucks a bag and full of good shit. I’m trying to not feed heavy in flower other than 2 or 3 top dresses and 2 teas and nothing after week 5. Because it’s taken so long for the plants to show sex, when I transplant into the 10 gallon pots, they should have more than enough nutrients too keep them going strong all the way through flower with just water. I’m a little skeptical about that though. Besides teas and dressings are fun. Everything should be broken down by week 8 or so.
Will transplant in a few days.
Likes
30
Share


@Velk1
Follow
This week was spannabis Barcelona had such a great time met some great people and Made some good friends I also managed to get my hands on some fire genetics from a buddy who hooked me up from the states and was also judging the monsters cup! Even got to sample the entry's man that was some dope smoke and chill can't wait till October in Madrid 👌🏾🙌🏾


Likes
5
Share


@coihue_ancestral
Follow
La planta más pequeña evidencia debilidad pero no sé a que se debe
Las hojas se doblan hacia abajo en los nodos mas cercano al sustrato
Saludos

Likes
Comments
Share

@eldruida_lamota
Follow
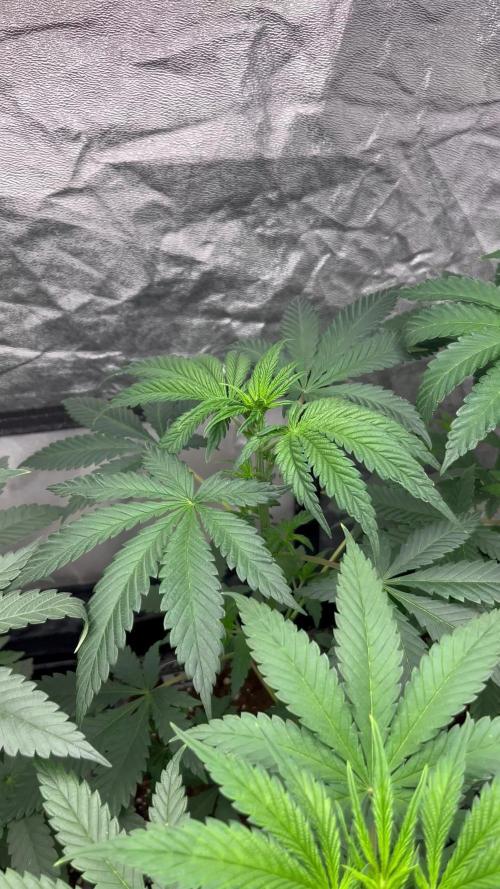
Que pasa familia, vamos con la quinta semana de vida de estas Forbidden Mochi feminizadas de Seedstockers.
Vamos al lío, las plantas se trasplantaron a macetas de 7 litros.
El ph se controla en 6.5, la temperatura la tenemos entre 24/22 grados y la humedad ronda el 70%.
El ciclo de crecimiento puse 20h de luz, el foco está al 50% de potencia.
Me gustaría estar más encima este cultivo pero la salud me está impidiendo un poco este 100% con el proyecto. Con suerte la semana que viene andaré mejor.
- os dejo por aquí un CÓDIGO: Eldruida
Descuento para la tienda de MARS HYDRO.
https://www.mars-hydro.com
Hasta aquí todo, Buenos humos 💨💨💨


Likes
11
Share


@Natesnugs
Follow
Day 99 dealing with annoying humidity issues seeing some damage on the leaves i think becuz of the humidity issue i got it all foxed up now an they look happier so hopefully i can maintain that the alien is showing no signs yet so shes really resistant to what ever it is so thats good
Day 100 getting dialed back in im hoping iv fixed the problems
Day 101 seems every plant is mostly happy but the qc blast still figuring out mayb a root problem
Day102 trying a flush with hygro products the qc blast is still dealing with problems hopefully this will fix it everything else seems to be doing better
Day 104 i think the flush fixed it
105 trics colors and smells coming in 🙌


Likes
57
Share


@1Right_Angle
Follow
May 21st
- start of week 8 flower for the A.G. & C.G., they have their own deadlines approaching so there will be some pics shortly of the trichome status on all 3 plants.
- a week behind the other 2; BlueGod has a shorter schedule and is under the spotlight now that its been flushed
- a/c & dehumidifier are now in service and I will be getting the bugs out of the system re: “limits” with fans, temp & humid targets, heaters etc.
- just giggling about how beautiful all if this bud is. Something has gone incredibly correctly this grow.
*** FOR THE FIRST TIME EVER THERE ARE NOTHING BUT REALLY SOLID NUGGETS ALL OVER THE PLACE !! That, is a first
- flushed plant will receive waterings w/ Rezin & Molasses till harvest.
-going to push a.g. & c.g. with one more big feed tomorrow.
~ 6L ea.
May 23rd,
- often i make little comments about how small each of the plants are; and 1 of the key reasons for that... is that I only Vegged the plant’s for 5 weeks, and then still controlled height with HST...
these plants are and have been an amazing grow, but next time they get Bigger b4 the Lites go Out !!!
May 24th, Trichome images required a little bud from each plant. And the Acapulco & Colombian plants are the furthest from harvest, but both did show a few Amber trichomes.
Together I shredded the 2 (a.g. & c.g.) buds and put them in a hot dry place for the day.
After dinner and on a whimsy i rolled them up & did I ever get stoned/baked from a couple small buds from the adolescent plants. Famous but young, and did they ever Kick.
That was so inspirational from a couple of legends. Cannot wait for a special harvest and a critical cure !
May 25th, the number of Amber trichomes on the Acapulco absolutely lead it directly to a flush on Thursday evening. End of week 8 in Flower. Hopefully the amber sweep is not too aggressive, it would be nice to milk this one along until the leaves are golden...
- And of course, the Colombian is just Soo damn full of crystals. Clear crystals with equal amounts of Cloudy ones and a flash of Amber on the Fringes. CG gets flushed in 9-10 days as per the schedule. We’ll see what happens
May 27th,
- woke the Acapulco Gold up early and gave it a good shower ~ started its day early with 24 gallons worth.
The feeding ingredients above are still the same for the Colombian Gold
- 2 Flushed plants; will be fed as required with water containing 2ml/L Rezin & 2.5ml/l Molasses


