The Grow Awards 2026 🏆 


Likes
Comments
Share
@Hou_Stone
Follow
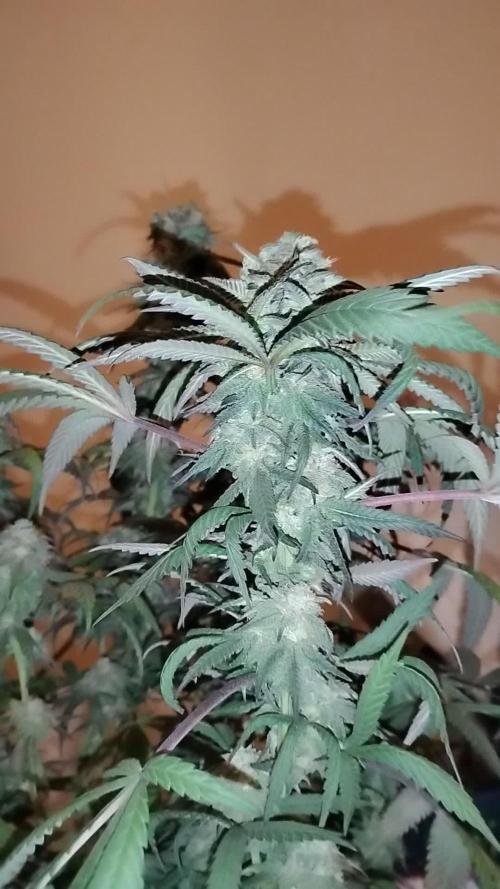
👌It’s progressing, slowly but surely for my 4 young banana krumble 👶🍌
For this grow, I plan to let each plant grow with a large main bud, without topping.
Next week I will cut the lower branches closest to the ground.
-----------------------------------------------------------
💧Watering:
1L on day 9 and 0.5L on day 12
I use tap water, adjust the ph to around 5.8 and water
------------------------------------------------------------
🤩Equipment of the week :
Light FC3000 Mars hydro. power 80% at 50cm
Extractor 6 inch Mars Hydro. power 1/10. ON 24/24h
2 fans to circulate the air inside the tent. Each on for 30 minutes then off for 1 hour. this rhythm repeats itself in a loop
Heating mat Romberg 95x95cm. ON 45 minutes. OFF 30minutes. In a loop
I am adding anti-midge bird stickers 🐦
------------------------------------------------------------
Thank you for your visit and your support with the likes, comments. It's always nice to see you!💚
------------------------------------------------------------
My Instagram 🌱❤️️ :
https://www.instagram.com/hou_stone420/


Likes
11
Share
@Cannibalgardens
Follow
Man another great strain from Divine seeds . The germinating was fast and they were into the soil in no time , within a few weeks I had a great looking female plant . She was topped and trained well giving me 4 solid main branches . The bud development was fast and by the end they were very dense and sticky . I was doing organics for the first 2 months and then synthetic just to go and finish it on the brand Dutch science "bloom" . I was so impressed with the smells and growth that I went and popped another strain at home .. The consistent results made me want to try a other one and so I did . I'm hooked now ..


Likes
13
Share
@DrewbieDoobieNoobie
Follow
I had a scare with this one in week 3 it was looking a little yellow and I had to dial in my watering and feeding but it bounced back.💪 this was the second highest producer of the 4 strains that finished.
Tangie-matic flushed well as you can see in the week 13 video the fan leaf's yellowed up also from heat stress as I had a leak in my filter and the fan. It was blowing hot air in the tent. 90 degrees for one day then it was fixed, lucky for me it was at the end of the cycle. I will grow these again maybe in a sog or try to scrog them better next time. good smelling strain Cheers to Green buzz and 420 Fast Buds.


Likes
1
Share
@eLeMeNt3de
Follow
First time growing Blueberry Auto, found it to fast growing with little margin for error.


Likes
8
Share
@dank604
Follow
Week 4 nutrients and she's responding extremely well. Will continue this dose one more feeding then increase Bloom. I wish I had more space but it is what it is ;)
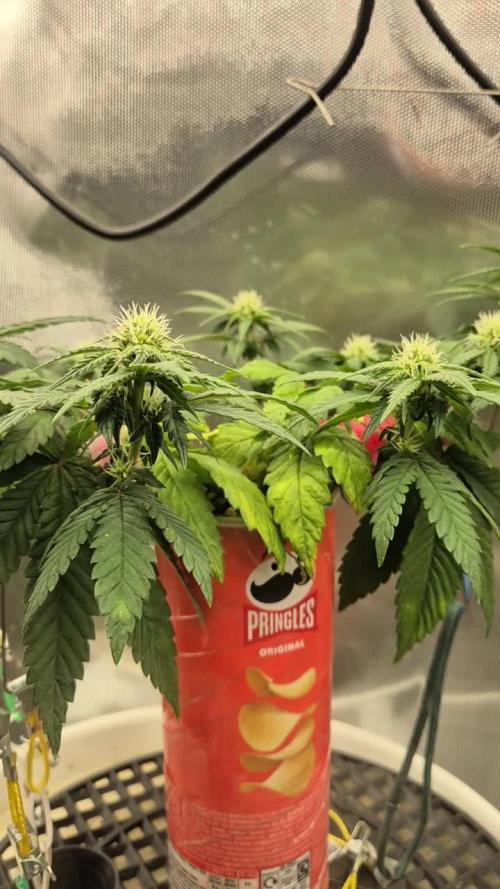
Good news my replacement light arrived and it's installed. :D So satisfying to see the white pistils appearing.

Likes
7
Share
@AestheticGenetix
Follow
7/18/25 chopped and hung. Will update more with smoke reports and final weight
7/20/25 been keeping it roughly around 60%
Been keeping it on the lower end cuz of the size of the buds
Likes
18
Share
@Marmellata420
Follow
Le piante hanno qualche carenza, ho provato a rimediare con il thè organico e con il concime di copertura anche questo organico, ma sembrano non bastare. Questa settimana ho usato dei concimi organo-minerali per avere un effetto più efficace... Si spera🤞. Comunque, tralasciando qualche foglia ingiallita, i fiori si stanno sviluppando bene e hanno un profumo davvero ottimo!

Likes
4
Share
@Lmnhz91
Follow
È venuto un bel casino, perché tra la prima e la seconda settimana di fioritura sono stato via 5 giorni, e al ritorno mi sono trovato 3 piante che avevano preso il sopravvento sulle altre e allora ho potuto solo piegare perché già non ci stavano più. Le piante hanno 25 giorni di vegetativa e 36 di fioritura
Likes
299
Share
@Metatronix
Follow
Good day to all my friends and visitors here on GD.
Decided to finally finish this diary, I took my time with his one ;)
Now we cut the second POGP auto plant, the first cut you can find in week 17. The plant from week 17 weighted 660g. wet, this one finished at 1,85kg. wet.
The girls where autoflower but thanks to me starting this grow in cold day temps (14 degree Celsius) the started flower really late, maybe that's also the reason for all my problems with this strain during the grow?!
The two plants where different phenotypes, the smaller one (from Week 17)though small had nice hard flowers, the bigger one as the only plant from four I grew during the growop started foxtailing.
Both of them branched nicely the smell was quite strong and awoul xD like gasoline and something rotten, it smelled so bad i checked a couple times under microscope for any signs of mold in the flower and to my suprise I found nothing.
Thank God later during drying the smell would subdue to a more generic "hazediesel" smell
--------------------------------------------------------------------------------------------------
SE7000 done it's magic with this grow as with all my other grow ops.
For anyone who is interested in obtaining this efficient and affordable light fixture ($ to gram) here's the link:
https://spider-farmer.com/products/spider-farmer-upgraded-se7000-730w-commercial-led-grow-light/
A shout out to SSSC for the gift of genetics: supersativaseedclub.com/
Thank you all for your companionship on this voyage, I hope you enjoyed it at least as much as I did.
Also thank you for this awesome year together here.

Likes
1
Share
@kauilmayel1996
Follow
Looking good
Las raices consiguieron un trenzado hermoso
No sé si eso es normal pero está planta me sorprende y me sigue sorprendiendo

Likes
3
Share
@Ninjabuds
Follow
My new Gro pros solutions under canopy lights are really making the colors pop
Likes
201
Share
@JamMAKEcan
Follow
They are doing great including the 1 that got ate she is now the baby of the bunch... The other 1 that had burnt leafs also seem to be growing showing new growth.. And the other 1 is 16 inches she is outgrow everything in tent lol... I love growing cannabis
Likes
5
Share
@Chubbs
Follow
These girls are progressing absolutely beautifully. I'm excited to see as it looks like there might be a purple pheno as I've never had that one grow before. No issues and the flowers are getting bigger daily. I did a defoliation and lollipopped up to maybe the 2nd-3rd node. All in all Happy Growing.
Likes
28
Share
@JiggleBudz
Follow
Day 36 - It's week 5 already! The canopy is really gaining height day by day. Tied some more side branches down and adjusted the tie down on the main branch.
Day 37 - Trying to figure out the correct watering amount. 1.5L was too much today will lower tomorrow to 1.2L.
Day 38 - Plant is looking good today. Adjusted the tie downs on some branches. Watered with 1.3L and run off was still around 350ml so lowering tomorrow to 1.2L.
Day 39 - Watering with 1.2L today. There was still no run off, I'm putting this down to the increased fan speeds, longer open tent periods and the plant growing more vegetation. My 2L watering can should arrive today, so I will be able to mix nutrients in one reservoir and water more accurately.
Removed 3 of the bottom most fan leaves which had a branch large enough to support itself.
Day 40 - Watered with 1.5L today. Removed 1 fan leaf and tied down a side branch. Run off was around 100ml. I also set the fan speed back to 1, as I think 2 was too strong for the plant and dehydration levels of the soil.
Day 41 - Watered with 1.6L today. Run off of 400ml (25%). Getting pretty bushy now almost stretching to all sides of the tent.
Day 42 - Watered with 1.4L today. Run off was 150ml (10%). She's now 32cm tall with the light hanging 36cm above the highest tips.
That brings us to the end of Week 6. It looks like we are a day or two away from starting to flower properly. Bring on Week 7!
Processing
Likes
9
Share
@Nookandplant42o
Follow
Earlier watering was fed with nutrients, and my temperature is not low so I should go with minimum to medium quotas with more water avoiding burns, without much runoff mixing with soil compounds and mycorrhizae for better performance I know they need a calcium magnesium for better performance the problem is money I will continue with the use of salt Epson the option I have at the moment, direct sulfur in the soil mix has helped me hear a noticeable change.
watering ph 6.2 solution temperature 20 ° - 0.50 g of large white microreceptor 2 days earlier sprayed with ppm-free water via leaves - lights off to serve as a cool-down shower is great for stomata .
Simple led panel added as main light source 260watts being divided to 3 plants in the fullspectro tent model, did not get much difference in temperatures compared to HPS, is more the same spectro ratio and UV to reach more directly in the trichomes and terpenes. Moc medium leaves look more like Indica while larger leaves bring one more sativa a set a nice strong sweet smell, I prefer to conclude in the end the true tone I feel, she drinks more water than others the soil is easier to drain So I see in her an ability to take more quotas of nutris, slowly being able to take if necessary always try to avoid burns ...

Likes
9
Share
@mangodalat
Follow
Start 12/10/2020
Finish 23/1/2021
I grow outdoors and use organic farming so there isn't too much to say. I just want to talk about a few things about strain: - Odor: not strong and very pleasant, I think it is suitable for both indoor and outdoor planting, but difficult to detect by the smell. - Bud: strong, many trichromes and fast growing. - Color: both plants and buds are green. - Height: short trees - Yield: good (because my country usually shines on 12/12 in sunlight, so plants grow slowly and bloom early so the output will not be high). Here's what I can say about this strain. Thank you for watching this diary and see you in the next diaries in 2021.


Likes
42
Share
@MrJoint
Follow
✂️ Defoliation one more time and LST adjustment.
🥦We stay training.
✌️🎃Thank you for checking my cultivation.
