


@Budz_Bunny
Follow
Week 2: The adjustment
Hello dear growers and groweresses,
it’s time for an update on my grow. My plants have completed the second week and have continued to grow. But they also faced some challenges that I will tell you about.
The adjustment
My plants have adapted to the new conditions in my room this week. I realized that I had my lamps too close to the plants and that they got too much light and heat. This resulted in them not developing as well as I had hoped.
I therefore hung my lamps higher and reduced the intensity of the light. I lowered the PPFD (Photosynthetic Photon Flux Density) from 400 to 280, to give the plants a more comfortable environment. The PPFD is a measure of the amount of light that the plants receive per square meter and second. The higher the PPFD, the more light the plants get, but also the more nutrients and water they need.
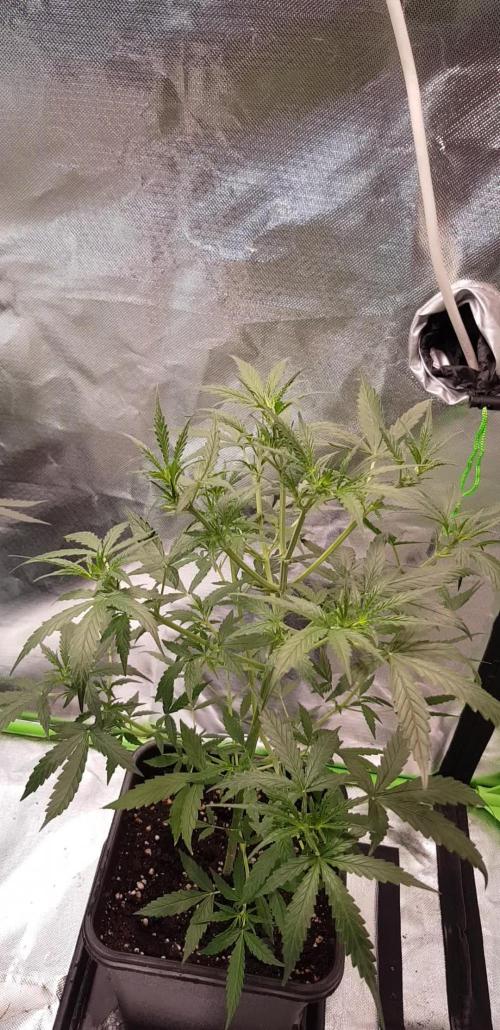
The plants accepted the change very well and recovered quickly. They started to grow stronger again and formed more leaves. They also got a nicer color and look healthier.
One plant that suffered a lot was the Frosty Nightmare. She was overwatered and had trouble developing. She was smaller and weaker than the others and had yellow tips on the leaves. I therefore gave her less water and moved her away from the other plants, to give her more space and air. She recovered and grew again. She is still the smallest of all, but she has potential.
I also increased the temperature in my room by 1 degree, to give the plants more heat. I set the temperature from 22 to 23 degrees Celsius, which is still in the optimal range for the plants. The plants liked that and showed me that by their growth. I let them vote democratically, by observing the plants and interpreting their reactions. :D
The water filter
I also want to introduce you to my water filter from Watertrim, which I use for my grow. It is a great product that saves me a lot of time and money and is also better for the environment.
The water filter has only two connections: an inlet and an outlet. So it has no waste water, which would otherwise go into the drain. It has different options of the filter, depending on how much water you want to filter and how high the EC value of the tap water is. The EC value is a measure of the electrical conductivity of the water, which depends on the dissolved minerals. The higher the EC value, the more minerals are in the water, which are not always good for the plants.
My filter filters at an inlet EC of 1.0 1000 liters, before it needs to be renewed. Since my tap water has an EC of 0.5, I can filter 2000 liters with it, until I have to renew it. That costs about 100 euros and works easily and quickly via the post.
The flow is almost 1 to 1 in speed, so no more waiting. I can tap the water directly from the filter and use it for my grow.
I use the filter as follows:
I tap water at the filter.
I pour normal tap water on it, until I have an EC of 0.3.
I add fertilizers etc., depending on what the plants need.
I check the EC again and adjust it if necessary.
I also adjust the pH value, which should be between 6.2 and 6.5, to ensure optimal nutrient uptake.
I give the water to my plants.
The water filter is really a great product, even if it is not very cheap in the purchase with once of 240 - 390 euros. But it pays off in the long run, as it saves me a lot of work and costs and also improves the quality of my water.
u can find it here : https://watertrim.de
The outlook
I am very satisfied with the result of the second week. My plants have adapted well and recovered from the problems. They have grown further and formed more leaves. They have recovered well and showed a great growth. I am very excited about the next week, where it goes to the repotting and the ladies can try fertilizer for the first time.
I will fertilize this run only a little late, even if I use osmosis water this time. The soil from BioBizz is really great and can carry the first weeks well alone.
I look forward to your visits and the next weeks. I will continue to provide you with information and photos and let you participate in my grow.
I wish you a nice day and a good grow! 😊



@Chucky324
Follow
Hello. This is the end of week 10 of flowering... and it's harvest time.
Just shot some quick video's to show what they look like after flushing.
Should take around 4 or 5 days to harvest all 13 plants.
With the weighing of the raw branches before wet trimming them and writing down the weight,
And the taking of the photo's, making them look good, it takes a little longer to harvest doing a diary.
OK. See you in a couple of weeks.
Chuck.


@Lickey
Follow
Transplanted to 5gal to see what happens! Flipping within the week for sure !
Mixed 50/50 444 and 284 Gaia green dry amendments.
Will cut a bunch of clones, trim the fan leaves and flip 🔜 soon!


@CanabisLoverHobbyGrower
Follow
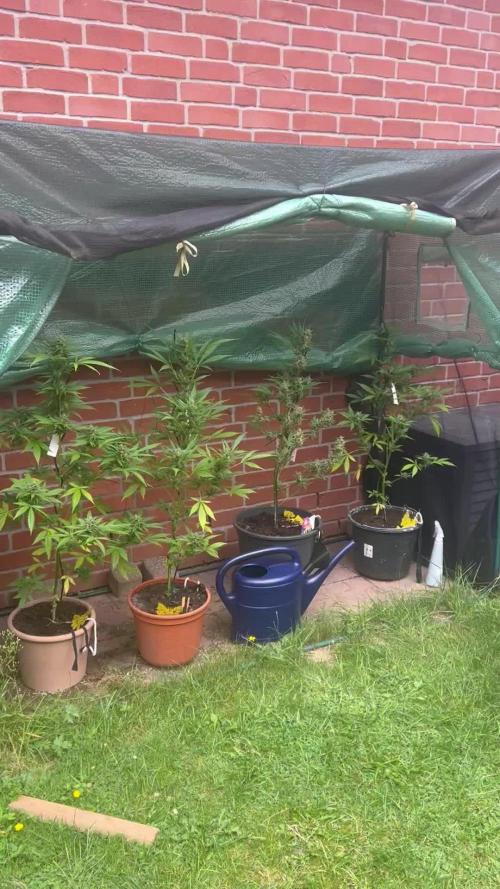
Excellent growth,.. all look so healthy, pink lemonade actually smells like lemonade, who'd of thought lol .... blackberry's smell nice and fruity also .. roll on next week 👌



@Seabass
Follow
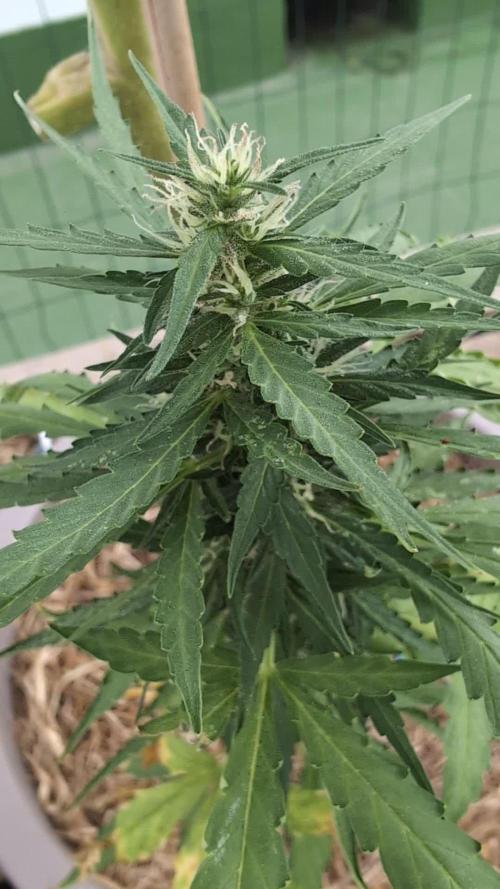
3.8. Weiterhin Schimmelprobleme.
Eine Pflanze notgeerntet und 1/3 der Blüten verloren. Schimmel auch unterhalb der Töpfe gefunden. Jetzt zum Glück wieder trockenes Wetter angesagt.


@nonick123
Follow
En este caso es un diario un poco distinto...
Tengo en mi terraza (outdoor) una maceta de unos 25 litros, con sustrato reciclado de todos los ciclos hechos con BIOTABS este invierno pasado
Durante todo el invierno / primavera, he ido añadiendo a esta maceta los "restos" de estas macetas del indoor, cargados de vida, sustratos y materia orgánica
Cada vez que añadía sustrato reciclado, añadía / renovaba la capa de mulch (heno) para proteger la micro-vida
Además, ha estado protegido por un techo de metacrilato todo el invierno, para evitar que las lluvias torrenciales de mi zona se llevasen los nutrientes
He mantenido este sustrato húmedo con Agua RO
A principios de mayo, planté una tomatera (tomate canario) en esta maceta
Alrededor del 26 de mayo, decidí dejar caer aleatoriamente una semilla de Gorilla Z Auto que me regaló mi amigo StackFarms
Unos días después, nacía con fuerza y vigor una pequeña plántula! 😍💥
Esta maceta se mantiene hidratada con un sistema de riego por goteo (TEMU) muy ingenioso: Utiliza un gotero medico como se usan en los hospitales!
Este sistema ha demostrado (en mis pruebas) ser bastante consistente en el riego diario!
La maceta con la tomatera + Gorilla Z Auto se mantiene hidratada con 1 Litro de H2O diario (RO o agua declorada, depende como me pille)
A divertirse con este experimento!
🚀 FastBuds 15% DISCOUNT code "NONICK" 2fast4buds.com @fastbuds.official
💦 BioTabs 15% DISCOUNT code "GDBT420" biotabs.nl/en/shop/ @biotabs_official
🌱Substrate PRO-MIX HP BACILLUS + MYCORRHIZAE @promixmitch @promixgrowers_unfiltered


shorts_status_processing


@No_Clout
Follow
New grow , New seeds just been put in water for 24hr then they will be put in paper towel for another 24hr before being planted straight into coco with some mykos an inch or two under.
I will update in 48hr.
16/07/18 - all three seeds germed fine all with 1cm+ tails and planted in 80/20 coco/perlite mix with some mykos mixed in and a layer of it 1-2 inch down from where seeds were planted.
I watered them each with 600ml roughly before planting and will update when they break through.
18/07/18 - 48hrs since seeds where planted and can see first set of true leaves already, I’ve got a steady 60-70% humidity and staying at 24 degrees Celsius. I’m going to spray them tonight with some ph’ed water with a tiny bit of rhizo.


@Master_weeda
Follow
Bonjour à tous les padawans et maîtres jedis
Jour84 arrosage avec 2 litres d'eau ph6.3
Jour86 arrosage avec 2. 5litres d'eau ph6.3
Jour89 arrosage avec 2 litres d'eau ph6.3
LE MEILLEUR MOMENT POUR RINCER SON CANNABIS
Le rinçage commence en général deux semaines avant la récolte. Si le plant a une période de floraison de huit semaines, le rinçage doit commencer six semaines après le début de la période de floraison. Il est préférable de regarder de près les trichomes sur le plant pour déterminer quand votre cannabis est prêt à être récolter. Si les petits trichomes commencent juste à passer d’une couleur transparente à une teinte laiteuse et blanche, c’est une bonne indication que les plants peuvent commencer à être rincés. Il faut s’arranger pour que la majorité des trichomes aient changé vers la couleur désirée pour la récolte après deux semaines – ça devient plus facile à faire avec l’expérience, alors accrochez-vous !
Le rinçage peut également être un bon moyen de remettre à zéro la terre quand un plant est toujours en phase de croissance végétative. Parfois, un cultivateur suralimente par accident son cannabis, ce qui provoque un changement de couleur et un flétrissement du bout des feuilles. Ceci est appelé une « brûlure par nutriments ». Rincer la terre peut éliminer les nutriments excédentaires, ce qui aide à résoudre le problème. Cependant, c’est une mesure drastique à ce stade de la culture, alors assurez-vous que le problème soit bien une brûlure par nutriments et non quelque chose d’autre.
Le rinçage ne concerne pas que le moment de la récolte. Cette technique peut aussi être mise en place durant la phase de croissance afin de débarrasser le sol des nutriments. Bien évidemment, les nutriments permettent à votre plante de rester en bonne santé et vous assurent des rendements maximaux, mais une trop grande quantité peut causer une accumulation et un état statique durant lequel la plante ne peut plus y accéder.
Le blocage des nutriments peut être causé par une accumulation saline ou des niveaux de pH incorrects. Ces deux causes peuvent être résolues par un rinçage de votre plante à l’eau claire. Les fluides viendront pousser les nutriments en dehors du substrat et le débarrasseront de l’accumulation, permettant ainsi aux racines de pouvoir accéder à nouveau aux nutriments.
EMPÊCHER LE BLOCAGE D'ABSORPTION DES NUTRIMENTS AVANT QU’IL NE POSE PROBLÈME
Au mieux, le blocage des nutriments peut être un problème, au pire, il peut être un vrai désastre. Comme le dit l’adage, il vaut mieux prévenir que guérir. Il vaut mieux prendre de l’avant pour empêcher le blocage des nutriments plutôt que de s’y atteler lorsque c’est trop tard.
Empêcher le blocage des nutriments peut se faire par le biais d’un rinçage de routine. En rinçant vos plantes une fois avant la floraison et une fois au milieu de cette dernière, vous minimiserez l’accumulation de nutriments.
LES ENZYMES À LA RESCOUSSE
Après le rinçage pour contrer l’accumulation ou le blocage des nutriments, vous remarquerez peut-être que vos plantes ont une apparence vert foncé, c’est le signe d’un excès de nutriments. Dans ce cas, certains cultivateurs choisissent d’ajouter une formule riche en enzymes à leur substrat.
Au cas où vous auriez oublié vos cours de biologie, les enzymes sont des protéines qui catalysent les réactions. Elles aident à rincer le substrat en décomposant l’amidon, les glucides et les nutriments. Il existe sur le marché toute une variété de produits qui contiennent des formules d’enzymes très efficaces.
Si l’eau ne suffit pas à vos plantes, ces petites protéines ne feront qu’une bouchée de l’accumulation de nutriments !
COMMENT BIEN RINCER SON CANNABIS
Rincer votre plant de cannabis est un processus simple. À chaque fois que vous apporteriez normalement des nutriments, vous rincez à la place. De l’eau du robinet non traitée est tout ce dont vous avez besoin pour rincer, assurez-vous juste que son pH est sans danger pour le cannabis. La plupart de l’eau de puits a un pH sain et ne nécessite pas de traitement, mais s’il est nécessaire de traiter l’eau de rinçage pour avoir un pH adapté, faites-le. Les ajustements du pH seront donc la seule chose à considérer.
Inonder la terre avec autant d’eau fraîche qu’elle puisse contenir. Laissez l’eau durant quelques minutes pour qu’elle puisse absorber les nutriments, puis inondez la terre encore pour rincer les nutriments loin du plant. Si vous cultivez en intérieur dans des pots, notez la couleur de l’eau qui s’échappe du fond des pots. Elle sera tâchée et aura une couleur sale. C’est à cette étape qu’un appareil de mesure des TDS (Total des Solides Dissous) est utile. Si vous récupérez et mesurez le TDS de l’eau « évacuée », elle devrait avoir un taux de 1300ppm, ce qui est assez élevé. Il est important de rincer le plant jusqu’à ce que total baisse à un niveau de 50ppm, ou du moins qu’il s’approche du TDS de l’eau fraîche que vous utilisez pour rincer le plant. La couleur de l’eau d’évacuation va s’éclaircir et apparaîtra plus propre. Vous devez tirer autant que possible de minéraux dissous du plant.
Comment et Quand Rincer les Plants de Cannabis
Rincer les plants de cannabis avant la récolte peut faire la différence entre les meilleurs têtes ou la plus rude pour la gorge. Cette petite tâche est simple et facile à faire. Ajoutez juste de l’eau ! Attention car le moment du rinçage joue un rôle critique.
Le b.a.-ba du rinçage de ses plants de cannabis.
Sommaire:
1. Qu’est-ce que le rinçage ?
2. Le meilleur moment pour rincer son cannabis
3. Empêcher le blocage d'absorption des nutriments avant qu’il ne pose problème
4. Les enzymes à la rescousse
5. Comment bien rincer son cannabis
6. Comment rincer ses plantes en hydroponie
7. Les résultats du rinçage de son cannabis
8. Quand éviter de rincer son cannabis
Vous avez enfin fini vos cultures et vous vous retrouvez avec un magnifique plant couvert de super têtes, maintenant sèches, vous avez fait le curing et vous êtes prêt à fumer – et pourtant quelque chose ne va pas. La weed semble ne pas vouloir se consumer et quand vous tirez une bouffée, c’est comme si on vous avait donné un coup de poing dans les poumons et vous toussez en craignant pour votre vie ! Le goût est rude et décevant. Si c’est une situation que vous avez vécue, il y a des chances pour que vos plants n’aient pas été rincés correctement avant la récolte.
Cette fumée bien loin d’être agréable est provoquée par la présence dans le plant des nutriments et minéraux utilisés lors de la culture, ce qui altère la façon dont le plant se consume. Rincer le plant élimine ces nutriments restants, ce qui améliore la qualité des sensations. Heureusement, le rinçage des plants de cannabis se fait facilement et sans effort, et cela vous permet de produire des têtes douces et délicieuses en un rien de temps.
ARTICLE LIÉ
Comment Utiliser les Nutriments pour Cannabis
QU’EST-CE QUE LE RINÇAGE ?
L’acte de rincer un plant implique d’utiliser de l’eau pour éliminer tout nutriment présent dans la terre. Une grande quantité d’eau est passée à travers la terre et drainée sur une base régulière. Tous les minéraux et nutriments présents dans la terre sont rincés avec le temps avec l’eau, ce qui laisse une terre propre.
Mais pourquoi vouloir éliminer tous les minéraux de la terre ? N’est-ce pas mauvais pour la récolte ? En fait, cela aide à la récolte de manière significative. Quand les nutriments sont éliminés de la terre, ceci force le plant de cannabis à utiliser tous les nutriments toujours présents dans le plant. C’est comme pour le corps humain. Quand on consomme beaucoup d’aliments, ce que nous n’utilisons pas est transformé en graisses. Dans les situations extrêmes où la nourriture est rare, le corps s’appuie sur cette graisse stockée pour tirer de l’énergie.
Comme rincer force le cannabis à utiliser tous les nutriments restants dans le plant, aucun ne devrait rester et altérer les têtes récoltées. Cependant, si vous le faites trop tôt, cela peut nuire à la santé du plant, le moment est donc clé.
LE MEILLEUR MOMENT POUR RINCER SON CANNABIS
Le rinçage commence en général deux semaines avant la récolte. Si le plant a une période de floraison de huit semaines, le rinçage doit commencer six semaines après le début de la période de floraison. Il est préférable de regarder de près les trichomes sur le plant pour déterminer quand votre cannabis est prêt à être récolter. Si les petits trichomes commencent juste à passer d’une couleur transparente à une teinte laiteuse et blanche, c’est une bonne indication que les plants peuvent commencer à être rincés. Il faut s’arranger pour que la majorité des trichomes aient changé vers la couleur désirée pour la récolte après deux semaines – ça devient plus facile à faire avec l’expérience, alors accrochez-vous !
Le rinçage peut également être un bon moyen de remettre à zéro la terre quand un plant est toujours en phase de croissance végétative. Parfois, un cultivateur suralimente par accident son cannabis, ce qui provoque un changement de couleur et un flétrissement du bout des feuilles. Ceci est appelé une « brûlure par nutriments ». Rincer la terre peut éliminer les nutriments excédentaires, ce qui aide à résoudre le problème. Cependant, c’est une mesure drastique à ce stade de la culture, alors assurez-vous que le problème soit bien une brûlure par nutriments et non quelque chose d’autre.
Flushing
Le rinçage ne concerne pas que le moment de la récolte. Cette technique peut aussi être mise en place durant la phase de croissance afin de débarrasser le sol des nutriments. Bien évidemment, les nutriments permettent à votre plante de rester en bonne santé et vous assurent des rendements maximaux, mais une trop grande quantité peut causer une accumulation et un état statique durant lequel la plante ne peut plus y accéder.
Le blocage des nutriments peut être causé par une accumulation saline ou des niveaux de pH incorrects. Ces deux causes peuvent être résolues par un rinçage de votre plante à l’eau claire. Les fluides viendront pousser les nutriments en dehors du substrat et le débarrasseront de l’accumulation, permettant ainsi aux racines de pouvoir accéder à nouveau aux nutriments.
EMPÊCHER LE BLOCAGE D'ABSORPTION DES NUTRIMENTS AVANT QU’IL NE POSE PROBLÈME
Au mieux, le blocage des nutriments peut être un problème, au pire, il peut être un vrai désastre. Comme le dit l’adage, il vaut mieux prévenir que guérir. Il vaut mieux prendre de l’avant pour empêcher le blocage des nutriments plutôt que de s’y atteler lorsque c’est trop tard.
Empêcher le blocage des nutriments peut se faire par le biais d’un rinçage de routine. En rinçant vos plantes une fois avant la floraison et une fois au milieu de cette dernière, vous minimiserez l’accumulation de nutriments.
LES ENZYMES À LA RESCOUSSE
Après le rinçage pour contrer l’accumulation ou le blocage des nutriments, vous remarquerez peut-être que vos plantes ont une apparence vert foncé, c’est le signe d’un excès de nutriments. Dans ce cas, certains cultivateurs choisissent d’ajouter une formule riche en enzymes à leur substrat.
Au cas où vous auriez oublié vos cours de biologie, les enzymes sont des protéines qui catalysent les réactions. Elles aident à rincer le substrat en décomposant l’amidon, les glucides et les nutriments. Il existe sur le marché toute une variété de produits qui contiennent des formules d’enzymes très efficaces.
Si l’eau ne suffit pas à vos plantes, ces petites protéines ne feront qu’une bouchée de l’accumulation de nutriments !
Comment et Quand Rincer les Plants de Cannabis
COMMENT BIEN RINCER SON CANNABIS
Rincer votre plant de cannabis est un processus simple. À chaque fois que vous apporteriez normalement des nutriments, vous rincez à la place. De l’eau du robinet non traitée est tout ce dont vous avez besoin pour rincer, assurez-vous juste que son pH est sans danger pour le cannabis. La plupart de l’eau de puits a un pH sain et ne nécessite pas de traitement, mais s’il est nécessaire de traiter l’eau de rinçage pour avoir un pH adapté, faites-le. Les ajustements du pH seront donc la seule chose à considérer.
Inonder la terre avec autant d’eau fraîche qu’elle puisse contenir. Laissez l’eau durant quelques minutes pour qu’elle puisse absorber les nutriments, puis inondez la terre encore pour rincer les nutriments loin du plant. Si vous cultivez en intérieur dans des pots, notez la couleur de l’eau qui s’échappe du fond des pots. Elle sera tâchée et aura une couleur sale. C’est à cette étape qu’un appareil de mesure des TDS (Total des Solides Dissous) est utile. Si vous récupérez et mesurez le TDS de l’eau « évacuée », elle devrait avoir un taux de 1300ppm, ce qui est assez élevé. Il est important de rincer le plant jusqu’à ce que total baisse à un niveau de 50ppm, ou du moins qu’il s’approche du TDS de l’eau fraîche que vous utilisez pour rincer le plant. La couleur de l’eau d’évacuation va s’éclaircir et apparaîtra plus propre. Vous devez tirer autant que possible de minéraux dissous du plant.
COMMENT RINCER SES PLANTES EN HYDROPONIE
Le rinçage des plantes en hydroponie est bien plus simple que de se débarrasser des nutriments en terre. Les cultivateurs en hydroponie pourront simplement drainer leur système et le remplacer par une eau au pH neutre.
Le rinçage des plantes en hydroponie est aussi un processus bien plus court. Une fois que la réserve d’eau aura été modifiée, les plantes en hydro n’auront pas accès aux nutriments externes. Pour cette raison, un rinçage de deux jours suffira.
LES RÉSULTATS DU RINÇAGE DE SON CANNABIS
Après la récolte des têtes, prenez du temps pour bien faire le curing pour atteindre le potentiel le plus élevé. Un affinage correct par curing permet de réduire encore plus le côté rude des têtes, en éliminant des choses comme un excès de chlorophylle. Vous serez étonné de voir la différence que ce petite effort peut avoir sur votre produit. Tout votre travail se sentira dans la première bouffée de cette weed douce comme de la soie, qui caresse la gorge comme du miel. Le plus doux de la nature. Vous pouvez donc améliorer la qualité de votre cannabis en ajoutant juste de l’eau !
QUAND ÉVITER DE RINCER SES PLANTES
Le seul moment où nous recommandons d’éviter le rinçage de son cannabis est lorsque l’on travaille avec une terre biologique amendée ou un super soil. Ces substrats ont été développés avec précaution afin d’héberger des micro-organismes bienfaisants tels que des bactéries ou des champignons. Cette délicate biodiversité pourrait être éliminée et endommagée par le rinçage.
Une fois de plus, l’absence de rinçage ne devrait pas poser de soucis, car aucun nutriment externe ou synthétique n’aura été ajouté au substrat. À la place, les plantes comptent sur les micro-organismes pour décomposer la matière organique et la livrer aux racines.
May the force be with you 💪



@masterofsmeagol
Follow
5/11 I DID NOT WATER. A COUPLE LOOKED DRY BUT STILL HAD HEFT AND I COULD FEEL MOUSTURE IN THE SOIL. I should've taken more pictures. I forgot it's a new week. Oh well. I'll be back over and I'm planning to bring the girls outside for the first time if it warms up a little more. It's windy as fuck but I can put them in the garage with the doors open. As long as that's not the direction of the wind. I raised the L.E.D light and lowered the hps. I also TRIED to FIM a 10th planet and an mk ultra. I may have just topped them. We'll see how it turns out before I do anything to the others. Pink kush grows slow and compact. Very similar to my experience with purple punch. I have two plants that have slightly twisted leaves. Nothing else is wrong with anything. Looking at the stippling on the leaf I think it might just be either low humidity or slight wind burn or a combination of the two. Now that I've looked again I think it might just be the first 5 finger leaf on those pink kush that I mat have mistaken. I'll keep an eye out. I feel better having done some research. I'll put some more pictures up and I'll update what it is that I get done.
EDIT: WENT BACK OVER AROUND THREE. EVERUTHING LOOKED GREAT AND THE LEAVES WETE PRAYING ON SOME. I MAY NEED TO WATER SELECT PLANTS TOMORROW. I'LL PLAY IT BY EAR. LOWER THE HPS AND RAISING THE LED WAS A WISE CHOICE I THINK. OH AND THE "TWISTED" LEAF I WAS WORRIED ABOUT IS NOTHING. JUST THE FAN TO CLOSE AND A FOMBINATION OF LOW HUMIDITY AND MINOR HEAT STRESS. ITS BEEN TAKEN CARE OF. I WANTED TO BRING THE GIRLS OUT TODAY. ITS SUNNY AND 60° BUT THE WIND IS WHIPPING! WE'VE GOT GOOD WEATHER COMING UP THOUGH WITH TEMPS IN THE 70'S. I THINK TOMORROW ILL CLEAN/SANITIZE THE CAGE AND WASH/SANITIZE THE GROW BAGS.
5/12 Looking and lifting some of the pots I found some that were pretty much totally dry. I watered the majority of all the plants. If soil was moist I left it alone. If it looked a little dry I gave it a little water. I didn't measure the water but it wasnt even ALL of what I had left from LAST WATERING (which was like a qtr gallon If that). I just don't want to over water. The ones that I went light on last time were the ones that were dry. Plants seem to explode after watering but this wasn't nearly as much. Everything is looking great. It's easy to tell these are all indicas due to the structure and leaf shape. Much different than even the Chem Dog #4 which doesn't LOOK as "indicay" as some of the others. I wanted to bring them outside today but it's only 50 out. I'm not going to make the same mistake as years past and stress the plants. When we get a nice warm day I'll bring them out. Other plants are ready to be topped or fimmed but I haven't done it yet. Also need to clean the cage and wash the bags.
5/13 It's 60° at 9am so I think the girls will be going outside for a little bit. Didn't fully water but I used what was left of the gallon and gave them that. Some are much drier than others. I'll probably give them a full watering tomm. I only gave them a little today because I didn't want them drying out. I FIMMed a Special Kush today. WE'LL see how the hst turns out.
EDIT: WENT AND BROUGHT THE GIRLS OUT FOR FOUR HOURS IN INDIRECT SUNLIGHT. THE TENTH PLANETS WERE THE ONLY ONES THAT LOOKED LIKE THEY HAD AN ISSUE. JUST MINOR HEAT OR LIGHT ISSUES WITH A COUPLE FAN LEAVES. EVERYTHING ELSE SEEMED LIKE THEY SHOT UP IN SIZE. THE LARGER CONTAINERS STILL SEEM KINDA MOIST BUT SOME ARE DRY. I NEED TO GET ON A STABLE WATER SCHEDULE. ITS HARD WITH DUFFERENT PLANTS OF VARYING SIZES. STILL HAVE A LOT OF WORK TO DO.
5/14 One plant was super light today and was a little droopy. I WATERED EVERYTHING TODAY USING APPROX A HALF GALLON. I brought them outside for the second day. I left them out for about 3hrs. It's hot today. I'm still floored that chatgtp gave me exact directions for hardening my plants off at my exact location taking the weather into consideration! That is awesome. They're all doing good. Pink kush is the slow starter this year. Kind of like purple punch was. The only plants that had ANY damage on them was the two 10th planet's and its not really damage. It's just a LITTLE mottling on the leaf and the serrations pointing down. It's weird because this strain did great here last time. The Special Kush #1 and the Pink Kush would probably be fine to leave out soon. Hindu Kush parents make those strains extremely resilient. The one chem dog #4 looks out of place with all tjis big fat indica leaves. I'm hoping the topping and fim-ing will take. It looks like it will.
5/15 Everything is looking great! I have some work to do bit then I'll be over to bring the girls out for a few hours. I'll edit this when I do.
EDIT: BROUGHT THE GIRLS OUT FOR THREE HOURS TODAY. I THOUGHT THE TENP WENT DOWN TO 73 BUT TUAT WAS INDOORS. OH WELL. THEY STILL DID GREAT! THEY WERE ALL LOOKING OUT OF THE LEAN-TO LIKE SUNFLOWERS! THE STRAIGHTEN OUT AFTER BEING UNDER THE GROW LIGHTS. I'M PLANNING TO CONTINUE TO HARDEN THROUGHOUT THE WEEK. STILL NEED TO CLEAN BAGS AND GROW AREA. I HAVE 'A' CAMERA DOWN. TRIED TO FIX IT TODAY BUT I WOULD GET RO THE LAST PART BUT THE CAMERA WOULDNT READ THE QR CODE ON MY PHONE. I EMAILED THE COMPANY BUT IF I DONT HEAR BACK BY TOMORROW AND I CANT FIX IT ILL JUST BUY ANOTHER CAMERA TO ADD TO THE SYSTEM. ITS THE OLDEST CAMERA I HAVE AND ITS DONE ME 5 GOOD YEARS. MAYBE ITS TIME TO RETIRE IT.
5/16 I watered a few of the girls this morning with a small ring around the pot. I brought them outside and am leaving them for 3.5 hours today in the lean-to. They get indirect light without all the wind this way. I'll slowly increase the hours outside until there is enough daylight for them to go outside without revegging. When I put them out I noticed that a few were light and since it was close to 80° I watered most everything. I used under a half gallon. I'll see how they do from here and then move forward. I fixed my down security camera and secured my cage. Now I just need to finish hardening off, clean/sanitize bags/environment and put them in tjeir final homes. I'm not rushing it though. I've learned my lesson with that.
5/17 Plants did great yesterday and were perky and praying this morning. It was HOT yesterday too. Got into the low 80's. It's 57° degrees at 9am and it's overcast and sprinkling. I haven't decided if I'm going to bring the girls out today. It might be a good day to try some direct sunlight. I'll update whatever I decide to do.


@eldruida_lamota
Follow
Vamos familia, actualizo la sexta semana de floración de estas Royal Gorilla de RoyalQueenSeeds.
Vaya color más bonito, se les ve sanas, están formándose las flores bastante bien. Y desprenden ya un aroma increíble. Alguna se adelantó en la floración intentaré cortarlas todas a la vez pero ya veremos cómo progresa.
Hasta aquí todo bien el único suplicio que sufro son altas temperaturas por estar en pleno verano. Acabaré este proyecto y daremos parón unas semanas. Que avance algo más el verano.
Máximas de 29 y mínimas de 26 ahora viene el calor y ando jodido en humedad ronda el 40%.
Agrobeta:
https://www.agrobeta.com/agrobetatiendaonline/36-abonos-canamo
Mars hydro:
Code discount: EL420
https://www.mars-hydro.com/
Hasta aquí es todo , espero que lo disfrutéis, buenos humos 💨💨
shorts_status_processing


@MG2009
Follow
04/14/2020
Finally 4 weeks till outdoor garden planting! Then the fun begins.
05/02/2020
Time to go outside! Day #1


@DogDoctorOfficial
Follow
Week 7 Flower | 12/12 From Seed
Nectar Drip — Bulk, Frost & the Quiet Finish
No drama this round. No chasing deficiencies. No heavy corrections. No unnecessary stress.
Just stable roots, stable feed, stable environment — and plants doing exactly what healthy plants are supposed to do when you stop interrupting them.
This run was built on simplicity from day one.
12/12 from seed. No veg extension. No topping. No high-stress shaping. No aggressive stripping. Just early guidance, clean structure, consistent watering, and enough light to let each plant express itself without wasting energy rebuilding from stress.
That decision shaped everything we’re seeing now.
By removing the recovery time that usually comes with topping, overtraining, or prolonged veg, these plants never had to pause and re-prioritize. They rooted, established, stretched, set flower, and transitioned directly into production mode. No detours. No wasted momentum. Just one continuous push from seed to flower.
And now, in Week 7 flower, it shows.
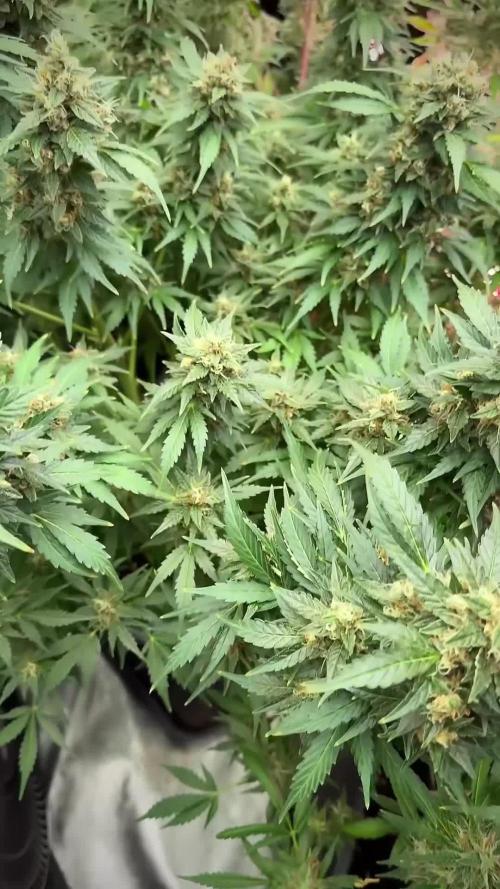
The canopy is heavy.
The flowers are swelling.
The resin is stacking hard.
The fade has started.
And the room is finishing with exactly the kind of top-to-bottom consistency this run was built for.
⸻
From Seed to Here — Why This Run Behaved Like It Did
This room was never pushed for speed.
It was built for continuity.
That’s the difference.
12/12 from seed changes the entire rhythm of development. Instead of forcing long vegetative expansion and then asking the plant to completely shift gears, this approach keeps the metabolism focused and directional from the start.
The plants stay efficient.
Internodes stay tighter.
Stretch stays controlled.
Energy gets allocated earlier.
And instead of building oversized frames that need correction later, the plant builds only what it intends to finish.
That’s why this room developed the way it did.
Not the biggest plants.
Not the tallest plants.
But highly efficient plants.
Compact structure.
Controlled vertical growth.
Dense flower sites.
Less wasted lower growth.
Less larf.
More usable biomass.
That efficiency is exactly why they are carrying weight now.
And because they were never heavily interrupted, resin production stayed consistent too. No major stress events, no stalled metabolism, no repeated recovery cycles. Just stable uptake, stable transpiration, and uninterrupted flower development.
That’s where the frost comes from.
Not magic. Not hype.
Consistency.
Stable roots feed stable flowers.
Stable flowers stack stable resin.
⸻
Feed Strategy — Simple, Stable, Boring (and Exactly Why It Works)
The feed is still intentionally simple, and that is the point.
At this stage, the plants are not asking for complexity.
They are asking for consistency.
So instead of overloading the root zone with ten competing inputs, the approach stays clean, predictable, and easy for the plant to process.
Current feed (per liter):
* Terra Grow — 2.5 ml/L
* Pure Zym — 1 ml/L
* Sugar Royal — 1 ml/L
* CalMag Pro — 1 ml/L
* Power Buds — 1 ml/L
* Green Sensation — 1 ml/L
That’s it.
Simple inputs. Stable ratios. No chaos in the root zone.
Why each one is here:
Terra Grow (2.5 ml/L)
Still holding the base. Even this late, a controlled amount of nitrogen matters. Enough to support photosynthesis and maintain metabolic function, but not enough to keep the plant too green or delay senescence. At this stage, it is no longer feeding growth — it is supporting function.
Pure Zym (1 ml/L)
Quietly doing the dirty work in the root zone. Enzyme support helps break down residual organic matter, keeps the substrate cleaner, improves root-zone efficiency, and helps maintain smooth uptake late into flower when consistency matters most.
Sugar Royal (1 ml/L)
Used here to support terpene expression, aroma development, and overall secondary metabolite production. Not magic in a bottle — just one more gentle nudge toward stronger expression in the final weeks.
CalMag Pro (1 ml/L)
Still important under strong lighting and consistent transpiration. At this stage it is less about “fixing deficiency” and more about maintaining transport stability, cell integrity, and keeping the plant moving cleanly through the finish.
Power Buds (1 ml/L)
Supports flower-site commitment and reinforces reproductive focus. At this point it is less about creating sites and more about helping the plant continue investing in the ones already built.
Green Sensation (1 ml/L)
This is the finisher. PK support, density support, sugar movement, and late-stage flower swelling. Right now this is one of the key drivers behind the visible bulking and weight gain.
Nothing excessive.
Nothing aggressive.
Just enough to keep the engine running clean while the plant finishes what it already decided to build.
That’s the entire strategy.
Stable EC. Stable pH. Stable uptake.
Let the plant do the rest.
⸻
Environment — Guided by Plants First, Numbers Second
This room is running warm, steady, and honest.
Around 26°C with ~60% RH, stable root-zone temperatures, consistent irrigation, and strong air exchange.
On paper, some growers will immediately point at VPD charts.
That’s fine.
But charts do not grow plants. Plants do.
Room VPD is useful. Leaf VPD is more useful.
And real plant behavior matters more than both.
The leaves are praying.
Transpiration is stable.
Uptake is stable.
Resin is building.
Flowers are swelling.
Nothing is stalling.
So the room is not judged by theory alone.
It is judged by response.
Numbers guide.
Plants decide.
And right now, the plants are very clearly saying yes.
⸻
Under Canopy Lighting — One of the Biggest Differences in This Run
This is one of the clearest upgrades in the room.
The under canopy lighting is doing exactly what it was meant to do:
keeping lower flower sites productive, reducing weak lowers, and allowing the plant to finish far more evenly from top to bottom.
That matters more now than ever.
Late flower usually exposes the weak parts of structure.
Lower sites fall behind.
Shaded flowers stay airy.
The top wins.
The bottom gets left behind.
That is not what happened here.
This room is finishing with noticeably better lower-site density, stronger mid-canopy development, and far less separation between top buds and lower buds.
Not identical — but much closer.
And that means more usable flower, more uniform ripening, and less waste at harvest.
The top still leads.
But the bottom is no longer irrelevant.
That is a major win.
⸻
What We’re Seeing Now
This is the transition every healthy flower room should earn.
The green is fading.
The fans are beginning to surrender.
Nutrients are being reallocated.
Calyxes are swelling.
Resin heads are thickening.
Aroma is deepening.
Weight is climbing.
This is not decline.
This is completion.
The fade is not a problem to correct.
It is the plant finishing on purpose.
And paired with the resin production we’re seeing now, this is exactly where these girls should be.
They are not just ripening.
They are closing.
⸻
What to Expect Next Week
Next week should be all about consolidation.
Less vertical movement.
Less new growth.
More density.
More oil.
More finish.
Expect:
* continued calyx swelling
* stronger late frost production
* deeper aroma development
* more visible fade through fans and lowers
* slower water demand as the finish approaches
* heavier flowers and firmer structure across the room
At this point, the work is mostly done.
Now it is about staying out of the way, keeping the root zone clean, keeping inputs stable, and letting the plants close properly.
No panic.
No chasing.
No overcorrection.
Just finish clean.
⸻
Shoutout Corner
Big love to everyone walking this one with us.
To the platform for giving growers a place to document the real process.
To the community for the time, support, questions, conversations, and shared experience.
To the day-ones, the regulars, and the silent followers who have been here since the first leaf.
To the new faces just arriving now.
To the growers learning.
To the growers teaching.
To the ones showing love.
To the ones watching quietly.
To the skeptics.
To the critics.
To the lurkers.
To the haters too.
If this took even a second of your time, it mattered.
Energy is energy, and none of it goes unnoticed.
To the genetics for doing what good genetics do.
To the tools that help us read them.
To the sponsors who support the work.
To the growers who keep showing up.
Respect all around.
See you next week for the close.
📡 DELETED @ 1K Please stay tuned.we never quit https://www.youtube.com/@TheDogDoctorOfficial NEW 🙏 Thank you for your patience and continued support.
FOR DISCOUNT CODES AND MORE JUST FOLLOW THE LINK https://website.beacons.ai/dogdoctorofficial
📲 Don’t forget to Subscribe and follow me on Instagram and YouTube @DogDoctorOfficial for exclusive content, real-time updates, and behind-the-scenes magic. We’ve got so much more coming, including transplanting and all the amazing techniques that go along with it. You won’t want to miss it.
GrowDiaries Journal: https://growdiaries.com/grower/dogdoctorofficial
Instagram: https://www.instagram.com/dogdoctorofficial/
YouTube: https://www.youtube.com/@dogdoctorofficial Deleted by Youtube - https://www.youtube.com/@TheDogDoctorOfficial NEW
Vimeo : https://vimeo.com/dogdoctorofficial Under construction stay tuned ⸻
Explore the Gear that Powers My Grow
If you’re curious about the tech I’m using, check out these links:
🔆 Lighting & Environmental Control
• Future of Grow — Advanced LED lighting technology
https://www.futureofgrow.com/
DISCOUNT CODE: DOG20
• Lumiflora — Under-canopy LED lighting
https://lumiflorade.com/
• TrollMaster — Environmental controllers and automation gear (past collaboration)
⸻
Genetics
• Zamnesia Seeds — Genetics used in this project
https://www.zamnesia.com/
⸻
🌱 Soil, Substrates, Boosters & Root Support
• Plagron — Substrates, bio mixes, and supportive products
https://plagron.com/en/
⸻
🎒 Storage, Curing & Preservation
• Grove Bags — Curing and storage solutions
https://grovebags.com/
⸻
📸 Photography Equipment & Tools
(Not sponsors, but part of my creative toolkit)
• Sony A6700
• Sony full-frame macro lens + few more
• Stacking photography workflow - learning
• iPhone (for behind-the-scenes shots)
We’ve got much more coming as we move through the grow cycles. Trust me, you won’t want to miss the next steps, let’s push the boundaries of indoor horticulture together!
As always, this is shared for educational purposes, aiming to spread understanding and appreciation for this plant. Let’s celebrate it responsibly and continue to learn and grow together.
With true love comes happiness. Always believe in yourself, and always do things expecting nothing and with an open heart. Be a giver, and the universe will give back in ways you could never imagine.
💚 Growers love to all 💚
📸 P.S. – The Eye Behind the Lens
All photos in this diary (for now — except for the ones showing the camera, which I took with an iPhone) are taken with a Sony A6700 paired with a Sony full-frame macro lens and a few more.
Photography is part of the story — it’s how we share the fine textures, the glow, and the quiet details that words can’t always capture.
I’ve also started experimenting with photo stacking — a technique where multiple images, each taken at a slightly different focus point, are layered together to create one perfectly sharp image from front to back.
It’s not digital enhancement or AI; it’s pure photography — a way to reveal the plant’s beauty in microscopic depth, from trichome to petal.
You’ll even see a few shots of "ghost me" capturing the shots — camera, lens, setup — because every grow deserves not just to be cultivated, but documented like art.
FOR DISCOUNT CODES AND MORE JUST FOLLOW THE LINK https://website.beacons.ai/dogdoctorofficial
NEW DISCORD - Official Server Invite Link : https://discord.gg/ksjAkA5T74


@Wackytabacky_420
Follow
🚨 CHOP DAY!! 🚨
So my Northern lights by @growerschoiceofficial has finished her life cycle at 79 days old. Upon chopping all the girls this plant is prob heavier than the other 3 put together!!! She did amazing in flower under her new light by MarsHydro the tsw2000!! Can't wait to see how this light treats the girls through the whole life cycle of a plant.
💡light sponsor💡
@marshydro_amazonled
@marshydro12
@marsnier
#marshydro
#TSW2000
Low stress training clips-
@madmadameplant
@madmanplant
Www.madmanplant.com
Other companies in this grow-
@foxfarmsoilandfertilizer - 100% ffof
@acinfinityinc - fabric pots
@generalhydroponics - flora trio line
@vivosun.official - inline exhaust fan
@opulent_systems - 4x4x80 grow tent
@growerschoiceofficial - 1 Northern lights seed
@inkbird_official - temp and rh controls
Well that's a wrap 4 this grow!! Till next grow growmies best of luck and Happy Growing!! Stay Zooted!!🌱💚💨🔥🔥🔥👊🏼🤟🏻


@TaterheadJohnson
Follow
7/14: Watered her today. Just plain water. Filled up half gallon jug of water. Filled reservoir back first line.
7/16: Bumped light intensity to 45%. Topped off reservoir at night.
7/18: Watered her today with the the leftovers of some treated water with Rapid Start from her half gallon jug. Prepping for new nutrient schedule next week.
I am happy to say it seems like the WCC is responding well to the environment and feeding schedule. So Far So Good!!! 😁
Thinking of possibly starting LST next week.
Please Comment if anybody sees anything wrong in the pics!?!?!? 👍 Also any tips on how-to/when to start LST would be greatly appreciated!
***** For this Grow******
“Day Air Temperature” will be the max temp of tent for the week.
“Substrate Temperature” will be the average temp of tent for the week.
“Night Air Temperature” will be the lowest temp of the tent for the week.


@GERGrowDesigns
Follow
Welcome to Veg Week 4 of Divine Seeds Auto Big Demon
I'm excited to share my grow journey with you all as part of the Divine Seeds Autoflowering Competition 2025. It's going to be an incredible ride, full of learning, growing, and connecting with fellow growers from all around the world!
For this competition, I’ve chosen the Feminized Automatic strain: Big Demon
Here’s what I’m working with:
• 🌱 Tent: 120x60x80
• 🧑🌾 Breeder Company: Divine Seeds
• 💧 Humidity Range: 90
• ⏳ Flowering Time: 8W-10W
• Strain Info: 21-23%THC
• 🌡️ Temperature: 26
• 🍵 Pot Size: 0.5l
• Nutrient Brand: Narcos
• ⚡ Lights : 200W x 2
A huge thank you to Divine Seeds for allowing me to be a part of this amazing competition and Sponsoring the Strains. Big thanks for supporting the grower community worldwide! Your genetics and passion speak for themselves!
I would truly appreciate every bit of feedback, help, questions, or discussions – and of course, your likes and interactions mean the world to me as I try to stand out in this exciting competition!
Let’s grow together – and don’t forget to stop by again to see the latest updates!
Happy growing!
Stay lifted and stay curious!
Peace & Buds!
