


Likes
25
Share


@GreenHouseLab
Follow
Day 10 Of 12-12, defoliated 75% of canopy will leave untouched until day 21 Flower. Running 1250 ppms of cropsalts, light dimmed to 75% @15-18” of canopy.


Likes
Comments
Share

@Growfather1
Follow
Hello everyone,
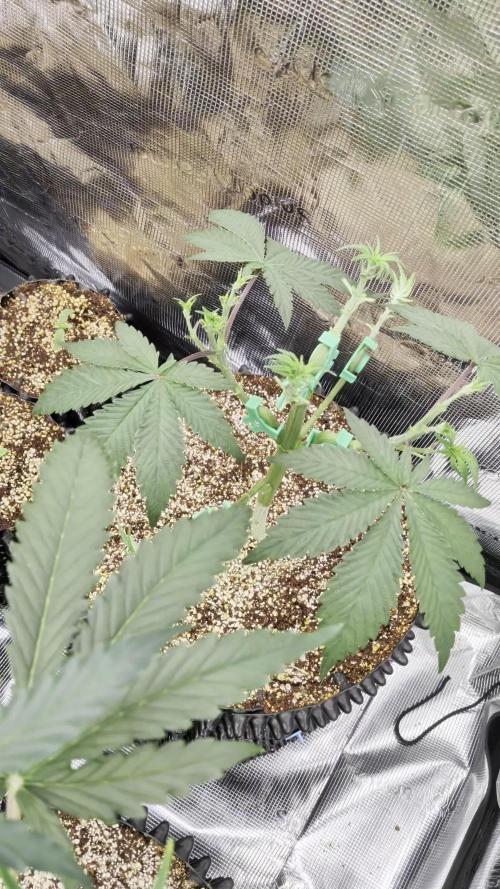
Week 5 is going okay i gave her a good haircut 💇♀️ removed leaves and internodes and made a video that refuses to upload tried many times but kept getting the error notification.
I will switch to flower in week 7 i need her to develop more roots.
Thanks for stopping by and have a nice day.
Growfather


Likes
11
Share


@MarkWatney
Follow
Starting to get preflowers finally! I’m gonna let it veg a little longer then switch to 12/12
Likes
80
Share


@TheCannaProphet
Follow
~MERINGUE by DUTCH PASSION~
Well friends, here we go on another 'canna-venture' together!
The grow room has had a complete remodel and some upgrades done to it including brand spanking new 4x8 and 4x4 tents and a Trolmaster Hydro X controller along with a new Control Panel.
This strain by Dutch Passion is one of my all time favorite strains that I've cultivated previously with phenomenal results so I'm looking forward to seeing what this girl has to offer when she's grown to her full potential!
I'm going to things a bit different this time around. I have a brand spanking new AC Infinity 4x4 tent and was just given one of HLG's newest lights for 2022, The Blackbird! I've got this 600w monster hooked up to my Trolmaster Hydro X Controller so I've got full control over timing, dimming and Sunrise/Sunset. This beauty is going to annihilate the 4x4 for sure! 😎👍
I'm going to grow her all by herself and veg her for around 70-90 days after witch I'll install a trellis net in the tent and spread her out. Once she's recovered from her 'net training' I'll flip her to 12/12 and hang on! 🤪
It's ALWAYS been a blast for me growing strains from Dutch Passion because their genetics are extremely stable which allow me to just concentrate on the essentials: Light, Environment, Water, Nutrients and possibly a bit of LST... not complicated, just basics like keeping a constant temperature and RH in the tent at a level that gives a good VPD, watering when almost dry and maintaining proper light levels according to their stage of growth and they REWARD you with some of the most EPIC cultivars you've ever grown! 👍👍👍
____________________________________________________________________________________________________________________________________________________________________________________________________________________________________________________________________________________________________________________________________________________________________________________________________________________________________________________
~STRAIN INFORMATION**~
~Unique USA genetics~
~Very sweet aroma and fruity flavors~
~Compact buds with one of the highest THC levels~
~Quality of the flowers is top-notch with an amazing bag appeal~
Meringue has a very sweet aroma and fruity flavor
Meringue is a hybrid indica/sativa strain with a complex fruity aroma that leans to the tangy side of the spectrum but a bit sweeter. It smells like oranges, mango and honey with some earthy, sour hints. Her aroma profile is also very pungent.
Meringue is a connoisseur’s delight
Meringue is a high-quality strain. She might not be the biggest overall yielder but the level of quality is definitely a reason to keep growing her again and again. Expect solid yields of stunning looking buds. Although the flowers can be a bit smaller, they are rock-hard and thus will still put down some weight on the scale.
When handled well she will deliver you some of the most beautiful looking nuggets on the planet. The dark hues in the flowers and leaves makes the white layer of resin really pop out for an eye-catching bag appeal.
Meringue is grown by crossing Wedding Cake x Animal Cookies.
Wedding Cake, also known as Pink Cookies, is a USA cross of the famous Girl Scout Cookies and Cherry Pie. These 2 strains make for the intense sweet tangy taste of the variety. It is also noted for its extremely high THC content.
Animal Cookies is another popular USA variety which is a child of the legendary GSC line and Fire OG. She is a clone-only variety that flowers in about 9 week and grows very dense and compact buds that can show some dark coloration in the flowers. This strain has a sweet and sour aroma with a strong body-effect that will suit the more experienced smoker.
-The genetics used to create Meringue ensure the following characteristics-
~A sweet tangy aroma from the Wedding Cake
~The dense, compact and colored buds from the Animal Cookies
~High potency levels thanks to both the Wedding Cake and Animal Cookies genetics
Meringue is top-notch variety with a high cannabinoid profile and an intensely sweet, pungent aroma.
~Meringue Effects~
Meringue is a crossing of 2 popular hybrid USA strains. She leans a bit more to the Indica side which is shown in the shorter flowering time and bud structure. The effect of the variety is quite euphoric with a powerful sense of well being and relaxation. When you smoke more during a short period of time you will be rewarded with a deep body stone which could give a couch-lock experience.
Meringue feminized seeds vs Lemon Meringue strain
Any fans of the USA Lemon Meringue variety will love the Dutch Passion Meringue. Both varieties share a THC rich high and a connoisseur flavor profile. However feminized seeds of the Dutch Passion Meringue are thought to produce frostier plants and a superior vaping experience.
-The growth and flowering time of Meringue-
We recommend a veg period of about 4-6 weeks for these feminized seeds. Meringue can have a bit of a slow start while showing some stretch during the latter part of the grow period. On the other hand, she doesn’t stretch a lot during flowering, so she can be a bit challenging to understand. Meringue can have quite an unusual growth pattern with leaves that have elongated stems and which are pointed upwards with some distance to the main stem. This requires the use of certain growing techniques, like leaf tucking, to make sure she receives sufficient light from top to bottom.
Meringue stays fairly compact and within 3-4 weeks there is already a lot of resin on the flowers. After 6 weeks of flowering the buds start to show orange pistils, they seem to ripen quite fast. Luckily all plants show amazing resin production, making them very appealing to the eye.
The flowering time is about 8 weeks. In combination with the recommended veg phase, it will take around 12-14 weeks from cannabis seed to harvest.
The yield of the Meringue
Meringue produces XL harvests of top-notch quality cannabis; between 400 and 500 grams per m2 is possible. The buds are really frosty and dense.
Our expert advice:
Meringue is the perfect strain for professional home growers or licensed producers looking for a variety with the highest possible resin levels. Buds are literally coated in layers of resin. We would recommend to look out for the plants which show the most hybrid leaf and plant structure.
These are generally the biggest and best yielding phenotypes. Consider using a UV light during the last few weeks of flowering and notice how the trichome production goes into overdrive. If you’re looking for something truly unique with an amazing bag appeal then please look no further, Meringue is the strain you need!
~More info about Meringue
Meringue isn’t the most straightforward plant to grow so she can be a bit challenging to understand. The thing that stands out the most is the slightly unusual growth pattern, therefore more leaf picking is necessary, otherwise the lower buds will not receive enough light.
Because of the slightly larger internodal distance, buds don’t have the tendency to become really big, which could make her a bit more interesting for growers with higher humidity levels. There should be enough fresh air around these flowers though, because they become rock-hard.
Buds are covered in trichomes, lab results showed all phenotypes were close to and above 20% THC, suited for hardcore smokers.
** Credit to Dutch Passion
____________________________________________________________________________________________________________________________________________________________________________________________________________________________________________________________________________________________________________________________________________________________________________________________________________________________________________________
~THE SETUP~
~Initially seed was lightly scuffed, then soaked for 3 hours in 78℉ distilled water after which it was transferred to a moist paper towel laid out in a Jiffy Pellet plastic starter tray with lid. Underneath the tray was placed a Mars Hydro Heat Mat with Controller that was set to 78℉ where it stayed until a tap root emerged.
~Planted into Jiffy Peat Pellet that was hydrated with distilled water warmed to 78℉ with a 7.0 ph.
~Once roots emerged from the Jiffy Pellet she was transferred to a 1qt plastic pot. As she grows I'll be moving her into larger pots along the way up until she's in her 10g fabric pot.
~Grown in a 10g fabric pot filled with Mother Earth 70/30 Coco/Perlite medium and fed Dutch Pro nutrients throughout the entire grow with de-chlorinated water ph'd @ 6.2-6.8.
~19/5 light cycle for vegetation, then 12/12 to flower with supplemental UVA added during the last weeks of flower. Lights are controlled by a Trolmaster Hydro X controller set for a 15min Sunrise/Sunset simulation.
~ Supplemental co2 provided throughout vegetation and flower - monitored and controlled by an AutoPilot APC8200 co2 controller.
____________________________________________________________________________________________________________________________________________________________________________________________________________________________________________________________________________________________________________________________________________________________________________________________________________________________________________________
Weekly Updates:
12/1- I soaked the seed for 3 hours in 78℉ distilled water after which it was transferred to a moist paper towel laid out in a Jiffy Pellet plastic starter tray with lid. Underneath the tray was placed a Vivosun Heat Mat with Controller that was set to 78℉. After 30 hours she had not popped open yet so I soaked another seed for 3 hours and then into a paper towel and onto the heat mat it went.
12/3- This afternoon I checked and the seed had a root that was about 1/4 to 3/8" so at 5 pm I transferred it into a Jiffy Peat Pellet that was hydrated with distilled water warmed to 78℉ with a 7.0 ph using a tine off of a plastic fork as a 'mini trowel' to make a hole in the pellet and to gently cover the tap root, leaving only the seed head slightly exposed. This method accomplishes most of the initial work the seed has to do by eliminating having to orientate itself, push it's root down and head up. By the next morning she had her cotyledon leaves opened!
12/5- Well this is Day ONE for the Dutch Passion Meringue! I'll keep her in the covered/heated Jiffy tray until I see her roots beginning to emerge from the peat pellet, then I'll transfer her gently into her 2qt plastic starter pot to begin growing.
12/7- Today when I checked her, she had roots just starting to emerge from her pellet, so tomorrow I'll transfer her into her 'starter' pot.
😎💚 Thank you for checking out my passion in life! Please visit as often as you wish and I hope you enjoy this journey as much as I know I will! Grow Strong! 💪😎🤙



Likes
21
Share


@Bakeryguy420
Follow
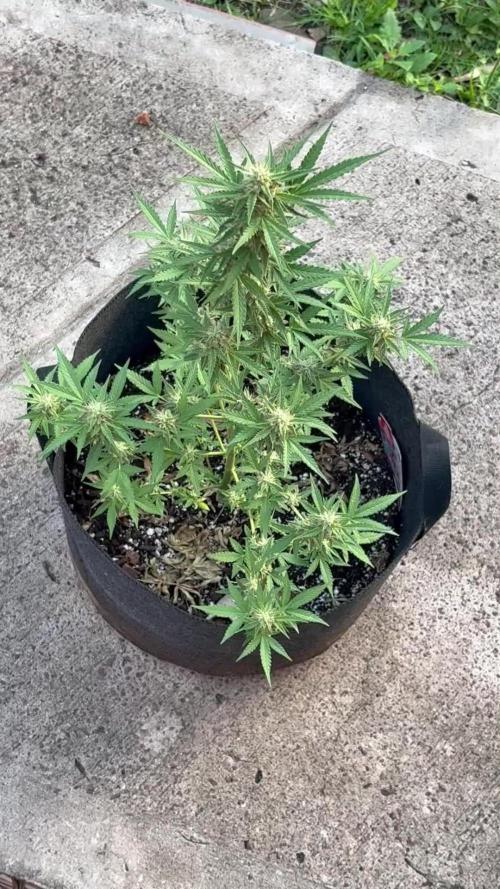
really easy to grow. Had some issues in the begging being underfed and low ph issues. But still grew through all the struggles. Wasnt the biggest yield but wasn't the biggest plant. So wasn't expecting truly much. The purple pheno gave me a zip and half about. The other green one gave me a zip dry. Both smell lovely and can't wait. Will come back next week or so to update smoke report. Also fixing to make cannabutter from some of this can not wait ^_^ . Will grow it again but in a bigger pot maybe.
Likes
17
Share


@Fat_Olsh_Farms
Follow
Day 14. Beautiful trileaf plant. Not quite ready for LST. Maybe tomorrow.
Day 15. Bent over nicely for me. This plant is gonna be a beast.
Likes
24
Share


@RastaGrow
Follow
It’s finally here. The last week..! All of my hard work and commitment to these ladies is about to reward me with some super sticky flowers! And lots and lots of them by the looks of it...
These buds look unreal, it looks like amazing quality flowers all over these girls. It’s dense buds that are coated in trichomes and resin.
The flowers came out a bit more dense on this grow compared to my previous soil/HPS run, which I find surprising. This could be due to a variety of improvements within the garden but I’m going to attribute most of it to my increasing horticulture skills.
Processing
Likes
1
Share


@blendmedmedman
Follow
she has been chopped. I went 60 days total in flower. I tried her but she was not ready to be smoked. she has been down for a few days as fastbuds recommended flower time was 62 days. I was going to
wait but she really started to stink. real strong and pungent. so make sure your carbon filter is big enough for your space. any ways she grew out nice and real sticky. I was able to get some darker fades going. real fun. I will do a smoke update here soon and close this out.

Likes
28
Share


@Growthetics
Follow
Sorry for the late post had a very busy period. The buds are great, good feedback from patients.
First time I've been able to taste a fully organic bud and I can say I won't be going back!

Likes
19
Share


@Ginger_gnome
Follow
Well damn thats a big bush lol. The one next to it looks so tiny but is at par with were my plants usually are at this stage with the type of training I've done lol. If it wasn't for its mass I'd probably still go one more week but because of king Kong over there I'm switching to 12/12 tomorrow lol.
Today is the last day of veg and the first day of flower is to come. If it goes a full 8 to 9 weeks I'll be looking at a March harvest. If that's the case I might be able to squeeze in a quick auto flower grow before the family summer vacation lol. The temperature has been getting warmer outside and the night time temperature hasn't been to bad. The humidity has been stay around 50% all week and thats were id like to keep it but we're expecting a lot of rain over the next few weeks so we'll see how well that works. I picked up 2 more temperature hydrometer meters with probes for the room. And with all the fans the air movement in the room has been great. Humidity and temperature is the same in every corner of the 8x9 room.
I switched the lights from 24/0 to 18/6 this last week to get them ready for the approaching 12/12 light schedule. And because that is tomorrow I lowered the lights down so that tomorrow I just have to turn the lights up.
I also emptied my tank and refilled it with the nutrients for flower so that the treys can empty a bit before I add all the new nutrients. I filled all the trays before I turned it all off so they would have enough for the night.
Well that's all for now, happy growing and happy new years!!! Keep it growing!!!

Likes
13
Share

@DutchBarnacle
Follow
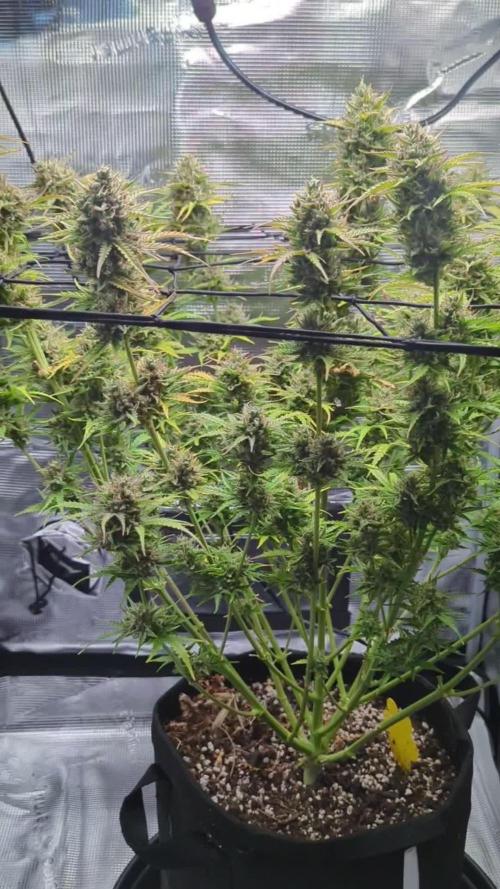
Week 9!
Day 65: 2L (pH6.8) + mild organic fertiliser from kitchen scraps.
Remember the potato water I spoke of earlier? I blended it up with some ruined sweet peppers from the garden and some applecider vinegar & eggshell to give her one last, very diluted nutrient solution. This feed was aimed more at the soil than the plant.
Bud bulking has come to a halt, she's fading. Nonetheless, I discovered some purple leaf edges on one of the buds in particular, I wonder if this might be related to nutrition or temperature.
Day 67: 2L (pH6.6) + 5ml/l home-made fertiliser.
I found some more information regarding the purple leaf edges here: https://growdiaries.com/grow-questions/54072-edges-tip-leaves-are-turning-purple
Also: oops.. I noticed I accidentally had turned off the timer on the LED, as well as left it on 20% power the entire night. I was expecting to have to disturb her lights off period to look at her, but there she was just chilling in low light conditions.
Also, she seems to have no problems running on the very diluted home-made fertiliser so I'm repeating the previous feed - this time being a bit more precise on the dosage: 5ml/l. As I stated, this is more of a fertiliser for the soil microbes than herself.
Day 68: Damp, no water
Trichomes are still mostly clear, nothing unexpected. Patience is not my strongest virtue.
Likes
45
Share


@masterofsmeagol
Follow
5/28 It poured yesterday so i dodnt bring the girls outside. Seedlings are transplanted into gallon pots. Once the fill that they'll go in final homes. I brought the plants out on this overcast day to harden them off. They're under the cover of the barn though placed by the open door. I've been putting in some work. Once this rain stops I have a couple things to do on the cage then I'll put the bags in the spots I have mapped out and mix my soil and fill the bags. The next day I typically transplant and add the first layer of supports. I have more pictures but not enough time to download them.
5/29 wow this site sucks. I have already done and saved this shit but its not here. Good thing I copy and pasted from grow with Jane. Only thing that sucks is I can't upload videos. It's not working here anyway so.... Watered and used about 3 gaterade bottles total. I may have messed up and watered the event horizon to much. They seem to be getting rootbound. Plants are doing well though with the transition. They are still hardening off. Tomorrow I plan to position and fill the bags with soil and if able I'll transplant them in the next few days. I want to make sure they're hardened off. Low tonight is 49 but it's 50s after that so I should be good. I'm hoping this video will load. Very stressful to do this shit over and over.
5/30 Plants have spent all day in tje Cafe and are coming in for the night. I finished mixing soil and filling the grow bags. They are ready for transplant. Weather is looking good so if plants respond well to this mild weather they will be transplanted with first set of supports added either tomm or the next day. Depends on plants response today (so far they're doing great) on whether I transplant tomorrow or the day after. I am sore as hell. Pictures are having trouble uploading and I'm not even gonna try to upload the video I took.
5/31 Plants have been taking a few days of full sun and they're doing fine. I'm planning on transplanting this afternoon. I had to water today. I weighed the pots and some were in tje 1200's grams which is dry. I'll update as I work. I have some errands to run then I'm putting the girls in their final homes.
EDIT: WIND WAS RIDICULOUS! I TRANSPLANTED 3 OF THE HEALTJY GMO'S. WHEN I GOT BACK PLANTS WERE RIGHT SIDEWAYS FROM THE WIND. I WENT WITH INTUITION AND TRANSPLANTED 3 GMO'S. OTHER BAGS ARE READY. THE REST OF THE PLANTS WILL GO OUT TOMORROW MORNING. THE SMALL SUPPORTS I HAD DIDNT DO SHIT. I HAD TO ADD TOMATO CAGES AND TOE THE STALK TO THE TOMATO CAGE. SUCKS I COULDNT GET THEM ALL IN BUT BETTER SAFE THAN SORRY. TRANSPLANTS WENT REAL SMOOTH. KNOCK ON WOOD. I TJ8NK THE OTHERS WILL TOO. THEY'RE READY FOR A NEW
6/1 Finished transplanting everything. Easiest transplant I've had so far. 4 gmo 1 toasted toffy 1 sherb pie and 2 event horizon. Everything is in 20 gal smart pots. One gmo is in a 30 gal smart pot. The medium is 1/3 of each roots organic 707, fox farm happy frog and fox farm ocean forest. Used mykos when transplanting. Wind gusts were coming from everywhere direction so I couldn't put a tarp up to block it. I bought "grow cages" which are kind of like tomato cages. The wind is so strong it blows the plants right against the cage. Oh well. I hope it works out. I'll check on them a little later and see how they're doing.
6/2 It was 45 degrees this morning. Nice out now. Plants are doing good. A couple gmos are drooping but it was cold. One gmo looked as good as ever! Sherb pie and toasted toffy are totally unaffected. In this new area plants get a lot of direct sun. Slight tacking on the gmos in the front. The event horizons really needed that transplant. Grow cages seem to be working out well.
6/3 I Watered the garden this morning as its been 75-80 out. I only used a gallon of water for the 8 clones. I'm not sure if I watered enough when I transplanted or not. Some plants have some burns from the intense direct sunlight. Plants could've used a bit more hardening but they'll be fine. A few of them seem great and have no real signs of stress dispute 25mph wind gusts and 15 mph constant wind and this hot sun. I should go check on my plants again this evening but I figure they'll be alright until morning. I've had an incredibly busy day and they were fine at noontime. I'm going to consult my other diaries and see what I did watering volume wise. I've for some videos but they take FOREVER to upload.
EDIT: Looked at last year's diary and it was rainy as fuck and I took way more time hardening the plants. I've had more going on in life which has effected that. Went over at 3pm and gave the plants 3 more gallons of water. Bags were light and soil was dry af. Granted I added soil after it settled but still. I watered one gallon this morning so I figured 3 more gallons would make it a half gallon a plant. Planning to increase to a gallon each if they do OK. Its supposed to thunder storm tomorrow so hipfully we will get some rain. I removed one leaf that was bleached but there are a few others. The weather is beautiful but we've gotten zero rain. In hindsight perhaps I should've given the plants an extra gallon at least.

Likes
9
Share


@pascal_dop
Follow
Bis auf ein paar kleiner Fehler läuft der Grow bisher eigentlich echt gut 💪

Likes
5
Share


@Chris42081
Follow
She is tall and stacking flowers nicely. . I've never not trained a plant so this one. Is new to me.