The Grow Awards 2026 🏆 


Likes
4
Share
@Drtomb
Follow
These plants have been running in a veg area for exactly 1 month. There are 9 plants and each plant has tops selected for a total of 27 tops.
Once plants were moved into flower location they were trimmed back to the shortest top. Then all bud sites bellow the 2 from top are removed. Plants will begin to exponentially grow.
Ill remove bud sites as the plants grow, Removing any lower branches that begin to stray from the main stem by more than 2"

Likes
32
Share
@BudVision
Follow
Hello growers,
I harvested all the chicks 🐥 and La Bomba was left alone in the coop 😀💣. The aroma is sweet and spicy, hard to describe but very pleasant. The buds are dense and beautifully colored.
I put them to dry in a space at 17 °C and 60% relative humidity.
Peace and happy growing! ✌️


Likes
20
Share
@MeaCulpa
Follow
Hey people.
So far everything looks good.
I highly doubt that any lady here will be as productive as one of my “Runtz”.
But we'll see.
Have a nice week everyone.

Likes
15
Share
@crystal_garden_0
Follow
Great week. Plants going fast now. Buds starting, strong smell. Plants have a great structure. So far so good. Looking forward to try the different flavors. Great genetics and light , thanks everyone
Likes
11
Share
@Souri93
Follow
Dernière semaine de rinçage déjà elle dégage une odeur de fou les nutriments sont entrain partir du coup elle ressort sont vrai goût tropicana cookies 🍪🍀


Likes
20
Share
@FarmZOG
Follow
This run didnt went the way I expected, loosing half tent yield because that freack plant (46 gr) frostiest and densest the the big one though, well thats life
Overall very happy with bud quality
Likes
39
Share
@ZombieKushAddicted
Follow
we will carry out this cultivation under the sponsorship of Mars Hydro with an FC-E 4800 lamp ,
to view this lamp or any other marshydro product go to: https://instagram.com/marshydro_aliexpress?igshid=YmMyMTA2M2Y=
Likes
3
Share
@Rinna
Follow
Unfortunately, the Blue am and dynamighty (also due to their long flowering periods) didn't make it. Told my roommate to cut the plants when I saw that video and those pics but it was far to late already..

Likes
5
Share
@sh4r4k
Follow
Moin Leute neues Update.
Erstmal sorry das länger nichts kam.. hatte viel um die Ohren und habe es immer vor mir her geschoben 😆
Bei den Ladys hat sich einiges getan. Sie befinden sich aktuell in Blütewoche 6 und so wie es aussieht gehts ihnen prächtig.
Die Dünge Menge habe ich natürlich in den letzten Wochen angepasst und gieße jetzt 2L pro Topf alle 2 Tage. Ich denke das passt soweit auch😃
Ansonsten gibts viel viel zu erzählen.. Bis hoffentlich nächste Woche 😂🙏


Likes
2
Share
@Lifesgarden420
Follow
Did not have much success with the first run but hopefully this one will be great especially inside of the groot

Likes
38
Share
@ILoVeThiSpLaNt
Follow
Giorno 67
La pianta sta bene come puoi vedere dal colore delle foglie.
Le temperature stanno scendendo e ha piovuto molto. Speriamo di non doverla raccogliere 🤞
A settimana prossima 🖐️

Likes
63
Share
@Castafunk
Follow
Installation de la lampe led Marshydro TS 1000 pour le début de la phase de floraison. les plants mesurent de 25 à 42 cm, pas de carences. humidité descendue a 60%, Engrais avec modération (un arrosage sur deux car les autoflos ont moins besoin de nutriments vu leur cycle court)
Ajout le 25/09 d'une led Relassy 50W dirigé sur le plus petit plant pour tester.
25/09 le plus grand plant mesure 47 cm
27/09 le plus grand plant mesure 51 cm, les deux petits 29 et 27 cm et partent sur un bon strecth

Likes
23
Share
@Kynareth
Follow
The plant keeps developing good, slow but she looks very healthy and happy.

Likes
68
Share
@Teamdirtbag2
Follow
Well reveg is happening to only the plants in the ground. All plants are in the same place. This is so fucking strange. The potted plants are staying in flower. This is a strange occurrence for me. Everything should have reveged... better yet the difference between a potted plant and one in the ground. It's an incredible difference in size. And I water the ones in the ground with plain hose water. Straight city tap water. So this is a strange year. Its obvious the bar has been set really low this year. There will be no "tree" just bushes this year. But how big a bush you got?


Likes
7
Share
@CannaGrowmie
Follow
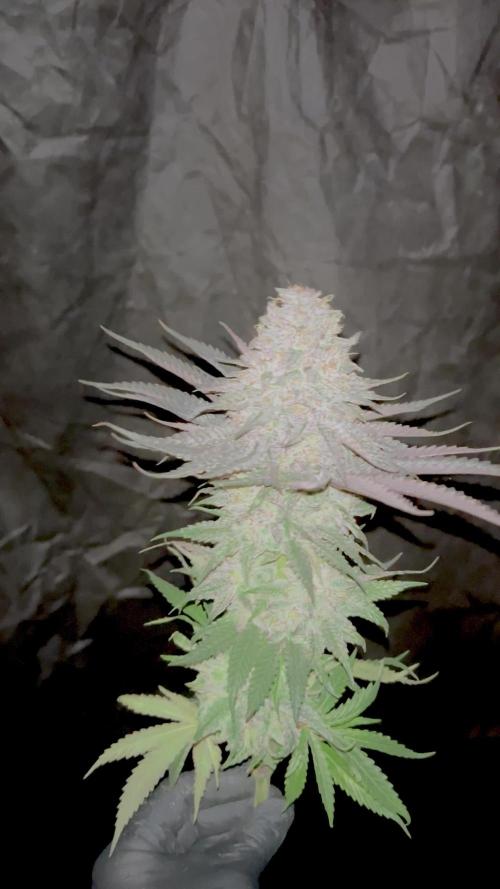
She finished up beautifully with deep silver and purple colors throughout, extra frosty, and super dank!
Will update with dry weight