
Likes
Comments
Share


@CanabisLoverHobbyGrower
Follow
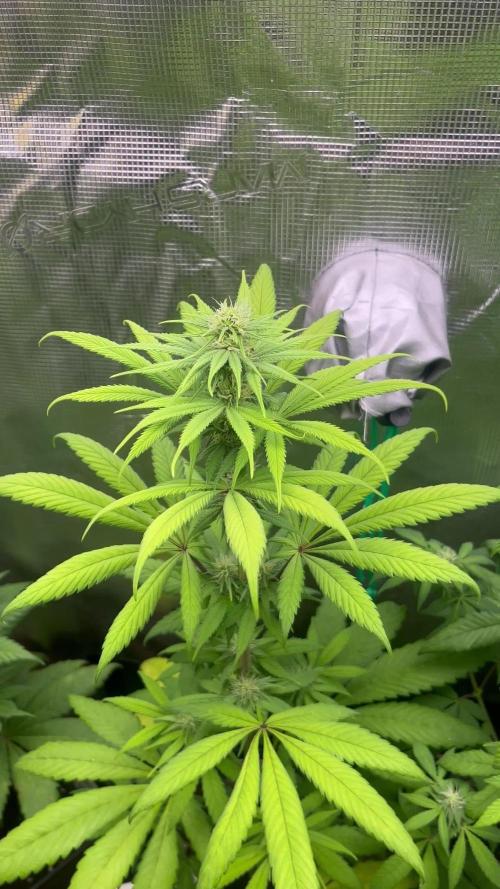
Well I've done a final tie down going to give them 5 days to a week and then flip them into flower, they react to training so well and are so flexible, think these are going to be one of the best looking ones the training on the bigger plant looks ace, roll on next week, flower time

Likes
5
Share

@Skynets_Growing
Follow
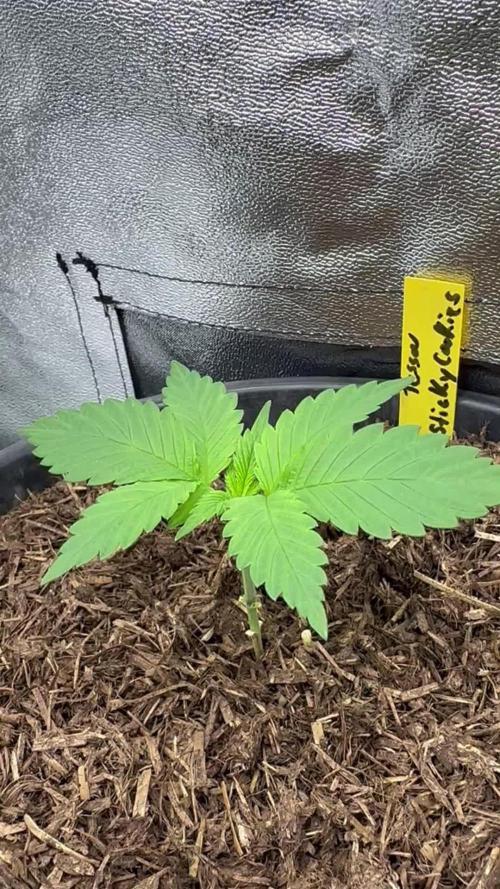
Tessa my Triploid Stucky Cookies Start her 3 week and you can see that her LST in the last week were no problem in this week. She grow and everything is nice…she is such a Beauty with her fresh green leaves. ;-)
Likes
6
Share


@CanarianGrow92
Follow
Another week for this SOG of Auto's from our friends fastbuds, at the moment they are doing great, i do notice that some genetics required less food than others (they all got the same amount but some showed signs of N toxicity last weeks)
At the moment we noticed the stretch and we needed to put the lamp higher, we are growing with a TS1000 at the moment and things are looking good 😊

Likes
13
Share

@eldruida_lamota
Follow
Que pasa familia, vamos con la tercera semana de floración de estas Green Gelato feminizadas de RoyalQueenSeeds.
Vamos al lío ,se trasplantaron en macetas de 7 litros definitivamente.
El ph se controla en 6.0 , la temperatura la tenemos entre 24/20 grados y la humedad ronda el 50%.
El ciclo de floración puse 12h de luz, el foco está al 80% de potencia.
De momento van creciendo a buen ritmo y tienen un buen color, estaban muy bien enraizadas al realizarle el trasplante se notaba la abundancia radicular.
Agradecer Agrobeta por el envío del kit gold series en cuestión, unos maestros 🙏
- os dejo por aquí un CÓDIGO: Eldruida
Descuento para la tienda de MARS HYDRO.
https://www.mars-hydro.com
Hasta aquí todo, Buenos humos 💨💨💨

Likes
87
Share


@Wastent91
Follow
Ehi ragazzi come va? All inizio quando hanno cambiato grow diaries ero dubbioso, ma ora che si possono caricare tutte le foto assieme è tutta un altra storia! Allora cosa posso dire, la ragazza questa settimana si è sviluppato in modo impressionante, si vede che il nuovo prodotto di plagron sta facendo effetto! Addirittura le cime hanno più fiori delle altre sorelle fertilizzante con Advanced, i fiori sono davvero tanti e molto densi, penso che dovrò defogliare un po per scongiurare il rischio di muffe, ma per il resto tutto procede secondo i piani, la pianta è bella grande di un bel colore verde intenso e senza carenze per ora.. Grazie plagron e spero di aggiudicarmi un buon posto nella sfida, anche se c'è gente molto più capace di me! Allora buon 420 e alla prossima settimana! Grazie sempre a Mars hydro per l equipaggiamento fenomenale che mi permette di avere la migliore erba medica a casa mia!! 💪😸😺🤞🍀🌱🌿🌲💐🧑🌾😎💨

Processing
Likes
10
Share


@Dunk_Junk
Follow
Not long now! Trichomes turning milky. I would think within the next week she will be harvested.

Likes
138
Share


@DogDoctorOfficial
Follow
One more week up wee go , and dude are they going hehehe , i had some life to my room and im giving the stretch times but asap i will apply deep and hard defoliation with should be enough until almost the end of cycle.
And defoliation day came and with it a second net to help support future buds, i was gona go harder on them but lol im happy with the new haircut lol
Gave them a strong full feeding with it and had some conditioner to my soil to help braking death mater and also gave them nome nematodes to fight fungus nets larvas and help control the life on my soil. For now thats all im doing , i will keep monitoring this fungus net and springtails etc that came with the time of the year and with the fact that im growing fully mineral organic .
As always thank you all for reading and checking out my diaries, im humbled by it all, much love to you all 💚💚💚🙏🙏🙏💚💚💚
Thank you MARSHYDRO and APTUSHOLLAND for having faith in my love for growing , lets make magic together 🙏🙏🙏
Genetics - Gorilla Blue - Advanced seeds
Grow tent - MARSHYDRO 4x4
Ligth - MARSHYDRO TSW 2000 @ 100%
Food - HAPTUS HOLLAND
Filter - vanguard hydroponics Falcon Filters
Extraction - 2 x vanguard hydroponics 280m3h
Extraction control - SMSCOM Smart MK2
All i grow is medicine for myself, for me and for my best friend with is me 😆 nothing to sell, so don’t even ask 😅💚💚💚
All info and full product details can be find in can find @
https://www.mars-hydro.com/grow-tent
https://www.mars-hydro.com/led-grow-light/mars-ts-series-led-grow-light/mars-tsw-2000-led-full-spectrum-hydroponic-led-grow-light
https://marshydro.eu/ DISCOUNT CODE - DOGDOCTOR 💚💚💚🙏🙏🙏💚💚💚
https://marshydroau.com/
https://aptus-holland.com/
#marshydro #aptus #aptusplantteck #aptusgang #aptusfamily #aptustrueplantscience #inbalancewithnature #trueplantscience #growerslove
With true love comes happiness 💚🙏 Always believe in your self and always do things expecting nothing and with an open heart , be a giver and the universe will give back to you in ways you could not even imagine so 💚💚💚
More info and updates @
https://growdiaries.com/grower/dogdoctor
https://instagram.com/dogdoctorofficial
https://youtube.com/channel/UCR7ta4DKLFMg2xxTMr2cpIg
💚💚💚Growers love to you all 💚💚💚

Likes
13
Share


@cookingwithninja
Follow
Week 6 day 1 video
Week 6 day 4 video
I’m still pushing very hard with carbs every watering, humic acid, soluble n, soluble pk, microbial mass, b+, fishshit. Already tried testers for lowers. Very potent hits harder than a pen. Feels like 30-40% baked for 1-3h per j, different phenos. Not harsh just testers dried for 0:01:15, checked seeds and developing for 2-3 weeks
Likes
7
Share


Likes
4
Share


Processing
Likes
10
Share


@Greenwizhun
Follow
The tallest lady harvested (too early) My light cant set to lover position


Processing
Likes
3
Share


@El3vated
Follow
This week I transplanted directly into a 5 gallon pot. It looks like there was a little stress after transplanting. It went from a nice green to a yellowish green. This one also started stretching so I lowered the light. Im going to add aminos this week and hope it can bounce back nicely.
Processing
Likes
8
Share


@Max1973
Follow
Day 49 - lookin good..... been bending her, trimmin abit, messin with the water solution.....
ph and ppm have been all over the place..... lol
she's been transitioning from grow to flower, and once she settles into night mode, the
solution and growing should stabilize......
the new fan is cool... tents working properly now, neg pressure, drawing in air behind the floor fan, blown around the bottom,
and cpu extractor fan pushing the air out the top of the tent, straight into the filter..... really nice way to run a little tent, low airflow........
keeps the impurities out of the buds.....
the stalks have all tuffened up since trimmin, and pretty strong now.... should hold the full weight that's about to occur all over the place......
i've simplified the nutrients, they were gettin alittle confusing, so started doin nuets differently, .... so,
just making my own nuet solutions, nothing fancy just base amount of normal elements ....
should be a pretty good christmas ......
Day 51 - pics/vids...
👍😎

Likes
18
Share


@Staffedition
Follow
Привет друзья. Моей растихе сегодня 48 дней.
Начал применять LST технику на 19 дне и продалжаю применять её через день, а 18 августа добавил ДЕФОЛИЗАЦИЮ
С 20.08 ДЕФОЛИЗАЦИЮ делаю каждые 3,4 дня
С 20.08 LST технику делаю каждые 4.6 дней
На сегодняшний день влажность 50%
Три дня назад заметил высокий Ph 7.9
С сегодняшнего дня Ph 5.8
Заказал погладитель влажности, отпишусь в следующем репорте.
Не смотря на высокую влажность и высокий Ph, растение растёт хорошо, генетика радует.
Всем мира и добра!
https://t.me/smail_seeds
#Smail_Seeds


Likes
18
Share


@GERGrowDesigns
Follow
Welcome to Flower Week 5 of SuperStrains Amnesia
I'm excited to share my grow journey with you from my
SuperStrains Project . It's going to be an incredible ride, full of learning, growing, and connecting with fellow growers from all around the world!
For this Project , I’ve chosen the Feminized Photo Strain Amnesia :
Here’s what I’m working with:
• 🌱 Tent: 225x150x150
• 🧑🌾 Breeder Company: SuperStrains
• 💧 Humidity Range: 45
• ⏳ Flowering Time: 10 Weeks
• Strain Info: 25%THC
• 🌡️ Temperature: 26
• 🍵 Pot Size: 20
• Nutrient Brand: Hy-Pro
• ⚡ Lights : 600W x 2
A huge thank you to SuperStrains for allowing me to try my Best with this amazing collection from Photo Strains they managed to Sponsore side by side with theyre Hy-Pro Nutriets . Big thanks for supporting the grower community worldwide! Your genetics and passion speak for themselves!
I would truly appreciate every bit of feedback, help, questions, or discussions – and of course, your likes and interactions mean the world to me as I try to stand out in this exciting competition!
Let’s grow together – and don’t forget to stop by again to see the latest updates!
Happy growing!
Stay lifted and stay curious!
Peace & Buds!

Likes
7
Share


@UrbanBoer
Follow
Another one is flowering cannot believe it, Another Auto. Sadly going to be absent for a couple of weeks, going out of town but as soon as I return I am posting the progress, hopefully defoliating at this stage works out.
Likes
50
Share


@AsNoriu
Follow
Day 82.
Its 81 day from seed touched soil ! If leaves would be healthier, i would run them at least one more week, but it is, what it is.
They spent 24 hours in darkness and now its Trim Jail !!! ;)))
Harvest Day !
Day 88. Tried bud from each, clearest weed straight from drying rack ! Only 3 feeds makes huge difference to harshness at the beggining. Still Queen is pure Tangie, can it be seed mistake ? ;)))
Day 89. Boy i am f@ckingly surprised !!! Heather - I love You, Your team, Your strains !!!! I still don't get how, but numbers are amazing, Thank You very much !!!!
Will update this diary as cure goes, but i feel so many nice words were unspoken, felt that FB will change my view about Autos - and they DID !!!
Amazing house !
Happy Growing !