Likes
Comments
Share


Processing
Likes
2
Share


@TolaMcFly
Follow
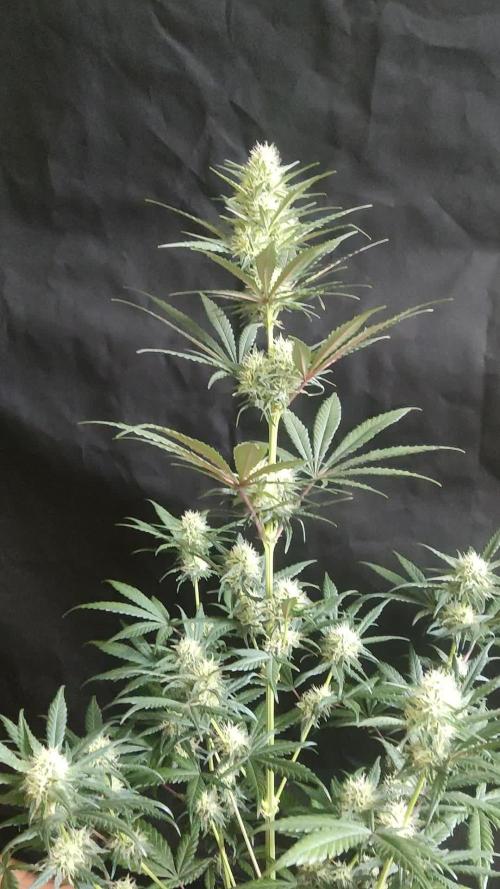
Han empezado a tomar ritmo en general esta cepa la he visto y cultivado y siempre se demora en mostrar flores contundentes , va lento pero seguro , lo mejor que tiene es el efecto que verdaderamente se parece al lsd , no se que habrá hecho Barney’s farms con esta cepa pero es un efecto muy fuerte , adjunte unas flores de otro cultivo , esta semana defoliamos otra vez las hojas más nuevas , dándole pelea al frío que ya afuera alcanza temperaturas de 2º C , de noche la temperatura fructua demasiado las plantas están tomando tonos violáceos y se ven muy pero muy parejos todos los cogollos que se vienen.


Likes
22
Share


@bypado_farm
Follow
Day 43:
Watered each plant with 1L with nuts
1589 ppm, 3380 us/cm, 3.3 EC (purple punch and wedding cheesecake)
1563 ppm 3325 us/cm 3.3 EC (strawberry banana)
1476 ppm 3180 us/cm 3.1 EC (gorilla cookies)
I have 3 different feedings for the 10 plants
They look healthy
Day 45:
Watered each plant with 1L with nuts
1563 ppm, 3325 us/cm, 3.3 EC (purple punch, strawberry banana, wedding Cheesecake)
1286 ppm, 2765 us/cm, 2.7 EC
(gorilla cookies)
2 different feedings for the 10 plants
Day 47:
Watered each plant with 1L with nuts
1584 ppm, 3380 us/cm, 3.3 EC (purple punch, strawberry banana, wedding Cheesecake)
1481 ppm, 3180 us/cm, 3.1 EC
(gorilla cookies)
2 different feedings for the 10 plants
Likes
218
Share


@DevilsBud
Follow
Week 9 of Critical RQS
Day 57 FLUSH WEEK!!!!!
I have decided to flush the critical.
Normally the critical needs 7 to 9 weeks of flowering and on week 9 . I don't see a lot of white pistils anymore and tricomes are all cloudy and some ambers it's going to be a exiting week.
Day 58
Flush the plants and run off had a lot of nutrients in it so have to flush for quit a bit
Day 59
Drying the soil out some and then do big flush again hopefully i will get those nutrients out other then that critical is looking awesome 🤘🏻😎🤘🏻
Day 60
Flush them again today and getting the nutrients out of the soil I probably have flush at least for a week i had bin a bit lazy checking with EC meter and now i have to deal with it i don't like to be inconsistent but is was a bizzy week
Day 61
Sunday rest day nothing going on 🤘🏻
Also want to thank everybody for the comments likes etc you know who you all are 👍🏻😍👍🏻
visit www.marshydro.eu
for your best gear and use the PROMO CODE: DEVILSBUD
Fully marshydro supported Setup:
Marshydro GT100X100X180
Marshydro Ts 1000 LED lamp
soil :Plagron batmix
Nutrients :Advanced Nutrients
Advanced Nutrients pH Perfect Bloom
Advanced Nutrients pH Perfect grow
Advanced Nutrients pH Perfect micro
Advanced Nutrients B-52
Advanced Nutrients Voodoo Juice
Advanced Nutrients Rhino Skin
Advanced Nutrients Big bud
Advanced Nutrients Bud candy
Advanced Nutrients Overdrive
Advanced Nutrients flawless finish
Advanced Nutrients Sensizym
BioBizz - Calmag
Mars Hydro tent handy info
Lock All Light Inside: MARS HYDRO Grow Tent Interior is made of diamond mylar. Non-toxic to the environment, no harm to plants. High-quality 1680D canvas being double stitched, (ALL OTHERS BRAND grow tent is 601D canvas) which is tear-proof for perfect light locking, No light leaks or rips at all.
Durability Grow Tent :Stable Metal corner adapters and poles are the trustful supporters of the tent. No rusting nor paint-falling. Quick easy tool-free installation. Carries strong heavy-duty SBS zippers, double layer lining to create a light-proof seal.
Easy Observation of your Plants: Special peek👀 window made by double layers of cloths. Observe the growing conditions of your plants without opening the tent and avoid disturbing plants. The peek window also serves to dissipate heat and ventilate air.
Removable Tray Keep Clean: The package includes a removable waterproof floor tray to hold soil and fallen leaves. The tray can be taken out easily to wash. Removable and water-proof cleaning easy.
Good Ventilation&Fast Assembly: Circular double-sleeved vent holes with adjustable nylon strap for air circulation by exhaust fan, ducting, carbon filter, or reflector. Better allows proper light, heat, and airflow. Quick tool-free installation. Reinforced by a sturdy metal frame to ensure security and stability, supports up to 140lb. Perfectly safeguard your plants to thrive even in winter.

Likes
226
Share


@Kitties_and_Colas
Follow
~_~_~_~_~_~_~_~_~_~_~_~_~_~_~_~_~_~_~_~_~_~_~_~_~_~_~_~_~_~_~_~_~_~_~_~_~_~_~_~_~_~_~_~_~_~_~_~_~_~_~_~_~_~_~_~_~_~_~_~_~_~_~_~_~_~_~_~_~_~_~_~_~_~
10/01/21
😻 Week 6 is here!! The girls are starting to get really heavy, we may be forced to cage the rest for support, we couldn't move them much this week for fear of them collapsing..not recognizing or stopping the runaway stretch soon enough has come back to bite us..lesson learned about this strain.. the canopy is terribly uneven lol, we're just kinda letting them do their own thing at this point, we did drop 1 of 2 lights to accommodate the shortest of the group. The buds on this strain are incredibly dense, it looks like it will be some pretty good smoke ..we'll likely cut all feed by the end of this week, giving them roughly 2-3 to flush out..thanks for reading if you made it this far and happy harvests friends!!! 😽💨❤️💡🌱
https://youtu.be/KZXdy_l_b_A
~_~_~_~_~_~_~_~_~_~_~_~_~_~_~_~_~_~_~_~_~_~_~_~_~_~_~_~_~_~_~_~_~_~_~_~_~_~_~_~_~_~_~_~_~_~_~_~_~_~_~_~_~_~_~_~_~_~_~_~_~_~_~_~_~_~_~_~_~_~_~_~_~_~
10/04/21
😾 Well it happened, they finally buckled lol, this bud is super dense..and more popcorn than we usually get ( ill make hubby clean it lol 😸) but even that will have some weight to it. We staked 2 of 3 plants and decided to switch to ph water for the remaining 3 weeks (or so)..thanks for stopping by grow family and happy harvests!! 💡🌱❤️😽💨
~_~_~_~_~_~_~_~_~_~_~_~_~_~_~_~_~_~_~_~_~_~_~_~_~_~_~_~_~_~_~_~_~_~_~_~_~_~_~_~_~_~_~_~_~_~_~_~_~_~_~_~_~_~_~_~_~_~_~_~_~_~_~_~_~_~_~_~_~_~_~_~_~_~

Likes
15
Share


@MrJones
Follow
MrJones Ztrawberriez Auto
🍓╰⊰🍓´🍓⊱╮🍓╰⊰🍓´🍓⊱╮🍓╰⊰🍓´🍓⊱╮🍓╰⊰🍓´🍓⊱╮🍓
💧 Feeding - Using Gaia Green Grow / Bloom and Compost Teas
🍃Training / LST-Defoliation-Topping TBA
🕷️ IPM - Will be using Green Cleaner" 1 OZ per Gallon, and CannControl from Mammoth alternating between products each month for Integrated Pest
🍓╰⊰🍓´🍓⊱╮🍓╰⊰🍓´🍓⊱╮🍓╰⊰🍓´🍓⊱╮🍓╰⊰🍓´🍓⊱╮🍓
▶️Sunday 10.29.23 - Going to leave the light cycle alone for another week, these ladies are blowing up pretty well, don't want to mess with the MoJo :)
🍓╰⊰🍓´🍓⊱╮🍓╰⊰🍓´🍓⊱╮🍓╰⊰🍓´🍓⊱╮🍓╰⊰🍓´🍓⊱╮🍓
▶️Bud Description Ztrawberriez Auto produces long and fat buds with a beautiful light green shade with oftentimes purplish hues and a thick layer of resin that starts at the top of the flowers and continues all the way to the tip of the sugar leaves. It’s the typical bud structure you would expect from hybrid varieties topped with an explosion of fruity terps that’ll hit you in the face with a blend of creamy, fruity, and sweet aromas as soon as you break the buds open. Definitely a must for terp heads and extractors looking for exaggerated flavors and aromas
🍓╰⊰🍓´🍓⊱╮🍓╰⊰🍓´🍓⊱╮🍓╰⊰🍓´🍓⊱╮🍓╰⊰🍓´🍓⊱╮🍓
▶️SOIL MIX
40% ProMix HP
40% Coco Coir 70/30
15% Worm Castings
05% Malibu Compost
🍓╰⊰🍓´🍓⊱╮🍓╰⊰🍓´🍓⊱╮🍓╰⊰🍓´🍓⊱╮🍓╰⊰🍓´🍓⊱╮🍓
Likes
45
Share


@masterofsmeagol
Follow
8/21, 8/22 TOASTED TOFFY WAS TREATED WITH PLANT DOCTOR ON THE 22nd. It's been a few days of rainy dreary weather. This morning I went over and did some MORE defoliation on the toasted toffy trying to get all infected leaves off. I then used the rest of the k bicarb on the gmo in the middle. I haven't seen hardly any pm. So that seems to be working. However I don't want septoria to spread through my garden either. Hopfully the plant doctor will take care of the problem. If not I'll get something different. I can make a diy Dr. Zymes or I could just go to the store and buy something specific like trichodermia. The weather has been a fungus nirvana. The conditions couldn't have been anymore perfect for mold development. I'm super impressed with the k bicarb treating the pm. I took tons of pictures yesterday but I've been sick and couldn't upload them. I still need to sanitize and put my supports up. I'll keep this updated with what I'm doing.
UPDATE: AFTER UNCKES FUNERAL I WATERED THE SHERB PIE THAT I DIDNT LAST TIME AND THEN I FED. I DIDNT FEED THE TOASTED TOFFY DUE TO IT BEING TREATED WITH PLANT DOCTOR. EVERYTHING GOT A QRT THE 50GAL GOT MORE. TWO GALLONS TOTAL USED. I NOTÌCED SOME SLIGHT PM ON THE GMO IN THE MIDDLE. IT WOULD BE TIME TO TREAT AGAIN ANYWAY. I PLAN ON WATERING TOMORROW AND TREATING THIS PLANT AGAIN. IM HESITANT TO UsE PLANT DOCTOR (do to feeding tonight) RIGHT OFF SO ILL PROBABLY USE YHE K BICARD. IT WORKS GOOD. I SHOULDNT HAVE FED THAT PLANT SO I COULD APPLY THE PLANT DOCTOR INSTEAD. THAT SEEMS TO BE WORKING REALLY WELL. LAST TIME I USED IT WAS ON FUSARIUM AND THATS JUST A LOSING BATTLE. DID A QIICK VIDEO ILL UPLOAD TOMORROW.
8/23 I HAD A CRISIS SITUATION AND I FUCKED UP THE DIARY. I THINK I JUST DIDN'T RECORD WHAT I DID ON THIS DAY.
8/24 I checked the bags and they were heavy. I watered the sherb pie today as it missed the last watering. Everything but the toasted toffy got fed yesterday. I noticed some slight pm on the middle GMO that I've been treating with k bicarb. Just a couple leaves. Looks like a couple spots I missed. I was going to apply it again but I dodnt have time. I'll be back over soon and I'll treat it and do the defoliation needed. Maybe I'll even sanitize and get support up. Since I fed yesterday I don't want to use the plant doctor for a few more days. I'm thinking of treating everything with it. I need to read and see when the next application for toasted toffy is due. Things are really starting to flower. Once I get the work done I may add beastie bloom to my nute line up. I think I'll do another k-bicarb app on the plant with pm. It's doing a good job. Since the l bicarb I don't see any pm. I should've held off feeding it so I could've used plant doctor. I'm monitoring toasted toffy and if it keeps working good I'll treat everything preventatively.
WENT BACK OVER AROUND 11:30 BECAUSE IT HAD CLIMBED INTO THE UPPER 80'S. AS I SUSPECTED THE PLANTS NEEDED WATER. THEY COULDVE WAITED UNTIL TONIGHT BUT UNFORTUNATELY I HAvE TO DO THINGS WHEN IM ABLE TOO. EVERYTHING GOT A GALLON EXCEPT THE GMO IN THE MIDDLE IN THE 30, THAT GOT 1.5. SHERB PIE GOT IT YESTERDAY AND ISNT FLOWERING AS VIGEROUS SO IT USES LESS WATER. BEFORE WATERING I WENT THROUGH THE ENTIRE GARDEN AND DEFOLIATED WHAT NEEDED TO BE DEFOLIATED. I HAVE A FEW SMALL LIMBS I SHOULD PRUNE BUT THAT STUFF MAKES GOOD HASH MATERIAL AND ACTUALLY ADDS UP. I NOTICED A LITTLE BIT OF PM ON THE GMO I TREATED. Just a couple spots on a couple leaves and I removed them. I MIXED UP K BICARB AND ILL APPLY IN THE MORNING. I WANTED TO USE PLANT DOCTOR BUT SEEING THAT I FED ILL WAIT. ID LIKE TO GIVE THEM ALL PLANT DOCTOR AS A PREVENTATIVE. SUPPOSABLY IT STIMULATES AN IMMUNE RESPONSE WITHIN THE PLANT WHICH FIGHTS THE PATHOGENS THEN LEAVES POTASSIUM AND PHOSPHORUS BEHIND AFTER 4 DAYS FOR THE PLANT TO USE. I THINK ITS GETTING CLOSE TO TREATING THE TOASTED TOFFY AGAIN. ILL HAVE TO LOOK. I TOOK A VIDEO BUT ILL HAVE TO UPLOAD IT it.
8/25 I know the diary is fucked up. But I know I watered yesterday. Except the sherb pie. I didn't check the weight bit did a bunch of defoliation. I made another half gallon of k bicarb with a drop of dawn and sprayed all the gmos. I only saw a COUPLE spots with pm on them and I removed them. Still though I wanted to make sure it doesn't get out of control. I should've checked the weight of the sherb pie but I'm sure it's fine.. I took a video but I can't upload it yet.
WENT BACK OVER AROUND TWO. IT WAS A BLISTERING HOT DAY IN THE 80'S. THE BAGS WERE DRY. THEY HAD A LITTLE WRIGHT TO THEM AND MOST SOME LEAVES WERE PRAYING. SOME WERE STARTING TO DROOP THOUGH. I WATERED EVERYTHING A GALLON EXCEPT THE SHERB PIE I GOT THIS MORNING. I gave the gmo in the 30 1.5. THE EVENT HORIZON IN THE MIDDLE COULDVE WAITED UNTIL MORNING BUT AT LEAST I CAN KEEP TRACK OF IT EASIER THIS. MAYBE I SHOULD GIVE THE 50 MORE WATER AT A TIME. IM GETTING YELLOW LEAVES. I THINK ITS PROBABKY SENESCENCE. ITS ABOUT THE SAME TIME EVERY YEAR I START LOSING SOME LEAVES. IT SEEMS TO BE JUST THE SHERB PIE AND THE BIG ONE IN THE 50. THAT PLANT HAS QUARTER SIZE BUDS ON IT THOUGH. ITS AMAZIBG HOW MUCH THE WATER INTAKE CHANGES WHEN ITS 60 OR UPPER 50S WITH HIGH HUMIDITY TO WHEN ITS IN THE 80S ALMOST 90. I HOPE IM NOT WATERING TO OFTEN. ITS BEEN COLD AT NIGHT. IN THE 50S. THE EVENT HORIZON HAS TURNED A NICE PURPLE ON MANY LEAVES. THE GMO'S AND SHERB PIE ALSO ARE TURNING PURPLE AND OTHER FALL COLORS. I SAW WHAT LOOKED LIKE SEPTORIA SPOTS CRAWLING UP KY EVENT HORIZON IN THE BACK. IN GOING TO TREAT IT WITH PLANT DOCTOR TOMORROW.
8/26 Rainy day. I noticed some septoria on the toasted toffy climbing a bottom branch. But it is time to reapply plant doctor. I saw a couple spots on the event horizon and I treated it today with 1/4 gallon of 2tsp per gallon plant doctor. I sprayed the leaves then I used the rest on the soil. The k bicarb is still keeping any pm at bay. I haven't seen a spot. I hope the plant doctor helps the event hotlrizon. I'm not even sure if it has it but I want to be cautious. I'm thinking of treating them all with plant doctor. I'm also going to use beastie bloom on some of the more advanced plants. I wasn't expecting it to rain but it wasn't for at least a couple hours after I sprayed. I ran another support line across the cage. I need to lst both event horizons and defoliate the sherb pie. It's weird but it seems like EVERY day I go over the flowers are bigger! I see birds darting out when I approach. Maybe that's why i haven't been finding pillars. I found ONE hairy one this week trying to escape to the soil on a string. I got him though. We'll see how it goes. If not I have other options for treatments if needed. That plant in the 10 is HUGE. I'm suprised it got that big in 10gals! Trying to upload videos but they are LONG so I don't know if they

Likes
34
Share


@Southwest_budders21
Follow
Candyman Day 22, Week 3 of veg! Will probably push 3 more weeks of veg until I flip 😬
The first plant (first pictures) seems a lot smaller then the other two 🤔 I've upped the lights to 50% intensity now. Second plant I've topped a set of lower branches aswell hopefully can start using my lst clips to train all three very soon. Last one seems a bit unhappy to me but still growing nicely. First couple branches only pushed out 3 finger leaves probably nothing just not noticed that before 🤷♂️🏼🤣
Update: I've just applied some LSTing so see how they look over next couple of days
Likes
18
Share


@valiotoro
Follow
Hello everyone 😎
Week 7 of flower for the Amnesia Zkittlez🍭
Only 1 plant left then finito✔️
Very nice smell super sweet🤤
The buds are super sticky🔥
Likes
13
Share


@Fatnastyz
Follow
10-14
Buildabloom 1/2 tap
10-16
Water
Water between 500-700 ml a day.
10-18
Fed 450 ppm build a bloom
10-19
Water few leaves removed.
Love her smell. Lemon, lime, sourish!
I definitely over filled my tent and this one felt it the most. But mainly because I didn't know what to expect. Somehow she has not been over fed, yet! I still got time!
Im excited for her and to grow her again! Oh and to learn to not over feed more than anything. Think imma try just drit, till shes hungry, then do water feeds! When hungry 🤣🤞
.
Likes
16
Share


@Hawkbo
Follow
The berry scent is intensifying and the buds are fattening up pretty good. Since I should be done with the harvest pics from the auto crop I can prob start taking some pictures next week. Only change this week was humidity dropping it's getting cold here. I've been defoliating a little bit here and there every time I feed but nothing too heavy.
Likes
27
Share


@RDWCGrowing
Follow
1/20/2023- So much to do pre grow and over the next 16 days, absolute first order of business is that I have to take down my current Grow---TIMBER-- Then I have a list of things I have to get done in order to be ready to start this grow 1 Feb.
With that said
T - 2 days until start 48 hour Flush
T - 2 days until Start 48 hours of Light
T - 4 days until TIMBER!!!
Items that need to be done before 1 Feb 2023
1. I need to clean the tent out
2. I need to clean the equipment- Proper Sanitization between grows in Hydro is a must!!!
3. I need to get the hole in the ceiling above my tent repaired- For my last grow I had a deep sink installed in my grow room, to make Hydroponics a little bit easier and have a water source in the same room. The seals on the pipes they were installing broke and leaked through the ceiling causing some damage all the way across my grow room, I was already weeks into my grow and couldn't risk them working above my tent and it would have been very awkward positon for them to be working in as well, so have to get this done quickly between chop and germination.
4. I have to install my new light- I was using a Vivosun 4000 and for this grow I am switching up to a Spider-farmer SF 7000.
1/20/23- For this upcoming grow I am working with M/F photo seeds so I ordered 4 Sex determination kits. I recieved my my 4 Sex determination testing kits from Rimrock Analytics today. I will be using these to test my plants at week 2 of Veg so that when/if I take clones I know I am taking them off females. As well as I don't want to accidently pollinate my tent during this grow I am looking for big beautiful buds not seeded buds. :-)
1/24/2023- Harvest of current grow- Started at 2:00pm and finshed wet trim and firt batch into the freeze dryer.
1/25/2023- Next batch into the freeze dryer and cleaning all my equipment for this Grow.
T-1 Day until the workers are supposed to be here to fix the hole in the Grow Room.
T-3 days until I instll my new Gorilla Grow Tent and my New Light Spider Farmer SE-7000 for this grow.
T-7 Days until Start of Germination
1/26/2023- Harvest is done ran through the Freeze dryer and dry tim completed.
1/27/2023- Grow Room repairs completed. Hole is gone Letting the paint dry before I install the new tent.
T-2 days until Install the New Gorilla Grow tent and the new Light
T-3 days until I put the hydro equipment in the new tent
T-5 days until Germination
1/29/2023- Day 0- Final Pre Germination activities
Germination Start T-3 days
The paint on the ceiling was dry and it was time to finish prepping for Germination. I got the following items knocked off my list.
New 4X4 Gorilla Grow Tent is up and ready
New Spider Farmer SE-7000 Light is installed- Thanks Moony Grows for the suggestion and for the Code that got me some money off and free shipping (Moonygrows)!! I turned the lights all the way up to max and set the timer to 18/6 0600-0000. I will keep an eye on the temperature and humidity without my plants and see how hot it gets with the new light.
I put my Hydro system back together and put in 40 gallons of water into it, time to monitor for leaks the next few days.
I Setup my cloning machine for Germination Days 3-11
1/30/2023
let me break down the situation, ROOM in the TENT.. Enough said.. No really I tried putting my exhaust system up in the new tent with my new light, The light is so big corner to corner that it really didn't give me enough room for the lights be be raised, with the exahust hanging the buckets my plants are Starting in are 2 and 1/2 feet off the ground, great for plenty of room for roots but not so great for upwards space for the plant to grow. In a 6' 11 tent with the exauhst in side and hanging that only gave me a little over 4 feet of grow room to play with. My last grow if you saw my diary, anyone could tell I was struggling to keep the buds off the lights. No good, Since space was such an issue I was running my carbon filter inside on the ground but It really needed to be up sucking the heat out not shooting the cool out. With that setup I was sucking air through the filter and pushing it out the tent at a bottom exhaust hole cold out. Wasn't doing me any good for my heat. I was hitting temps of up to 85 degrees. I bought a portable AC unit and have been running it in the grow room to try and keep temps below 85 and I have had to lower the power on my lights during grow also not ideal.. With that said a friend of mine MoonyGrows (Check out his diary) took the time to look at my issue send me a picture of my grow tent setup with detailed instructions on how to suck the air out from the top but putting my filter and fan on top of my tent so no room issue and I am sucking the air out from the top where the heat is instead of pushing the air out from the bottom where the cool is... THANK YOU MoonyGrows For taking the time to help me get this straightened out.. Now I have room and I have the exhausts working right and now my temps with everything at 100% are topping out at 80 this dropped the temp by 5 + degrees at 100% max.
T-2 days until Start of Germination
Prepped my seed tray with humidity dome
Prepped my Rapid Rooter plugs. I Used RO water, and I added a few drops of Hydrogen peroxide to Oxygenate the water. I then PH balanced between 5.7-6.0 the same that they will be getting in the Cloning Machine and when they get to thier final grow pod. I perfere the 5.8x range and I hit 5.84 for these rapid rooters. If you want to see a complete video on the process HowWeedGrow has an amzing video that shows step by step how to do it and explains it better than I ever could including how to plant the seeds. Which I will cover when I get to that step on Wed. https://www.howweedgrow.com/how-germinate-weed-seeds-cannabis-rapid-rooters/
1/31/2023
T-1 day until Germination Start
All set and ready have my Rapid Rooter plugs ready to go have my seeds out.. Have my seed tray warming up tonight. Tomorrow morning right into the Rapid Rooter then strait into the tray. I will spray the dome to start the humidity in there.
2/1/2023
Germination Day!!
Let the games begin!
0600am Put the seeds into the Root Riots. And then put the seeded Root Riots into their first home the Seed tray. I have them under the light 24/7. Sprayed the dome
7:30pm Sprayed the Dome to keep humidity going on the dome.
2/2/2023
Day 1 of Germination
Sprayed the Dome in the morning
Sprayed the Dome in the evening
2/3/2023
Day 2 of Germination
Roots are starting to come out the bottom of the root riot plugs and the heads are slowly popping out of Number 4 just below the surface.
Afternoon- Number 4 has popped up
Evening- Number 3 has popped up as well. Happy Dance!!
2/4/2023
Day 3 - Germination
Surprise Surprise Surprise- all 4 have now poked their heads up.. Happy day!! 100% Germination succeeded.
Now major milestone to track is how many are female and how many are male.
I will take look at the roots this afternoon/evening and see if they have enough root to go into the cloning machine for the next 7 days before they go into their Hydro Pods.
Day 3 - Germination - Evening..
Roots looked good and they were tall enough to make it into the cloning machine.
Now that they are all in the cloning machine I have switched the lighting to veg state 18 on 6 off.
2/5/2023
Day 4 - Germination - Morning
All the Ladies (fingers crossed) looking great stretching nicely and look nice and green, Photo synthesis underway....
UPDATE!! After a very interesting POD cast on FSTS by Dr. Bruce Bugsbee from Utah University, I have shifted my lighting to 24 hours on through seedling and then I am going to shift to 20 hours on the rest of Veg.
2/6/2023
Day 5 - Germination
While Checking on my conditions inside the new tent last night, I found that the Humidity was down to 39 Percent. I added an AquaOasis Cool Mist Humidifier, the reason I selected this humidifier is that I needed one that could be turned on and off utilizing my Inkbird Humidity Controller IHC200 that I have my Pro Breeze Dehumidifier currently running with.
Root structures are starting to get there about 1/4 of an inch.
2/7/2023
Day 6 - Germination
Everything seems on track more roots poking out of each today. They are each getting a little taller as well.
Checked in the evening and number 3 was drooping the Root riot plug on the bottome was dry and the roots were not in the water yet. I raised the water just enough that the longest root that was sticking out is now hitting the water.
2/8/2023
Day 7 - Germination
Everything looked good while checking in on them this morning number 3 is now full up and no droop again.
2/9/2023
Day 8 - Germination
T-2 days until Plant into Forever Pods and we start week 1 of Veg .. :-)
Surprising thing to me is that number 1 and 2 were later in popping then 3 and 4 but the roots are growing longer in 1 and 2.
2/10/2023
Day 9 - Germination
Number 1 and Number 2 are definitely ready for transplant today.. Based on how they were yesterday and where they are today I am hoping by tomorrow 3 and 4 are ready. Today they look to me where 1 and 2 did yesterday.. I really hope 3 and 4 catch up by tomorrow since..
T-1 day until transplant to new/ final home for grow.
Need the roots long enough to have some clay down in the basket to keep the root riot out of the water and only roots in the water..
2/11/2023
Day 10 - Germination
Today they got placed in thier forever Home, 7 days from Sprout and 7 days until Week 1 Start.
PPM- 180 this is water out of the Tap
Temp Water: 70.7
Temp Tent: 77
Humidity: 40% I have a humidifier going 24/7 to try and bring this up.. I also have Humidity Domes on each plant.
2/12/2023
Day 11 - Germination
Sprayed the domes, all are looking good.. Nothing much to do at this phase but Keep monitoring the PH level in the system and making sure they have a comfortable home.
T-6 days until Week 1 start
2/13/2023
Day 12 - Germination
Sprayed the domes, They were looking a little yellow today so I moved the light down to assist. Nothing much to do at this phase but Keep monitoring the PH level in the system and making sure they have a comfortable home.
T-5 days until Week 1 start
2/14/2023
Day 13 - Germination
Sprayed the domes, They were looking a little Florissant yellow today, with what looks like slight burn on the tips, I talked with a fellow grower and we agreed that It was probably that I was drowning them, Yes you can drown you plants even in Hydro, but only early on.. :-) It usually happens with the water being too high, which soaks not only the roots but the medium (root Riot plug in this case). I lowered the water from touching the bottom of the pot to about 1" away. This will probably take 3-4 days to resolve. I will continue my daily monitoring.
T-4 days until Week 1 start
2/15/2023
Day 14 - Germination
Sprayed the domes, continue my daily monitoring they look a little darker green instead of lime green now that I lowered the water levels in the system, so I think that I might have resolved the issue but it will take a few days for recovery to happen.
T-3 days until Week 1 start
2/16/2023
Day 15 - Germination
I looked in on them this morning, 3 and 4 look like they are doing well and recovering nicely. Number 1 not so much it has brown spots on the leaves, this very well can still be a side effect of the overwatering but I decide to go ahead and add Nutes earlier than I was planning just incase. I was going to wait until Saturday but I think intervention is necessary now especially after drowning them early on.
I added 1/2 what I am planning on adding for week 1 start. I also think I am going to adjust my chart to add 1/2 2 days after plant from now on. I don't think it would hurt it to have some Nutes to pull from.
.25ml/Gal Calmag = 12.5ml
1ml/gal GH FloraMicro= 50ml
1ml/gal GH FloraGro = 50ml
1ml/gal GH FloraBloom = 50ml
T-2 days until Week 1 start = I will drain the system and start it over on Saturday with Week 1 Nutes.
2/17/2023
Day 16- Germination
I didn't even want to post today after looking in on them this morning, 3 of the 4 are now showing signs of dronwing.. Brown spots on the leaves, the water levels were still too high.. I drained about another inch out of the tanks.. Will see how quick they recover.. I start week 1 tomorrow and will have to ensure my water levels are at least 1" away from the basket on this round.

Likes
12
Share


@Kingseeds
Follow
This strain has a yield of extra large, compact colas that are heavy in weight and covered in extra adhesive trichomes that stick to your fingers. Cherry Punch's exterior is dark green and exhibits small amounts of midnight purple leaves
Cherry Punch's exterior is dark green and exhibits small amounts of midnight purple leaves. Its aroma is fruity but skunk-like, and has a soft, sweet berry taste that resembles its parent Purple Punch

Likes
13
Share


@DeepRootsGrowTrees
Follow
PABLO ESCOBAR / DIVINE SEEDS
WEEK#11 OVERALL
WEEK #10 VEG
This week was another good week of growth she hasn't had any issues in veg She's been a champ and she's starting to get bigger and a little bushy from her training looking good overall about another week before we flip due to some autoflowers finishing up. Stay Growing!!
Thank you for stopping by and taking a look it's much appreciated!!
Thank you DIVINE SEEDS!!!
BUDTRAINER.COM BUD CLIPS
PABLO ESCOBAR / DIVINE SEEDS

Likes
5
Share


@DivineBuds420
Follow
Update – Frisian Dew Trim Hash
Ich habe den Trim aus diesem Outdoor-Run mit der Eiswasser-Methode zu Bubble Hash verarbeitet, inspiriert von Frenchy Cannoli.
Das Material war nicht besonders gut – viele größere Blätter mit wenig bis kein Harz – trotzdem ist gut was rausgekommen.
Der Großteil kam aus den 73 und 25 Micron Bags, in 120/160 war kaum etwas.
Mit längeren Waschgängen wäre evtl. noch mehr gegangen, aber nach ein paar Stunden hat es mir gereicht.
Ich habe das Material getrocknet und zu kleinen "Temple Balls" gepresst.
Update – Frisian Dew Trim Hash
I processed the trim from this outdoor run into bubble hash using the ice water method, inspired by Frenchy Cannoli.
The material wasn’t great – quite a few larger leaves with little to no resin – but still yielded a decent amount.
Most of it came from the 73 and 25 micron bags, while 120/160 had very little.
Could’ve probably pushed it further with longer washes, but after a few hours I called it.
I dried the material and pressed it into small “temple balls.”

Likes
48
Share


@TheCannaProphet
Follow
~ WEDDING CHEESECAKE FAST FLOWER by FastBuds ~
Well fam, here we go again with another epic strain from FastBuds Fast Flowering stable. After having such tremendous success growing their Gorilla Cookies Fast Flower outdoors last year, I've decided to run another of their fast flowering strains outdoors this year... Wedding Cheesecake Fast Flower!
The best description of this awesome cultivar comes directly from my friends at FastBuds which is as follows:
"A delight for the mind and body: Wedding Cheesecake FF (Fast-Flowering) is a delicious strain that offers XXL yields in a 7-8 weeks flowering cycle. This terpene powerhouse produces loads and loads of mouth-watering vanilla-creamy-cookie-scented terps with hints of citrus and cinnamon. In addition to its delicious aromas, this variety grows very well in both indoor and outdoor setups, yielding up to 650 g/m2 without extra maintenance, making it the ideal strain for beginners as it allows you to maximize yields while minimizing work. This super-fast feminized photoperiod version offers upbeat and energetic yet deeply relaxing effects that are perfect for consumers looking for a heavily focused, motivating, and creative high. It’s the ideal strain for those needing that extra energy boost to start a busy day on the right foot.
Wedding Cheesecake FF boasts chunky, large-sized buds with a thick layer of silvery-white resin and bright orange hairs scattered all over: that just screams ‘quality’. The lime-green flowers sparkle with an array of hues ranging from dark to light green, to magenta and purple, and reek of a delicious aroma that’ll remind you of fresh store-bought cheesecake.
This is an XXL hybrid that grows extremely tall in height, reaching up to 3m with one huge main cola and multiple long side branches that can withstand enormous yields of up to 650 g/m2 with ease. Wedding Cheesecake FF is extremely resilient to the elements and can be grown in almost every climate as long as you’ve got the space and basics covered, making her an excellent choice for those looking for large-scale harvests with a quick turnaround time without much effort."
________________________________________________________________________________________________________________________________________________________________________________________________________________________________________________________________________________________________________________________
The Setup:
This is going to be an outdoor grow, but I have started the Wedding Cheesecake FF indoors as our weather is still too cold to put her outside (nighttime temp's dipping regularly into the 30's℉).
The plan is simple... let her grow inside under a 19/5 light schedule until the nighttime temperatures stay above the mid 40's℉, at which point she'll be moved outside and transplanted into the soil which I have already setup and inoculated with beneficial microbes, and then let the fun begin!🤪💚
________________________________________________________________________________________________________________________________________________________________________________________________________________________________________________________________________________________________________________________
Weekly Updates:
6/1- Ten weeks from seed and the FastBuds Wedding Cheesecake Fast Flower has the pedal to the firewall now!
Today I top dressed the Wedding Cheesecake Fast Flower with 2 cups of Gaia Green 4-4-4, 1 cup of Down to Earth Bio Fish along with 1/2 gallon of worm castings. After top dressing and working the amendments into the soil by hand, I watered it in via garden hose with straight well water.
6/3- Rained hard today so I skipped watering the Wedding Cheesecake FF.
6/5- Today was sunny and warm. I watered the Wedding Cheesecake Fast Flower with straight well water from the garden hose.
6/7- There goes another week for the Wedding Cheesecake Fast Flower from FastBuds and she continues to impress and amaze me. I hope to see you next week!
Thank you for checking out my diary, your positive comments and support make it all worthwhile! 💚Growers Love!💚😎🙏


Likes
37
Share


@Roberts
Follow
Mandarin XL auto has snapped out of the heavy nutrition mutation. She is making grow progress. Things are going in the right direction. 🤞🏻it keeps going smooth. Thank you Meduc Grow, Gen1:11, and Ganja Farmer. 🤜🏻🤛🏻🌱🌱🌱
Thank you grow diaries community for the 👇likes👇, follows, comments, and subscriptions on my YouTube channel👇. ❄️🌱🍻
Happy Growing 🌱🌱🌱
https://youtube.com/channel/UCAhN7yRzWLpcaRHhMIQ7X4g

Likes
7
Share


@Cogollo_eu
Follow
**Encontrarás la traducción a español al final de la descripción**
From/Desde: 08/03/19 || To/Hasta: 14/03/19
From day/Desde día: 15 || To day/Hasta día: 21
You can find the Gorillas Diary here:
** Podéis encontrar el diario de las Gorilla aquí:**
https://growdiaries.com/diaries/25675-makingmoney-with-gorilla-mm-vs-gorilla
-----IMAGES & VIDEOS-----
Video 1:
7 days TimeLapse, +/- 1 image each 180 secs @ 30 fps, you can see how beauty is the dance of this babies and how are they growing. This is a fast timelapse adjusted to 1 minute for instagram, if you want to see the 3:21 min complete video (1fx60s 30fps) it's uploaded on the gorillas diary named abobe.
Video 6:
An overview video of the babies, moments before i performed the first topping/man-linning/prunning/LST on the biggest gorilla. The other one is recovering at time from those ugly color marks she has on them leaves. As the leaves seems not healthy i decided to not perform the man-lining on this one until it has a pair of healthy main leaves on which i can trust to guide.
-----WEEK SUMMARY-----
I traveled to Venice this week and i have very few photos, also i returned with a terrible flu, so i'm not going to take too much photos for the next week too, i'm so sorry.
The Money Makers are growing healthy and equitative, with very short nodal distances as you can see in photos 4 & 5, i'm not going to perform the same main-lining technique i'm doing with the gorilla, i'm going to test some things. With the Money Makers i'm going to perform something similar to the man lining but with 3 or 4 floors, i'll be twisting the main branch to create a circular horizontal proppagation with 6 or 8 branches. First i will fix the heights of the floors and then i will push them horizontally. Let's see where they go ;).
-----WATERING CALENDAR-----
12/03/19 - 700 ml with all week nutrients @ 0.95 E.C. PH5.9
12/03/19 - FOLIAR - Used about 25 ml of (200 ml water with 1ml Pro Active, 2 ml Plant Vitality + and 0.1 ml Foliar Spray)
*****ESPAÑOL*****
-----IMÁGENES & VÍDEOS-----
Vídeo 1:
TimeLapse de 7 días, +/- 1 imagen cada 180 segundos @ 30fps, observad la maravillosa danza de las nenas y cómo crecen. Esta es una versión rápida de 1 minuto que cree para instagram, si queréis ver el vídeo completo de 3:21 min (1fx60s 30fps), está subido en el diario de las gorilas que nombro en la cabecera de la descripción.
Video 7:
Un vídeo general del armario, está grabado momentos antes de realizar las técnicas de cultivo sobre la mejor de las gorilas. La otra se sigue reponiendo de esas manchas feas que le salieron en las hojas. Ya que las hojas parecen enfermas, he decidido no hacer el man-lining hasta que no tenga un par de hojas saludables en las que poder confiar para hacer el guiado y alimentar los brotes.
-----SUMARIO SEMANAL-----
Las Money Makers están creciendo sanas y equitativas entre si, con distancias internodales cortas como podéis ver en las imágenes 4 y 5, no voy a realizar el mismo man-lining que estoy realizando sobre una de las gorilas, pues voy a probar cosas. Con las Money Makers voy a realizar algo similar al man-lining pero respetando 3 o 4 pisos de las plantas, giraré el tallo principal para crear una propagación horizontal circular de las plantas con 6 u 8 ramas. Primero ajustaré las alturas de los pisos y luego las expandiré horizontalmente. Veamos hacia donde van ;).
-----WATERING CALENDAR-----
12/03/19 - 700 ml con todos los nutrientes semanales @ 0,95 E.C. PH5,9
12/03/19 - FOLIAR - He usado unos 25 ml de (200 ml de agua con 1ml Pro Active, 2 ml Plant Vitality + y 0,1 ml Foliar Spray)