


Likes
5
Share

@PavementPunk
Follow
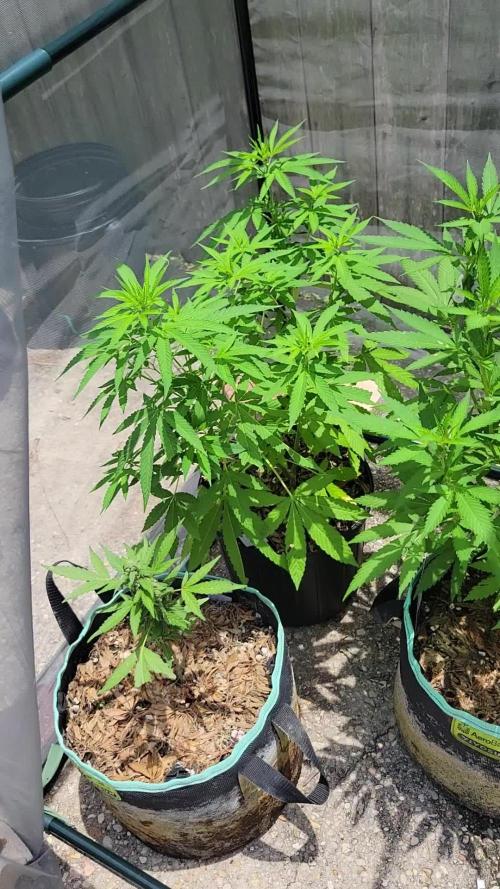
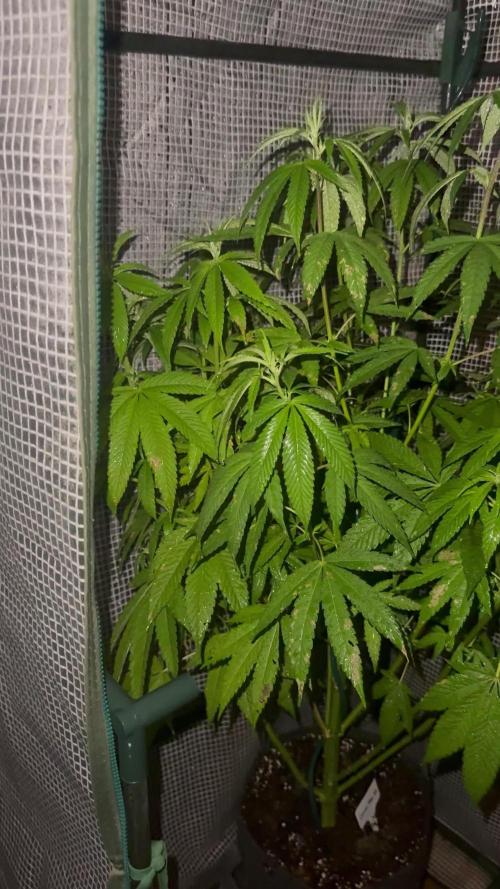
7/8/26 I really dont feel there is much to report on this plant or my whole grow in general. Maybe im just being lazy. I feel like it was just a bit of a normal week everyone got fed twice. I made sure to take my time and water them with care. Only real note is that i got a few spidermites in the tent. I caught it super early and manually squished them and hopefully its done. I did see one outside i believe. And thats got me wanting to lay down some pesticide to get rid of those bastards from around my house. This spit shot has been loving the sun loving it outside and is looking great. Photoperiod plants are the shit. Bad slow start? No worries just veg em longer and bang big gorgeous girl like woah now! 🙃happy growing friends ✌️
Processing
Likes
27
Share


@lMorphine
Follow
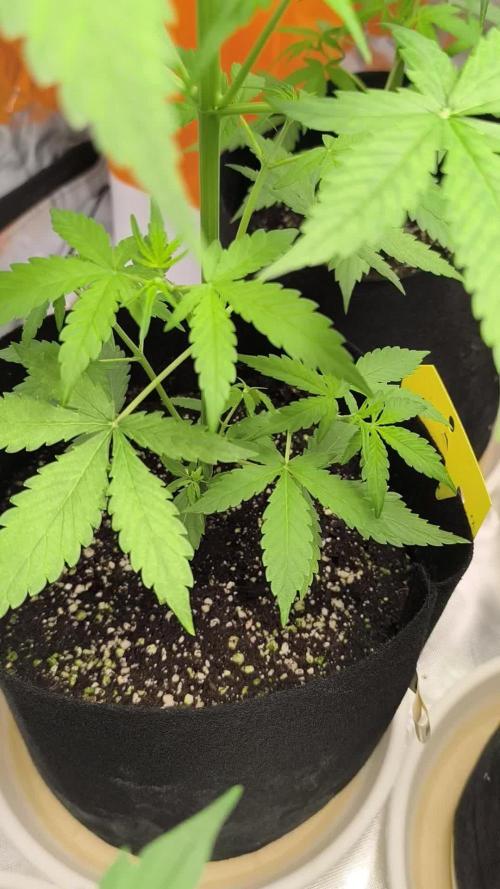
In week 8, she has been growing nicely. i think i will stay in Veg stage for 1 week further before turn to 12/12 because i want her to grow a bit more after she was stunned for a while. i also increase a ratio of nutrients for my plant and i think i will increase a bit more on next feed. if anyone has a recommendation feel free to let me know. Thank a million in advance 😁
in front of her i have a Blue Dream clone. i decided to do like a little bonsai in 1 gallon pot and turn to FLO with my Glookies 😍
Likes
8
Share

@GuanoRomano
Follow
🌱 Week 3 – End of Vegetative Stage
10/04 (Day 22): Watered with 500 ml at pH 5.7, EC 1300. Solution included 2.5 ml/L CalMag + 1.4 ml/L Coco A + 1.4 ml/L Coco B — Deeper Underground removed from the mix starting today. Runoff measured EC 700, pH 7.0. Considering removing a few fan leaves to allow more light penetration to the lower branches.
10/05 (Day 23): No watering today — pots still heavy and moist. The tips of new leaves are showing a very light green to yellowish color. Planning to start micronutrient supplementation directly in the nutrient solution in two days. Plants continue stretching rapidly; one grew 4 cm in the last 24 hours. Roots are now protruding through the fabric pots, indicating full root colonization.
10/06 (Day 24): Pistils visible on all plants — flowering will begin next week 🌸. Tried increasing light intensity to 20k lux, but plants showed stress, so it was reduced again. Still not obtaining reliable results with the lux meter, so I’ve ordered a PAR meter to better control light levels. Watered with 1 L of the same solution as Day 22. Runoff EC rising slightly to 750, pH stable at 7.0.
Week 3 Summary — End of Vegetative Stage
Strong vegetative finish: vertical growth continued steadily, some plants growing 4 cm in 24 h.
Root zone fully colonized — roots visible through the fabric pots.
All plants showing pistils → clear sign of transition to flowering.
Light management tricky this week; stress appeared above 20k lux. PAR meter ordered for better control.
Nutrient mix stable at EC 1300 (2.5 CalMag + 1.4 A/B). Deeper Underground discontinued.
Runoff EC ~ 700–750, pH ~ 7.0 → substrate still buffered high, but plants adapting well.
🌼 ➡️ Plan for Week 4 – Flowering Week 1
Nutrients:
Transition feed: keep CalMag at 2.0–2.5 ml/L, A/B around 1.4–1.6 ml/L.
Introduce bloom additives gradually (PK boosters or bloom A/B if applicable).
pH: Keep irrigation at 5.6–5.7 to slowly bring substrate down from 7.0.
EC: Increase gradually toward 1400–1500 µS/cm as flowers initiate.
Lighting: Use PAR meter to maintain 300–400 µmol/m²/s (~15–18k lux) during transition.
VPD: Raise to 1.0–1.2 kPa for better transpiration and nutrient flow.
Defoliation: Light removal of large fan leaves if necessary to expose lower sites.
Observation: Watch for stabilization of new growth color and confirm consistent pre-flowering on all plants.


Likes
25
Share

@Kirsten
Follow
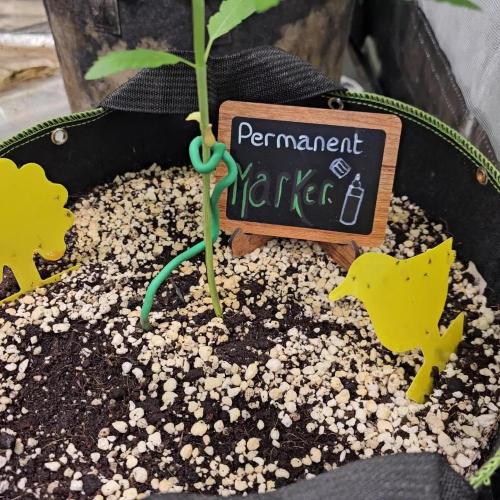
Permanent Marker has stalled in growth a little.
I think it has had a bit too much nitrogen. I'm not worried as I'm sure it'll all work out in the end 😅
5.9.25:
I decided the plant was ready for some training, I FIM'ed her. Hopefully I can just tie the odd branch down, when we get to that stage.
Here is what I did this week.
4.9.25:
I watered with 1L of dechlorinated water PH'd to 6.5 with;
💜 1ml Trace
💜 . 25 TSP Biosys
PH: 6.5
PPM: 365
9.9.25:
I watered with 1.5L of dechlorinated water PH'd to 6.4, with;
💜 1ml Trace
PH: 6.4
PPM: 361
Thanks for stopping by this week and hanging out 😁💚✌️🌱🧡🤞

Likes
Comments
Share


Likes
18
Share


@Stonyways
Follow
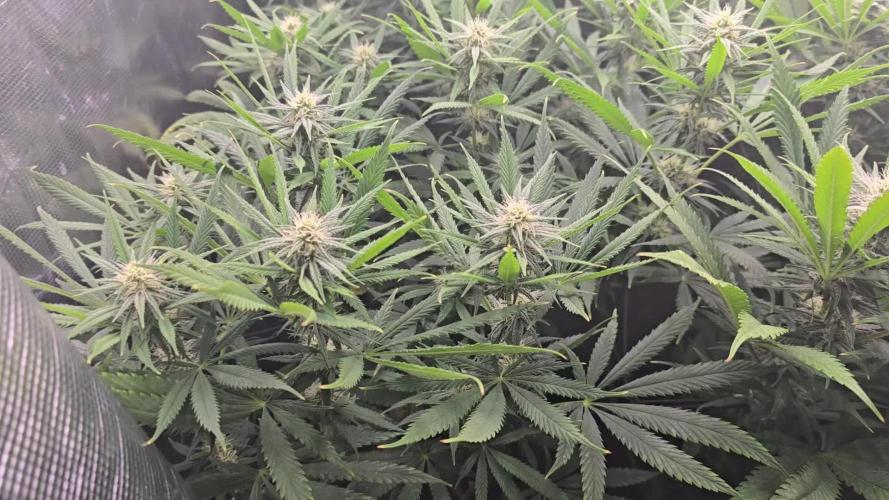
trimmed and netted the plants last night, 12/30, and the energy pushed the plants to stretch another 1/2 inch+
this will be the last week of vegetation as I prep this light leaking tent for flower, not a fan of mars hydro at all right now. their poles are the weakest I've encountered yet, too many light leaks and this is the first grow with it. My high cfm fan , which is only a 4", is pulling the fabric too much and causing the leaks to grow a bit. This is not new, its been happening with indoor tents for a while now but I thought a grow company such as MH would have a decent, respectable tent. My solution is Blackout Curtains draped over the sides. However, I am hesitant to do this with the MH tent as the poles for the tent are too weak as it is, tsk tsk tsk mars hydro.
will continue to increase the watts the next 6 days
HAPPY NEW YEAR
a combination of light and fresh soil has made the plants stretch so I will finish tightening up the MH tent today and ill start flower tomorrow, day 62.
while adjusting the height I must have nudged the dial for the dimmer and sent it to 184w. this would have been a big jump but manageable but I lowered the light 7" and the plants took a bit of a hit. I adjusted the light back down to 160w and I'll let the plants recover before anymore adjustments.
Likes
5
Share


@Lazuli
Follow
Big love to MSNL seeds 💚💚
thank you so much
I never smelled a perfection like this i love it as much as the alien og, my life got so much better now with this medicine
(i smoked my first buds from the smaller plants i did)
and its ridiculously insane it brought happyness and a tear to my eye


Likes
17
Share


@eldruida_lamota
Follow
Que hay familia,actualizo la primera semana de crecimiento de estas Runtz F1 automáticas de Zamnesia.
Vemos que las 5 están en perfectas condiciones, tienen un buen color y salieron sin ningún problema aparente.
Empiezo por supuesto abonando una pequeña cantidad de la gama Agrobeta.
La temperatura está un pelín alta 26 grados y la humedad anda entorno al 55%. Riego cada 48 horas y suelo pulverizar con agua para aumentar un poco la humedad ambiental.
Hasta aquí es todo estas próximas semanas veremos cómo van avanzando.
Agrobeta:
https://www.agrobeta.com/agrobetatiendaonline/36-abonos-canamo
Mars hydro:
Code discount: EL420
https://www.mars-hydro.com/
Os comento que tengo un descuento y para que compréis en la web de Zamnesia de un 20%, el código es ZAMMIGD2023
The discount 20% and the code is ZAMMIGD2023
https://www.zamnesia.com/
Hasta aquí es todo, buenos humos 💨💨💨.

Likes
2
Share

@SidekickGrowie
Follow
Ich hab mir vorgenommen mir mehr Zeit für die Pflanze zu nehmen. Regelmäßig gießen und Nährstoffe pushen.
- Die Blütebildung hat begonnen!
Raupen Angriff, IPW muss her!
Tag 87 : gegossen mit Calmag 0,65 auf 1 Liter (3 Liter)
Tag 88 : IPW Anwendung (1ml auf 1 Liter)
Likes
9
Share

@RBG
Follow
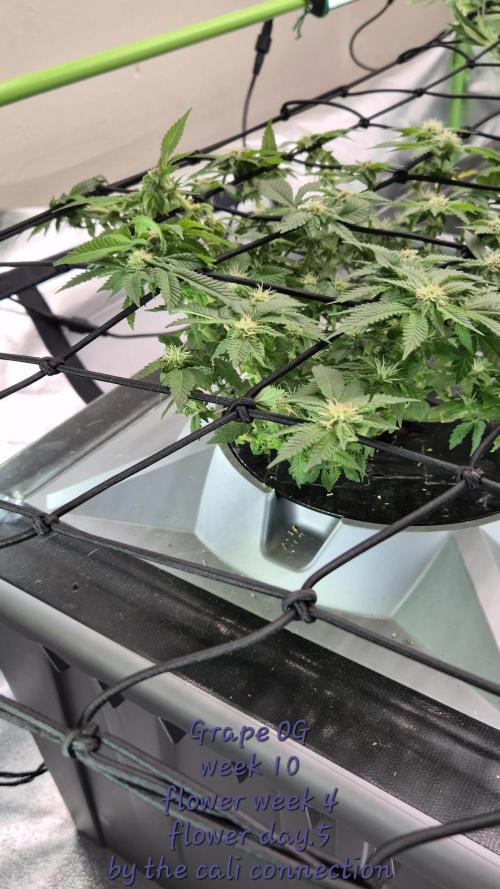
Week 10
Flower week 4
Flower-day 1
05/11/2025
Nutrients change
Floramax veg1
Floramax Organabud
Floramax flowering enhancer
Floramax Rezin
Cyco platinum series silica
Green planet bud booster
Complete grow cal mag
( sensi unfortunately got refunded so got this instead today )
Sleeps with the fishez ( hocI )
Ladies are looking good overall, let the fun goodness begin i guess 😂
7/11/25
Blockage within systems finally fixed after 4 flushes. Not exactly sure what it was but whatever ive done has fixed it for now 🤷♂️😂 take it as a win for now i guess
11/11/25
Unfortunately I hate scrogg so took it off but once I had spread her out again with lst, I noticed that shes struggling with lower growth. I saw this with my autoflowers. I'm not too sure if its from too many budspots,colas or if it's just from being overpacked. So her pisitils showed up on the 25th, some people count from that date as flower and some count as soon as you flip, I've decided to go of the 25th as first pisitils so its only 3 n a half weeks currently.
I decided to take a few branches and a few of the lower budspots to try and help her even herself on where shes taking her sugars and growth.
No Defoilation, just 10 or so budspots n only 3 branches. I DONT NOT RECOMMEND doing any of this, I'm only reattempting this because it worked on autos I had going. I do think I've made the right choice
Grape og is meant to be a pretty hearty and forgiving strain, so she should bounce back pretty quickly
Oh well. I'll definitely be rerunning her again later in future but trying a different method
Processing
Likes
3
Share


@Longmountain
Follow
Did a good thinning out today, took some more clones she is a great plant to clone from grows well under my mars hydro TSL2000. I tied her back a little further took off all the big fan leaf 🍁 and trimmed up to 4th node.
I added 1gal of ro water with 1tbs of big bloom, 1tbs of molasses, 1/2 tsp kelp, 1tsp MykosWP, top dressed with 3 tsp magnesium sulfate and 3 tbs of alfalfa meal. She is very strong odor of skunk cross with a slight fruity smell but strong nonetheless.
Likes
6
Share


@Shadow_grower89
Follow
Im goong to start a to flush one of my plants this week for 10 days the other one is a few weeks away yet

Likes
16
Share


@GrowerGaz
Follow
Just water as they are very small , light is a 100w Samsung led light for the first week then I will switch to the Zeus 465w Compact pro.
I have repotted the plants now the seeds have popped, they are in 2 litre pots now. As soon as the toots hot the bottom of the pots I will put them in my autopots system.
I have tried adding a layer of perlite on top of the bAc soil. To try and stop any bugs getting into my soil and also reflect the light back.


Processing
Likes
6
Share


Processing
Likes
7
Share


@Stonesgrowing
Follow
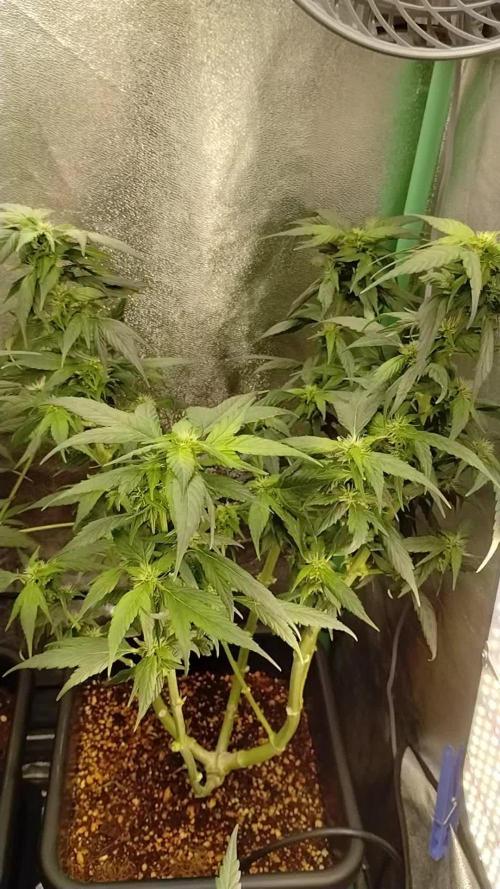
She's doing so well now. She also got her darkgreen color back. She is also showing her sex (female) on day 9 in flower. Will enjoy to see her fatten up🍁💯


Likes
11
Share

@BalconyBoy
Follow
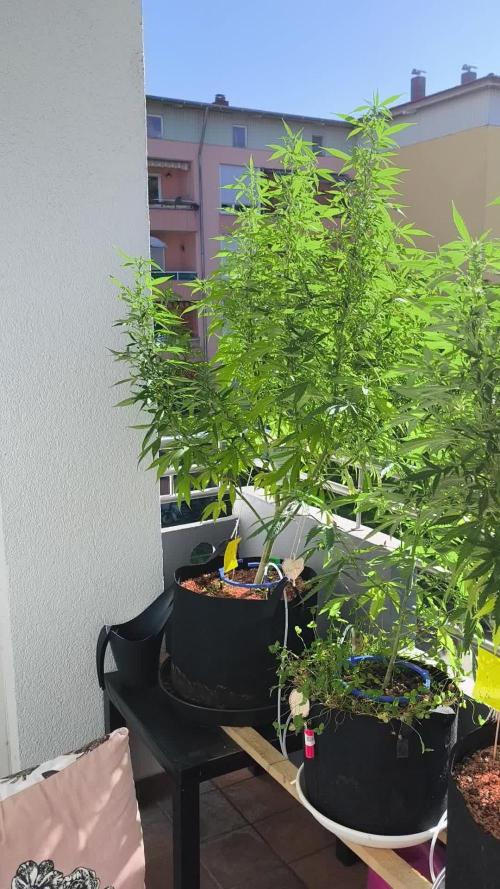
12.08.25 weather is back on Sommer Mode and the plants continue to start flowering except the Quick Sherbet which still lacks visible signs. I installed a smart plug and camera to be able to give additional water on hot days based on leave tension while on vacation. The setup was super easy. I plan on top dressing flower fertilizer a second time at the end of August. Enjoy the weather if you can and happy growing to everyone!

