
Likes
Comments
Share


@ykscotttyk25
Follow
Afghan Original was developed by crossing several Afghani Indica landraces, so there’s only 100% Afghani cannabis genetics behind it. Potent, sturdy and perfect for novice growers as well as more experienced enthusiasts with bigger demands. A resin production champion it can be conveniently used for hasheesh making! Afghan Original has been probated by hundreds of growers and proven a sturdy, fast growing Indica that yields heavily and can sustain minor mishaps. Afghan Original can be regarded as “the very Afghani cannabis” that any devoted stoner feels obliged to try at least once!
Mostly grown out of doors, but Afghan Original works for indoor growing just as brilliantly. Perfect choice for hydroponic/aeroponic setups, green houses and even balconies! Provide at least 18-20 litres for a full-size root system if using soil or substrate. Feel free to make Afghan Original cannabis bushier by using any training techniques such as LST, FIM or topping, ScroG or SoG, mainlining or supercropping. About 35-50% increase in yielding can be expected after training! Resistant to molds. Insect pests are guarded away with aggressive hashy stench – another superpower of Afghan Original! Sometimes plants need supports further into flowering to stay vertical (weighy colas). Outdoor harvesting time is late September – early October.


Likes
26
Share


@Bakeryguy420
Follow
Start of week 6 of flowering for 4
Getting really frosty !!! Coming to and end of week 6 of flowering
Tangie ,gg4,sweet creme and glueberry all.started.to.get flushed!!! Exciting.for.chop . The hazes are all looking amazing .
Forgotten cookies is amazing =).
Just added grapey walter and douple grape. =)

Glueberry Auto · Expert Seeds
Gorrila Glue #4 Auto (Expert Gorilla Auto) · Expert Seeds

Tangie Auto · Fast Buds
Sweet Cream Auto · Expert Seeds

Amnesia Haze Auto · Vision Seeds

Amnesia Gold · Pyramid Seeds
OGesus Auto · Expert Seeds

Royal Haze Automatic · Royal Queen Seeds

Caramella Auto · Custom Breeder & Strain
Rhino Ryder Auto · Fast Buds

Fugue State · Mephisto Genetics
Likes
21
Share


@BB_UK
Follow
Ok let’s go!
She’s doing so amazing! She’s catching up at such a fast rate! I guess that’s brand new genetics for you plus that added Zamnripper umph combined force lol I trimmed away the lower leaves off her and she loved it appreciated it and boosted up! Dynomyco is obviously doing it’s thing too helping her get to canopy! And with help of the new light TSW2000 from mars hydro it will be a better outcome! I continue to give her a little spray a few times a day only lightly but it helps with the low humidity! I am in 2 minds with the flip! Like do I wait for this to go 4 weeks at least or just go for it so I’ll decide very soon! As that’s in a few days lol so she’ll be 3.5 weeks! So should be alright!
Processing
Likes
47
Share


@BloodBath
Follow
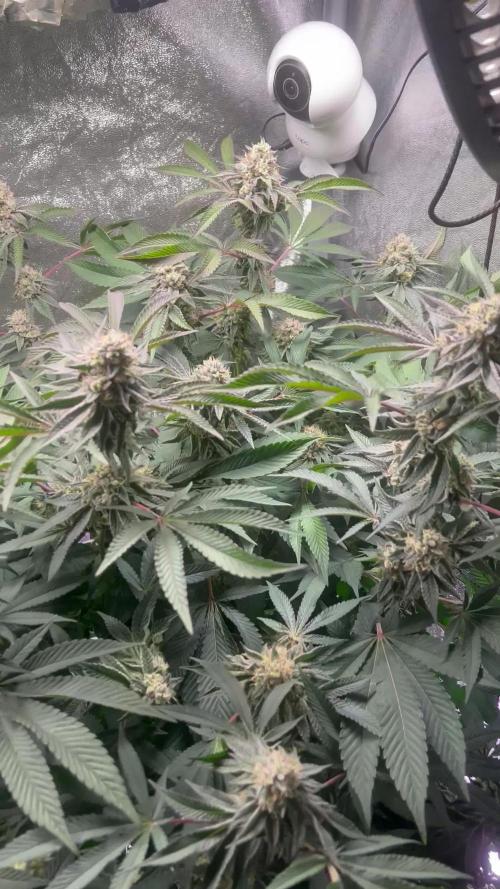
Someone help me with how to make my top colas bigger!?!? Not enough phosphorus? Too close to the led lights? My ph is good and plant is healthy just can’t seem to get big colas and I don’t know why or if it’s too late since I’m 4-5 weeks into flowering. Help would be greatly appreciated!! Thanks 🙏🏻

Likes
12
Share


@Bryankush
Follow
Terreno aggiornato sopra nei dati del diario.
Bene ragazzi tornato dopo 2 settimane esatte dal trapianto la signorina è in gran forma. È piovuto un po e ci sono stati giorni nuvolosi e soleggiati durante queste settimane quindi non c'è stato bisogno di annaffiature
Giorno 4 defogliazione e lollipopping
Likes
8
Share


@HighOhioAn
Follow
What can I say papaya sherbet really thriving under low stress training starting the last week of stretch hoping to keep a level canopy, but without topping her it’s hard to keep it flat🔥
Likes
8
Share


@Lazuli
Follow
Day 21, transplanted them in the autopot, just a few more days handwatering now

Likes
23
Share


@adam_pawloski87
Follow
This week went real great , one has been getting flushed and the rest we will start flush Tomorrow! These ladies are doin so amazing! Hope you all enjoy !! Stay tuned for next week! Cheers an happy holidays!


Processing
Likes
14
Share


@Greenfingeress
Follow
Hello & big Welcome....
To my Greenfingeress diary "Weed Seeds Express" strain "Ak-48" auto 🌿 donated by the generous guys from Weed Seeds Express who I'd like to say a big thumbs up 👍 for all their support and Excellent strain choice😁
Germination was successful within 24hours... In moist tissue paper with just plain ph5.6 water, in my usual ice-cream tub with holes in the lid to keep the moisture then placed into mother room to keep warm.. 😁 Can't wait to get these girls going🌿
14 Hour's later all my girl's have popped as you can see 😁 weed Seeds Express always have strong good seeds 100% success rate👍
Day 2.... Carefully planted into some plain soil then into propagation, I have heat mat inside giving me high humidity (although I wish I had a better light😤) just waiting for a head's up now 😂
Well will you look at them go... Using smaller domes now tightly on (no gaps)
Day 3.... After 24hour's in propagation unit with heat mat and smaller domes they have all come through....
I'm quite chuffed as they don't look to thin and long at the moment fingers crossed😬🍀
Day 4.... Now into my veg tent with bigger domes on, as you can see I am growing 4 girls, three of them are in the same pot going to Greenfingers666 one of them I am growing all the way through to harvest😬
As you can see I've added some pictures of my veg tent of all the different strains I'm growing and all the different ages they are... My diaries have only been germination and veg as that's my speciality can't wait to try these autos and being able to grow all way through to harvest now🌻
Cream Caramel
AK48
Girl Scout Cookies
Herz Og
Any tips would be welcome as my tent is only 140cm high with a shitty light😂
🌻Big thanks to u all for comments, likes and follows.. let's grow together🌿


Likes
21
Share


@m0use
Follow
***Sponsored Grow*** = Medic || https://medicgrow.com || Grow = ***Sponsored Grow***
Not a whole lot is happening this week, still having some PH issues in the medium, I believe this is from the microbial mass I added a while back. A microbe product, PH going into the medium is around 6.5-6.8 and coming out is between 5.5-5.8, so something is acidifying it up. Also noticed the runoff last week was a bit higher at times. So lowered the feed down quite a bit, going in at 1.4EC vs 1.8 will bump it up to 1.5 and 1.6 in the next few weeks. I also added in a bit of a PK booster. nothing to crazy only 60ppm worth on a total allowance of 700PPM
Lights now running at 100% with V1 spectrum, decided to go with 100% now vs after stretch, will see how it works out.
Till next week.
***Sponsored Grow***
Official Website: https://medicgrow.com/
Facebook:
https://www.facebook.com/medicgrowled
Twitter:
https://twitter.com/medicgrow
Instagram:
https://www.instagram.com/medicgrow420/
YouTube:
https://www.youtube.com/channel/UCNmiY4F9z94u-8eGj7R1CSQ
Growdiaries:
https://growdiaries.com/grower/medicgrowled
https://growdiaries.com/grow-lights/medic-grow

Likes
2
Share


@MatthewVC
Follow
Update; February 14th, 2023.
From the moment I flipped to flower, they’ve been exploding with growth! They are super healthy! They grow back and fill in so fast after defoliating, no matter how heavy I go.
I’ve added the supplemental lighting (Viparspectra 600) this week to really get the most I can. Figuring out a way to mount it higher.


Likes
29
Share


Processing
Likes
25
Share


@curvylex
Follow
Week 3 In the beginning of Week 3 I used 1/2 teaspoon of Grow Big which was a mistake! They really just needed to be left alone! Showed the tiniest bit of nute burn on the tips and when I saw that I went straight to checking PPM which was at like 1500 (yikes) and flushed until I got it down by 300 ppm. Should have waited until the 3rd set of leaves to feed! Luckily it was caught early and they are flourishing with no further issues.
The side lighting from the T5 bulb really seems to be helping. They are really going along nicely, here's hoping I can get them through the net few weeks in the same fashion :)
Moved the light down from 28 inches in the beginning to 17/18 inches by the end of week 3. The plants seem to love it and aren't showing any signs of heat/light stress


Likes
16
Share


@Moose82
Follow
Week was good. Hope y'all like what I got done on my door. Things are starting to grow fast
Likes
5
Share


@MrFriday
Follow
22.09.2025
DAY 27/DAY 8VEG
RH DAY 60-63%
RH NIGHT 60-63%
Room temperature day 26-27C
Room temperature night 23-25C
EC 490
pH 5.9
Water temperature 18.5-19.5
PPFD 420
Light cicle 20/4
VPD 1.2-1.3
I'm increasing the EC to 0.48 by the Athena feeding program. A little bit of defoliation in order for the side branches to reach better light. I usually don't go in to a heavy deforestation I just occasionally remove some of the big fan leaves in order to have better light penetration. So far the roots are going great not even a slight sign of bacteria or problems in the root zone. We have nice white roots and so far is all going great. Ill probably move them in a separate buckets in week 4. I'm not sure that I'll even have 4 weeks of vegetation becose some of them are starting to show the gender signs, so probably it will be like 3 weeks veg at maximum.
DAY 28/DAY 9VEG
RH DAY 60-63%
RH NIGHT 60-63%
Room temperature day 26-27C
Room temperature night 23-25C
EC 520
pH 5.8
Water temperature 18.5-19.5
PPFD 420
Light cicle 20/4
VPD 1.2-1.3
I sense a little bit of deficiency maybe is Mn or Fe not sure but I added a little bit of CaMg and a bit more Grow A+B in order to fight it. I have heard that Athena usually are thirsty for CaMg so basically you have to add more. Plus I lower the pH to 5.8 and now the game is ON. I'll see in a couple of days but if I'm not satisfied probably I'll raise the EC to 600 with a little bit of higher CaMg for base.
DAY 29/ DAY 10VEG
RH DAY 60-63%
RH NIGHT 60-63%
Room temperature day 26-27C
Room temperature night 23-25C
EC 485
pH 6.1
Water temperature 18.5-19.5
PPFD 420
Light cicle 20/4
VPD 1.2-1.3
I realized they this problem with the leaf burn is from the Foliar feeding. NEVER PH YPUT FOLIAR FEEDING AND NEVER LEFT THE FAN WORKING🤣🤣🤣 Anyway it's all good now besides the few burned leafs. This strain is branching a lot, so basically I don't plan to use LST. I don't even think that is possible to use LST effectively becose my plants are hard and woody and only possible way for me to deal with them is through scrogging.
DAY 30/ DAY 11VEG
RH DAY 60-63%
RH NIGHT 60-63%
Room temperature day 26-27C
Room temperature night 23-25C
EC 450
pH 6.1
Water temperature 18.5-19.5
PPFD 550
Light cicle 20/4
VPD 1.3-1.4
So far I decided to use the full spectrum. The idea of the first few weeks under cold White was to preserve them a little bit and keep them short but since today we have full spectrum plus far red. Lets see what is going to happen tomorrow. I'm a little bit afraid of the temperature swing becose this will Spike higher temperature, but whatever I'll deap with it.
DAY 31/DAY 12 VEG
RH DAY 60-63%
RH NIGHT 60-63%
Room temperature day 26-27C
Room temperature night 23-25C
EC 380
pH 5.8
Water temperature 18.5-19.5
PPFD 550
Light cicle 20/4
VPD 1.3-1.4
Brutal development only for one night. I know it's hard to be seen on a picture but on live it looks amazing. The little ladies have during pretty much 2 liters of water and so far the AC is going down straight forward so they eat a lot. I had to put a little bit more of fertilizer just to keep them well fed. The Voyager is crushing it and it's only 40% on Chanel 1 and Chanel 2. In fact im not going to experiment with cold light anymore full spectrum is the deal. So far I'm not touching the EC I'm waiting for the week to pass and to jump on even higher.
DAY 32/DAY 13 VEG
RH DAY 60-63%
RH NIGHT 60-63%
Room temperature day 24-25C
Room temperature night 21-24C
EC 500
pH 5.8
Water temperature 18.5-19.5
PPFD 550
Light cicle 24/0
VPD 1.0-1.2
I couldn't wait more time for the new week to come and to increase the AC. My current AC for today was 300 and I have started to see manganese deficiency so I had to add nutrients. Tomorrow is the last day of the week after that I'll rise the EC to 670. Somehow and in my opinion Athena needs a little bit more EC Dan the recommend dose in the manual. So far that's the first fertilizer I see that needs more dan the recommendation on the label 🤣🤣🤣 Interesting fact is that now I can clearly see the reproductive organs of the plant. It's female but it's still in week two VEG. I'm curious em I going to see more dan 3 weeks VEG before we go in to Flowering ☠️😜
DAY 33/DAY 14VEG
RH DAY 65-67%
RH NIGHT 65-67%
Room temperature day 24-25C
Room temperature night 21-24C
EC 350
pH 6.1
Water temperature 18.5-19.5
PPFD 350
Light cicle 24/0
VPD 1.0-1.1
Finally I solve the problem with the leaves. It turned out that my clip fan was blowing the humidifier mist toward my flowers. I notisec that only two of the plants have this types of burbs and those are the once right next to the fan. I have changed the fan position and the dehumidifier positions and now I hope all will be fine. I have defoliated a little bit of big fan leaves and I hope in the end of the next week I'll have time to move the RDWC buckets becose I'm a little bit busy does days. I have lower the PPFD becose it seems that this is a bit to much for the flowers.
Likes
18
Share


@Pokan187
Follow
This week went by well, I will start checking the trichomes on the Runtz at the end of this week. It should be ready for harvest in the next 2 to 3 weeks
The G13 is still smelling like magic, looking majestic.
The GDP buds are starting to put on weight