


Likes
Comments
Share


@Nicogreen
Follow
Super flot uger igen og har lige været kommet hjem fra ferie igen.. Men jeg har ikke mere ferie nu, så nu kan jeg forkusere 110 procent på. Min små børn. Og jeg får ny lampe i morgen engang. Håber i andre har det godt og god konkurrence til alle jer der deltager.

Likes
41
Share


@Ganjagrandaddy
Follow
DAY 56 f: well here we are folks. The final week for these girls to impress and sparkle with the build up of their trichromes.
The Six Shooter are the closest to the harvest time and i think i will be taking them out 1st. They have some beautiful purples and dark reds on their leaves and buds and the smell is so damn potent too. Very fuel terped so far but really potent to inhale. Both have different sizes but identical buds to represent the strain really well. I think their bag appeal will be top drawer.
The Mexican airline are also close now and smell.so fruity fresh that it hits your throat with a sting. Lol not the biggest ladies for production but some beautiful looking buds on them.
The Strawberry pies are another level altogether....
#1 is so fresh and vibrant looking with most of her leaf left on stil. I think she may go another week before her sweet spot is here though. She has a lot of good sized mains around the plant and they look and smell line fresh chopped pineapple so far. #2 has had her main leaf taken out for the past 5 days to encourage as much light around the numerous beautiful buds she has produces. I did supercrop her main to keep her from hitting the light and have noticed how floppy she is becoming from the weight building in the bud tips. I love how she looks now with the edible looking buds everywhere. Some of the best buds I have had the pleasure of seeing in these autos. Roll on harvest time. The soil has performed brilliantly throughout the whole grow this run and with a no-till method being used in the trays , I expect it to get better each new run. The organic/vegan soil also means any edibles are as clean as can be from home growing. The lack of harshness from using nutes is very noticable in my grows now and drying really is just about the moisture removal and natural chemicals so curing is a lot shorter. Instill get the gassy , initial conversion when using jars but it is more about the potency of the hit than the harshness of residual chemicals. While there is a slight loss in yield from soil , the smoke quality certainly makes up for it. So there we have it growmies. A great final week ahead and some beautiful bud porn for you to enjoy in the pics. Have a brilliant start to your 2022 and the future. Be well.

Likes
43
Share


@Master_weeda
Follow
Bonjour a tous les padawans et les maîtres jedis
Pour cette semaine 4 je surveille comme à mon habitude hygrométrie et arrosage. Je peaufine mon LST en stressant ma plante le moins possible. Je combine mon LST avec un pincage d'Apex cela me permettra d'avoir une canopé plus homogène donc une meilleure pénétration lumineuse et par conséquent un meilleur rendement.
Petit rappel sur le pincage d'Apex:
Le pinçage des plantes de cannabis
Proche de la taille d’apex sur le principe, cette technique possède cependant plusieurs avantages, le principal étant de conserver le gros bud central de la plante, d’une production et qualité maximale.
Pinçage des plantes de cannabis
Le pinçage d’apex (tête de la plante) consiste simplement à pincer délicatement la tige du dernier étage de la plante, entre le pouce et l’index, jusqu’à sentir la fibre s’écraser sous les doigts avec un petit bruit critch caractéristique. Si l’espace disponible sur la tige du dernier étage ne permet pas d’y placer confortablement ses doigts, il faudra plutôt pincer l’étage du dessous.
Le pinçage ralentira fortement la croissance verticale de la plante, tout en stimulant le développement des branches secondaires, donnant ainsi à la plante une forme de buisson.
La plante mettra quelques jours à réparer ce pinçage, formant un nœud à cet endroit, et poursuivra ensuite sa croissance de façon normale. Le pinçage peut alors être répété si nécessaire, sur l’étage suivant nouvellement formé, ainsi que sur les éventuelles branches secondaires qui pourraient dépasser l’apex.
Le pinçage est donc une excellente technique pour avoir une belle canopée uniforme de type marée verte. En pinçant régulièrement l’apex des plus grandes plantes de votre espace, durant la croissance et en début de floraison (stretch), vous obtiendrez ainsi facilement des plantes de hauteur homogène en pleine floraison, ce qui facilitera la culture et augmentera la production finale, surtout si vous cultivez simultanément de multiples variétés de marijuana.
Avec un peu d’habitude le pinçage pourra être réalisé aussi rapidement qu’efficacement. En cas de pinçage trop violent qui se traduirait par un apex arraché, cela produira simplement les mêmes résultats qu’une taille classique de l’apex, ce qui ne sera donc pas dramatique.
Que la force soit avec vous💪

Likes
3
Share

@Thedibber
Follow
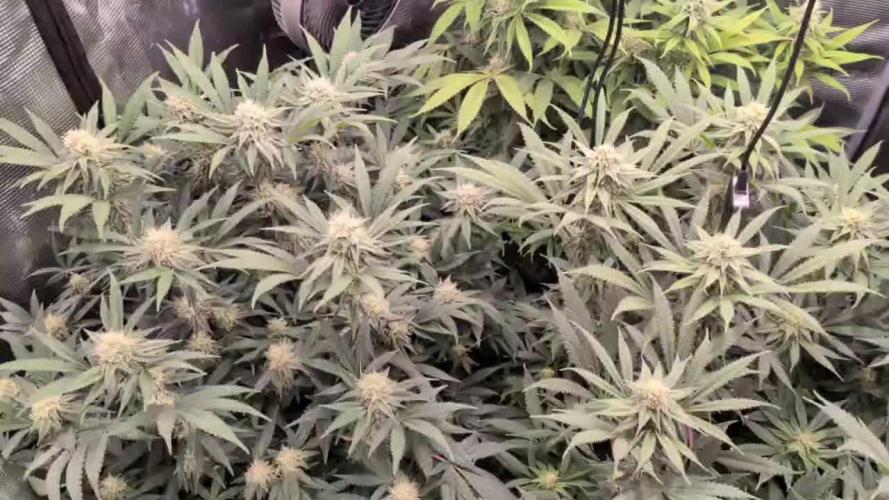
Bottom left is the badazz og cheese she's smelling dank and hopefully gives me some dank medicine

Likes
50
Share

@Antifame
Follow
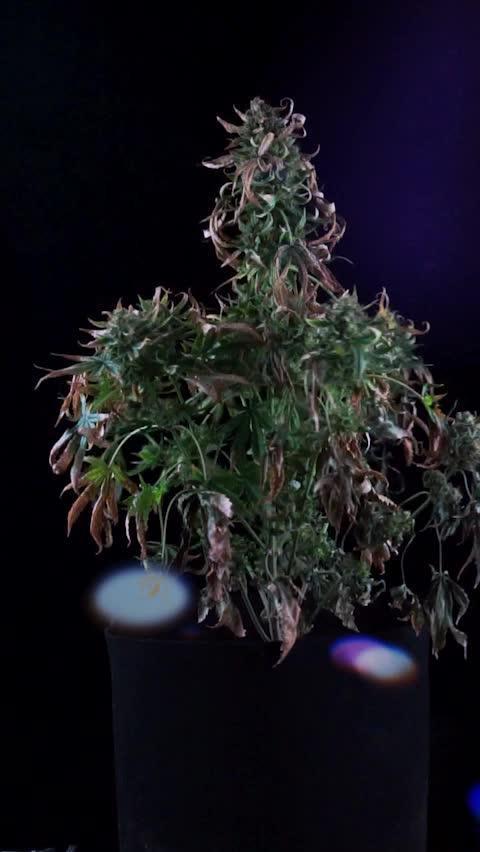
The harvest day has come! 😍 I can't get this song out of my head...
How I Make My Tincture / Vape Juice
Decarboxylate the material
Place about 15 g in the oven and heat for 1 hour at 120 °C.
Break it up
Once cooled, break the material into smaller pieces. Don’t grind it into a powder.
Ultrasonic extraction
Put the material into an ultrasonic cleaner with the heater set to 70 °C. Add 400ml of PG/VG base liquid.
When the temperature is steady, let it run for 30 minutes, stirring occasionally.
Filter
First strain the liquid through coffee filters, then filter again using a lab-grade vacuum filter.
Use
Fill the finished liquid into vape cartridges or take it orally. Both work well.
Enjoy 😇
Likes
79
Share


@Xonidan
Follow
Jeden Tag Schimmelkontrolle. Ich finde immer wieder kleine Schimmelstellen.Der Ventilator unter der Hutze packt die Feuchtigkeit nicht mehr.
Die Buds werden immer dicker.
14.8.25 habe einen größeren Ventilator zusätzlich zum USB-Ventilator reingehängt.
Die Feuchtigkeit unter der Hutze war minimal.

Likes
7
Share


@Onlygrow99
Follow
Bien pues ya tenemos en marcha el 2º seguimiento del perfil...
Son 6 white truffles, 6 Apple&Bazzokies de GBSTRAINS y 5 GG4 de GBSEEDS que se empezaron a germinar el 15 de mayo por la tarde sobre las 19:00
Todas nutridas con BOOM nutrients jejeje
Todas las semanas iremos viendo los cambios y la evolución, los riegos y las flores que vendrán :)
El 16 de mayo del 23 sobre las 07:00 de la mañana pase las semillas del vaso con agua, a los tapers con servilleta. Ahí estuvieron 24 horas mas haciendo un total de 36 horas germinando para después,
pasarlas a las macetas de 1 litro.
22/05/23 actualizado, meto unas fotos mas de como van las semillas después de 7 días desde que se empezaron a germinar en el vaso de agua.
A día 22/05/23 llevamos 7 días desde que se empezaron a germinar.
ACTUALIZACION DE ESTADO:
30/05/23 Subo unas fotos después de 8 días.
Llevamos 15 días desde que se empezó a germinar las semillas en vaso de agua.
A partir de aquí, empiezo a contar semanas de crecimiento.
Trasplantaremos a maceta definitivas de 7L dentro de una semana o 2.

Likes
5
Share


@LittleBigTrees
Follow
Defoliated a bit more, feeding sugar royal and green sensation.
The smell is really coming through now.

Likes
269
Share


@JohnnyBlaz3
Follow
Day 92
Day 30 Bloom
42ish days remaining.
Pour some SUGAR on meeeee.........wowzers the sugar is really starting to cake the sugar leaves now. Got tons of healthy bud sites forming and the smell is just delightful. Did another decent defoliation to keep all the buds site in the light. Keeps it nice and clean with great air flow. Speaking of air flow I added an oscillating fan to keep the air moving under the canopy better.
There is a problem forming that I'll need to take care of this week. Another purchase?? 😡 lol
De-humidifier......the humidity is very slow starting to raise. I started with 2 humidifiers on full, then 1 on full, then 1 on min for a bit then no humidifier and now its starting to raise with no humidifier so I'm gonna need to deal with this asap as it will become a very big issue in the future if I let my girls get moldy, but no chance I would let that happen! so i'll be on the search for a decent used one this week or purchase a new one unless I learn something new here, which I probably will.
A question this week too. about Harvest. mayb 2 questions. So I hear alot of tricks regarding harvest. 24-48-72 hours of darkness before harvest then cut them in the "dark" meaning dont let the bloom lights come on again before harvest. different flush times and so on. what works best for you guys?! I'm thinking 7 day flush since thats why my nute sched says and it hasnt led me astray yet. I'm considering doing a tiny mid bloom flush reccomended by a friend, i like the idea to give just pure water for 1-2 days and kind of give the plants a break from the massive ppms i'm putting them through although I might skip this step if not needed either.
2nd part of the question, if the flower time for this strain is 70-75 days, I realize I should harvest when most of the tricones are milky and some clear with very little to no amber ones. but if I flush for a week before harvest, how do I know when to start the flush, how long is my harvest time frame for maximized potency. I'm guessing with experience I'll be able to know my girls and say yup harvest is x days out but for this one not too sure.
40ish days til harvest is bittersweet, feels so long but part of me loves it, how big can/will these buds get with another 42 days!
Thanks again friends for following, this week the sugar came now I wanna see the weight really start being packed on.

Likes
82
Share


@BigBadLion
Follow
Hey people! I hope everyone is doing well! 👋
Here's the 15th week of my babies or the 4th of flower. All of them have been developing some really nice buds and trichomes keep appearing or getting bitter (or that's what it seems from all the photos I've taken!) 😃
This week I started giving my babies more potassium and phosphorus! I hope those products will help to get even bigger buds! At first tho I was a little worried because I thought I could end overfeeding and then nutrient locking my babies (the ppm of the water after I used all my nutrients was at 1400 and the vendor says I should be safe as long as I'm bellow 2200 ppm, which I was) from all the NP I would be giving them (which would've been awful) but everything went well! Leaves look healthy (a little more yellow, but I suppose that's normal!) 😍
My only problem this week has been Falco's chlorosis... it has also gotten worse (you'll see in the photos) 😢 and I decided to cut some of them to see if that helps (I assume those leaves are making her waste energies). Hopefully she'll be fine!
I also made a small mistake in the week. For a second I thought one of my plants turned herm because she had developed a "sack". I later found out I was wrong and it was only a swollen calyx which made me relax a lot haha (I'm still such a noob 😱😂)... and that's all what happened this week. It was quite calm I believe!
Right now I'm debating if I should remove all the small flowers/leaves at the bottom of the plant or just let them be (I don't want to over stress my babies x_x). I don't want them wasting energies in flowers that won't be as good as the others! Maybe I'll make a grow question out of this.
Thanks all for reading! I hope you all like the photos I took with my DSLR and the timelapses! 😊

Likes
3
Share


@HeavensHarvest89
Follow
week 8 was another growful week no issues to report.. No matter what I do to this thing she just continues to thrive.. i was worried some of the aggressive defoliation I was doing would stress her out but she has showed no signs even after the training accident she didn't slow her growth down a bit
Likes
12
Share


@Fabii
Follow
I pretty much stopped All Nutrients only giving small doses of A&B once every other watering soon i will only pour regular Water (not ph) just a couple of videos this time not to many because they haven’t gained size .
Pure Videos today of both Mazari & Strawberry OG.
Likes
14
Share


@Whiteybulger1814
Follow
As for what I've been doing for maintenance, I've been watching and waiting and just adding water when needed into the reservoir, should be less then 2 or 3 days by now


Likes
70
Share


@Insaniac_0
Follow
All feeds with nutes use either a whole ratio or combination of "Veg Mix" and "Bloom Mix"concentrates DILUTED in water until a total ppm of add in is reached using a (Total Dissolved Solids)TDS Meter measured in PPM (parts per million). The "Veg Mix" concentrate will eventually be added in smaller ratios and "Bloom Mix" concentrate what will eventually replace the "Veg Mix" concentrate entirely with the ppm and ratios listed when I feed. Veg mix recipe is on week 3. Bloom Mix recipe is on week 5.
Day 49
VPD is okay now - temps at 75F RH also now at 65% with ILVent at 50% = VPD of 1.04 -
ppfd also same as yesterday mostly 480 to 490 around the ring with 510 and 520 in the center
Took ph readings as well - 3 readings 6.43, 6.48, and 6.37 to avg 6.426
Which is good because she's starting to show signs of stress after the topping and defoliation from a couple days ago. The leaves are starting to curl at the tips and the bronze color stripping is happening again - however this time seems to be a slower progression so Im hoping that having the correct ph this time will help while she's re-routing her resources. I 'did notice also that the growth tips seem to be growing at a slower rate than before - I think she's at her limit in colas and the roots are having to find more space to spread, may even be too big for the 5 gallon pot. I have no plans to change her out just yet, but will monitor.
Soil is drier today - so I will be watering tomorrow with de-chlorinated water at 6.4ph
Day 50
VPD was good at 74/64 with the tent open while I feed that I left it open for a bit and took time in feeding and cleaning - after all that still good at 74F/61%RH/50%ILV
ppfd was checked after water and setting back - same as yesterday as most of the newest growth is still coming from the new colas - most seem to be adjusting 1 at a time in each split but both are showing growth now on all cuts.
Started feed by making new ph buffer solutions, calibrating/testing both meters. The have about a .15 variance between the two.
Checked weight and made 1.5 gallons of feed. started at 228ppm added 450ppm veg and 150ppm bloom for a total of 833ppm feed/epsom salt - splashed h2o2 and ph'd to about 6.4- I fed via watering can and spray and fed the whole amount slowly since I was feeding until bottom drip and she took it all before starting to bottom drip. Afterwords I let her drain (about a quart came out) and checked ppm from runoff at 2500 (telling me she's okay but isnt eating as much as before her topping yet) ph is a mystery - I show 3 readings from top level of 6.62, 6.57, and 6.57 for an avg 6.586 but 2 separate readings from 2 meters (4 readings total) on the bottom runoff showed 5.3 and 5.6 then confirmed later. I expected a variance since the wood ash probably stuck to the top side of the soil - but I didnt expect that much of a difference. I will monitor but honestly dont know what I should do, if anything other than watch.
made a video of the fan movements and runoff drip
Day 51
What I am calling "stress burn" is progressing as expected. I am monitoring the ph from the top as I did before, but again, not much I can do other than over water, so I'll just watch for now and compare rate of spread until she fixes her resource pathways. It seemed to take about a week to clear up after the ash treatment last time, so I am on day 3 of 7 for now with no treatment. Looking for a spurt of new growth to show and then I'll know she's better.
Adjusted the lights to accommodate a week 6 level of 500 to 600 ppfd - that means I can raise the lights to the top of the tent and increase power. So now set at 3 tick up and 37 inches from the soil or 26" from the plant top. Now her ppfd reads about 540 on both of the center colas and 500 to 510 on the surrounding ring.
Adjusting lights meant I had to adjust the fans up to medium power and re-directed them to blow at the edges of the pot; made a video.
VPD is steady, but still warmer than typical (only by a couple degrees nothing too much) 76F/61%RH/50%ILV for 1.15 kpa on room VPD
Day 52
VPD is higher now that I have the lights to the top of my tent and the fans on the lights blowing down at the pot. I moved the IL Vent to the top sucking out with the motor and vent outside the tent now.
I also opened two lower air holes with my heater set for fan on the opposite side of the tent than the vent. Currently, I am at a max of 1.2 room VPD and ranging down to 1.0 so I'll take it until it does something else. 74F/65% RH/75%ILV - I will monitor to ensure it's stable.
ppfd is same as yesterday as there's little growth still.
Spots are still progressing on the oldest leaves at the same rate as before - however the newest leaves are not showing signs yet, so I will continue to monitor.
Day 53
ppfd was a little changed today, showing that there's growth coming back now. lowest on outer ring was 500 with most at 520 and 530 highest, center colas were tested at 540 and 560ppfd. VPD was stable as I watched it most of the day since I made changes yesterday. Temps were 74 to 76 and RH was 61% to 68%. ILV was set to 33% with the bottom heater on fan to draw in air.
lockout continues on the oldest fan leaves at the last top nodes. New growth is already marked in a couple of spots. I have about 6 gallons of tap water burning off chlorine now and will use about 2 gallons to flush at 8ph. I plan to dunk this weekend with feed so this will allow time to dry out and hopefully reset the ph and lower my ppm readings at the lower part of the pot before then.
Day 54
Took Control pics measured VPD and ppfd
Lights are at the top of the tent and second tick from highest power level. Lights to soil is 37 inches and lights to plant is 12 inches shorter so 25 inches leaves to light. currently ranging 530 to 550 around the ring and 575/580 ppfd at center (after feed and replaced).
Moving the lights (day 51) made the tent hotter so I changed my ILVent to suck out at the top and fresh air in at the bottom - I have been fighting to keep temps under 78 managed to hit 74 to 75 with the heater being set just to fan for the bottom air vents- I did also raise humidity to a setting of 65% a day before moving the lights, so Im hitting 61 to 68% between power cycles on the humidifier. Overall Tent VPD is 1.0 to 1.2 as max.
Took controls for feed. Weight 16lbs 11oz. tested and calibrated 2 meters and took 4 ph readings of 6.55, 6.77, 6.53, 6.85 to avg 6.675. from top of soil (last runoff measured 5.6 and 5.3 on two meters)
prepared 2 gallons of feed at 500 ppm over tap. (burned chlorine off overnight) starting ppm was 217 - added 75/25 veg/bloom ratio. ph balanced to 7.8 and 7.63 on separate meters (rinsed and retested to be sure got 7.79 and 7.63 again)
I used 4 knitting needles in the soil about 3 inches from the plant center. Poured feed water over the needles until it pooled slightly on top of the soil, I then pulled the needle out a little to allow the water to drain into the holes better. I did this in 8 different spots. As soon as she started dripping water from the bottom I poured a little on the leaves and then moved the plant to another drip pan to finish pouring the rest over the top of the soil without dripping any over the sides. Took videos of the drip and waited 10 min before putting her on another clean drip pan and back in the tent.
Runoff from second drip pan was measured twice at 5.8ph and 2410 ppm - and first pan 5.85 and 2670ppm (expected higher ppm since I moved perlite on the bottom with the needles)
Defoliated the oldest leaves before lights out.
Day 55
She mostly looks like she appreciated the clippings and ph balance from yesterday - slower progression of the lockout issue and largest new growth since topping day.
So speaking of new growth, I plan to use LST in the next few days to set these colas in what will hopefully be their last bind around the ring.
VPD is steady at 75F to 77F and RH is between 63 and 68%. My ILV have been set to 33% and the lower fan blowing rather than heat.
top soil ph was measured with 3 readings, on a tested and calibrated meter. 6.47, 6.7, 7.12 to avg 6.763 (kinda wild in those readings so I double checked them all twice and got the same in each hole)
Likes
23
Share


@Chi_K24
Follow
Hey folks and welcome to my 2021 outdoor grow diary! I hope you guys enjoy my upcoming posts and see how these ladies will end up by october!
Just to break down this years grow, I will be trying new grow techniques, as last year my plants turned out like bonsais, as always, organic grow using Promix HP and Gaia Green Organic Amendments, and watering with a mixture of molasses to feed the soil microbes.
So my pops got his hands on some "local growers" clones of Kings Kush cash crop, apparently it is an 80/20 Indica hybrid with a THC average of 14-23%, the smell is suppose to be like musky, peppery Kush and taste the same according to the guy that sold him the clones. Tho, I wouldn't rely on the sellers credibility, all I know is that the strain is mold resistant which is a must in the GTA and is a strong plant and has been doing well for my pops indoor grow so far. I will keep you guys updated on how his batch turns out.
So I got 4 of these clones ready by May 16th and transplanted them from a 1 gal to its final 15 gal fabric pots.
With that, I used Promix HP and amended the 15 gal with 2 cups of Gaia green all purpose 4-4-4 with approximately 1 cup of Gaia green power bloom and mixed well into each 15 gal pot. (About 70/30 ratio @4tbs/gal of the mixture)
After the transplant was completed, I started to water the plants with dechlorinated tap water pHed to 6.5 and gave each pot about 0.5gal each of water.
My plans for the next watering is to introduce blackstrap molasses at 1tbs/gal of water to start supercharging the dormant microbes in the soil!
I also have to add yellow sticky strips to keep an eye on pests such as fungus gnats and spray neem oil as a PM in the soil and plant.
Likes
26
Share


@ButterfliesLittleFarm
Follow
Hello Diary.
Two new diaries. Hulkberry and Green Gelato, both Automatic. Many thanks to RQS for these strains, and I am very happy to be starting with the new storys.
WHY HULKBERRY AUTOMATIC?
HulkBerry Automatic is Royal Queen Seeds’ revved-up version of Bruce Banner #3 Auto. She’s one of the most potent autos you can get your hands on, easily outperforming many photoperiod strains in this area. Her compact and frosty flowers provide a THC content of up to 21%, enough to satisfy the most experienced of smokers. Expect a wave of euphoria to crash over you after a vape hit or bong bowl of HulkBerry Automatic. The strain is motivating, increases alertness, and gets the creative juices flowing. She makes a superb smoke when listening to music and watching films, or when indulging in your own creative endeavours. Overall, she’s an excellent strain for daytime use.
LET'S START FIRST WITH THE FARM SET-UP:
Box - Secret Jardin DS120W 120x60x178
Lights - MIGRO 200+
Ventilation - Blauberg Turbo - E 100
Fan - Oscillating Koala Fan
Humidifier - Beurer LB 45
Soil - BIOBIZZ Light - Mix
Pot - 11L Fabric Pot from RQS
Seed - Royal Queen Seed
Nutrition - BioBizz and RQS Organic nutrition
I apologize in advance for the detailed documentation, or the large number of photos, but I enjoy it, and I think it will help others around tracking their plants.
LET THE DIARY START OFFICIALLY:
10/06/2020. planting.
I have prepared everything I need for planting. The 11lit fabric pot I got from RQS, also Organic Boost Nutrition and Mycorrhizza from RQS, Soil is Light-Mix from BioBizz and of course the seeds of the new strain Hulkberry Automatic. After adding 50g of pellets from Organic Nutrition and 5g of Mycorrhizze, I mixed everything well in the pot. After that I watered well and soaked the soil, I dug a hole with a wooden stick about 2-3 cm, I first put 1g of mycorrhize and then put the seeds inside. I lightly covered the hole with earth and put the pots in their new home. I planted two Hulkberries and one Green Gelato Automatic. The temperature was about 25 degrees and the humidity about 65%.
14/06/2020. She sprouted.
After 4 days, Hulkberries came out. In the meantime, I sprayed the surface of the earth a little twice. The temperature is still around 26 degrees, thanks to the summer and the high temperature that enters the apartment anyway. I regulate the humidity with a humidifier, I maintain it around 60% -65%.
15/06/2020.
Their first photo shoot, I also watered their with about 2 liters of water, which I only regulated p.H. at 6.3 with Plagron, Lemon Kick.
19/06/2020. Day 1.
Hulkberries is officially one day old. On that occasion I took another photo shoot to celebrate this big day :).
24/06/2020. First Feeding
First feeding. Their got a whole meal from BioBizz, Root-Juice, Bio-Heaven and Acti-Vera, p.H of water I regulated with Lemon Kick from Plagron.
25/06/2020. Day 7.
End of the first week. For now, everything is great. It is developing nicely, its conditions are almost perfect.
Hulkberry #1 - Day 7. - 9 cm
Hulkberry #2 - Day 7. - 10 cm
I think that’s all for this week, I’m happy that it’s starting all over again, following its development and looking forward to what’s to come. See you next week.
Likes
19
Share


@MadeInGermany
Follow
Hey guys :-) .
Today the plant was sprayed again with neem oil.
There weren't any more trips to be seen after the second application, but to be on the safe side, you did it again today get a cure.
That's why the beautiful dark shimmer on the leaves :-).
She has developed very well this week.
I will give you 7-10 days before I switch to flowering.
This week it was poured 3 times with 1 l each (nutrients see table above)
Otherwise everything was cleaned and, as always, everything was checked.
Have fun with the update and stay healthy 🙏🏻
👇🏼👇🏼👇🏼👇🏼👇🏼👇🏼👇🏼👇🏼👇🏼👇🏼👇🏼👇🏼
You can buy this Nutrients at :
https://greenbuzzliquids.com/en/shop/
With the discount code: Made_in_Germany you get a discount of 15% on all products from an order value of 100 euros.
👇🏼👇🏼👇🏼👇🏼👇🏼👇🏼👇🏼👇🏼👇🏼👇🏼👇🏼👇🏼
You can buy this strain at :
https://gardenofgreenseedbank.com/candyland/
Water 💧 💧💧
Osmosis water mixed with normal water (24 hours stale that the chlorine evaporates) to 0.2 EC. Add Cal / Mag to 0.4 Ec Ph with Organic Ph - to 5.8 - 6.4
MadeInGermany

Likes
21
Share


Likes
37
Share


@JonnyTerpen
Follow
Update vom Blütetag 39
Ich wünsch euch allen erstmal dicke Buds an den Bäumen und alles gute zum Nikolaus! 🎅💚
Die Woche ging's wieder mit einigen Fragezeichen weiter, aber seht sie euch selber an. Bis jetzt macht mir nur die Blue Cheese n bisschen Sorgen, die braunen spitzen werden schlimmer und die Papaya hat auch angefangen, seit heut macht die Lemon Cherry Gelato noch mit. Erst dacht ich es kommt von Überwässerung, Licht, oder Mangel und mittlerweile denk ich der Booster is schuld. Hatte den letze Woche einmal gegeben und diese Woche auch einmalig, was irgendwie komisch is weil es ja schon davor anfing. Jetzt bekommen sie erstmal nur Wasser, denk das werden wir schon noch zu Ende bringen. Die Erde hat auf jedenfall Power wie das aussieht, oder seht ihr da n Mangel?
Schönes Wochenende euch allen! 🤠💚🖖


Likes
10
Share


@Lew420
Follow
She is a good size now, hopefully I get another week or two of stacking before she starts to swell
Likes
10
Share


@samadhi
Follow
Week 7 was awesome! She finally took off into flower and has started to put on visible inflorescence. This was a great development as I was afraid I was going to have to manually flip her. This means I can finish the run outdoors as planned and wont have to contend with fitting her in the tent with the photos who are currently finishing their run. I continued some light LST this week and it looks like I wont be able to train her into quite as pronounced of a spiral as I had hoped as she is going to need to have her apical meristem turned up to follow the lower branches that have now surpassed it in height. This is not a big deal though as the canopy still looks great and I am happy with how she turned out. I think she is set up for a nice finish.
She continues to exhibit strong growth and a hearty resistance to outdoor conditions here that can often take weaker genetics of any species down in a heartbeat. I'm not sure if it is typical for this cultivar to flower so late in the run but I can't say I mind it that much. The extra veg time will make for a strong harvest, I think. I've been most impressed with Dinafem's gear so far. Definitely top notch.
I'm already most the way through week 8 and can't wait to show you guys what she's done in the next update. Keep following along and please click "Like" below if you dig what I'm doing here. Cheers! 👊🌱☮️✌️